How to Use Raspberry Pi 2B: Examples, Pinouts, and Specs
Introduction
The Raspberry Pi 2B is a powerful, credit card-sized single-board computer that has revolutionized the world of hobbyist electronics and education. With its quad-core ARM Cortex-A7 processor and 1GB of RAM, it provides a robust platform for a wide range of applications, from learning programming and computer science to building complex projects like home automation systems, media centers, and even low-cost desktops.
Explore Projects Built with Raspberry Pi 2B
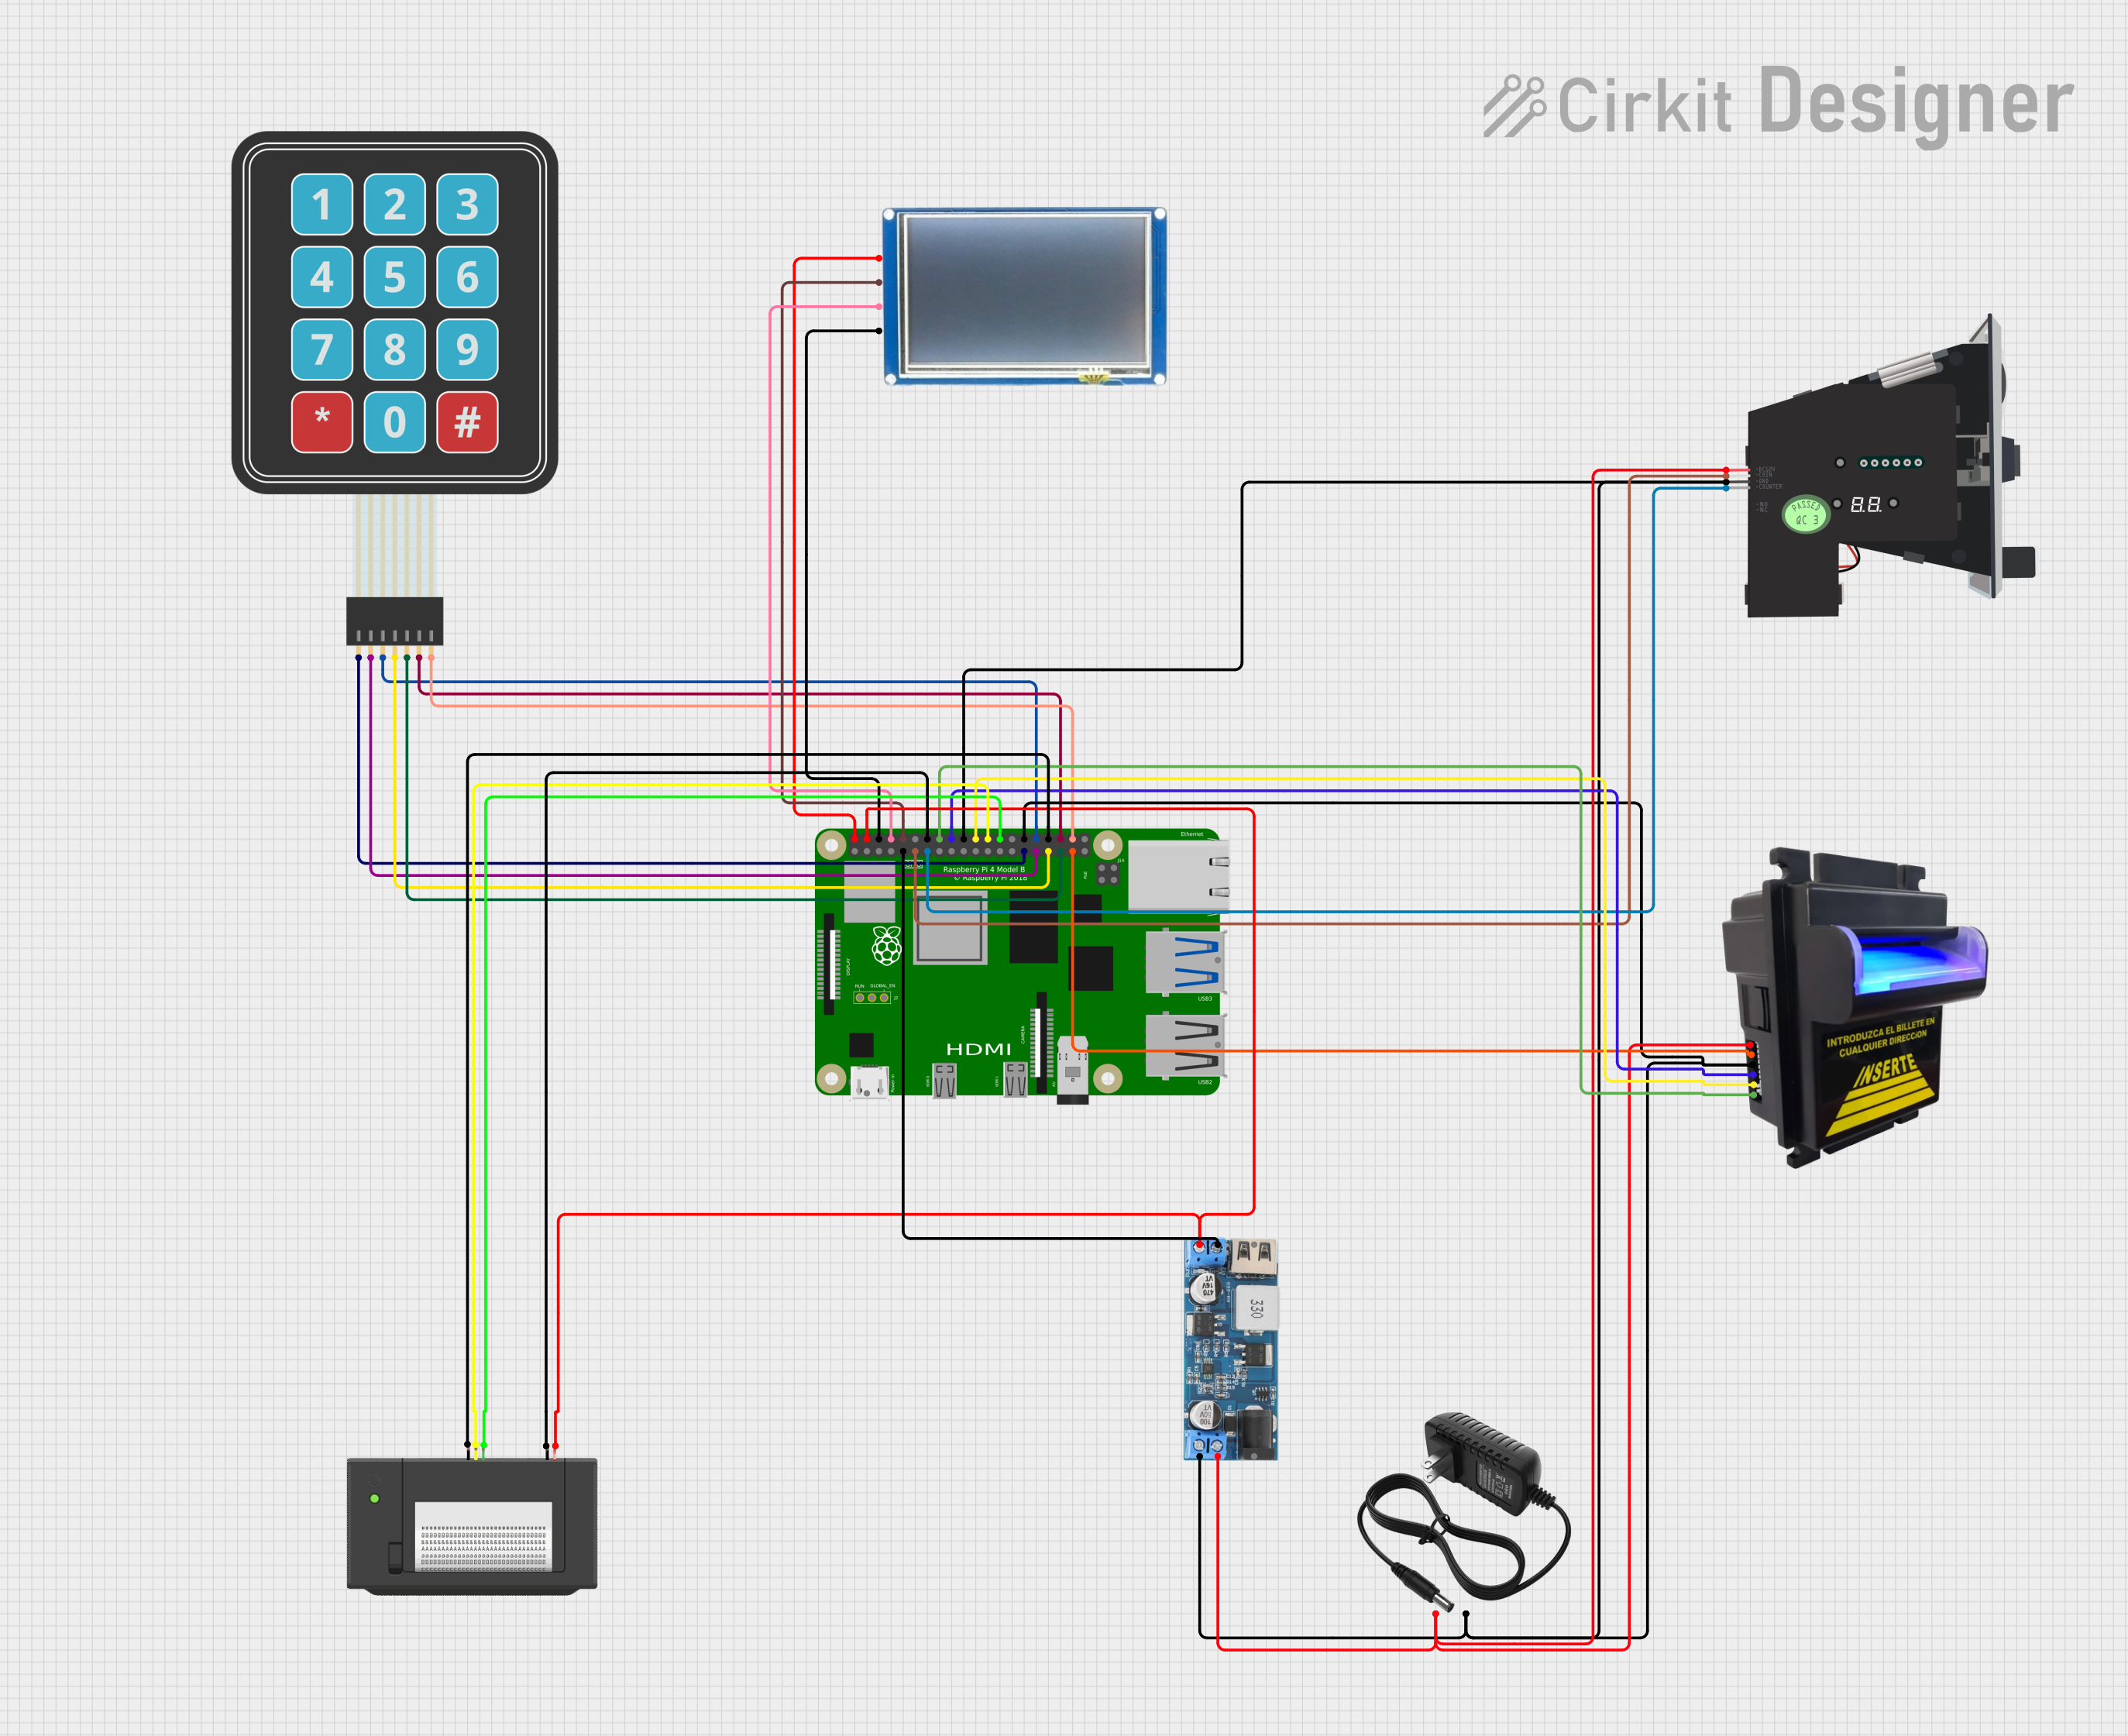
Explore Projects Built with Raspberry Pi 2B
Common Applications and Use Cases
- Educational purposes (learning programming and electronics)
- DIY projects (home automation, robotics)
- Media centers (running software like Kodi)
- Retro gaming consoles (using emulators)
- Prototyping IoT devices
- Low-cost desktop replacement
Technical Specifications
Key Technical Details
- CPU: Quad-core ARM Cortex-A7
- Clock Speed: 900 MHz
- RAM: 1GB LPDDR2
- Networking: 10/100 Ethernet
- GPIO: 40-pin header
- Storage: microSD card slot
- USB Ports: 4 x USB 2.0
- Video Output: HDMI, Composite RCA
- Audio Output: 3.5mm jack, HDMI
- Power Input: Micro USB, 5V
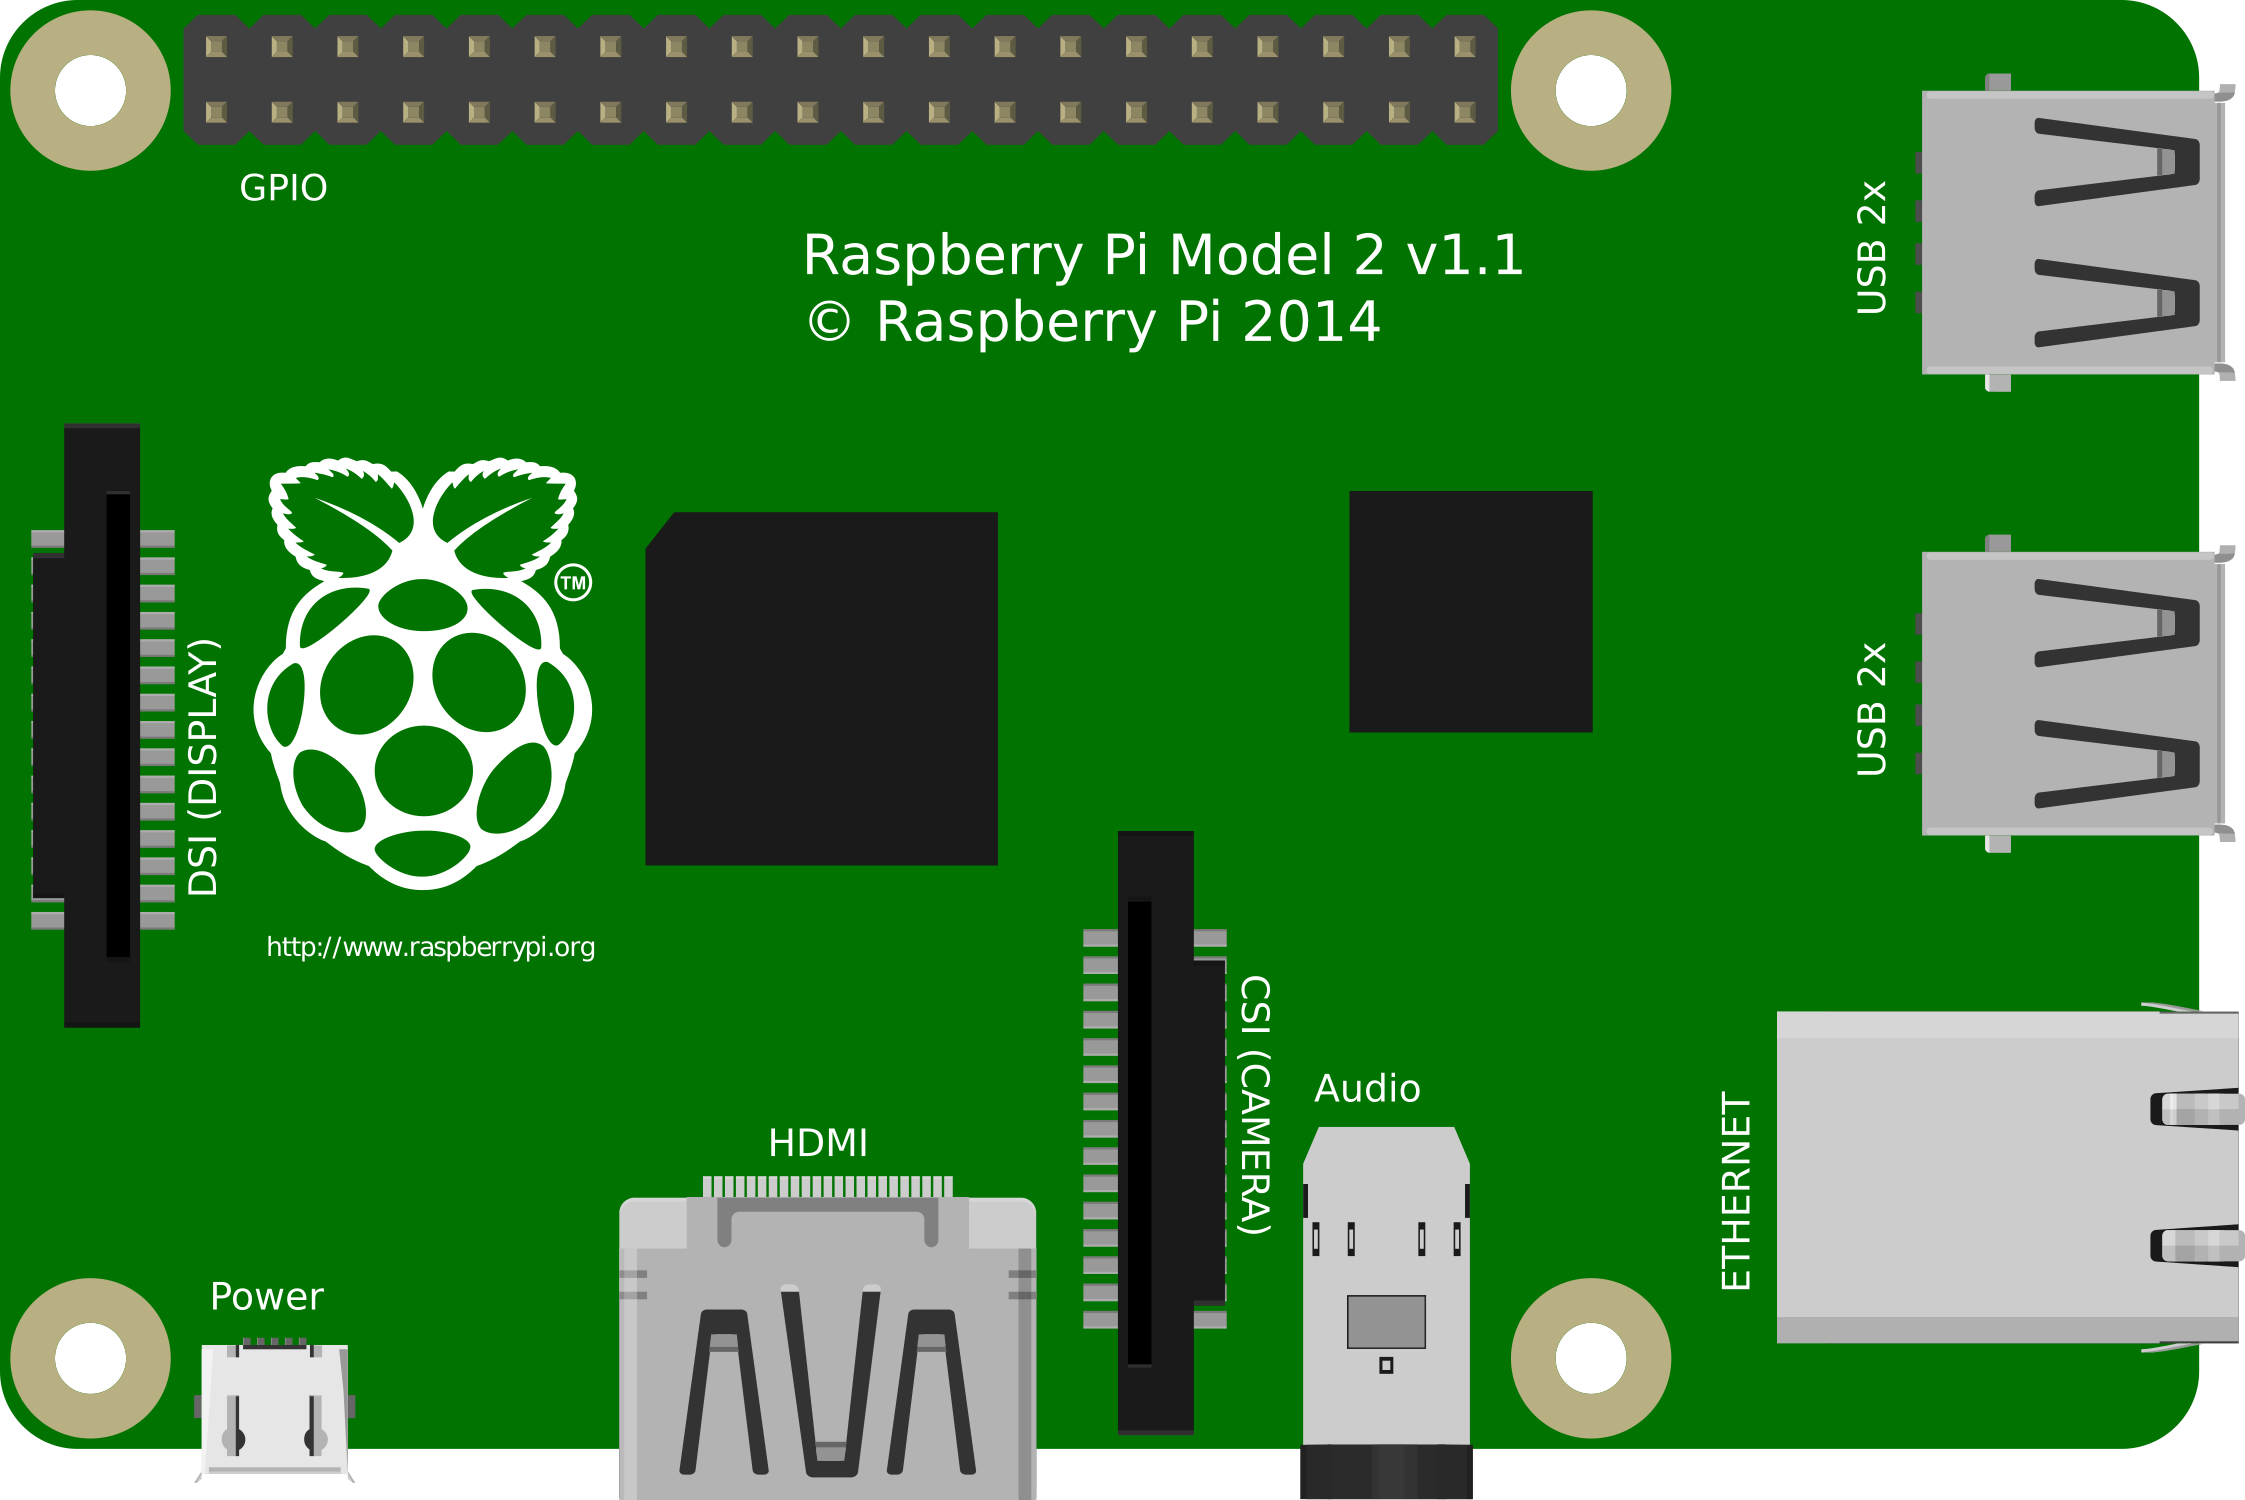
Pin Configuration and Descriptions
| Pin Number | Description | Pin Number | Description |
|---|---|---|---|
| 1 | 3.3V Power | 2 | 5V Power |
| 3 | GPIO2 (SDA1, I2C) | 4 | 5V Power |
| 5 | GPIO3 (SCL1, I2C) | 6 | Ground |
| ... | ... | ... | ... |
| 39 | Ground | 40 | GPIO21 (SPI0_MOSI) |
| Note: This table is not exhaustive. Refer to the official GPIO pinout for complete details. |
Usage Instructions
How to Use the Raspberry Pi 2B in a Circuit
- Powering the Pi: Use a 5V micro USB power supply capable of supplying at least 2A.
- Connecting to a Display: Connect an HDMI cable to a monitor or use the composite RCA for older displays.
- Setting Up Storage: Insert a microSD card with the Raspberry Pi OS or another compatible operating system.
- Peripheral Devices: Connect a keyboard and mouse to the USB ports.
- Internet Access: Use an Ethernet cable for network connectivity or add a Wi-Fi dongle to one of the USB ports.
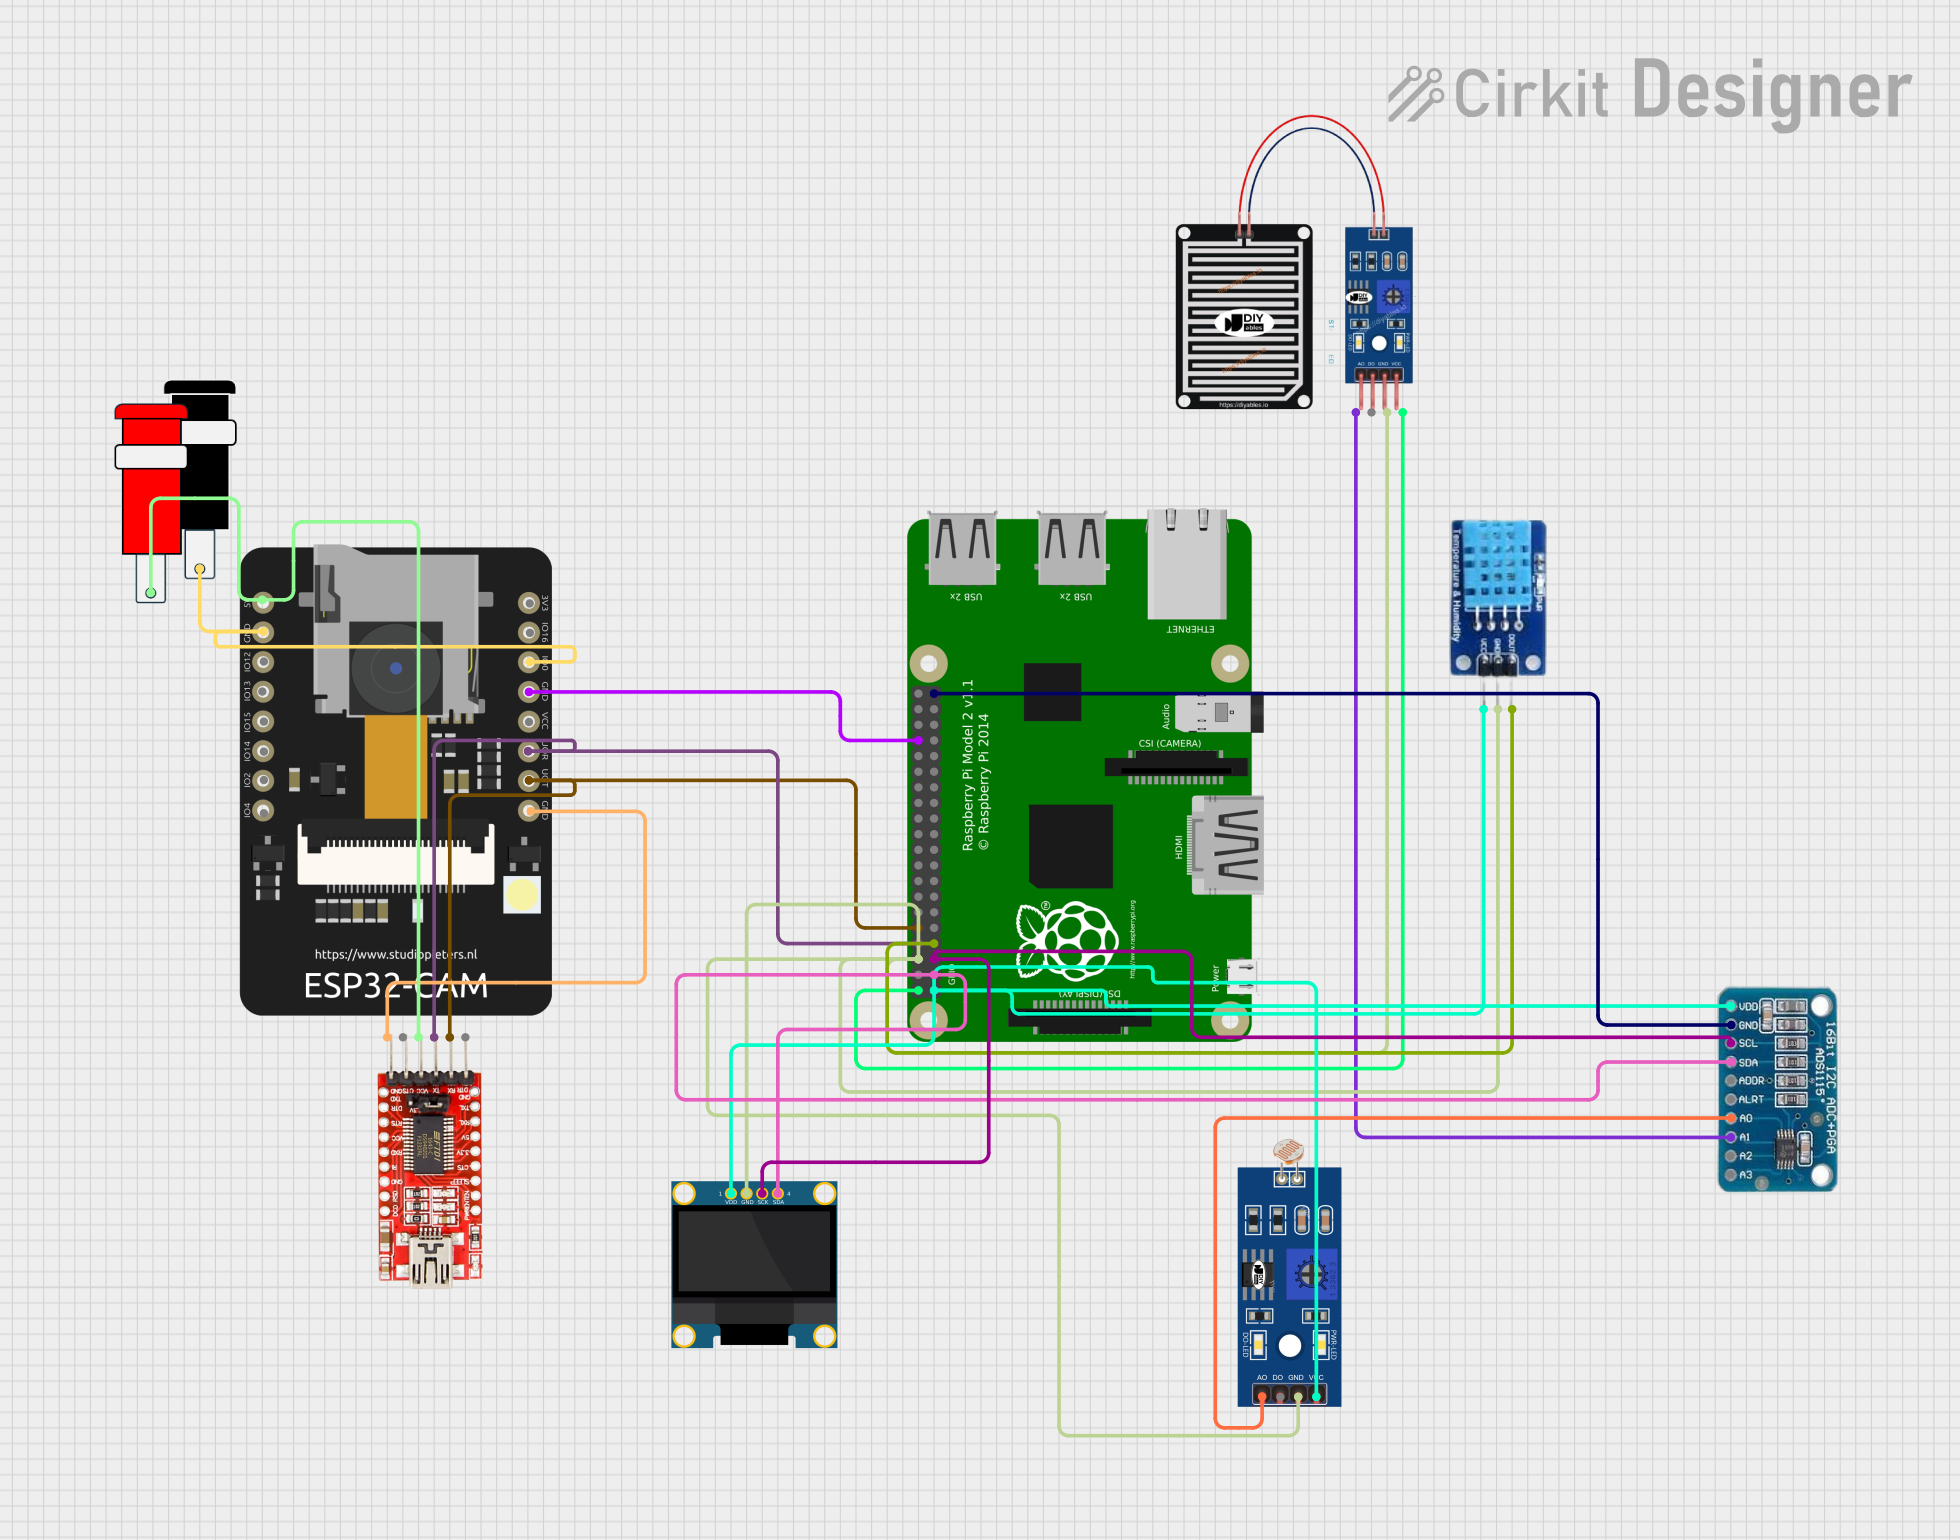
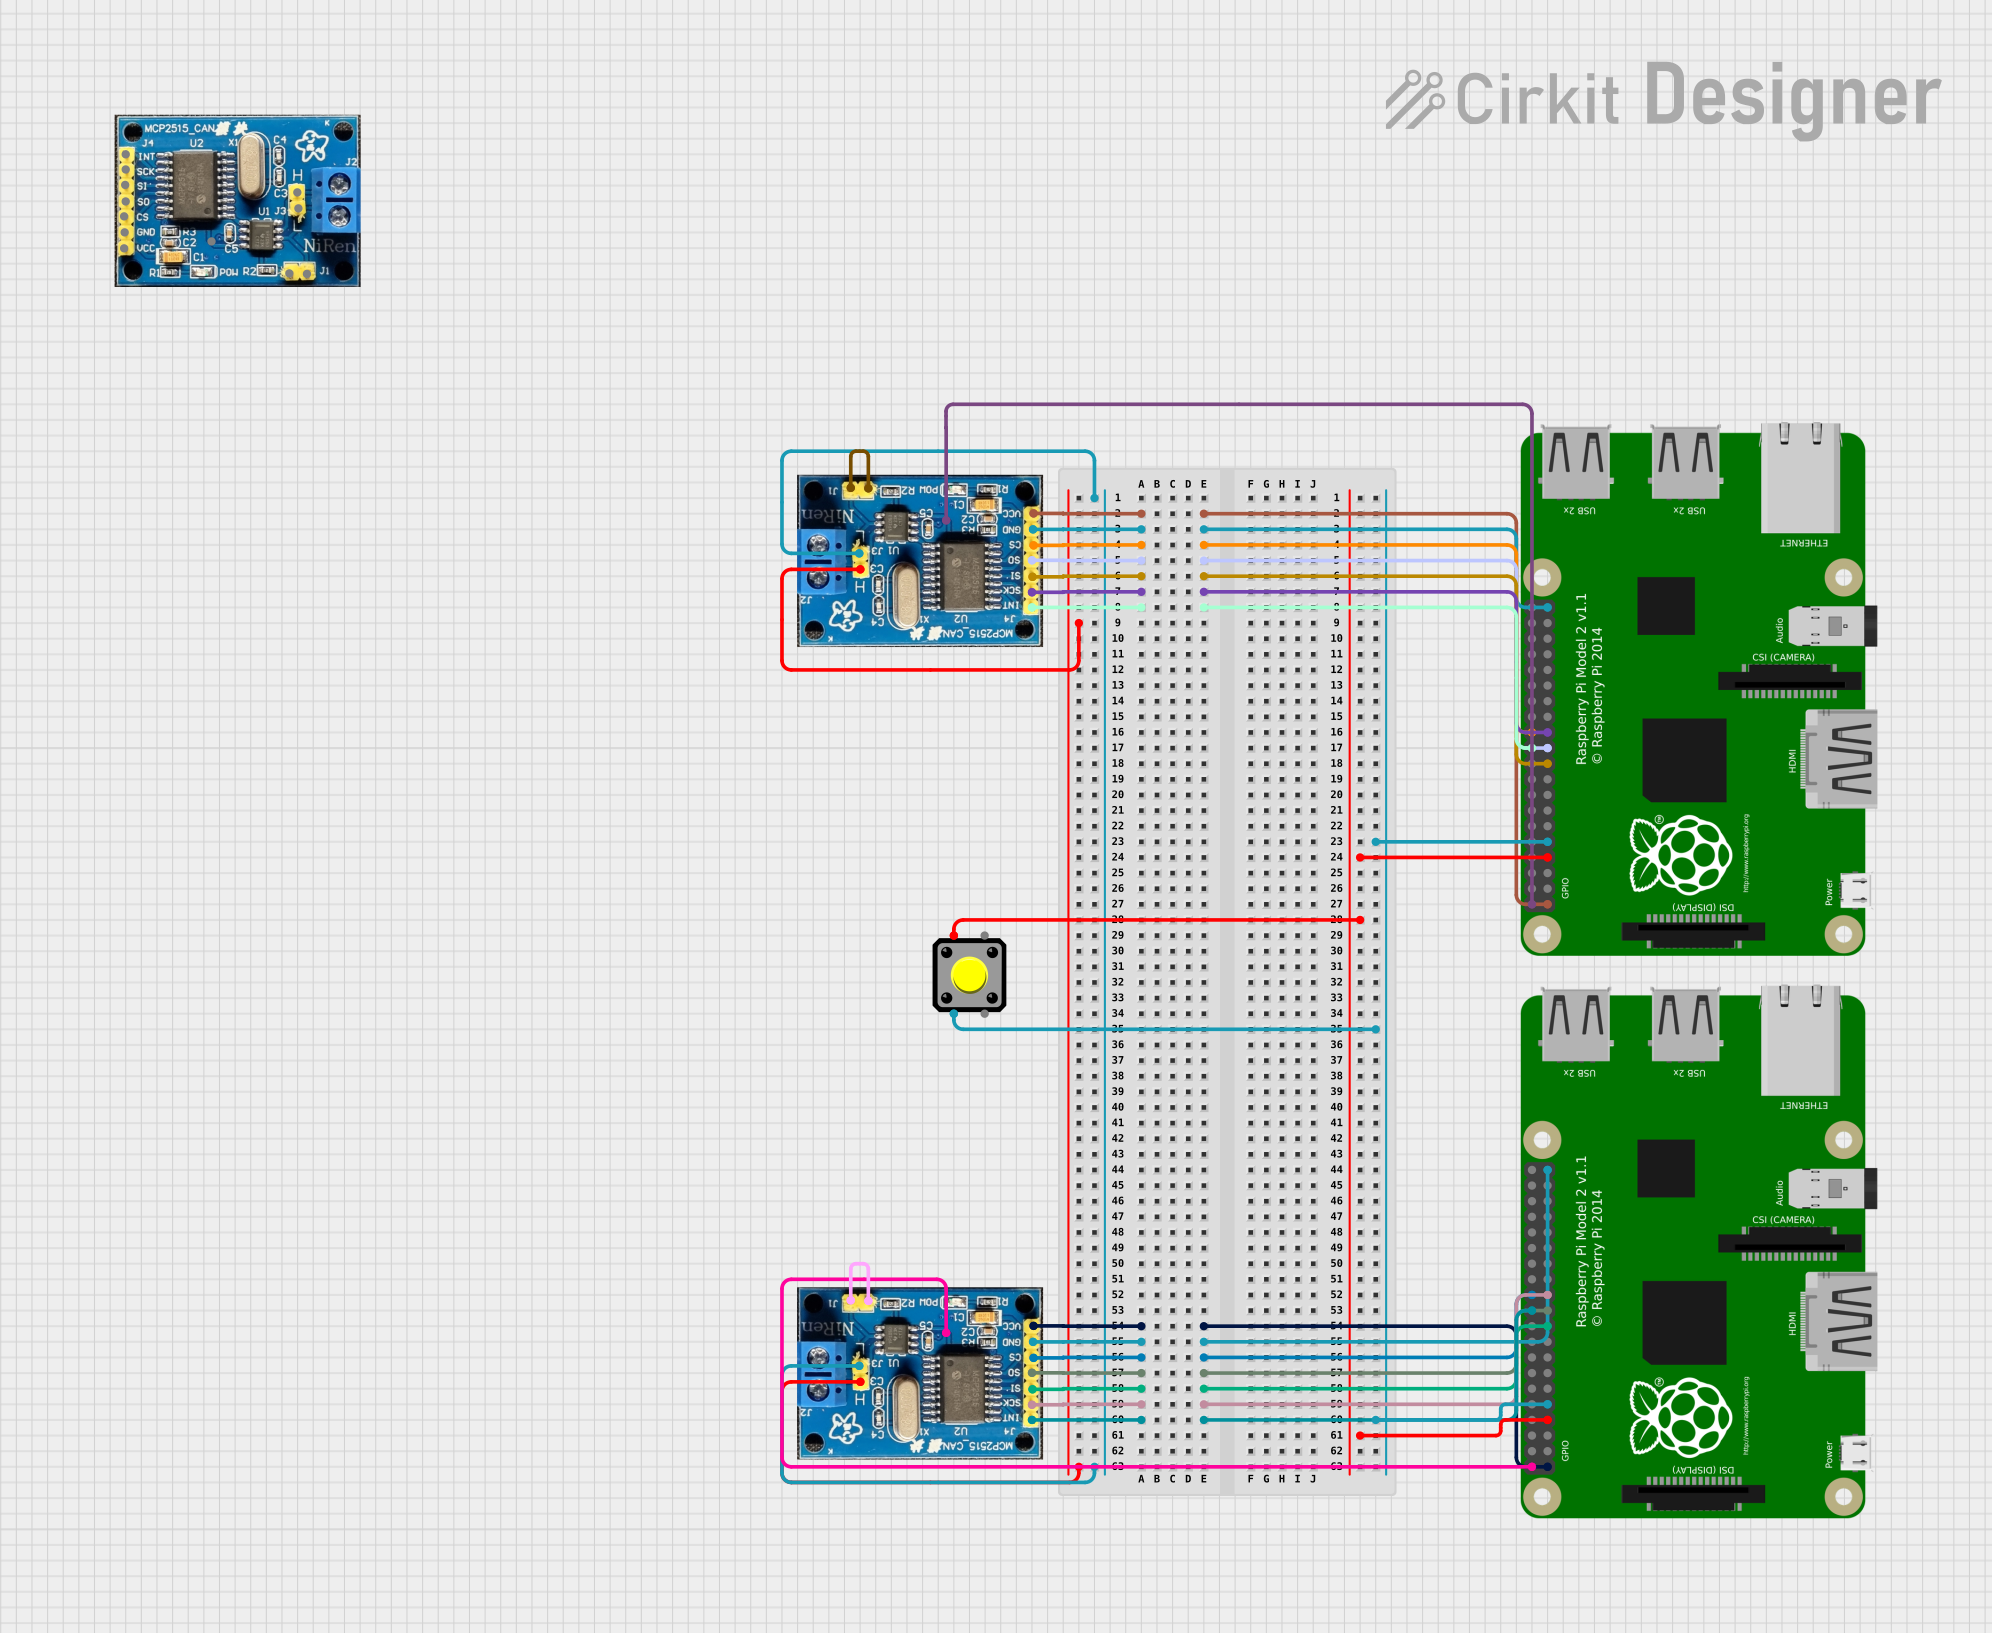
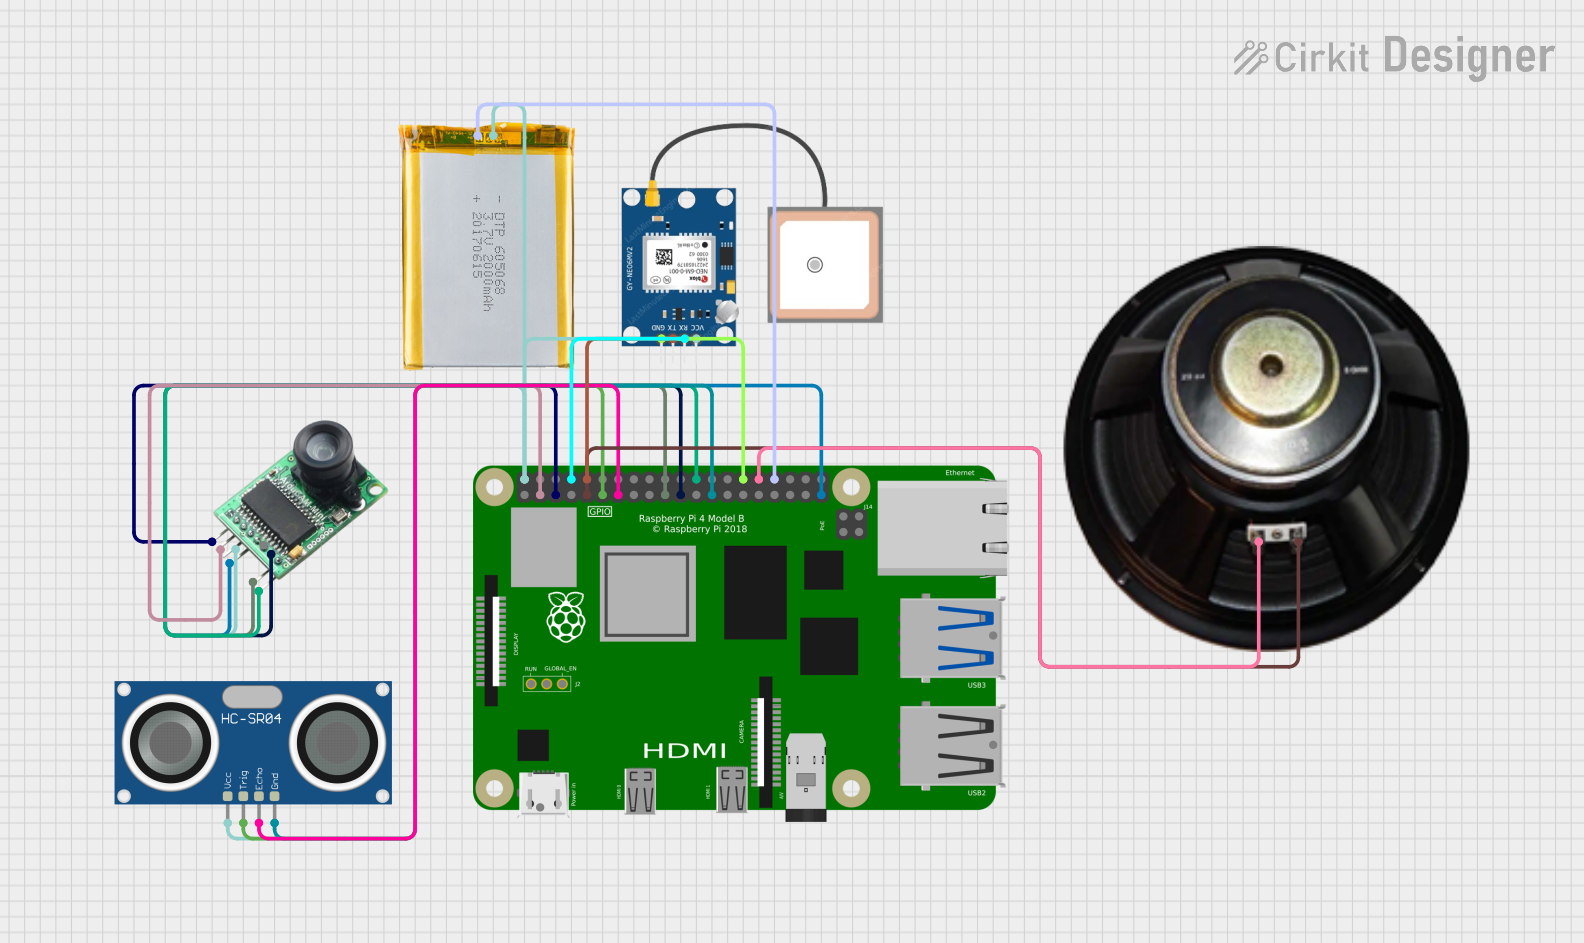
- GPIO Usage: Connect sensors, actuators, or other modules to the GPIO pins using jumper wires.
Important Considerations and Best Practices
- Always shut down the operating system before disconnecting the power to avoid SD card corruption.
- Use a case to protect the Raspberry Pi from static and physical damage.
- Be cautious when connecting components to the GPIO pins to avoid short circuits or overloading the pins.
Troubleshooting and FAQs
Common Issues
- Pi not booting: Ensure the microSD card is properly inserted and contains the correct OS image.
- Overheating: Make sure the Pi is in a well-ventilated area or use heat sinks.
- USB devices not recognized: Check the power supply; it may not be providing enough current.
Solutions and Tips for Troubleshooting
- Red LED not lighting up: Check the power supply and micro USB cable.
- Green LED blinking in a specific pattern: Refer to the Raspberry Pi documentation for LED blink codes.
- No video output: Check the HDMI connection or try a different screen.
FAQs
Q: Can I power the Raspberry Pi from a computer USB port? A: It's not recommended as most computer USB ports do not supply enough current.
Q: What operating systems can I run on the Raspberry Pi 2B? A: Raspberry Pi OS, Ubuntu, and other ARM-compatible operating systems.
Q: How do I access the Raspberry Pi remotely? A: You can enable SSH on the Raspberry Pi and use an SSH client to connect to it from another computer.
Q: Can I use the Raspberry Pi as a regular desktop? A: Yes, but it may not be suitable for intensive tasks due to its limited processing power and RAM.
Example Code for Raspberry Pi 2B with Arduino UNO
Example Python code to blink an LED connected to an Arduino UNO
which is interfaced with the Raspberry Pi 2B via serial communication.
import serial import time
Establish a serial connection (Make sure to replace '/dev/ttyACM0' with your Arduino's port)
arduino = serial.Serial('/dev/ttyACM0', 9600) time.sleep(2) # Wait for the connection to establish
try: while True: # Send a command to the Arduino to turn the LED on arduino.write(b'H') time.sleep(1) # Wait for 1 second
    # Send a command to the Arduino to turn the LED off
    arduino.write(b'L')
    time.sleep(1)  # Wait for 1 second
except KeyboardInterrupt: arduino.close() # Close the serial connection when the script is stopped
*Note: The Arduino must be programmed to listen for the 'H' and 'L' characters on its serial port and turn an LED on or off accordingly.*

This documentation provides a comprehensive overview of the Raspberry Pi 2B, ensuring users can get started with their projects efficiently. For more detailed information, users should refer to the official Raspberry Pi resources and community forums.