How to Use Omron B3F button: Examples, Pinouts, and Specs

Introduction
The Omron B3F is a compact tactile pushbutton switch designed for reliability and durability. It is widely used in electronic devices to provide user input, such as in control panels, remote controls, and embedded systems. Its tactile feedback ensures a satisfying and precise actuation, making it a popular choice for applications requiring dependable and responsive input mechanisms.
Explore Projects Built with Omron B3F button
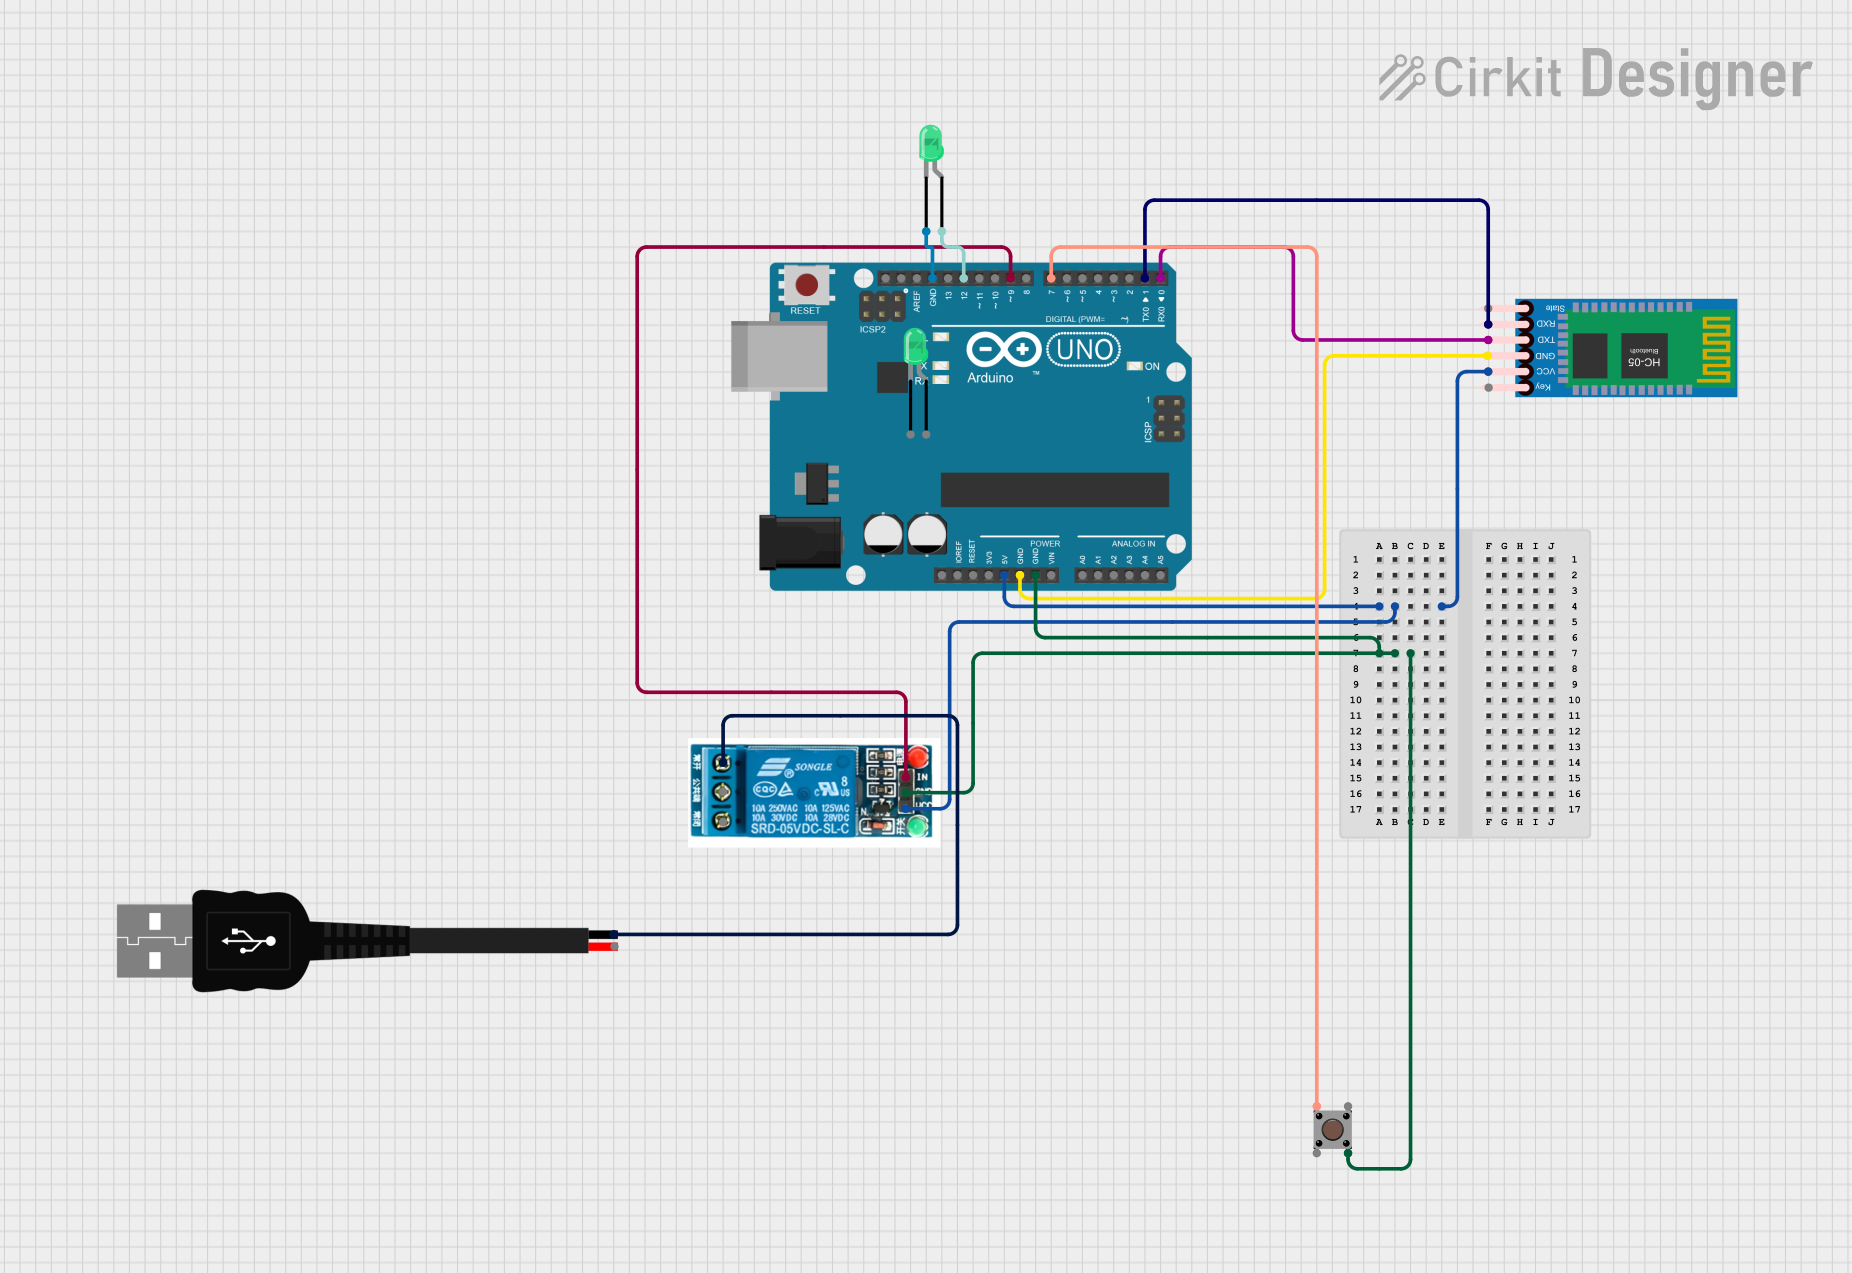
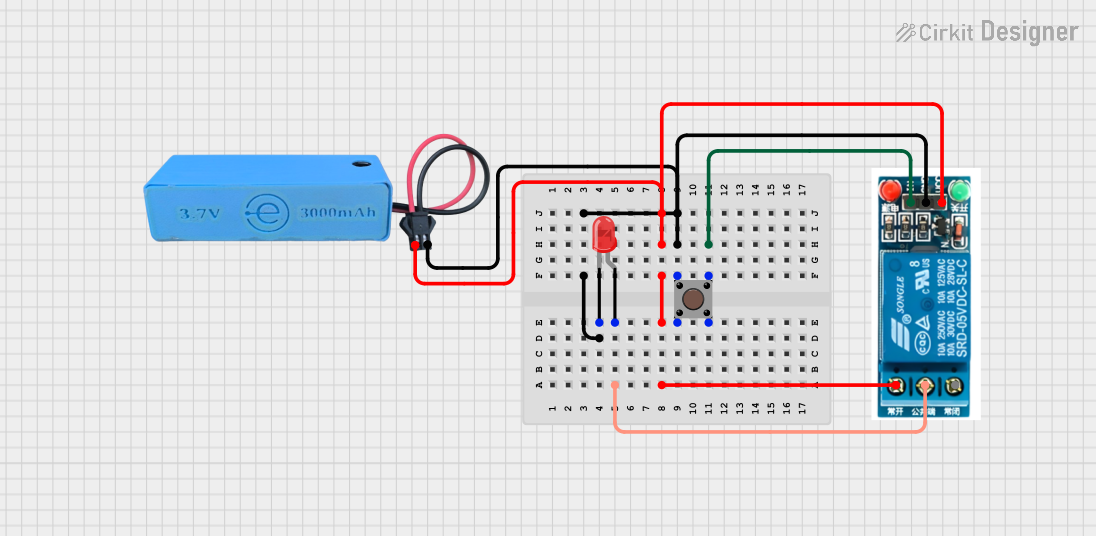
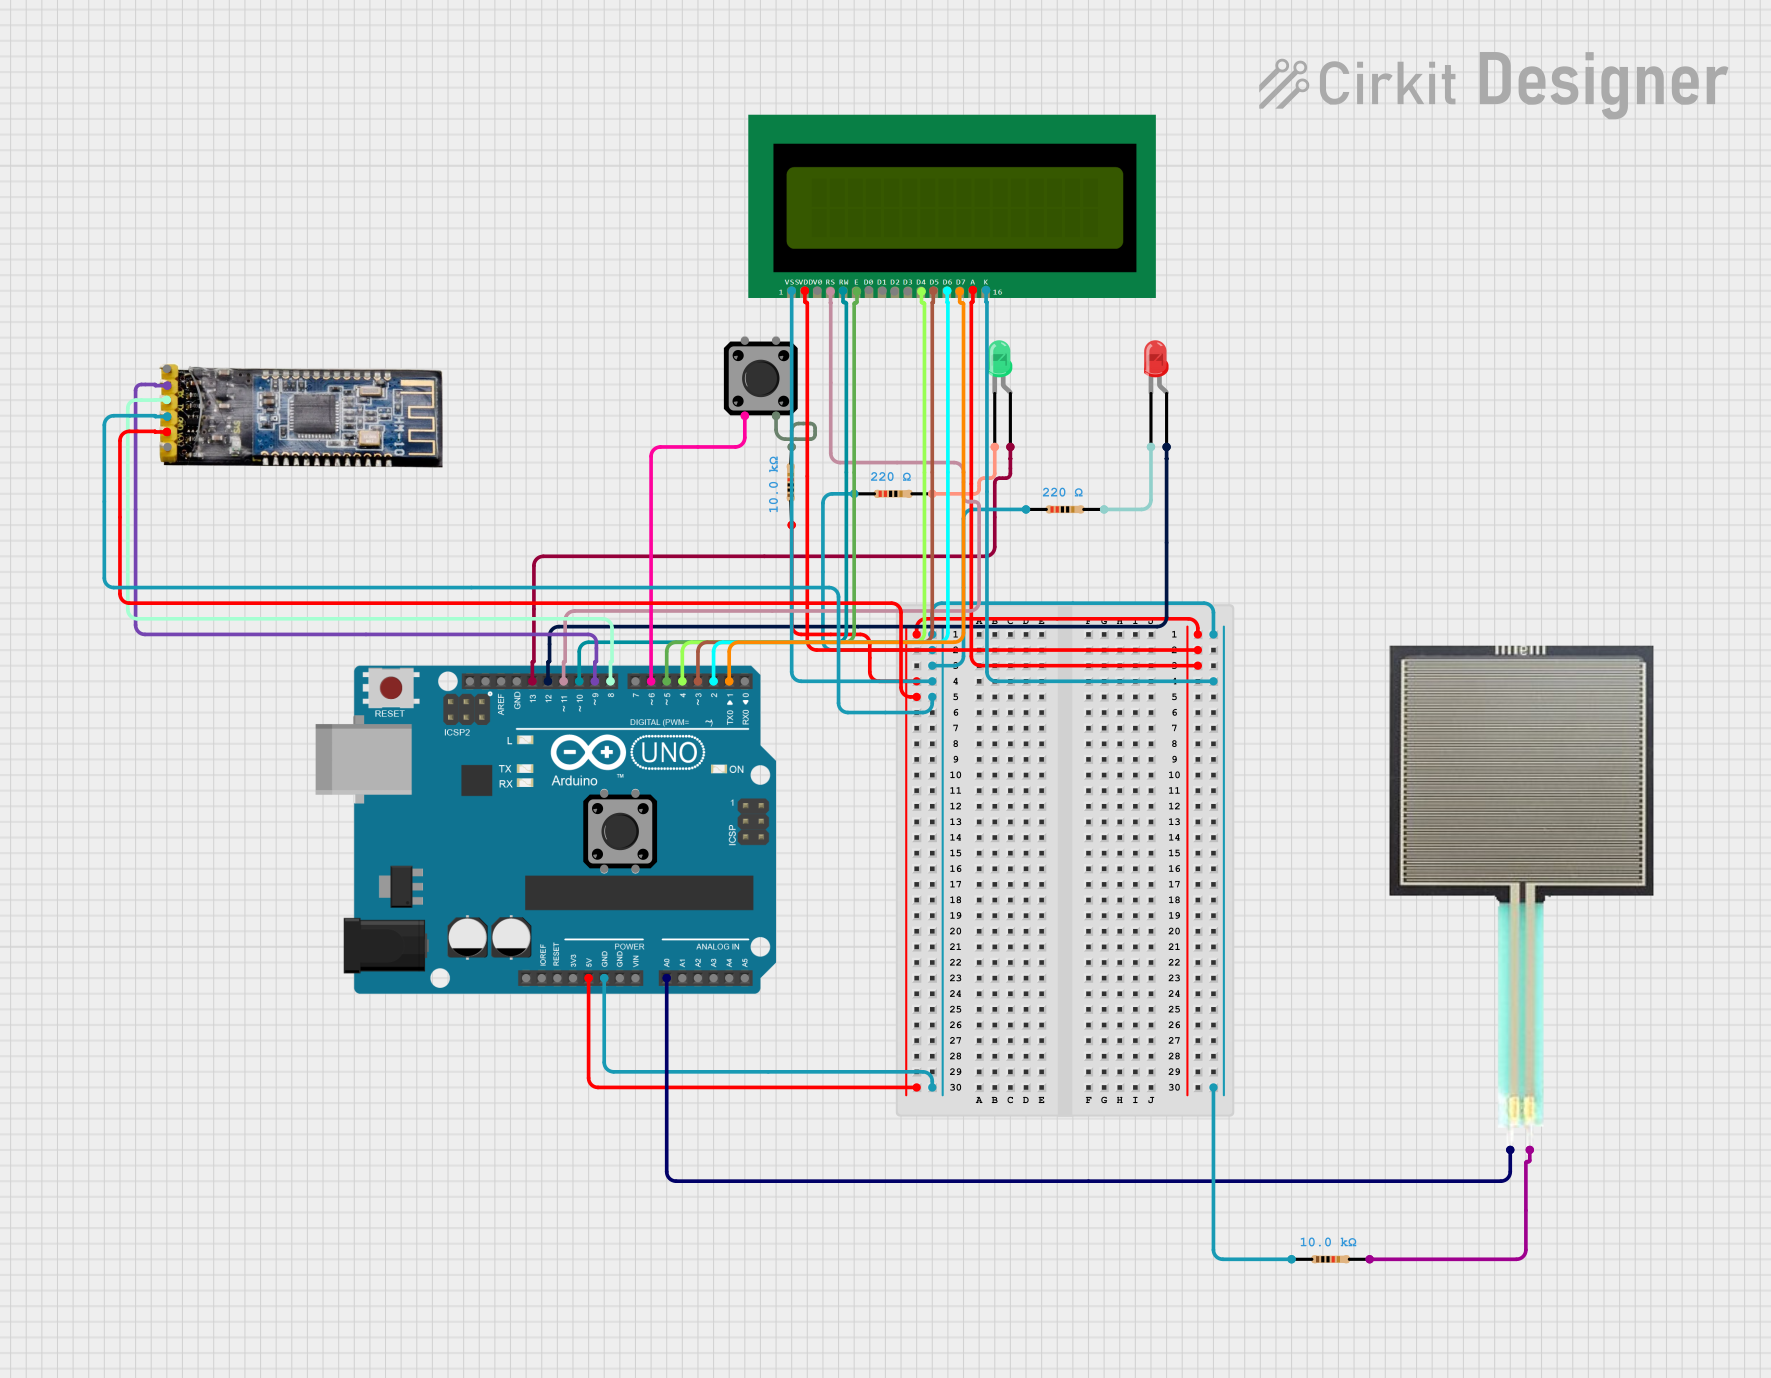

Explore Projects Built with Omron B3F button
Common Applications and Use Cases
- Consumer electronics (e.g., remote controls, calculators)
- Industrial control panels
- Prototyping and DIY electronics projects
- Embedded systems and microcontroller-based designs
- Keyboards and other input devices
Technical Specifications
The Omron B3F button is available in various configurations, but the following are the general specifications for the standard model:
| Parameter | Value |
|---|---|
| Manufacturer | Omron |
| Part Number | B3F |
| Actuation Force | 1.47 N (varies by model) |
| Operating Voltage | 12 V DC (maximum) |
| Operating Current | 50 mA (maximum) |
| Contact Resistance | 100 mΩ (maximum) |
| Insulation Resistance | 100 MΩ (minimum at 100 V DC) |
| Operating Temperature | -25°C to +70°C |
| Mechanical Durability | 1,000,000 operations (typical) |
| Electrical Durability | 100,000 operations (typical) |
Pin Configuration and Descriptions
The Omron B3F button has a simple 4-pin configuration. The pins are arranged in a square layout, with two pairs of pins internally connected. This design allows for easy integration into circuits.
| Pin Number | Description |
|---|---|
| 1 | Switch terminal (connected to 3) |
| 2 | Switch terminal (connected to 4) |
| 3 | Switch terminal (connected to 1) |
| 4 | Switch terminal (connected to 2) |
Note: The button is non-polarized, meaning there is no specific orientation required for its operation.
Usage Instructions
How to Use the Omron B3F Button in a Circuit
- Connection: Connect one pair of terminals (e.g., pins 1 and 3) to the input signal line and the other pair (e.g., pins 2 and 4) to ground. When the button is pressed, the circuit is completed, allowing current to flow.
- Pull-Up or Pull-Down Resistor: Use a pull-up or pull-down resistor to ensure a stable signal when the button is not pressed. A typical value is 10 kΩ.
- Debouncing: Mechanical switches like the B3F can produce noise or "bouncing" when pressed. Use hardware (e.g., capacitors) or software debouncing techniques to filter out these unwanted signals.
Example Circuit with Arduino UNO
Below is an example of how to connect and use the Omron B3F button with an Arduino UNO:
Circuit Diagram
- Connect one terminal of the button to digital pin 2 on the Arduino.
- Connect the other terminal to ground.
- Use a 10 kΩ pull-up resistor between digital pin 2 and 5V.
Arduino Code
// Example code for using the Omron B3F button with Arduino UNO
const int buttonPin = 2;  // Pin connected to the button
const int ledPin = 13;    // Pin connected to the onboard LED

int buttonState = 0;      // Variable to store button state

void setup() {
  pinMode(buttonPin, INPUT_PULLUP); // Set button pin as input with internal pull-up
  pinMode(ledPin, OUTPUT);         // Set LED pin as output
}

void loop() {
  buttonState = digitalRead(buttonPin); // Read the button state

  if (buttonState == LOW) { // Button is pressed (LOW due to pull-up resistor)
    digitalWrite(ledPin, HIGH); // Turn on the LED
  } else {
    digitalWrite(ledPin, LOW);  // Turn off the LED
  }
}
Important Considerations and Best Practices
- Debouncing: Always implement debouncing to avoid erratic behavior in your circuit.
- Voltage and Current Ratings: Do not exceed the maximum voltage (12 V DC) or current (50 mA) ratings to prevent damage.
- Durability: While the B3F is highly durable, avoid excessive force or environmental conditions outside its operating range.
Troubleshooting and FAQs
Common Issues and Solutions
Button Not Responding
- Cause: Poor connection or incorrect wiring.
- Solution: Verify the wiring and ensure the button terminals are properly connected.
Erratic Behavior (Multiple Signals on Press)
- Cause: Switch bouncing.
- Solution: Implement hardware or software debouncing.
Button Feels Stiff or Unresponsive
- Cause: Mechanical wear or debris.
- Solution: Clean the button or replace it if it has exceeded its durability limits.
LED Stays On or Off in Arduino Circuit
- Cause: Incorrect pull-up/pull-down resistor configuration.
- Solution: Check the resistor value and ensure it is properly connected.
FAQs
Q: Can I use the Omron B3F button with a 3.3V system?
A: Yes, the B3F button is compatible with 3.3V systems as long as the current does not exceed 50 mA.
Q: How do I identify the connected pin pairs?
A: Use a multimeter to check continuity between pins. Pressing the button will complete the circuit between the connected pairs.
Q: Is the Omron B3F waterproof?
A: No, the B3F is not waterproof. For outdoor or moisture-prone environments, consider using a sealed switch.
Q: Can I use the B3F button for high-power applications?
A: No, the B3F is designed for low-power applications. Exceeding its ratings may cause damage or failure.