How to Use Tilt de Mercurio: Examples, Pinouts, and Specs

Introduction
The Tilt de Mercurio (Mercury Tilt Switch), manufactured by Keys (Part ID: Mercury Switch), is a compact and reliable device that uses the movement of mercury to open or close an electrical circuit. This switch operates by tilting, causing the liquid mercury inside to either complete or break the circuit. Its simplicity and durability make it a popular choice for applications requiring level sensing, tilt detection, or safety interlocks.
Explore Projects Built with Tilt de Mercurio
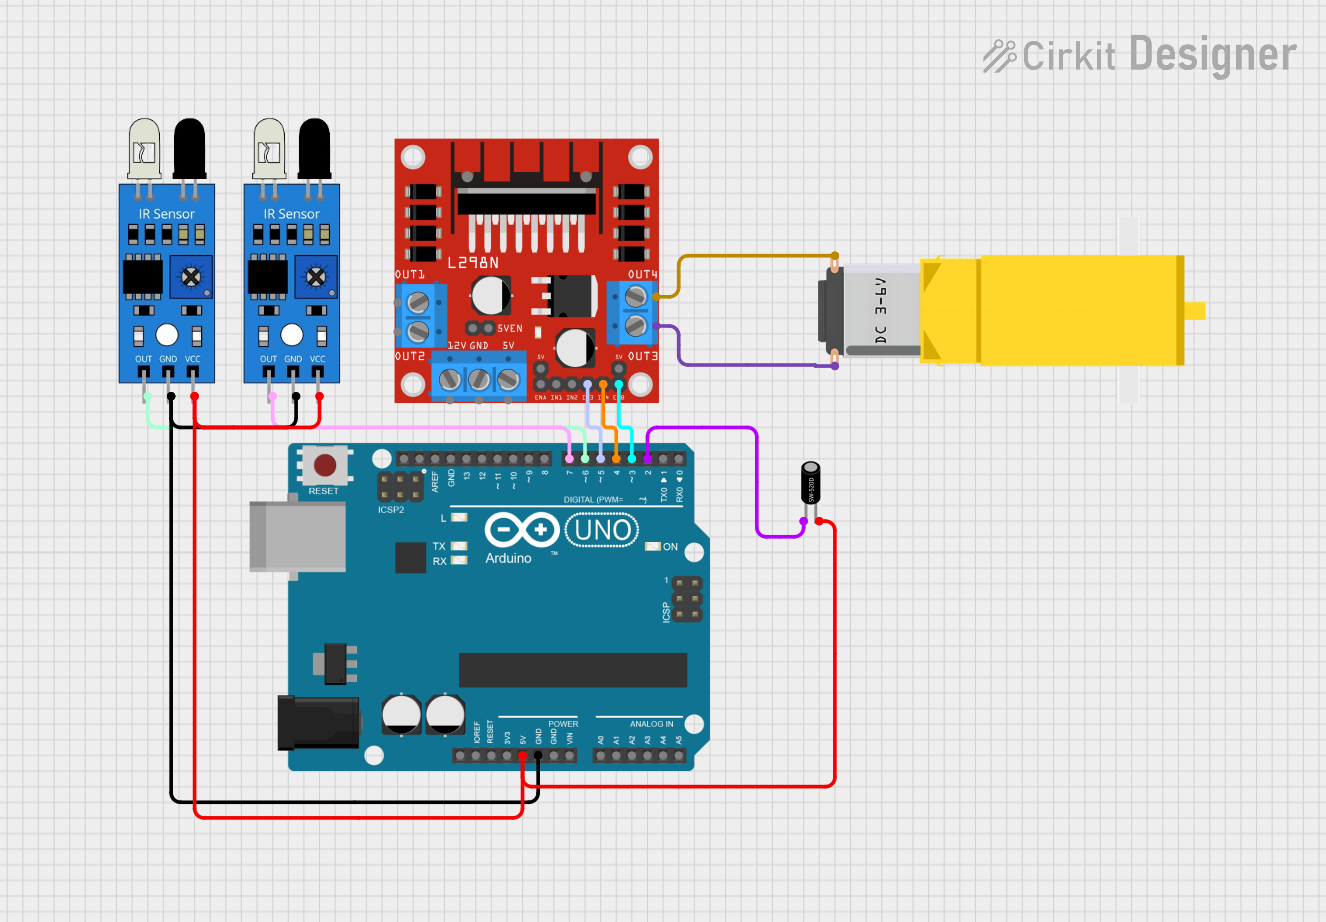
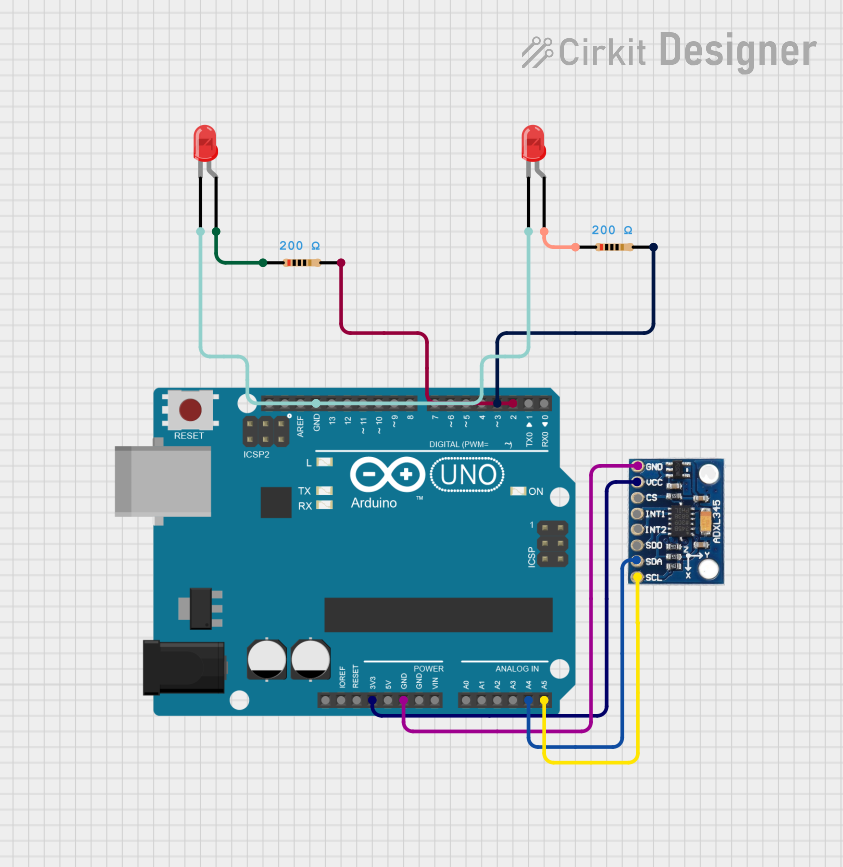
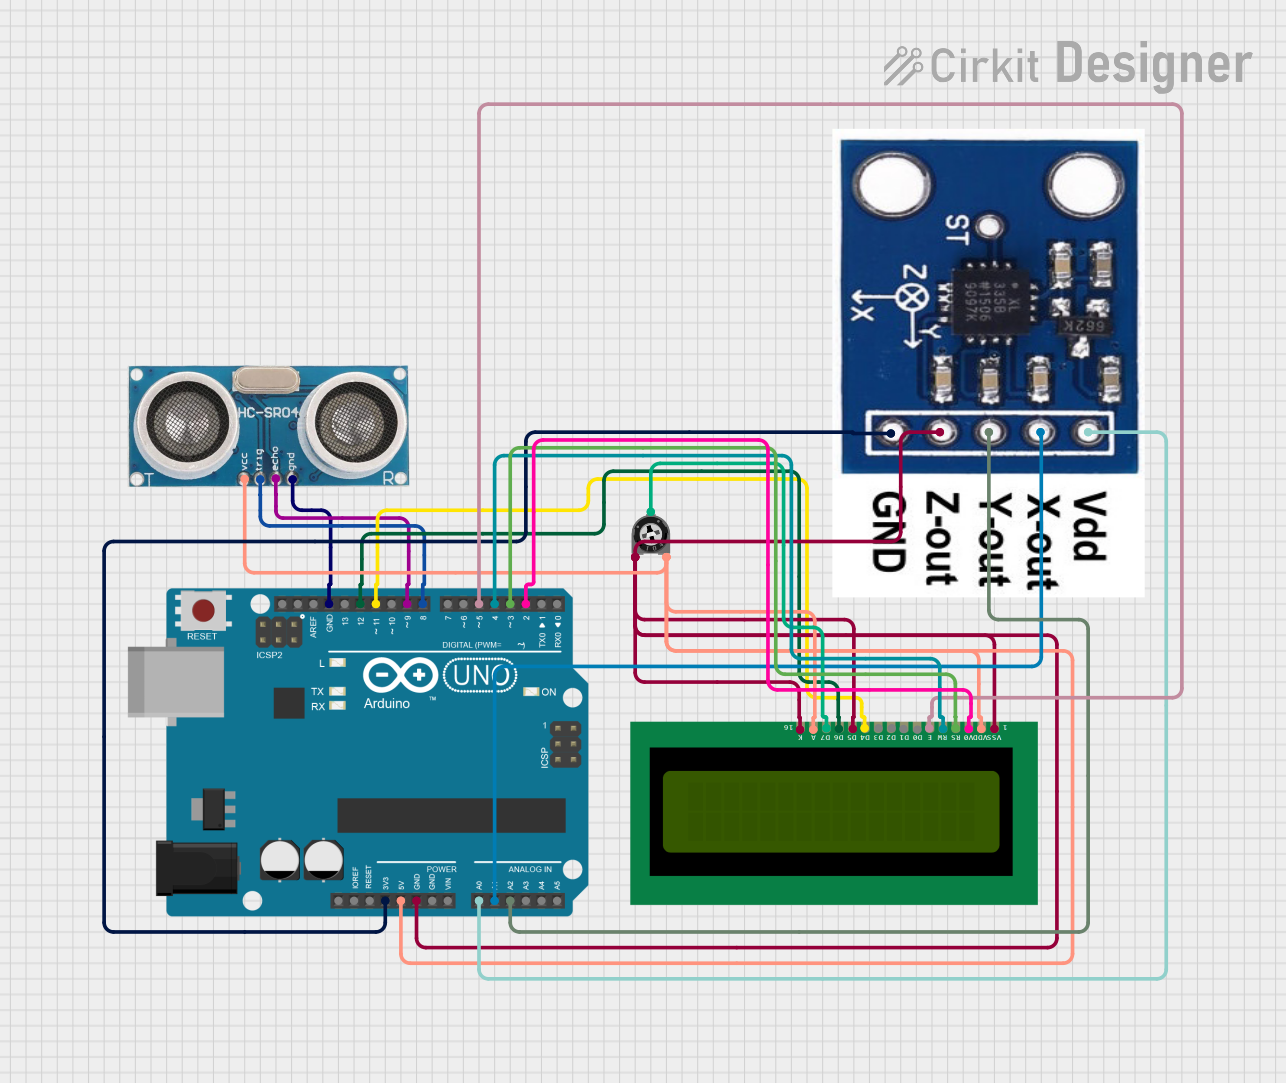

Explore Projects Built with Tilt de Mercurio
Common Applications and Use Cases
- Level Sensing: Detecting the orientation of a device or container.
- Safety Switches: Automatically shutting off equipment when tilted beyond a certain angle.
- Motion Detection: Triggering alarms or actions based on movement.
- Industrial Automation: Monitoring the position of machinery or components.
Technical Specifications
The following table outlines the key technical details of the Tilt de Mercurio:
| Parameter | Value |
|---|---|
| Manufacturer | Keys |
| Part ID | Mercury Switch |
| Operating Voltage | 3V to 12V DC |
| Maximum Current Rating | 500 mA |
| Contact Resistance | < 100 mΩ |
| Operating Temperature | -40°C to +85°C |
| Housing Material | Glass or metal casing |
| Orientation Sensitivity | Typically 10° to 15° tilt angle |
Pin Configuration and Descriptions
The Tilt de Mercurio typically has two pins for electrical connection. The table below describes the pin configuration:
| Pin | Description |
|---|---|
| Pin 1 | Input/Output terminal for one side of the circuit |
| Pin 2 | Input/Output terminal for the other side of the circuit |
Usage Instructions
How to Use the Component in a Circuit
- Wiring: Connect one pin of the Tilt de Mercurio to the positive terminal of the power source and the other pin to the load (e.g., an LED or microcontroller input pin). Ensure the circuit is completed by connecting the load to the negative terminal of the power source.
- Orientation: Mount the switch in the desired orientation. The circuit will close (conduct) when the switch is tilted to allow the mercury to bridge the internal contacts.
- Testing: Verify the operation by tilting the switch and observing the behavior of the connected load (e.g., an LED turning on/off).
Important Considerations and Best Practices
- Avoid Excessive Vibration: Mercury switches are sensitive to movement. Excessive vibration may cause erratic behavior.
- Environmental Safety: Mercury is toxic. Handle the switch carefully and dispose of it according to local regulations if damaged.
- Mounting: Secure the switch firmly to prevent unintended tilting or movement.
- Debouncing: When used with microcontrollers, consider implementing software or hardware debouncing to filter out noise caused by slight movements.
Example: Connecting to an Arduino UNO
The Tilt de Mercurio can be easily interfaced with an Arduino UNO for tilt detection. Below is an example circuit and code:
Circuit Diagram
- Connect one pin of the Tilt de Mercurio to Arduino digital pin 2.
- Connect the other pin to the GND pin of the Arduino.
- Use a pull-up resistor (10kΩ) between digital pin 2 and the 5V pin of the Arduino.
Arduino Code
// Tilt de Mercurio Example Code
// This code reads the state of the mercury tilt switch and turns on an LED
// when the switch is tilted.

const int tiltSwitchPin = 2; // Pin connected to the Tilt de Mercurio
const int ledPin = 13;       // Built-in LED pin on Arduino

void setup() {
  pinMode(tiltSwitchPin, INPUT_PULLUP); // Set tilt switch pin as input with pull-up
  pinMode(ledPin, OUTPUT);             // Set LED pin as output
}

void loop() {
  int tiltState = digitalRead(tiltSwitchPin); // Read the state of the tilt switch

  if (tiltState == LOW) { // LOW means the switch is tilted (circuit closed)
    digitalWrite(ledPin, HIGH); // Turn on the LED
  } else {
    digitalWrite(ledPin, LOW);  // Turn off the LED
  }
}
Troubleshooting and FAQs
Common Issues and Solutions
Switch Not Responding to Tilt:
- Ensure the switch is mounted at the correct angle for operation.
- Check the wiring for loose connections or breaks.
- Verify the power supply voltage is within the operating range (3V to 12V DC).
Erratic Behavior:
- Excessive vibration or movement may cause the mercury to oscillate. Secure the switch firmly.
- Implement software or hardware debouncing to filter out noise.
No Output Signal:
- Test the switch with a multimeter to confirm continuity when tilted.
- Ensure the load (e.g., LED or microcontroller) is functioning correctly.
FAQs
Q: Can the Tilt de Mercurio be used in high-vibration environments?
A: While it can tolerate some vibration, excessive or continuous vibration may cause erratic behavior. Consider alternative tilt sensors for such environments.
Q: Is the mercury inside the switch hazardous?
A: Yes, mercury is toxic. Handle the switch carefully and avoid breaking it. Dispose of damaged switches according to local hazardous waste regulations.
Q: Can I use the Tilt de Mercurio with a 3.3V microcontroller?
A: Yes, the switch operates within a voltage range of 3V to 12V, making it compatible with 3.3V systems.
Q: How do I debounce the switch signal?
A: You can use a capacitor in parallel with the switch or implement a software debounce routine in your microcontroller code.
This concludes the documentation for the Tilt de Mercurio. For further assistance, refer to the manufacturer's datasheet or contact Keys support.