How to Use BL300: Examples, Pinouts, and Specs

 Design with BL300 in Cirkit Designer
Introduction
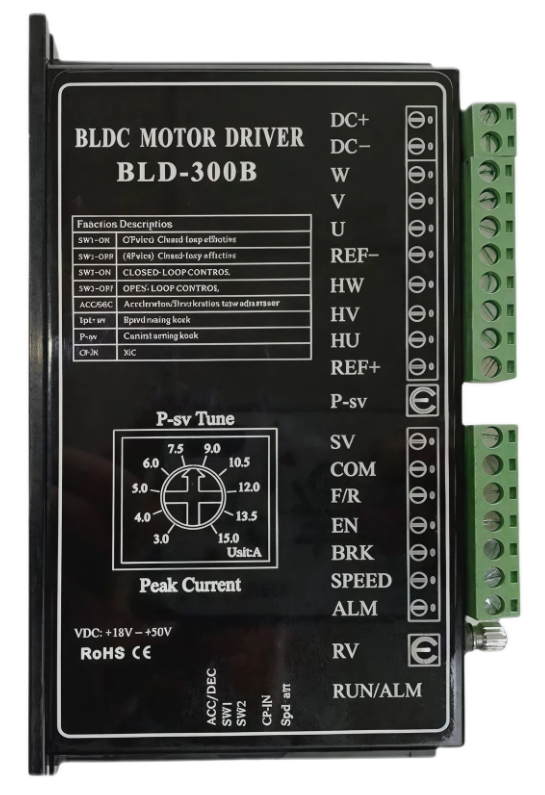
The BL300, manufactured by ALTO (Part ID: DRV-BL300), is a high-performance battery management system (BMS) designed specifically for lithium-ion batteries. It offers advanced features such as cell balancing, temperature monitoring, and state-of-charge (SoC) estimation. These features ensure the safe, efficient, and reliable operation of lithium-ion battery packs in a wide range of applications.
Explore Projects Built with BL300

 Open Project in Cirkit Designer
 Open Project in Cirkit Designer
 Open Project in Cirkit Designer
 Open Project in Cirkit Designer
Explore Projects Built with BL300

 Open Project in Cirkit Designer
 Open Project in Cirkit Designer
 Open Project in Cirkit Designer
 Open Project in Cirkit Designer
Common Applications and Use Cases
- Electric vehicles (EVs) and hybrid electric vehicles (HEVs)
- Renewable energy storage systems (e.g., solar and wind energy)
- Uninterruptible power supplies (UPS)
- Consumer electronics (e.g., laptops, power banks)
- Industrial battery systems
Technical Specifications
Key Technical Details
| Parameter | Value |
|---|---|
| Operating Voltage Range | 3.0V to 60.0V |
| Maximum Cell Count | 16 cells |
| Cell Balancing Current | 50 mA |
| Temperature Monitoring | -40°C to +85°C |
| State-of-Charge Accuracy | ±1% |
| Communication Interface | I²C, SPI |
| Power Consumption (Idle) | < 10 µA |
| Overvoltage Protection | Configurable (up to 4.3V per cell) |
| Undervoltage Protection | Configurable (down to 2.5V per cell) |
| Dimensions | 25mm x 15mm x 3mm |
Pin Configuration and Descriptions
| Pin Number | Pin Name | Description |
|---|---|---|
| 1 | VCC | Power supply input (3.0V to 60.0V) |
| 2 | GND | Ground connection |
| 3 | CELL1+ | Positive terminal of the first cell |
| 4 | CELL1- | Negative terminal of the first cell |
| 5-20 | CELL2+ to CELL16+ | Positive terminals for cells 2 to 16 |
| 21 | TEMP1 | Temperature sensor input 1 |
| 22 | TEMP2 | Temperature sensor input 2 |
| 23 | SDA | I²C data line |
| 24 | SCL | I²C clock line |
| 25 | SPI_MOSI | SPI data input |
| 26 | SPI_MISO | SPI data output |
| 27 | SPI_CLK | SPI clock |
| 28 | SPI_CS | SPI chip select |
Usage Instructions
How to Use the BL300 in a Circuit
- Power Supply: Connect the VCC pin to a power source within the operating voltage range (3.0V to 60.0V). Connect the GND pin to the circuit ground.
- Battery Connections: Connect the positive and negative terminals of each lithium-ion cell to the corresponding CELL+ and CELL- pins. Ensure proper polarity to avoid damage.
- Temperature Sensors: Attach external temperature sensors to the TEMP1 and TEMP2 pins for monitoring battery temperature.
- Communication Interface: Use either the I²C or SPI interface for communication with a microcontroller or host system. Configure the interface as per your application requirements.
- Cell Balancing: Enable cell balancing through the communication interface to maintain equal charge levels across all cells.
- Protection Settings: Configure overvoltage and undervoltage protection thresholds using the communication interface.
Important Considerations and Best Practices
- Wiring: Use short, low-resistance wires for battery connections to minimize voltage drops and ensure accurate measurements.
- Temperature Monitoring: Place temperature sensors close to the battery cells for accurate readings.
- Configuration: Use the manufacturer's software or firmware tools to configure the BL300 for your specific application.
- Static Protection: Handle the BL300 in an ESD-safe environment to prevent damage from static electricity.
- Testing: Test the system thoroughly before deploying it in a critical application.
Example: Connecting the BL300 to an Arduino UNO
Below is an example of how to interface the BL300 with an Arduino UNO using the I²C communication protocol.
#include <Wire.h> // Include the Wire library for I²C communication

#define BL300_I2C_ADDRESS 0x40 // Default I²C address of the BL300

void setup() {
  Wire.begin(); // Initialize I²C communication
  Serial.begin(9600); // Initialize serial communication for debugging

  // Send a test command to the BL300
  Wire.beginTransmission(BL300_I2C_ADDRESS);
  Wire.write(0x01); // Example command to read cell voltages
  Wire.endTransmission();

  Serial.println("BL300 initialized and test command sent.");
}

void loop() {
  // Request data from the BL300
  Wire.requestFrom(BL300_I2C_ADDRESS, 2); // Request 2 bytes of data

  if (Wire.available() == 2) {
    int highByte = Wire.read(); // Read the high byte
    int lowByte = Wire.read();  // Read the low byte
    int cellVoltage = (highByte << 8) | lowByte; // Combine bytes into a 16-bit value

    Serial.print("Cell Voltage: ");
    Serial.print(cellVoltage);
    Serial.println(" mV");
  }

  delay(1000); // Wait 1 second before the next reading
}
Troubleshooting and FAQs
Common Issues and Solutions
No Communication with the BL300
- Cause: Incorrect I²C or SPI wiring.
- Solution: Verify the connections to the SDA, SCL, SPI_MOSI, SPI_MISO, SPI_CLK, and SPI_CS pins. Ensure pull-up resistors are used for I²C lines if required.
Inaccurate Cell Voltage Readings
- Cause: High resistance or loose connections in the battery wiring.
- Solution: Use low-resistance wires and ensure all connections are secure.
Overheating
- Cause: Excessive current draw or poor thermal management.
- Solution: Check the load current and ensure adequate cooling or heat dissipation.
Cell Balancing Not Working
- Cause: Incorrect configuration or damaged balancing circuitry.
- Solution: Verify the configuration settings and inspect the hardware for damage.
FAQs
Q: Can the BL300 be used with other battery chemistries?
A: The BL300 is optimized for lithium-ion batteries. Using it with other chemistries may require additional configuration or may not be supported.Q: What is the maximum number of cells the BL300 can manage?
A: The BL300 can manage up to 16 cells in series.Q: Does the BL300 support wireless communication?
A: No, the BL300 does not have built-in wireless communication. However, you can pair it with a wireless module via its I²C or SPI interface.Q: How do I update the firmware on the BL300?
A: Firmware updates can be performed using the manufacturer's software tools via the I²C or SPI interface. Refer to the ALTO firmware update guide for detailed instructions.