How to Use BH1750: Examples, Pinouts, and Specs
Introduction
The BH1750 is a digital light sensor manufactured by ROHM Semiconductor. It is designed to measure ambient light intensity in lux, providing precise and reliable readings. The sensor communicates via the I2C protocol, making it easy to integrate into microcontroller-based systems. Its compact design and low power consumption make it ideal for a wide range of applications.
Explore Projects Built with BH1750

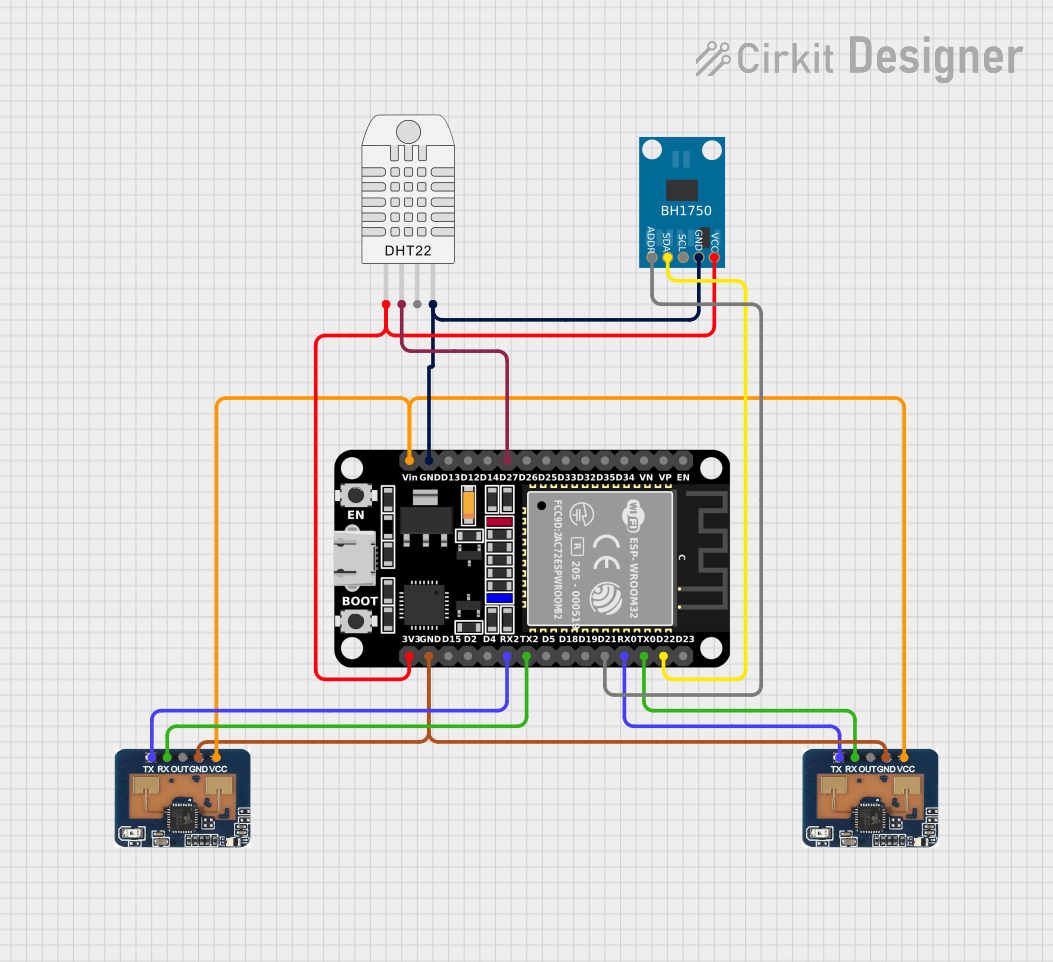
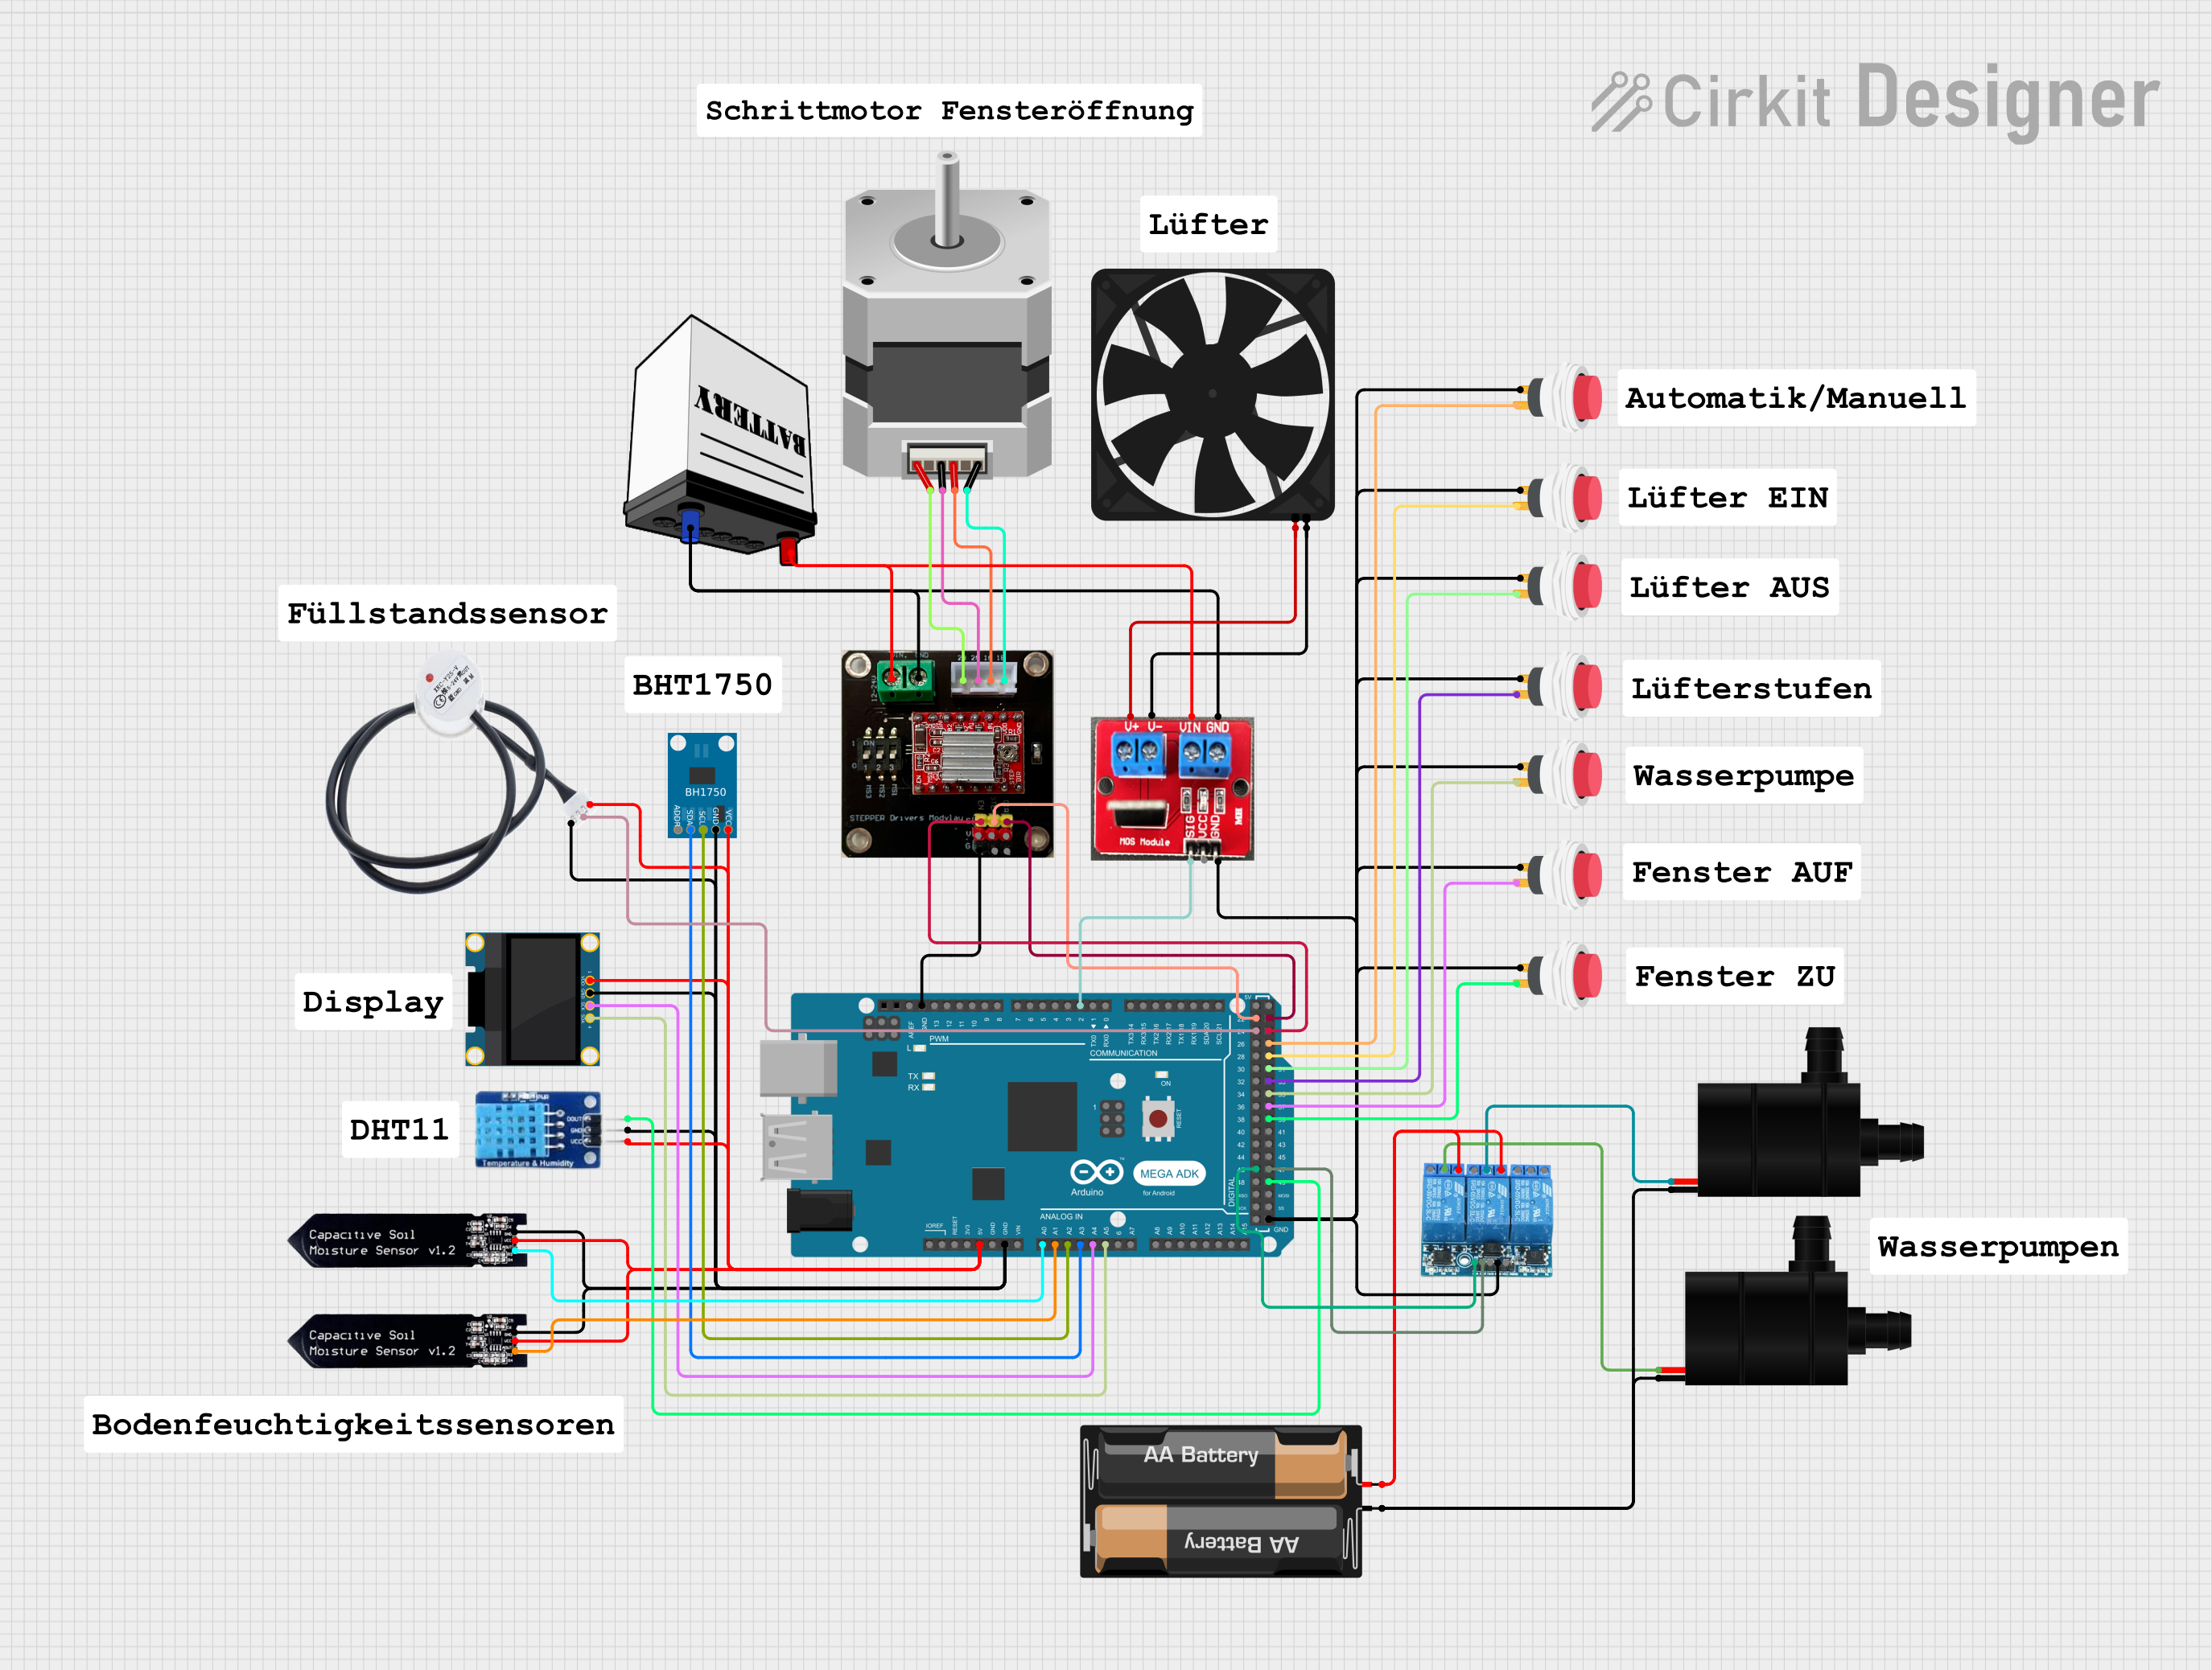
Explore Projects Built with BH1750
Common Applications
- Automatic brightness control for LCD and OLED displays
- Energy-efficient lighting systems
- Smart home devices
- Weather monitoring stations
- Industrial automation systems
Technical Specifications
The following table outlines the key technical details of the BH1750:
| Parameter | Value |
|---|---|
| Operating Voltage (Vcc) | 2.4V to 3.6V |
| Operating Current | 0.12 mA (typical) |
| Measurement Range | 1 lux to 65535 lux |
| Communication Interface | I2C (7-bit address: 0x23 or 0x5C) |
| Light Measurement Modes | High Resolution, Low Resolution |
| Operating Temperature | -40°C to +85°C |
| Package Type | SOP-8 |
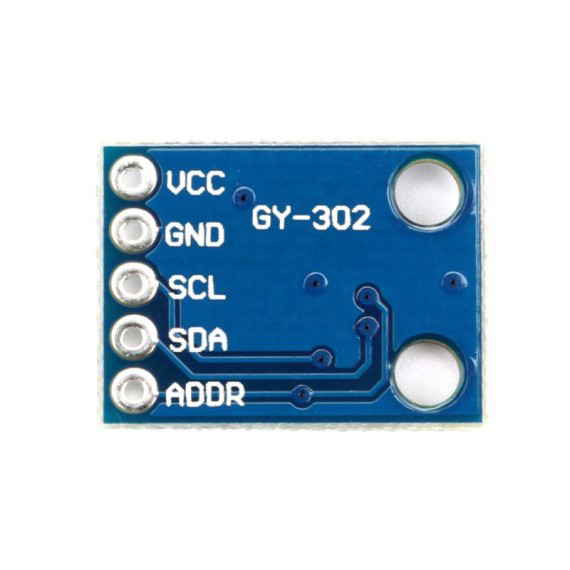
Pin Configuration
The BH1750 has 8 pins, as described in the table below:
| Pin Number | Pin Name | Description |
|---|---|---|
| 1 | VCC | Power supply (2.4V to 3.6V) |
| 2 | GND | Ground |
| 3 | ADDR | I2C address selection (Low: 0x23, High: 0x5C) |
| 4 | NC | Not connected (leave floating) |
| 5 | NC | Not connected (leave floating) |
| 6 | SCL | I2C clock line |
| 7 | SDA | I2C data line |
| 8 | NC | Not connected (leave floating) |
Usage Instructions
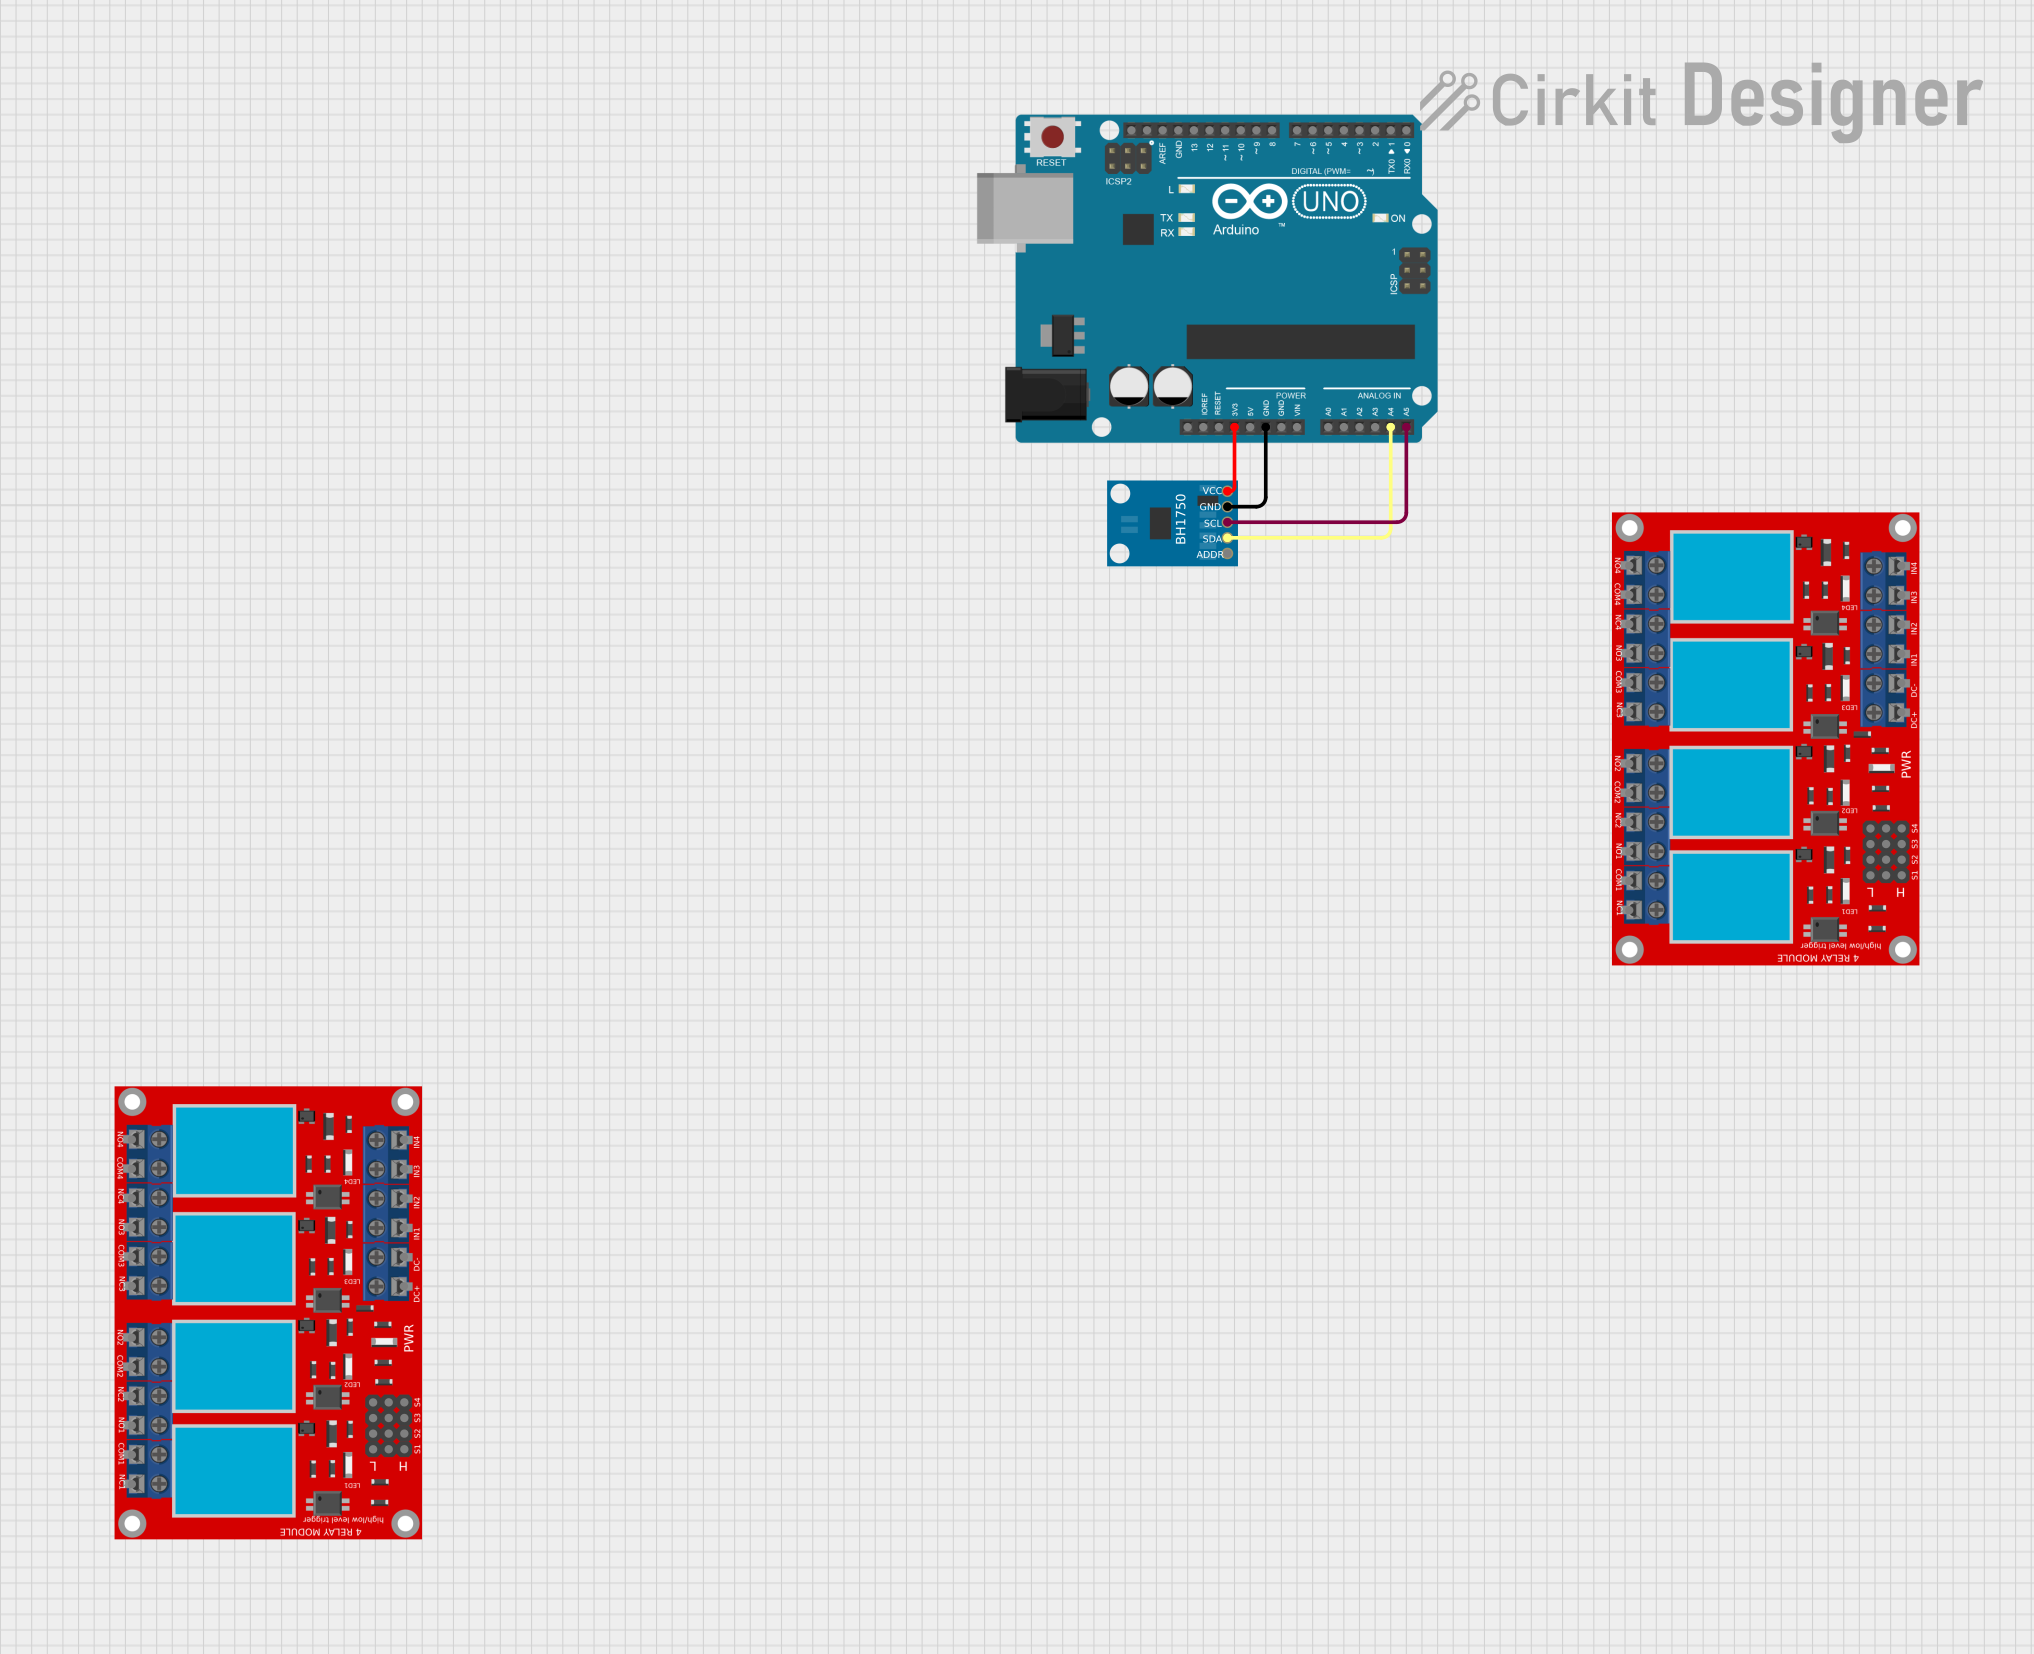
Connecting the BH1750 to a Microcontroller
To use the BH1750, connect it to a microcontroller (e.g., Arduino UNO) as follows:
- Connect the VCC pin to the 3.3V power supply of the microcontroller.
- Connect the GND pin to the ground of the microcontroller.
- Connect the SCL pin to the I2C clock pin (A5 on Arduino UNO).
- Connect the SDA pin to the I2C data pin (A4 on Arduino UNO).
- Use a pull-up resistor (typically 4.7kΩ) on both the SCL and SDA lines for proper I2C communication.
Example Arduino Code
Below is an example Arduino sketch to read light intensity from the BH1750:
#include <Wire.h>
#include <BH1750.h>

// Create an instance of the BH1750 sensor
BH1750 lightMeter;

void setup() {
  Serial.begin(9600); // Initialize serial communication
  Wire.begin();       // Initialize I2C communication

  // Initialize the BH1750 sensor
  if (lightMeter.begin()) {
    Serial.println("BH1750 initialized successfully.");
  } else {
    Serial.println("Error initializing BH1750. Check connections.");
    while (1); // Halt execution if initialization fails
  }
}

void loop() {
  // Read light intensity in lux
  float lux = lightMeter.readLightLevel();

  // Print the light intensity to the serial monitor
  Serial.print("Light Intensity: ");
  Serial.print(lux);
  Serial.println(" lux");

  delay(1000); // Wait for 1 second before the next reading
}
Important Considerations
- Ensure the I2C pull-up resistors are properly connected to avoid communication issues.
- The BH1750 operates at 3.3V. If using a 5V microcontroller, use a level shifter for the I2C lines.
- Avoid exposing the sensor to direct sunlight for extended periods, as it may affect accuracy.
Troubleshooting and FAQs
Common Issues
No response from the sensor:
- Verify the wiring and ensure the I2C lines (SCL and SDA) are correctly connected.
- Check the I2C address (default is 0x23, but it can be changed to 0x5C using the ADDR pin).
Incorrect or fluctuating readings:
- Ensure the sensor is not exposed to sudden changes in light intensity.
- Verify that the power supply voltage is within the specified range (2.4V to 3.6V).
Sensor not initializing:
- Confirm that the I2C pull-up resistors are in place.
- Check for any loose connections or damaged wires.
FAQs
Q: Can the BH1750 measure light intensity in complete darkness?
A: No, the BH1750 cannot measure light intensity in complete darkness. Its minimum measurable value is approximately 1 lux.
Q: How do I change the I2C address of the BH1750?
A: The I2C address can be changed by setting the ADDR pin:
- Connect ADDR to GND for address 0x23.
- Connect ADDR to VCC for address 0x5C.
Q: Can the BH1750 be used outdoors?
A: While the BH1750 can operate in a wide temperature range, it is not waterproof. Use a protective enclosure for outdoor applications.
Q: What is the difference between high and low resolution modes?
A: High resolution mode provides more accurate readings but takes longer to measure, while low resolution mode is faster but less precise.