
How to Use Modul Charging TP4056: Examples, Pinouts, and Specs
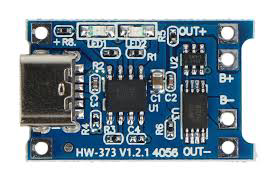
 Design with Modul Charging TP4056 in Cirkit Designer
Introduction
The TP4056 is a lithium battery charger IC designed to provide a constant current/constant voltage (CC/CV) charging profile. It is specifically tailored for charging single-cell lithium-ion batteries. The module integrates overcharge protection, thermal regulation, and a straightforward interface, making it an ideal choice for compact and efficient charging applications.
Explore Projects Built with Modul Charging TP4056
 Open Project in Cirkit Designer
 Open Project in Cirkit Designer
 Open Project in Cirkit Designer
 Open Project in Cirkit Designer
Explore Projects Built with Modul Charging TP4056
Open Project in Cirkit DesignerOpen Project in Cirkit DesignerOpen Project in Cirkit DesignerOpen Project in Cirkit DesignerCommon Applications and Use Cases
- Charging single-cell lithium-ion or lithium-polymer batteries
- Power banks and portable battery packs
- DIY electronics projects requiring rechargeable batteries
- Wearable devices and IoT applications
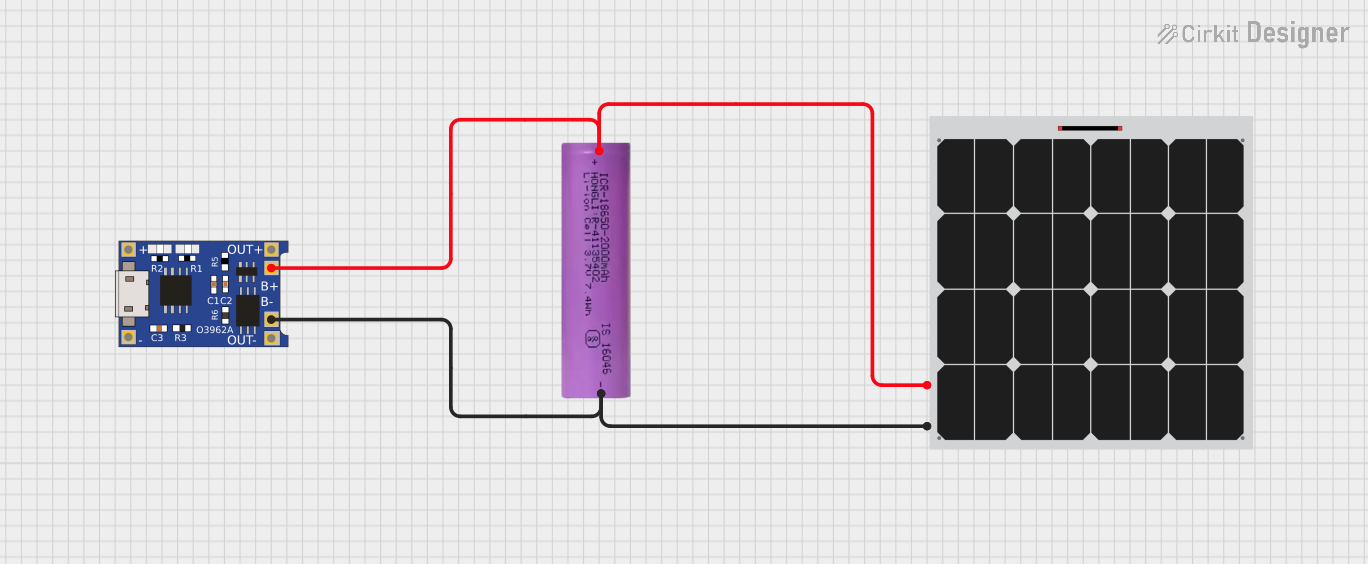
- Solar-powered battery charging systems
Technical Specifications
The TP4056 module is a compact and efficient charging solution. Below are its key technical details:
Key Technical Details
| Parameter | Value |
|---|---|
| Input Voltage Range | 4.5V to 5.5V |
| Charging Voltage | 4.2V ± 1% |
| Maximum Charging Current | Adjustable up to 1A (default: 1A) |
| Charging Method | Constant Current/Constant Voltage (CC/CV) |
| Battery Type Supported | Single-cell lithium-ion/lithium-polymer |
| Overcharge Protection | Yes |
| Thermal Regulation | Yes |
| Operating Temperature Range | -40°C to +85°C |
Pin Configuration and Descriptions
The TP4056 module typically has six pins. Below is the pinout and description:
| Pin Name | Pin Type | Description |
|---|---|---|
| IN+ | Input | Positive input voltage (4.5V to 5.5V). Connect to the positive terminal of the power source. |
| IN- | Input | Negative input voltage (ground). Connect to the negative terminal of the power source. |
| BAT+ | Output | Positive terminal for the battery connection. Connect to the positive terminal of the lithium battery. |
| BAT- | Output | Negative terminal for the battery connection. Connect to the negative terminal of the lithium battery. |
| OUT+ | Output | Positive output voltage for powering external circuits (optional). |
| OUT- | Output | Negative output voltage for powering external circuits (optional). |
Usage Instructions
How to Use the TP4056 Module in a Circuit
- Power Input: Connect a 5V DC power source to the
IN+andIN-pins. This can be a USB power source, a DC adapter, or a solar panel. - Battery Connection: Connect the lithium-ion battery to the
BAT+andBAT-pins. Ensure correct polarity to avoid damage. - Load Connection (Optional): If you want to power an external circuit while charging the battery, connect the load to the
OUT+andOUT-pins. - Adjust Charging Current: The default charging current is 1A. To adjust it, replace the onboard resistor (Rprog). Use the formula: [ I_{CHG} = \frac{1200}{R_{PROG}} ] where ( R_{PROG} ) is in kΩ and ( I_{CHG} ) is in mA.
- Monitor Charging Status: The module has two onboard LEDs:
- Red LED: Charging in progress.
- Blue LED: Charging complete.
Important Considerations and Best Practices
- Battery Compatibility: Only use the TP4056 with single-cell lithium-ion or lithium-polymer batteries.
- Heat Dissipation: The module may heat up during operation. Ensure proper ventilation or add a heatsink if necessary.
- Input Voltage: Do not exceed the recommended input voltage range (4.5V to 5.5V) to avoid damaging the module.
- Reverse Polarity: Always double-check connections to prevent reverse polarity, which can damage the module and battery.
- Load Sharing: If powering a load while charging, ensure the load current does not exceed the module's capacity.
Example: Using TP4056 with Arduino UNO
The TP4056 can be used to charge a battery that powers an Arduino UNO. Below is an example of how to monitor the battery voltage using the Arduino:
// Define the analog pin connected to the battery's positive terminal
const int batteryPin = A0;

// Define the reference voltage and voltage divider ratio
const float referenceVoltage = 5.0; // Arduino's reference voltage (5V)
const float voltageDividerRatio = 2.0; // Assume a 2:1 voltage divider

void setup() {
  Serial.begin(9600); // Initialize serial communication
}

void loop() {
  int analogValue = analogRead(batteryPin); // Read the analog value
  // Calculate the battery voltage
  float batteryVoltage = (analogValue / 1023.0) * referenceVoltage * voltageDividerRatio;

  // Print the battery voltage to the Serial Monitor
  Serial.print("Battery Voltage: ");
  Serial.print(batteryVoltage);
  Serial.println(" V");

  delay(1000); // Wait for 1 second before the next reading
}
Note: Use a voltage divider circuit to step down the battery voltage to a safe level for the Arduino's analog input (0-5V).
Troubleshooting and FAQs
Common Issues and Solutions
Module Overheating
- Cause: High input voltage or excessive charging current.
- Solution: Ensure the input voltage is within the 4.5V to 5.5V range. Reduce the charging current by increasing the value of the Rprog resistor.
Battery Not Charging
- Cause: Incorrect connections or damaged battery.
- Solution: Verify all connections and ensure the battery is functional. Check the polarity of the battery connection.
Red LED Stays On Indefinitely
- Cause: Battery capacity is too large, or the charging current is too low.
- Solution: Increase the charging current by decreasing the Rprog resistor value. Ensure the battery is not damaged.
Blue LED Does Not Turn On
- Cause: Battery is not fully charged or module is malfunctioning.
- Solution: Allow more time for charging. If the issue persists, check the module for defects.
FAQs
Q1: Can I use the TP4056 to charge multiple batteries in series?
A1: No, the TP4056 is designed for single-cell lithium-ion batteries only. Charging multiple batteries in series requires a specialized charging circuit.
Q2: Can I power the TP4056 module with a solar panel?
A2: Yes, as long as the solar panel provides a stable voltage within the 4.5V to 5.5V range.
Q3: What happens if I connect the battery in reverse polarity?
A3: Reverse polarity can damage the module and the battery. Always double-check connections before powering the module.
Q4: How do I adjust the charging current?
A4: Replace the onboard Rprog resistor with a different value. Use the formula ( I_{CHG} = \frac{1200}{R_{PROG}} ) to calculate the desired charging current.
By following this documentation, you can effectively use the TP4056 module for safe and efficient lithium battery charging.