How to Use 1:3 Split Small: Examples, Pinouts, and Specs

Introduction
The 1:3 Split Small is a compact and efficient electronic component designed to divide a single input signal into three separate output signals. It is commonly used in audio and video applications to distribute signals to multiple devices without significant signal loss or degradation. This component is ideal for scenarios where a single source needs to feed multiple outputs, such as splitting audio signals to multiple speakers or distributing video signals to multiple displays.
Explore Projects Built with 1:3 Split Small

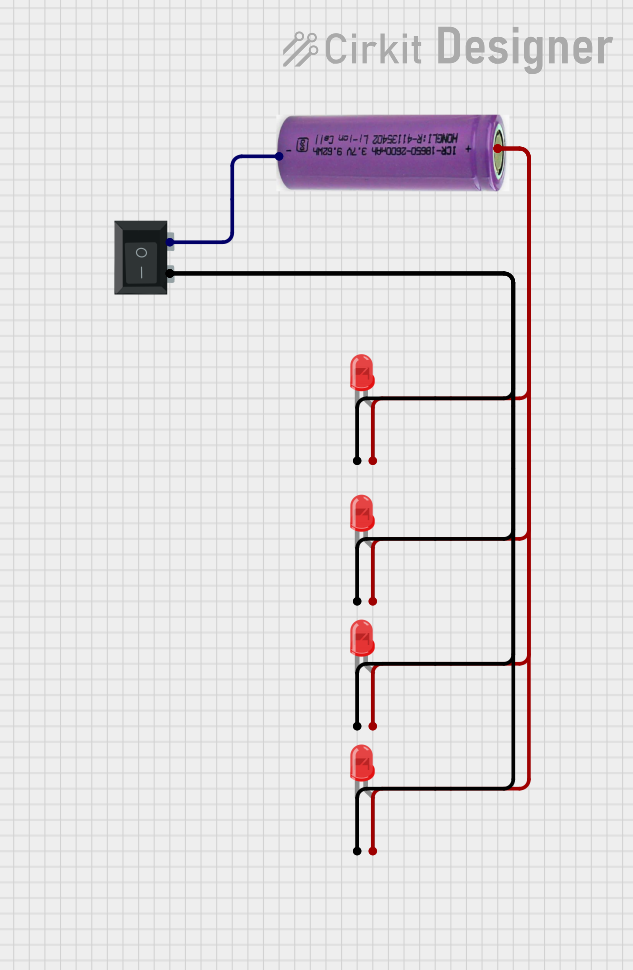

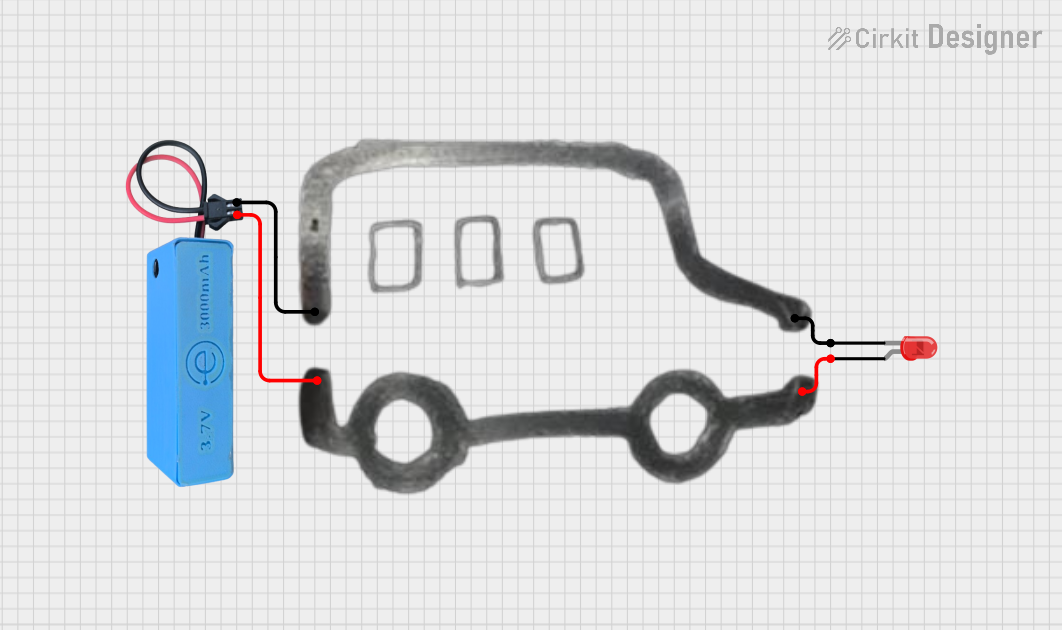
Explore Projects Built with 1:3 Split Small
Common Applications and Use Cases
- Audio signal distribution to multiple speakers or amplifiers
- Video signal splitting for multiple monitors or projectors
- Signal distribution in home theater systems
- Broadcasting and professional audio/video setups
- Educational and presentation systems
Technical Specifications
The 1:3 Split Small is designed to handle a variety of signal types while maintaining signal integrity. Below are its key technical specifications:
| Parameter | Value |
|---|---|
| Input Voltage Range | 5V to 12V DC |
| Signal Type Supported | Analog and Digital (Audio/Video) |
| Maximum Input Signal | 2V peak-to-peak |
| Output Impedance | 75Ω (per output) |
| Frequency Range | 20 Hz to 20 kHz (audio) |
| Power Consumption | < 1W |
| Dimensions | 25mm x 15mm x 10mm |
Pin Configuration and Descriptions
The 1:3 Split Small has a simple pin layout for easy integration into circuits. Below is the pin configuration:
| Pin | Name | Description |
|---|---|---|
| 1 | VCC | Power supply input (5V to 12V DC) |
| 2 | GND | Ground connection |
| 3 | IN | Signal input |
| 4 | OUT1 | Signal output 1 |
| 5 | OUT2 | Signal output 2 |
| 6 | OUT3 | Signal output 3 |
Usage Instructions
How to Use the Component in a Circuit
- Power the Component: Connect the VCC pin to a DC power source (5V to 12V) and the GND pin to the ground of your circuit.
- Input Signal: Connect the signal source (e.g., audio or video signal) to the IN pin.
- Output Signals: Connect the OUT1, OUT2, and OUT3 pins to the devices or circuits that need the signal.
- Verify Connections: Ensure all connections are secure and that the input signal is within the specified range.
Important Considerations and Best Practices
- Signal Integrity: Use shielded cables for input and output connections to minimize noise and interference.
- Power Supply: Ensure the power supply voltage is stable and within the specified range to avoid damage to the component.
- Load Matching: The output impedance is 75Ω; ensure connected devices are compatible to maintain signal quality.
- Avoid Overloading: Do not connect more than one device to a single output pin, as this may degrade the signal.
Example: Using the 1:3 Split Small with an Arduino UNO
The 1:3 Split Small can be used with an Arduino UNO to distribute a PWM signal to multiple devices. Below is an example code snippet:
// Example: Distributing a PWM signal from Arduino to 3 outputs using 1:3 Split Small

const int pwmPin = 9; // PWM output pin on Arduino

void setup() {
  pinMode(pwmPin, OUTPUT); // Set the PWM pin as an output
}

void loop() {
  // Generate a PWM signal with 50% duty cycle
  analogWrite(pwmPin, 128); // 128 corresponds to 50% duty cycle (0-255 range)

  // The 1:3 Split Small will distribute this signal to its 3 output pins
  delay(1000); // Wait for 1 second
}
Note: Ensure the input signal to the 1:3 Split Small does not exceed 2V peak-to-peak when using it with the Arduino.
Troubleshooting and FAQs
Common Issues and Solutions
No Output Signal
- Cause: Incorrect power supply or loose connections.
- Solution: Verify the power supply voltage and ensure all connections are secure.
Signal Degradation
- Cause: Long or unshielded cables causing interference.
- Solution: Use shorter, shielded cables to minimize noise.
Uneven Output Levels
- Cause: Connected devices have mismatched impedance.
- Solution: Ensure all connected devices are compatible with the 75Ω output impedance.
Component Overheating
- Cause: Exceeding the input voltage range or overloading the outputs.
- Solution: Use a regulated power supply and avoid connecting multiple devices to a single output.
FAQs
Q: Can the 1:3 Split Small handle digital signals?
A: Yes, it supports both analog and digital signals, making it suitable for a wide range of applications.
Q: What is the maximum cable length I can use with this component?
A: For optimal performance, keep cable lengths under 2 meters. Longer cables may introduce signal loss or noise.
Q: Can I use this component with a 3.3V power supply?
A: No, the minimum input voltage is 5V. Using a lower voltage may result in improper operation.
Q: Is it possible to cascade multiple 1:3 Split Small components?
A: Yes, you can cascade them, but ensure the input signal strength is sufficient to avoid degradation.
This concludes the documentation for the 1:3 Split Small. For further assistance, refer to the manufacturer’s datasheet or contact technical support.