Cirkit Designer Logo
Cirkit Designer
Your all-in-one circuit design IDE
Home / 
Component Documentation

How to Use 5v battery: Examples, Pinouts, and Specs

Image of 5v battery
Cirkit Designer LogoDesign with 5v battery in Cirkit Designer

Introduction

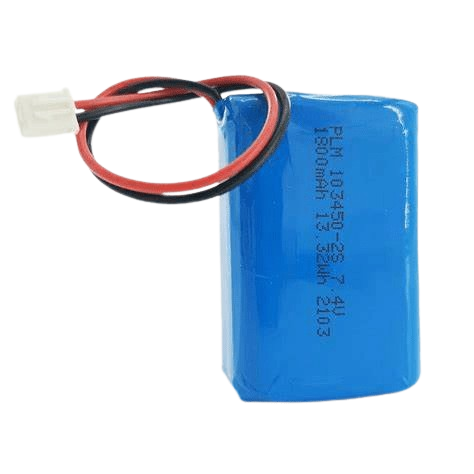
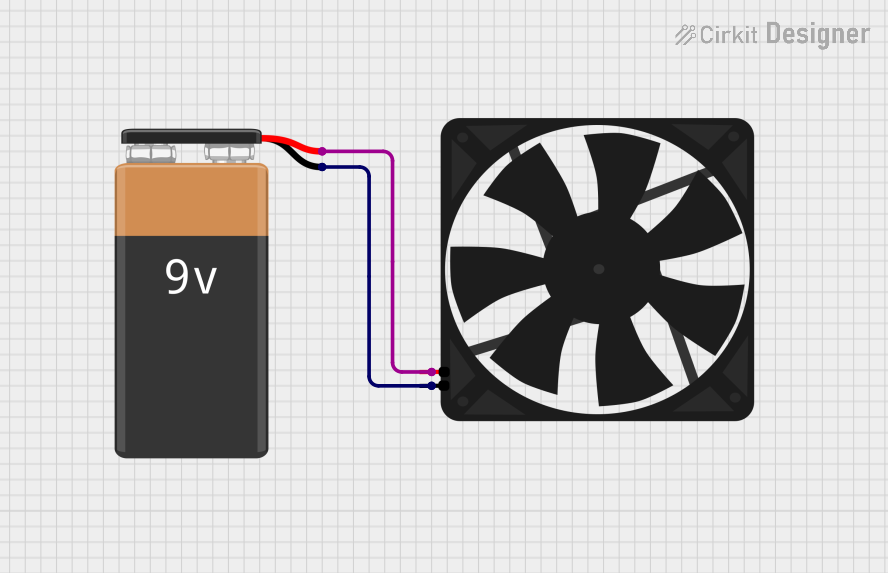
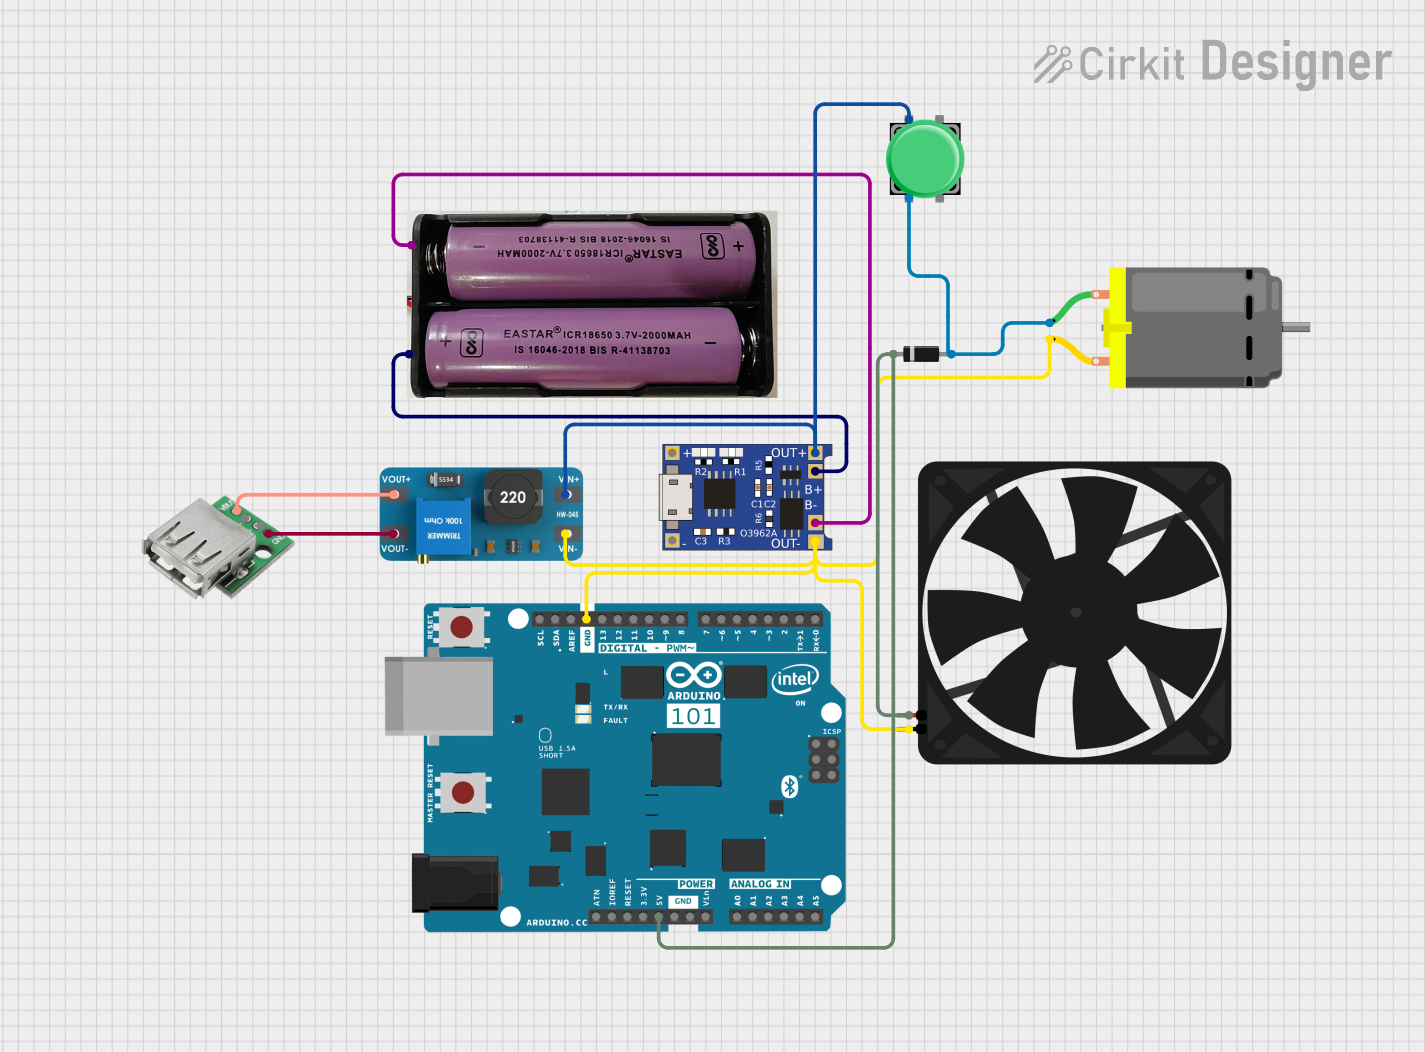
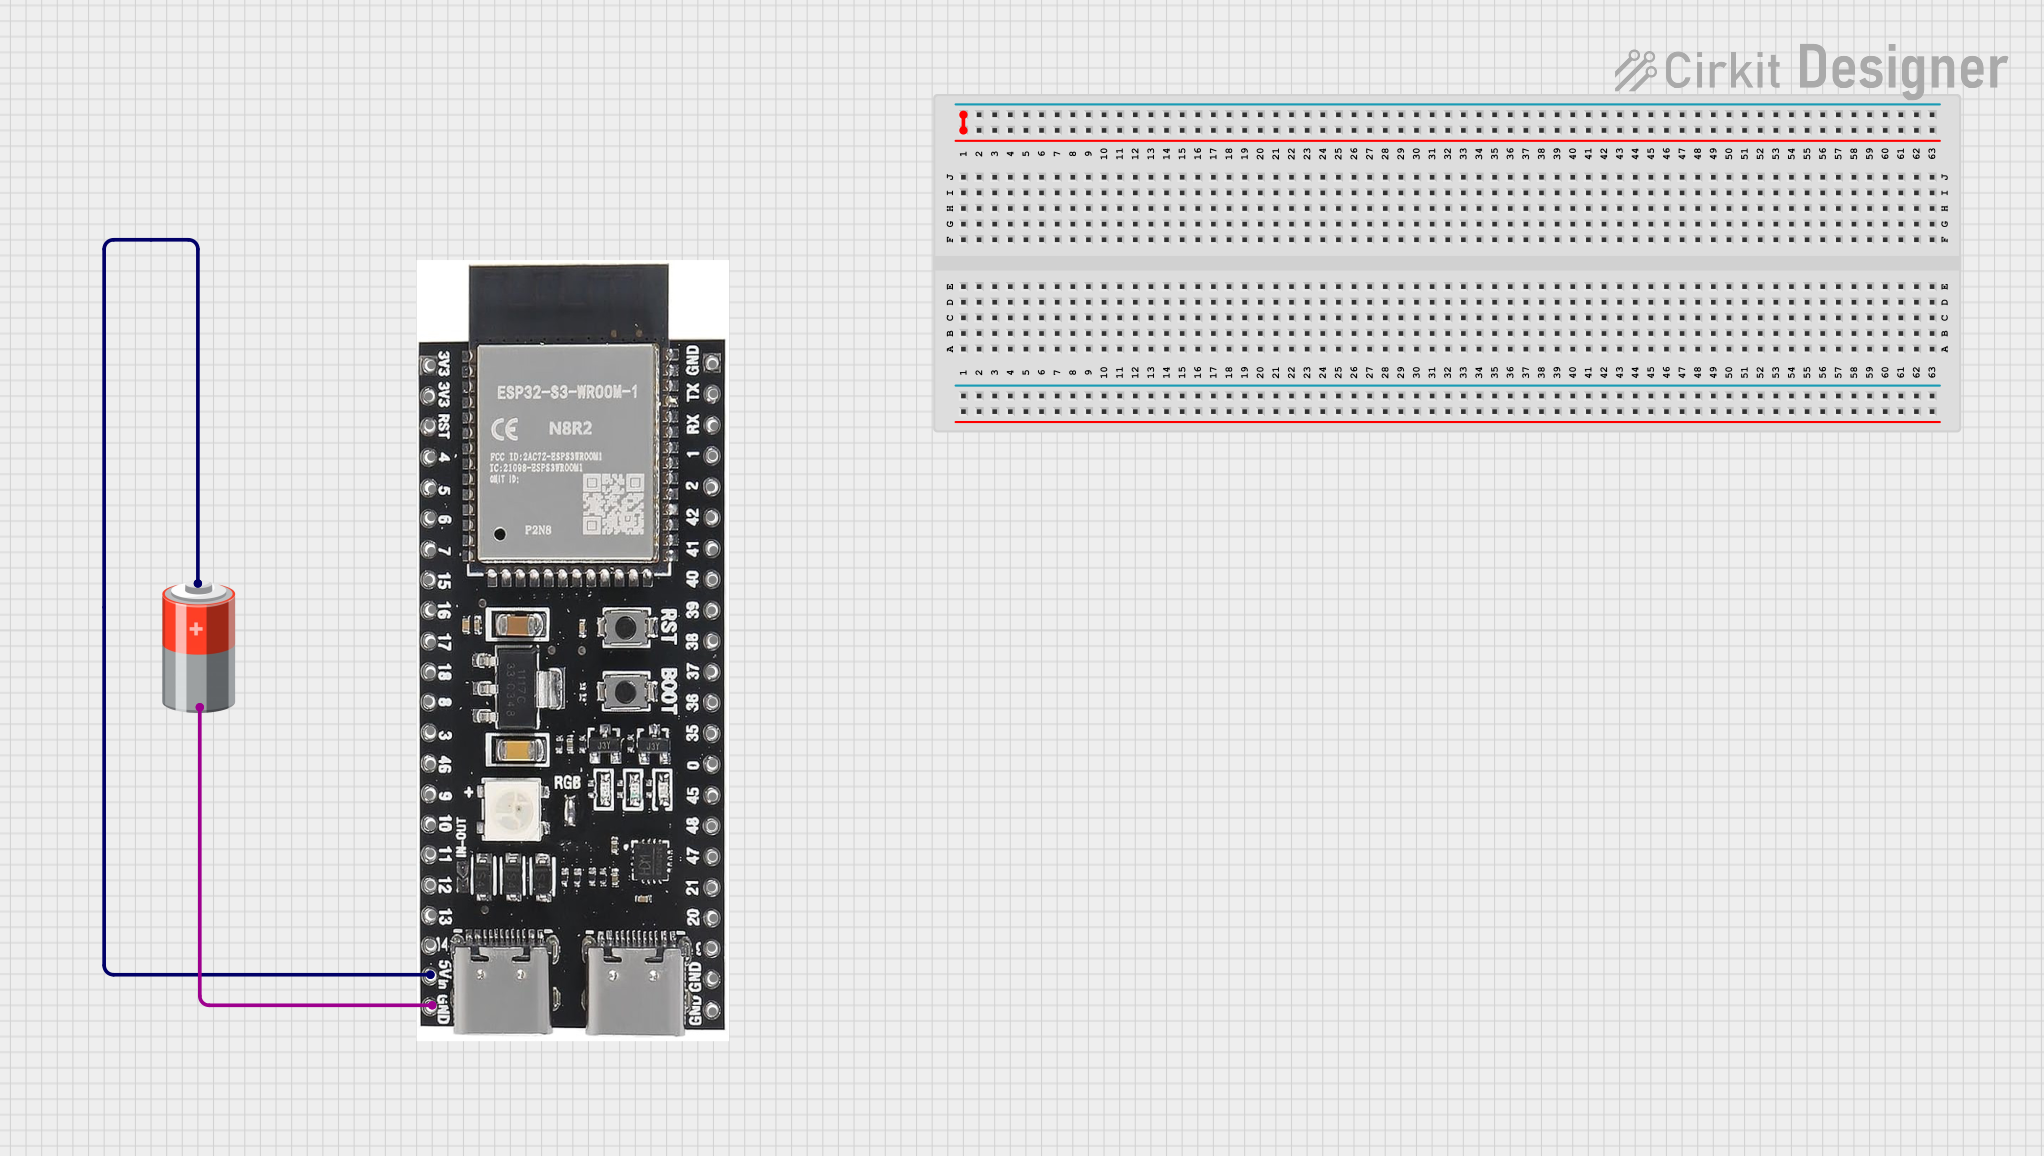
A 5V battery is a portable power source that delivers a steady 5-volt output, which is a common requirement for a wide range of electronic devices and circuits. This type of battery is particularly useful for projects that require mobility or where a mains power supply is not available. Common applications include powering microcontrollers like Arduino UNO, portable consumer electronics, DIY projects, and small robotics.

Explore Projects Built with 5v battery

Use Cirkit Designer to design, explore, and prototype these projects online. Some projects support real-time simulation. Click "Open Project" to start designing instantly!
Battery-Powered LED Indicator with 7805 Voltage Regulator
Image of 5V circuit: A project utilizing 5v battery in a practical application
This circuit uses a 9V battery to power a 7805 voltage regulator, which outputs a stable 5V. A toggle switch controls the input to the voltage regulator, and the regulated 5V output powers an LED through a 200-ohm resistor, allowing the LED to indicate when the circuit is active.
Cirkit Designer LogoOpen Project in Cirkit Designer
Battery-Powered Fan Circuit
Image of lesson 1: A project utilizing 5v battery in a practical application
This circuit consists of a 9V battery connected to a fan. The positive terminal of the battery is connected to the 5V pin of the fan, and the negative terminal of the battery is connected to the GND pin of the fan, providing the necessary power for the fan to operate.
Cirkit Designer LogoOpen Project in Cirkit Designer
Arduino 101 Battery-Powered Fan and Motor Controller with USB Charging
Image of Help 3: A project utilizing 5v battery in a practical application
This circuit is a battery-powered system that uses a TP4056 module to charge a 7.4V battery, which then powers an Arduino 101, a fan, and a DC motor through a boost converter. The Arduino 101 controls the fan based on the state of a pushbutton, turning it on when the button is pressed.
Cirkit Designer LogoOpen Project in Cirkit Designer
Battery-Powered ESP32-S3 Development Board Circuit
Image of my esp test: A project utilizing 5v battery in a practical application
This circuit consists of an ESP32-S3-DevKitC-1-N8R2 microcontroller powered by a 5V battery. The battery's positive terminal is connected to the 5Vin pin of the ESP32, and the negative terminal is connected to the GND pin, providing the necessary power for the microcontroller to operate.
Cirkit Designer LogoOpen Project in Cirkit Designer

Explore Projects Built with 5v battery

Use Cirkit Designer to design, explore, and prototype these projects online. Some projects support real-time simulation. Click "Open Project" to start designing instantly!
Image of 5V circuit: A project utilizing 5v battery in a practical application
Battery-Powered LED Indicator with 7805 Voltage Regulator
This circuit uses a 9V battery to power a 7805 voltage regulator, which outputs a stable 5V. A toggle switch controls the input to the voltage regulator, and the regulated 5V output powers an LED through a 200-ohm resistor, allowing the LED to indicate when the circuit is active.
Cirkit Designer LogoOpen Project in Cirkit Designer
Image of lesson 1: A project utilizing 5v battery in a practical application
Battery-Powered Fan Circuit
This circuit consists of a 9V battery connected to a fan. The positive terminal of the battery is connected to the 5V pin of the fan, and the negative terminal of the battery is connected to the GND pin of the fan, providing the necessary power for the fan to operate.
Cirkit Designer LogoOpen Project in Cirkit Designer
Image of Help 3: A project utilizing 5v battery in a practical application
Arduino 101 Battery-Powered Fan and Motor Controller with USB Charging
This circuit is a battery-powered system that uses a TP4056 module to charge a 7.4V battery, which then powers an Arduino 101, a fan, and a DC motor through a boost converter. The Arduino 101 controls the fan based on the state of a pushbutton, turning it on when the button is pressed.
Cirkit Designer LogoOpen Project in Cirkit Designer
Image of my esp test: A project utilizing 5v battery in a practical application
Battery-Powered ESP32-S3 Development Board Circuit
This circuit consists of an ESP32-S3-DevKitC-1-N8R2 microcontroller powered by a 5V battery. The battery's positive terminal is connected to the 5Vin pin of the ESP32, and the negative terminal is connected to the GND pin, providing the necessary power for the microcontroller to operate.
Cirkit Designer LogoOpen Project in Cirkit Designer

Technical Specifications

General Characteristics

  • Nominal Voltage: 5V
  • Chemistry: (This will depend on the specific type of 5V battery, e.g., LiPo, Alkaline)
  • Capacity: (mAh rating, varies by manufacturer and model)
  • Rechargeability: (Specify if the battery is rechargeable or single-use)
  • Operating Temperature Range: (Typical range, e.g., -20°C to 60°C)

Physical Attributes

  • Dimensions: (Length x Width x Height in mm)
  • Weight: (Weight in grams)
  • Connector Type: (e.g., USB, JST, barrel jack, or specific connector for the battery)
  • Enclosure: (Material and any relevant environmental protection, e.g., IP rating)

Electrical Characteristics

  • Maximum Continuous Current: (Amps, varies by manufacturer and model)
  • Peak Current: (Amps, for a specified duration)
  • Cut-off Voltage: (Voltage at which the battery is considered fully discharged)
  • Charging Voltage (if rechargeable): (Typical charging voltage)
  • Charging Current (if rechargeable): (Maximum charging current)

Usage Instructions

Integrating with a Circuit

  1. Connection: Ensure the battery connector is compatible with the device or use an appropriate adapter.
  2. Polarity: Always check the polarity (+/-) before connecting the battery to avoid damaging the circuit.
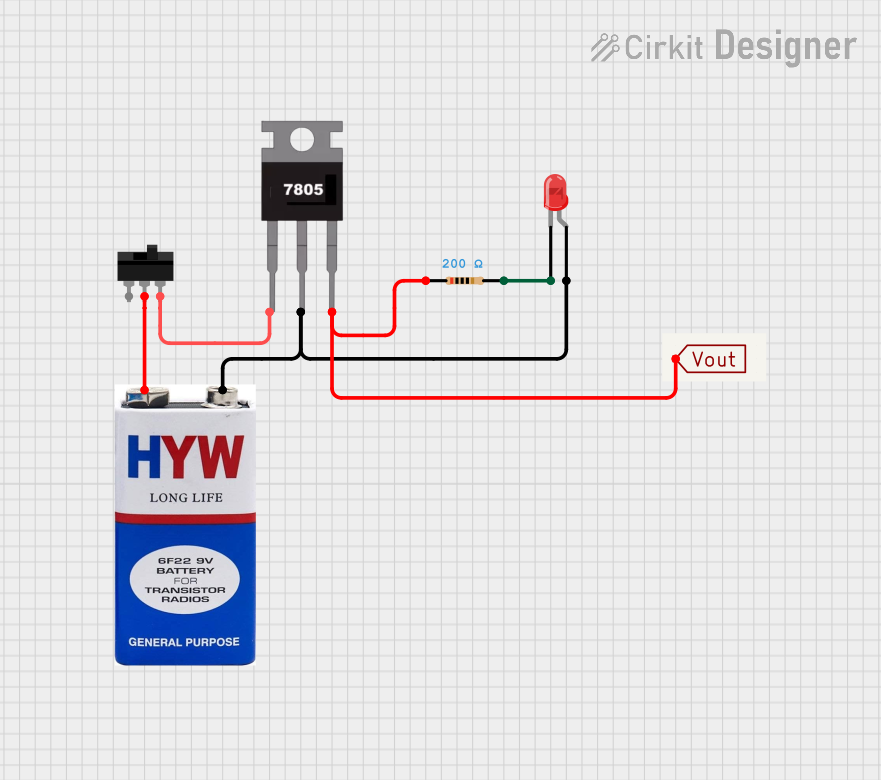
  3. Voltage Regulation: If the circuit requires a regulated 5V supply, ensure that the battery output does not exceed this under any condition.

Best Practices

  • Charging (if applicable): Use a charger that matches the battery's chemistry and specifications.
  • Storage: Store the battery at room temperature in a dry environment.
  • Disposal: Follow local regulations for battery disposal or recycling.

Troubleshooting and FAQs

Common Issues

  • Battery won't charge: Ensure the charger is functioning and compatible with the battery.
  • Reduced runtime: The battery may be nearing the end of its life cycle or was not charged properly.
  • No power output: Check connections and measure the battery voltage to ensure it is above the cut-off voltage.

FAQs

  • Q: Can I use a 5V battery to power an Arduino UNO? A: Yes, a 5V battery can be used to power an Arduino UNO directly through the 5V pin or the USB port.

  • Q: How do I know when the battery is fully charged? A: Most rechargeable batteries have an indicator or the charger will have an LED that changes color or turns off.

  • Q: Is it safe to leave the battery charging overnight? A: This depends on the battery's charging circuitry. Use a charger with overcharge protection to prevent damage.

Example Code for Arduino UNO

// Example code to check battery voltage on an Arduino UNO

const int batteryPin = A0; // Analog pin connected to battery voltage divider

void setup() {
  Serial.begin(9600);
}

void loop() {
  int sensorValue = analogRead(batteryPin); // Read the analog value
  float voltage = sensorValue * (5.0 / 1023.0); // Convert to voltage
  Serial.print("Battery Voltage: ");
  Serial.println(voltage);
  delay(1000); // Wait for 1 second before reading again
}

Note: This code assumes a direct connection to the battery. If a voltage divider is used, the calculation for voltage must be adjusted accordingly.

Remember to ensure that the battery's voltage does not exceed the maximum voltage rating of the Arduino's analog pins if a voltage divider is not used.