How to Use YF Robot driver 2016: Examples, Pinouts, and Specs
Introduction
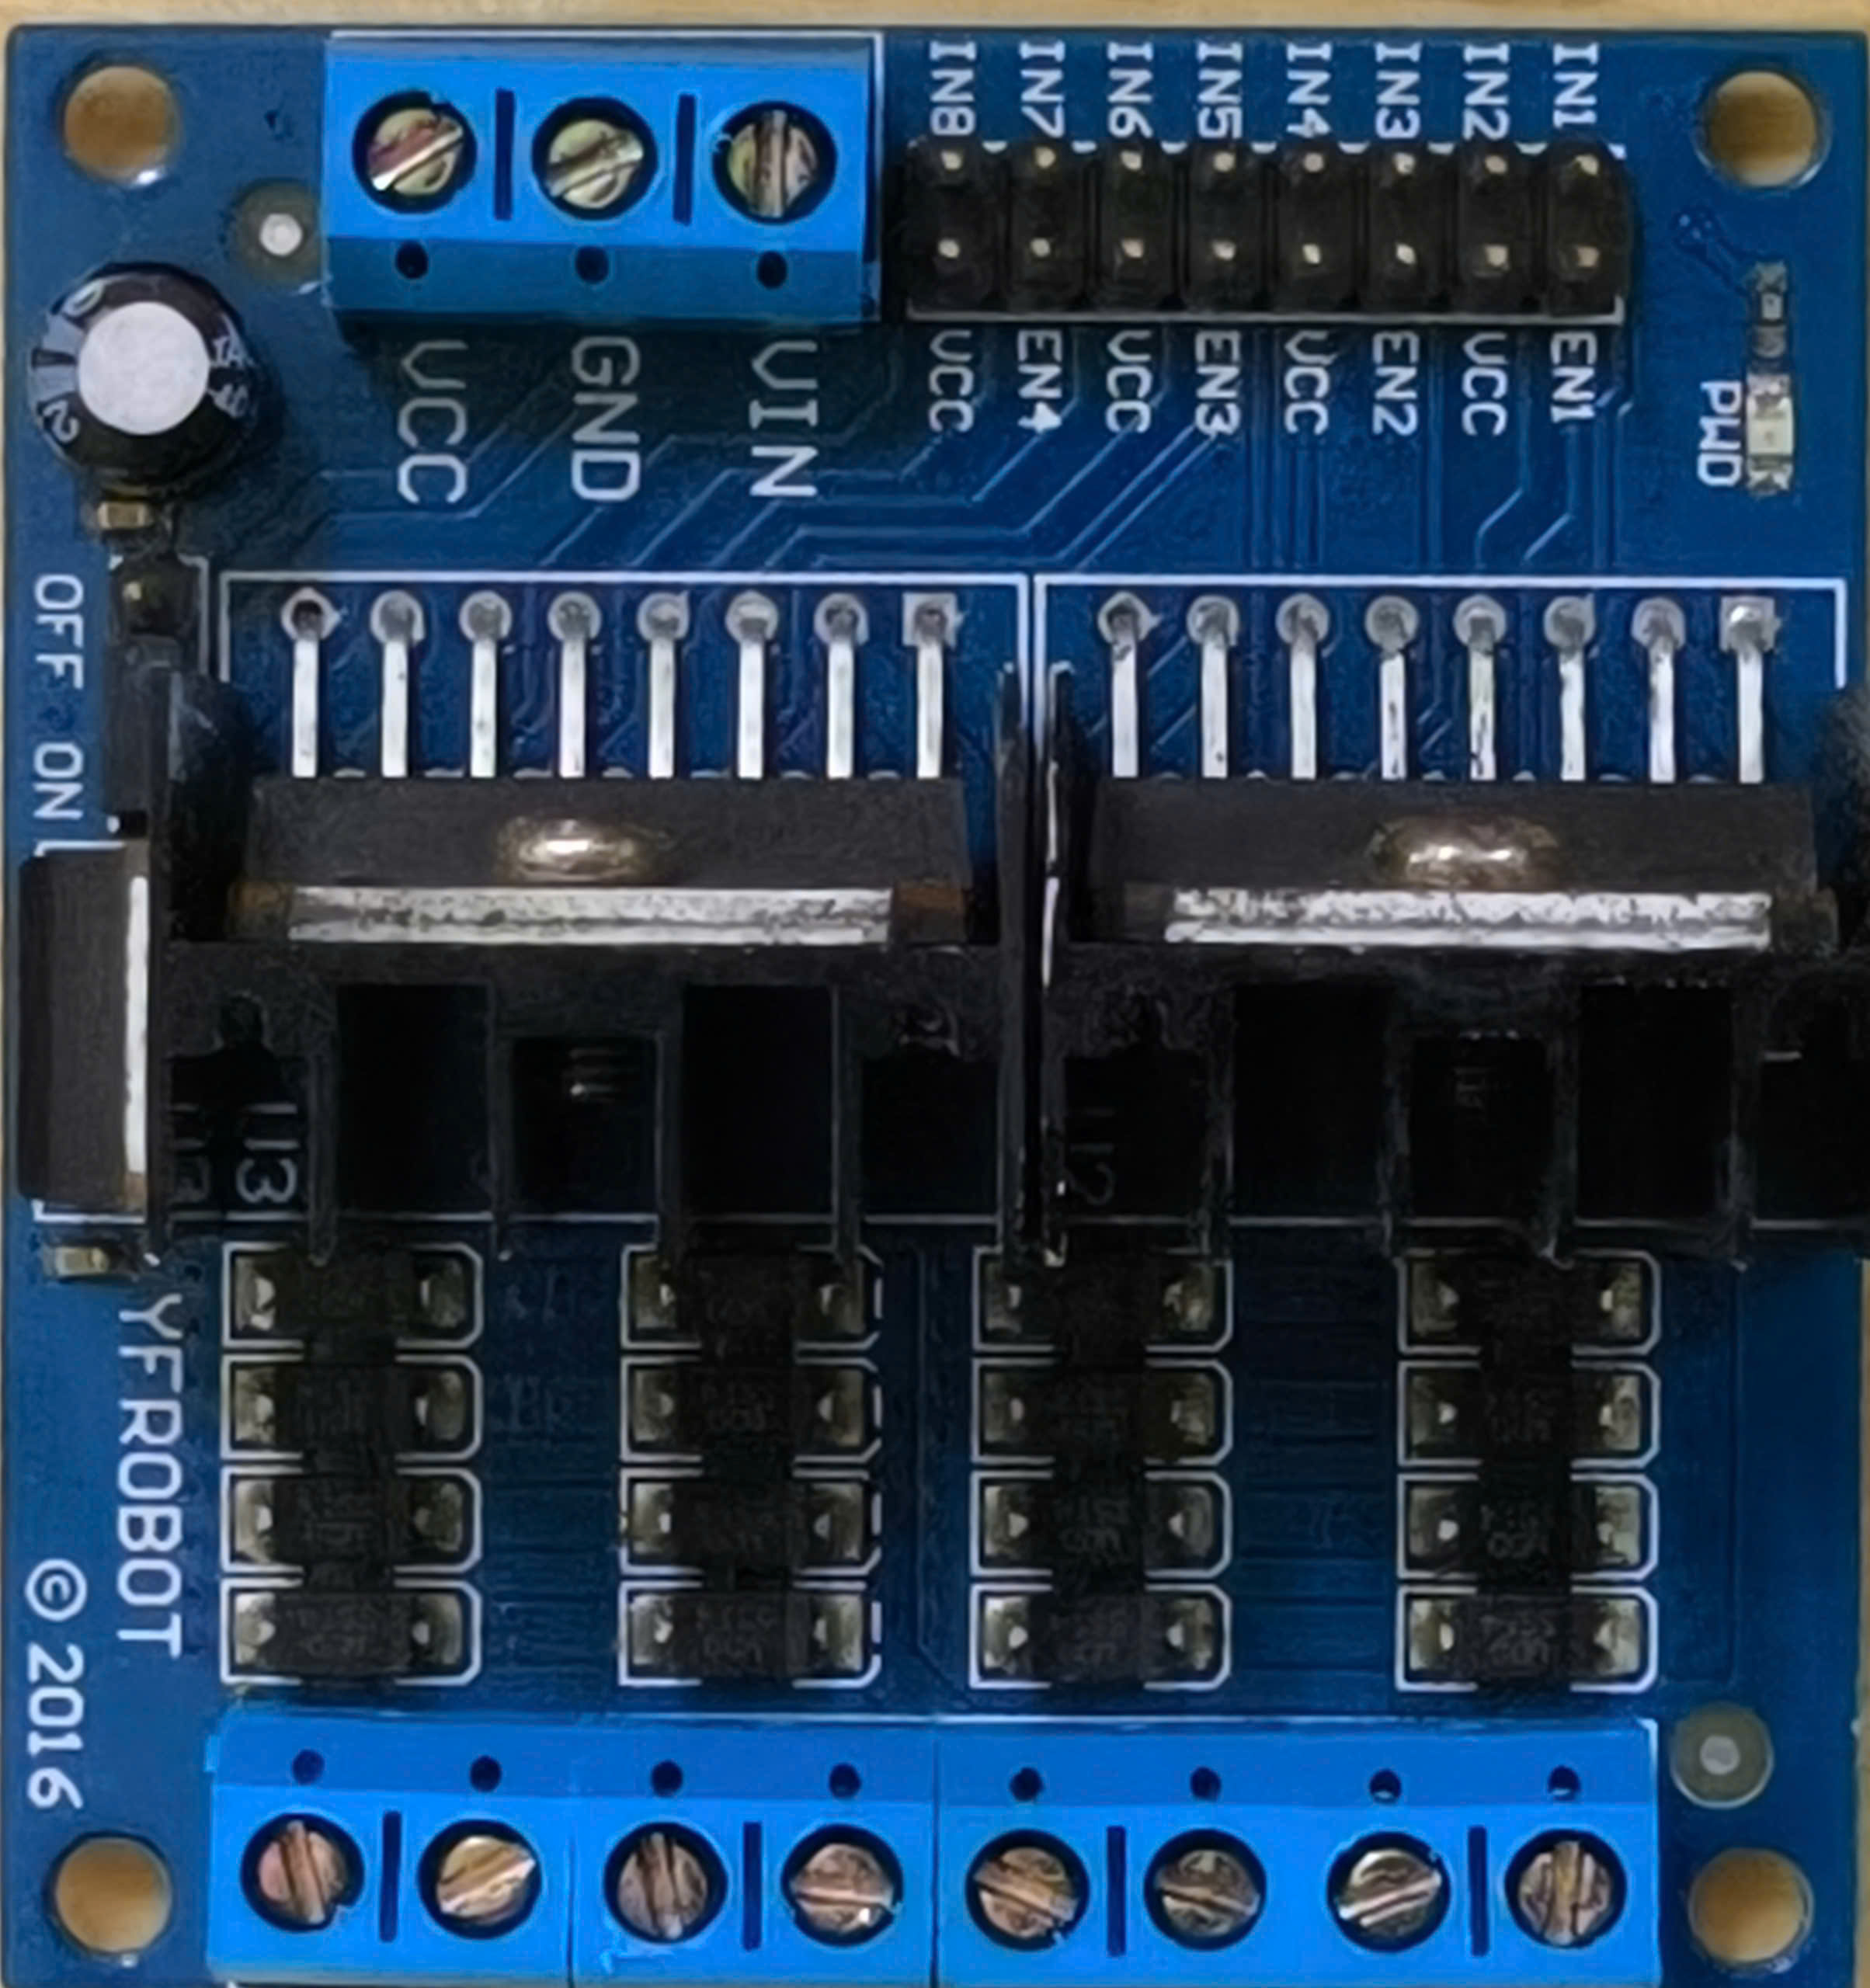
The YF Robot Driver 2016 is a motor driver board designed for controlling DC motors and servos in robotic applications. It features multiple channels for driving motors with adjustable speed and direction, making it an ideal choice for robotics enthusiasts and professionals. This versatile component simplifies motor control, allowing users to focus on building and programming their robotic systems.
Explore Projects Built with YF Robot driver 2016

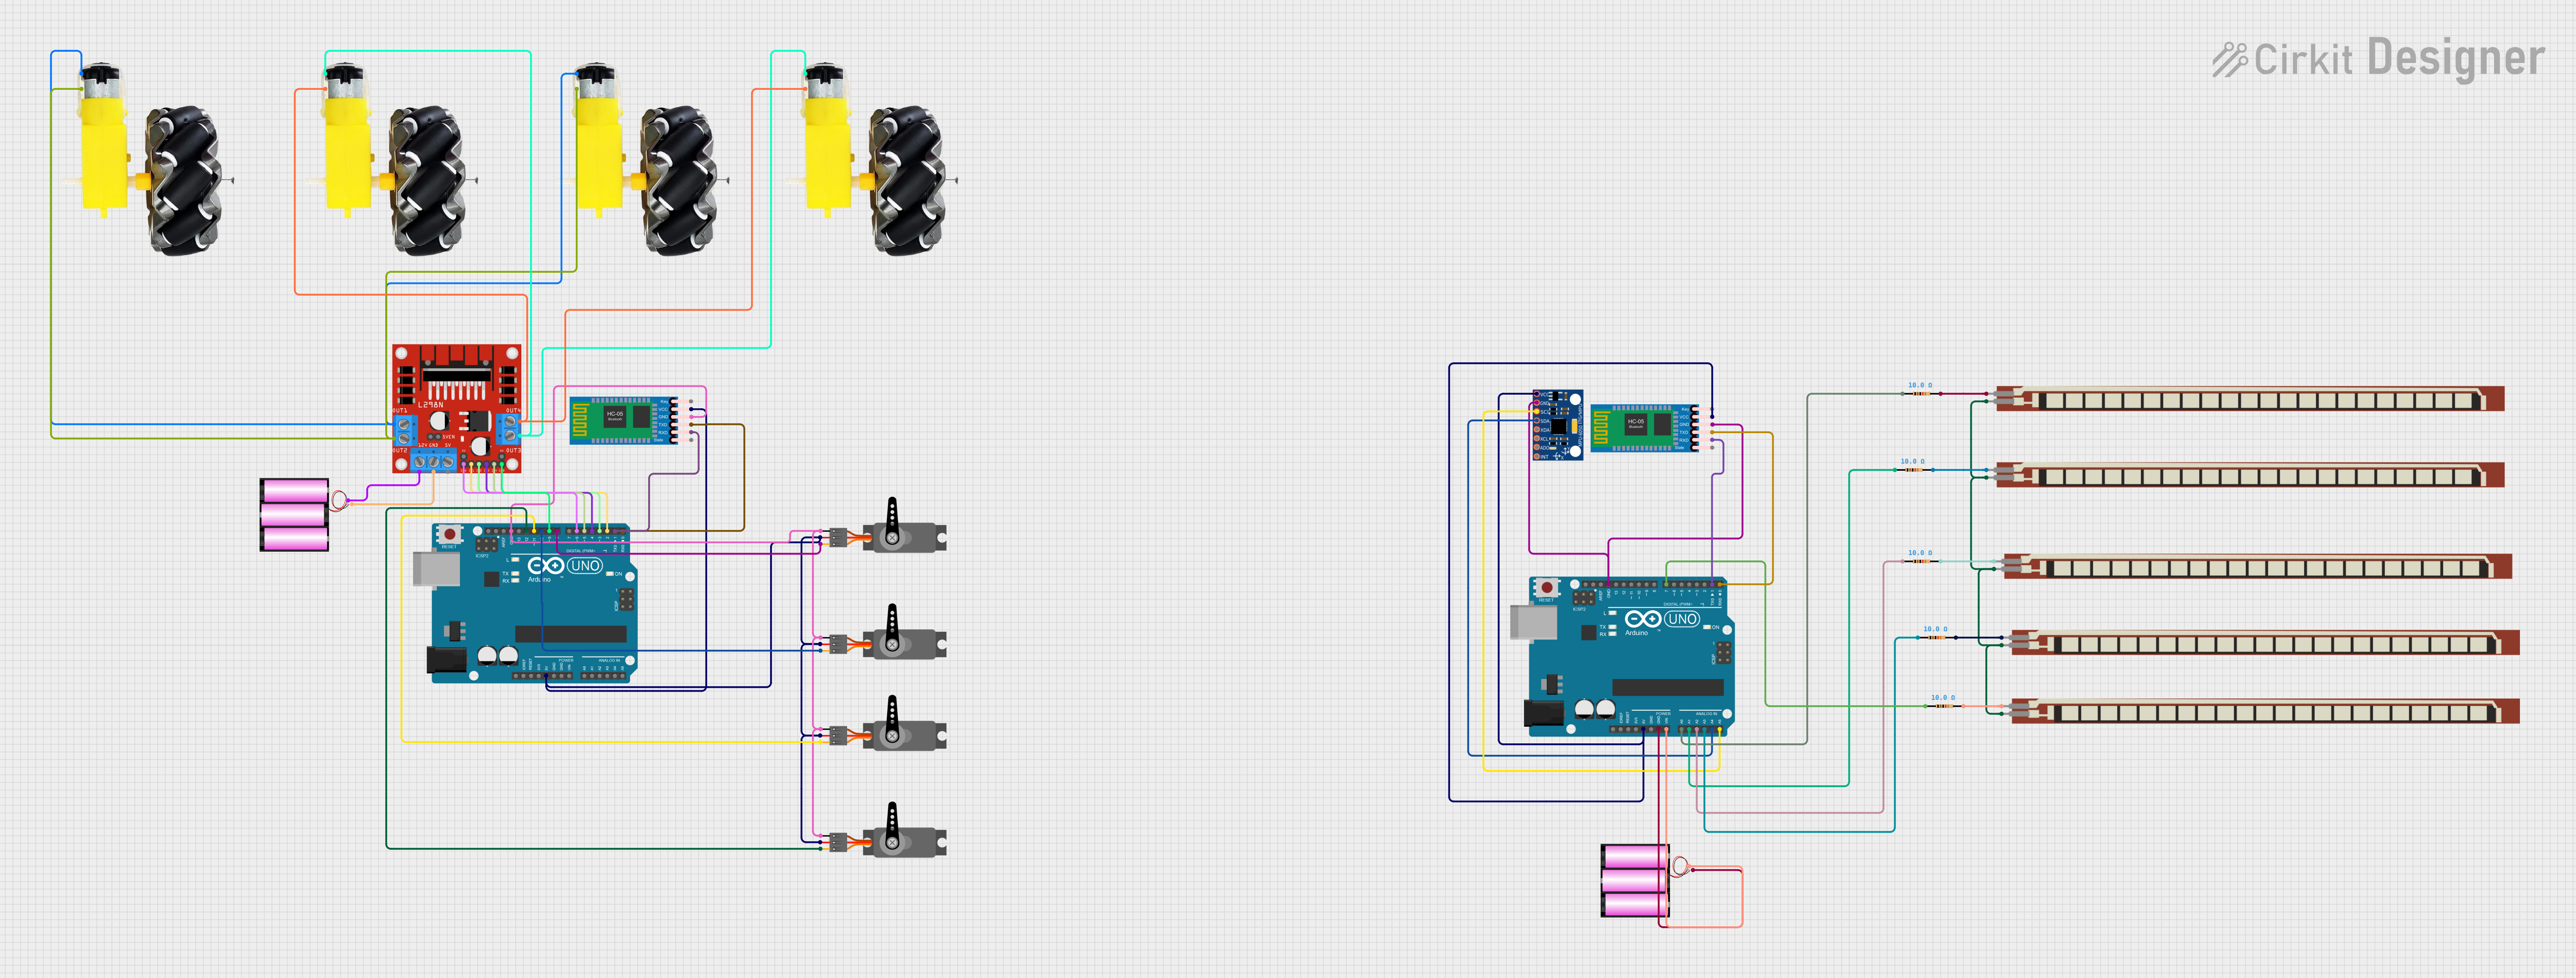
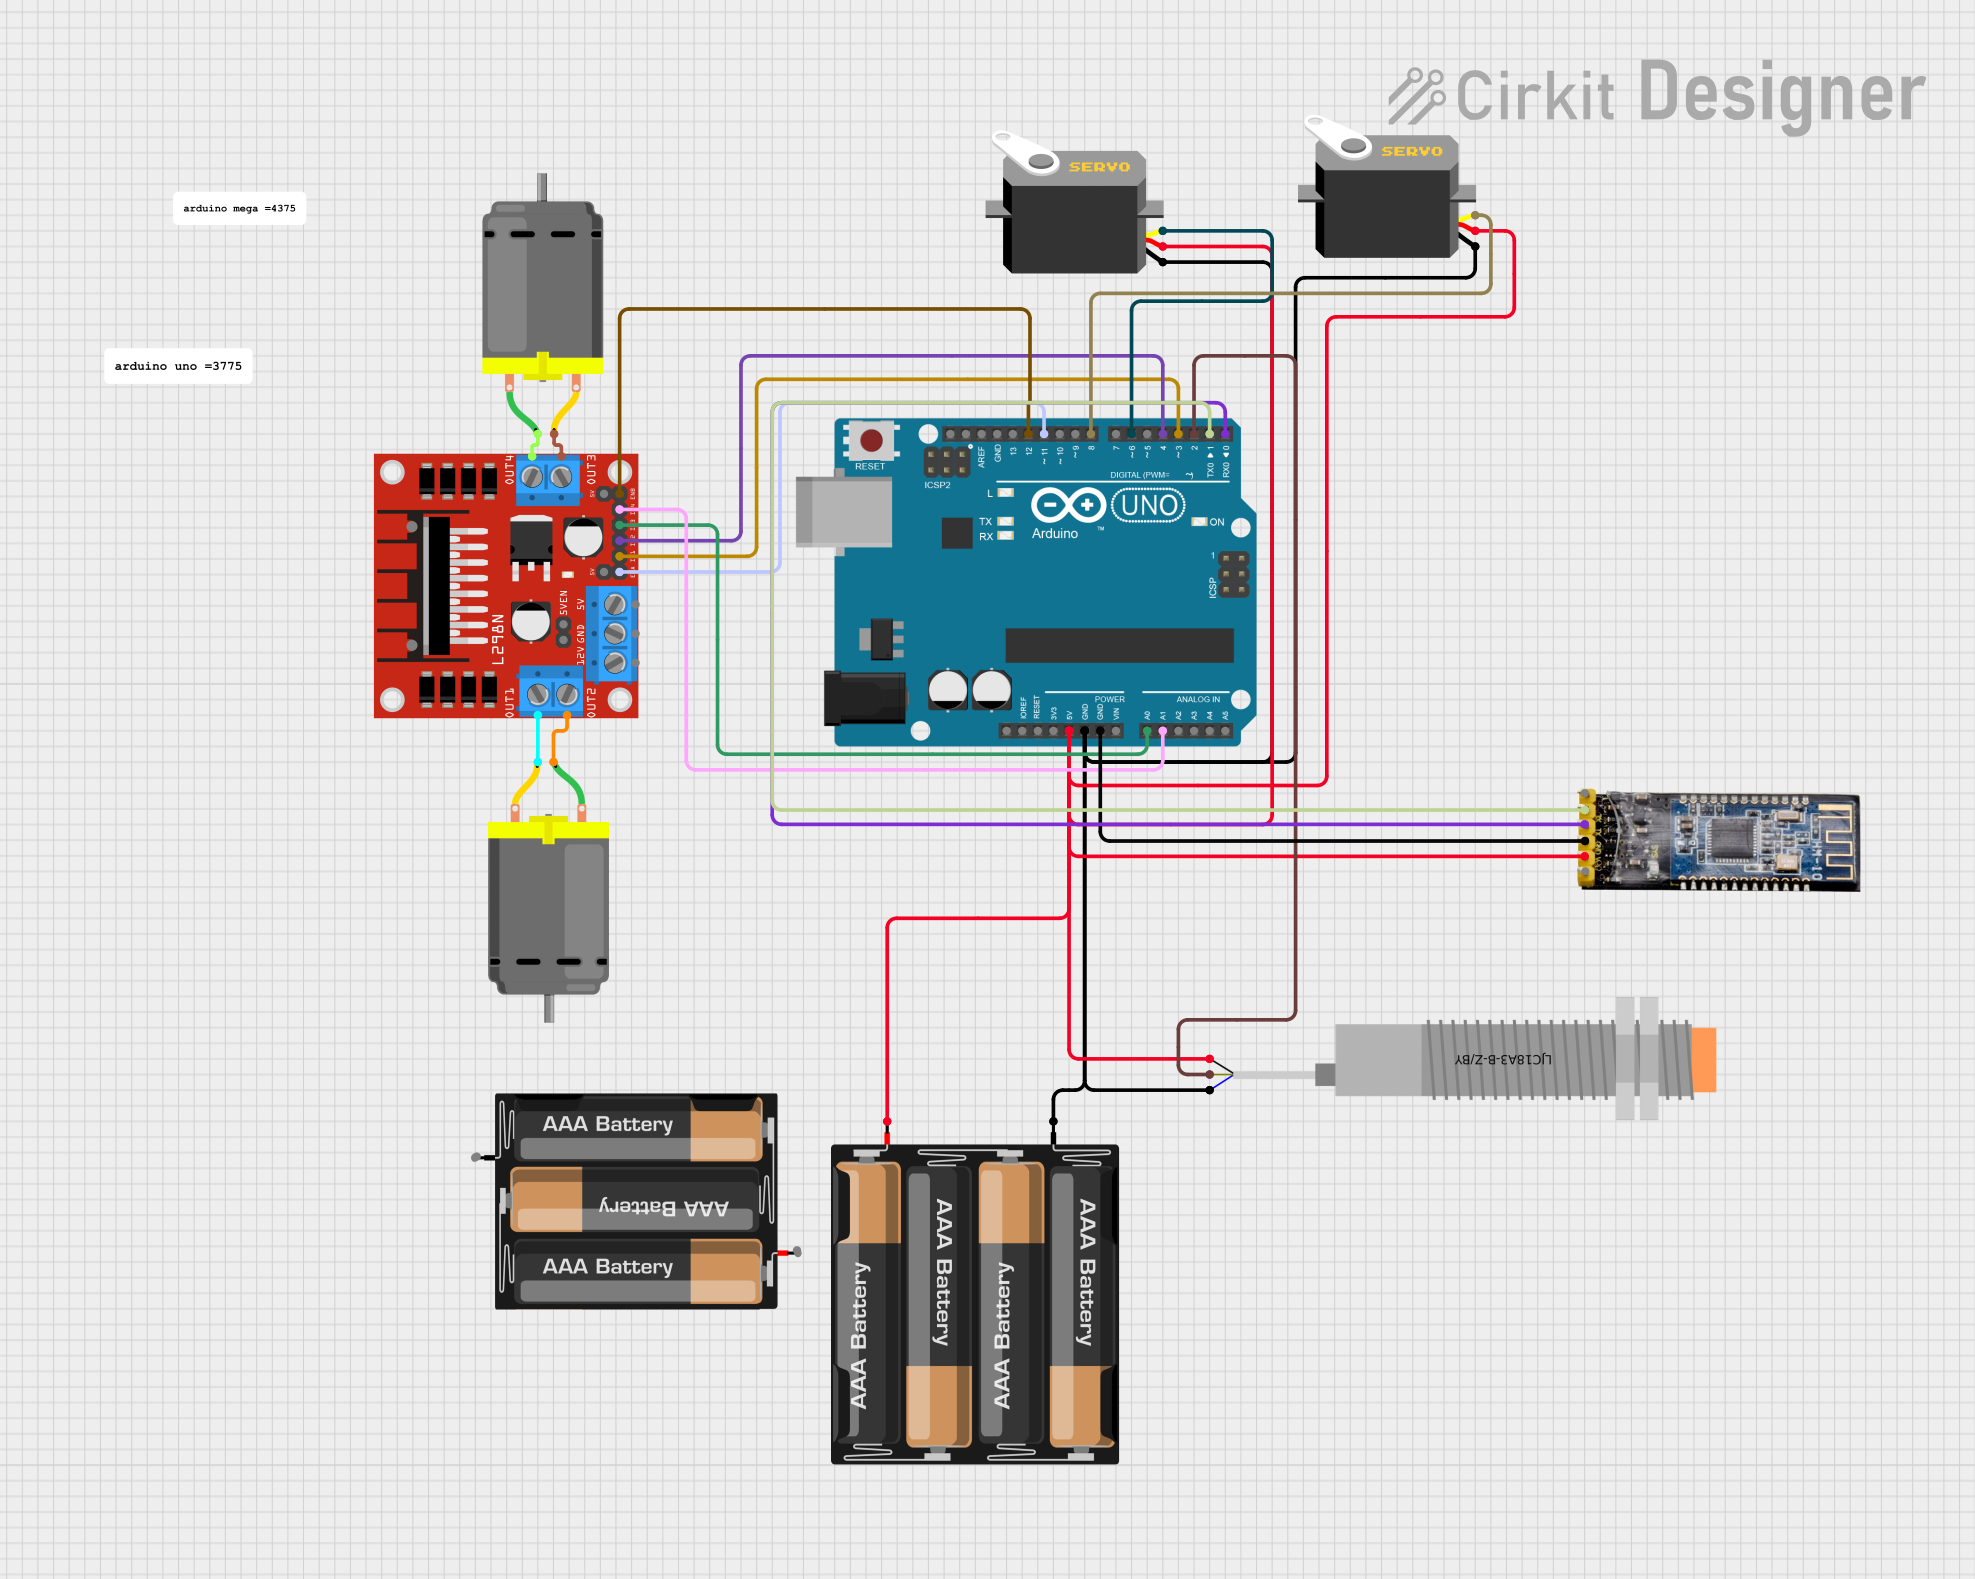

Explore Projects Built with YF Robot driver 2016
Common Applications and Use Cases
- Robotics projects requiring precise motor control
- Automated vehicles and robotic arms
- DIY projects involving DC motors and servos
- Educational kits for learning motor control and robotics
Technical Specifications
The YF Robot Driver 2016 is equipped with robust features to handle various motor control tasks. Below are its key technical specifications:
General Specifications
| Parameter | Value |
|---|---|
| Operating Voltage | 6V - 12V |
| Maximum Output Current | 2A per channel |
| Number of Motor Channels | 2 (for DC motors) |
| Servo Control Channels | 2 |
| PWM Frequency | Up to 20 kHz |
| Dimensions | 60mm x 50mm x 15mm |
Pin Configuration and Descriptions
| Pin Name | Type | Description |
|---|---|---|
| VIN | Power Input | Main power supply input (6V - 12V). |
| GND | Ground | Common ground for the board and connected devices. |
| M1+ | Output | Positive terminal for Motor 1. |
| M1- | Output | Negative terminal for Motor 1. |
| M2+ | Output | Positive terminal for Motor 2. |
| M2- | Output | Negative terminal for Motor 2. |
| EN1 | Input | Enable pin for Motor 1 (PWM signal). |
| EN2 | Input | Enable pin for Motor 2 (PWM signal). |
| DIR1 | Input | Direction control for Motor 1. |
| DIR2 | Input | Direction control for Motor 2. |
| SERVO1 | Output | Signal pin for Servo 1. |
| SERVO2 | Output | Signal pin for Servo 2. |
Usage Instructions
How to Use the Component in a Circuit
- Power Supply: Connect the VIN pin to a power source (6V - 12V) and the GND pin to the ground.
- Motor Connections:
- Connect the DC motor terminals to the M1+/M1- or M2+/M2- pins.
- Use the EN1/EN2 pins to control the speed of the motors via PWM signals.
- Use the DIR1/DIR2 pins to set the direction of the motors.
- Servo Connections: Connect the signal pins of the servos to SERVO1 and SERVO2. Ensure the servos share a common ground with the board.
- Microcontroller Interface: Use a microcontroller (e.g., Arduino UNO) to send PWM signals to the EN pins and logic signals to the DIR pins.
Important Considerations and Best Practices
- Ensure the power supply voltage matches the requirements of the motors and servos.
- Avoid exceeding the maximum current rating of 2A per channel to prevent damage.
- Use appropriate heat dissipation methods if the board operates under high loads for extended periods.
- Always connect the ground of the motor driver to the ground of the microcontroller.
Example Code for Arduino UNO
Below is an example code snippet for controlling two DC motors using the YF Robot Driver 2016 with an Arduino UNO:
// Define motor control pins
const int EN1 = 9;  // PWM pin for Motor 1 speed
const int DIR1 = 8; // Direction pin for Motor 1
const int EN2 = 10; // PWM pin for Motor 2 speed
const int DIR2 = 7; // Direction pin for Motor 2

void setup() {
  // Set motor control pins as outputs
  pinMode(EN1, OUTPUT);
  pinMode(DIR1, OUTPUT);
  pinMode(EN2, OUTPUT);
  pinMode(DIR2, OUTPUT);
}

void loop() {
  // Motor 1: Forward at 50% speed
  digitalWrite(DIR1, HIGH); // Set direction forward
  analogWrite(EN1, 128);    // Set speed (0-255)

  // Motor 2: Reverse at 75% speed
  digitalWrite(DIR2, LOW);  // Set direction reverse
  analogWrite(EN2, 192);    // Set speed (0-255)

  delay(2000); // Run motors for 2 seconds

  // Stop both motors
  analogWrite(EN1, 0);
  analogWrite(EN2, 0);

  delay(2000); // Wait for 2 seconds before repeating
}
Troubleshooting and FAQs
Common Issues and Solutions
Motors Not Running
- Cause: Incorrect wiring or insufficient power supply.
- Solution: Double-check all connections and ensure the power supply meets the voltage and current requirements.
Motors Running in the Wrong Direction
- Cause: DIR pins are set incorrectly.
- Solution: Swap the logic levels (HIGH/LOW) on the DIR pins to reverse the motor direction.
Servo Not Responding
- Cause: Signal pin not properly connected or incompatible servo.
- Solution: Verify the servo's signal pin connection and ensure it is compatible with the board's output.
Overheating
- Cause: Excessive current draw or prolonged high-load operation.
- Solution: Reduce the motor load or add a heat sink to the driver board.
FAQs
Can I use this board with stepper motors? No, the YF Robot Driver 2016 is designed for DC motors and servos only.
What is the maximum PWM frequency supported? The board supports PWM frequencies up to 20 kHz.
Can I power the board directly from an Arduino? No, the board requires a separate power supply (6V - 12V) to drive motors and servos.
By following this documentation, you can effectively integrate the YF Robot Driver 2016 into your projects and troubleshoot common issues with ease.