How to Use socket 3 gang: Examples, Pinouts, and Specs
Introduction
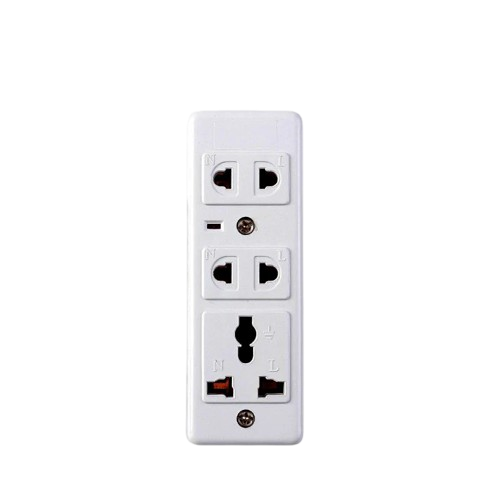
A socket 3 gang is an electrical outlet that provides three separate sockets for plugging in devices. It allows multiple appliances to be powered from a single wall outlet, making it a convenient solution for homes, offices, and workshops where multiple devices need to be connected simultaneously. These sockets are commonly used for powering household appliances, office equipment, and entertainment systems.
Explore Projects Built with socket 3 gang


Explore Projects Built with socket 3 gang
Common Applications and Use Cases
- Powering multiple electronic devices such as TVs, computers, and lamps.
- Providing additional outlets in areas with limited wall sockets.
- Used in workshops to connect tools and equipment.
- Ideal for home entertainment systems to power multiple components like speakers, gaming consoles, and streaming devices.
Technical Specifications
Below are the key technical details for a standard socket 3 gang:
| Specification | Details |
|---|---|
| Voltage Rating | 220-240V AC (varies by region) |
| Current Rating | 10A or 13A (depending on the model and regional standards) |
| Power Rating | Up to 2500W (ensure total load does not exceed this limit) |
| Number of Sockets | 3 |
| Socket Type | Varies by region (e.g., Type G for UK, Type A/B for US, Type C for EU) |
| Material | Flame-retardant plastic housing, copper or brass internal contacts |
| Safety Features | Overload protection, child safety shutters (on some models) |
| Mounting Style | Wall-mounted or surface-mounted |
Pin Configuration and Descriptions
The pin configuration for a socket 3 gang depends on the regional standard. Below is an example for a Type G socket (commonly used in the UK):
| Pin | Description |
|---|---|
| Live (L) | Supplies the active current to the connected device. |
| Neutral (N) | Completes the circuit by returning current to the power source. |
| Earth (E) | Provides a safety path for fault currents to prevent electric shock. |
Usage Instructions
How to Use the Socket 3 Gang in a Circuit
Installation:
- Ensure the power supply is turned off before installation.
- Mount the socket securely to the wall or surface using screws and a compatible backbox.
- Connect the live (L), neutral (N), and earth (E) wires to the corresponding terminals on the socket.
- Double-check all connections to ensure they are secure and comply with local electrical codes.
Operation:
- Plug devices into the individual sockets.
- Ensure the total power consumption of connected devices does not exceed the socket's power rating (e.g., 2500W).
Safety Precautions:
- Do not overload the socket by connecting devices that exceed the current or power rating.
- Avoid using the socket in wet or damp environments unless it is specifically rated for such conditions.
- Regularly inspect the socket for signs of wear, damage, or overheating.
Important Considerations and Best Practices
- Cable Management: Use cable organizers to prevent tangling and reduce strain on the socket.
- Surge Protection: Consider using a surge protector to safeguard connected devices from voltage spikes.
- Periodic Maintenance: Check the socket periodically for loose connections or signs of damage.
- Regional Compatibility: Ensure the socket type matches the plug type of your devices.
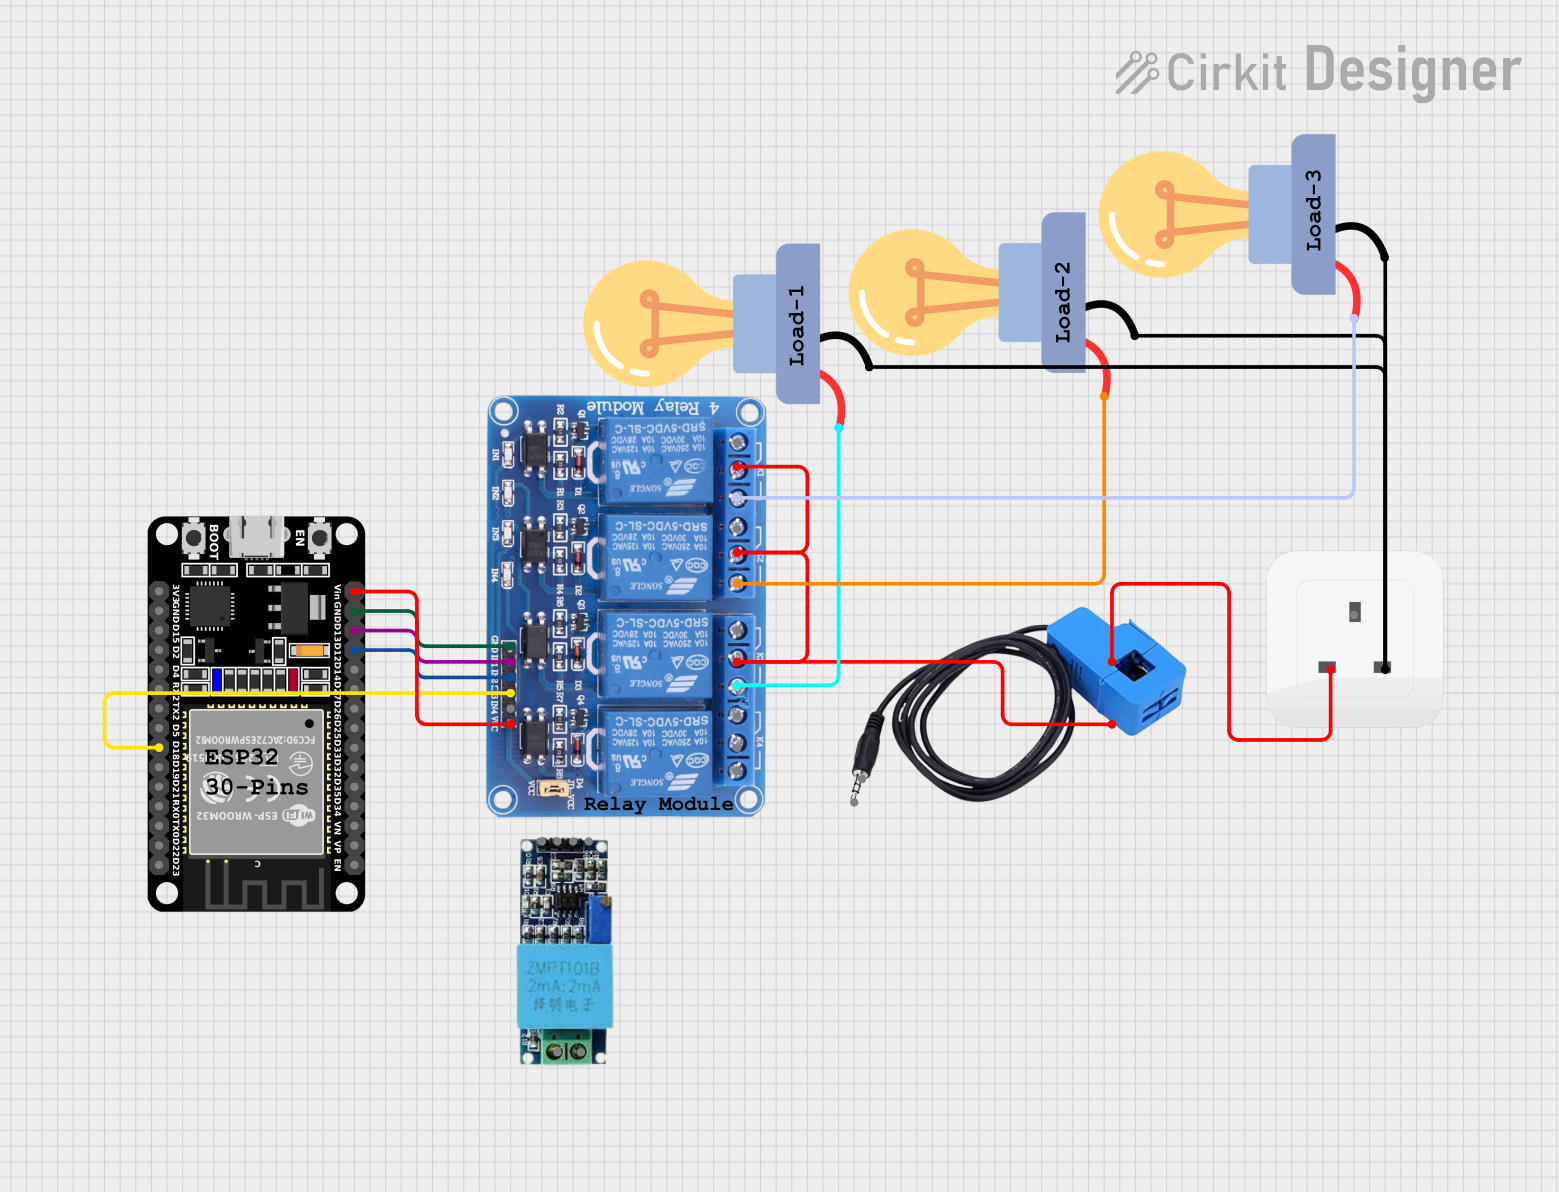
Arduino UNO Integration
While a socket 3 gang is not directly connected to an Arduino UNO, it can be used in projects where the Arduino controls devices powered by the socket. For example, you can use a relay module to control the power supply to devices connected to the socket. Below is an example code snippet for controlling a relay module with an Arduino:
// Example: Controlling a relay to switch a socket 3 gang on/off
const int relayPin = 7; // Pin connected to the relay module

void setup() {
  pinMode(relayPin, OUTPUT); // Set the relay pin as an output
  digitalWrite(relayPin, LOW); // Ensure the relay is off initially
}

void loop() {
  digitalWrite(relayPin, HIGH); // Turn the relay on (socket powered)
  delay(5000); // Keep the socket powered for 5 seconds
  digitalWrite(relayPin, LOW); // Turn the relay off (socket unpowered)
  delay(5000); // Wait for 5 seconds before repeating
}
Note: Ensure the relay module is rated for the voltage and current of the socket. Always follow safety guidelines when working with high-voltage components.
Troubleshooting and FAQs
Common Issues and Solutions
| Issue | Solution |
|---|---|
| Socket does not power connected devices | Check the power supply and ensure the socket is properly wired and switched on. |
| Overheating of the socket | Reduce the load by unplugging some devices. Ensure the total power does not exceed the rating. |
| Loose connections | Turn off the power and inspect the wiring. Tighten any loose connections. |
| Devices not fitting into the socket | Verify that the plug type matches the socket type. Use an adapter if necessary. |
FAQs
Can I use a socket 3 gang outdoors?
- Only if it is specifically rated for outdoor use and protected from moisture.
What happens if I overload the socket?
- Overloading can cause overheating, damage to the socket, or even fire. Always stay within the rated power limits.
Can I replace a single-gang socket with a 3-gang socket?
- Yes, but ensure the wiring and backbox are compatible with the 3-gang socket. Consult a qualified electrician if unsure.
Is it safe to use extension cords with a socket 3 gang?
- Yes, but ensure the extension cord is rated for the total load of connected devices.
By following this documentation, you can safely and effectively use a socket 3 gang in your electrical setup.