How to Use 3000mah 12v Battery: Examples, Pinouts, and Specs
Introduction
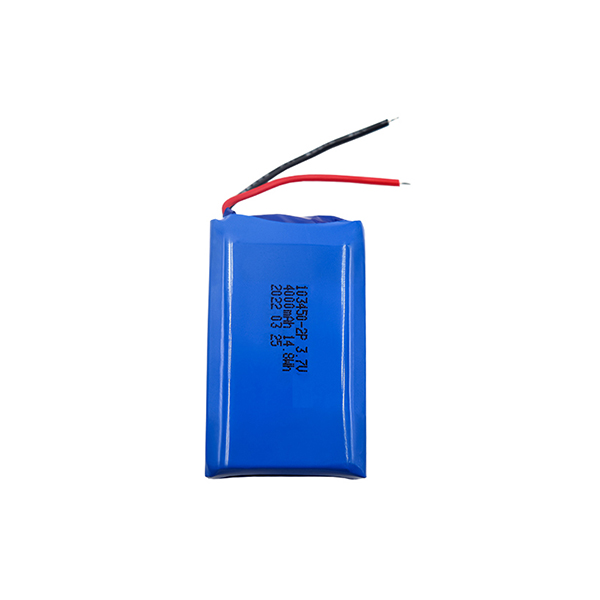
The 3000mAh 12V battery is a rechargeable power source with a nominal voltage of 12 volts and a capacity of 3000 milliamp-hours (mAh). This battery is widely used in various applications, including powering electronic devices, robotics, portable tools, and backup power systems. Its compact size and reliable performance make it a popular choice for both hobbyists and professionals.
Explore Projects Built with 3000mah 12v Battery

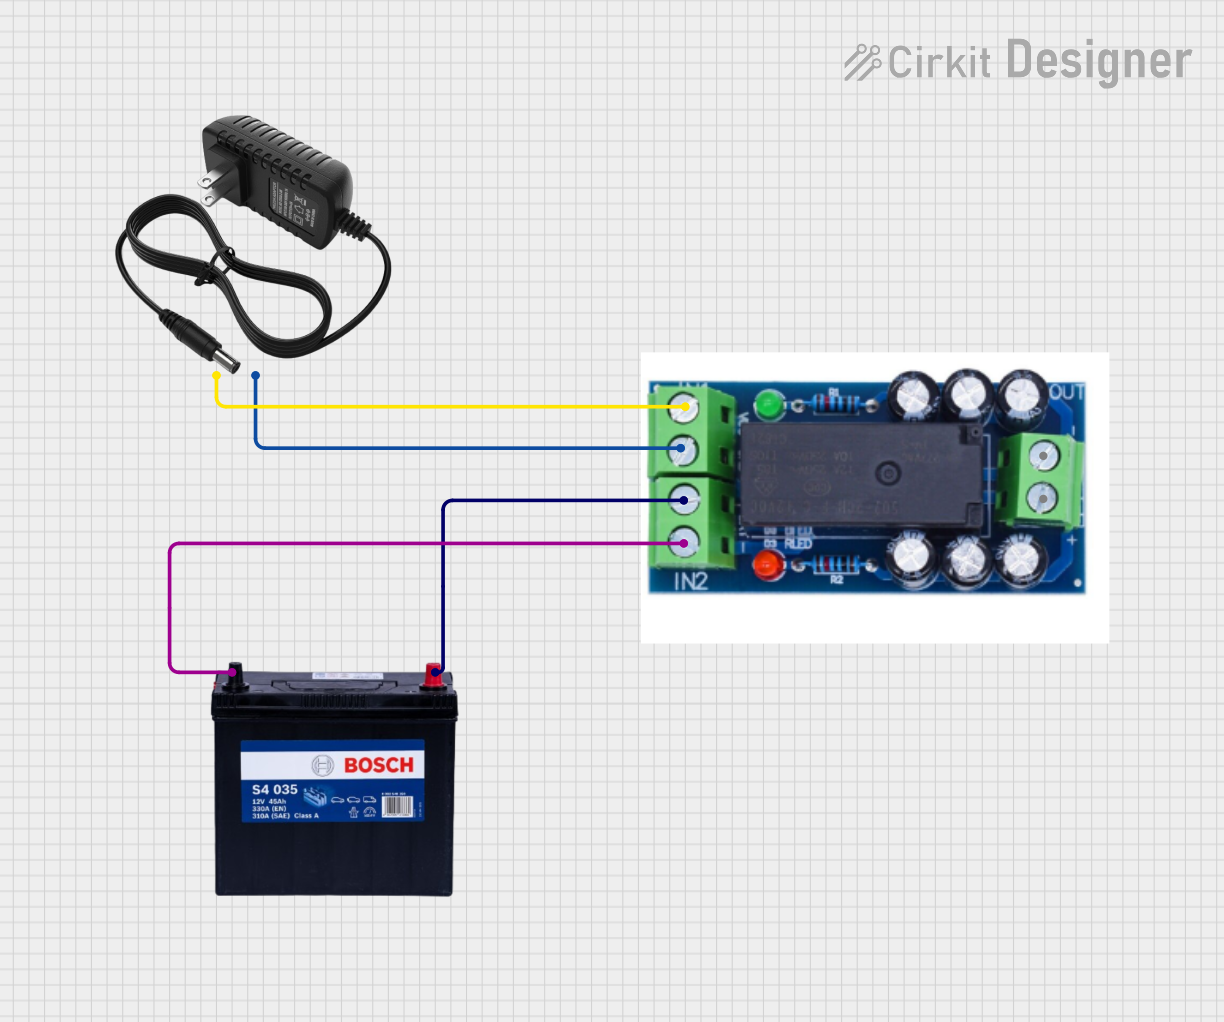
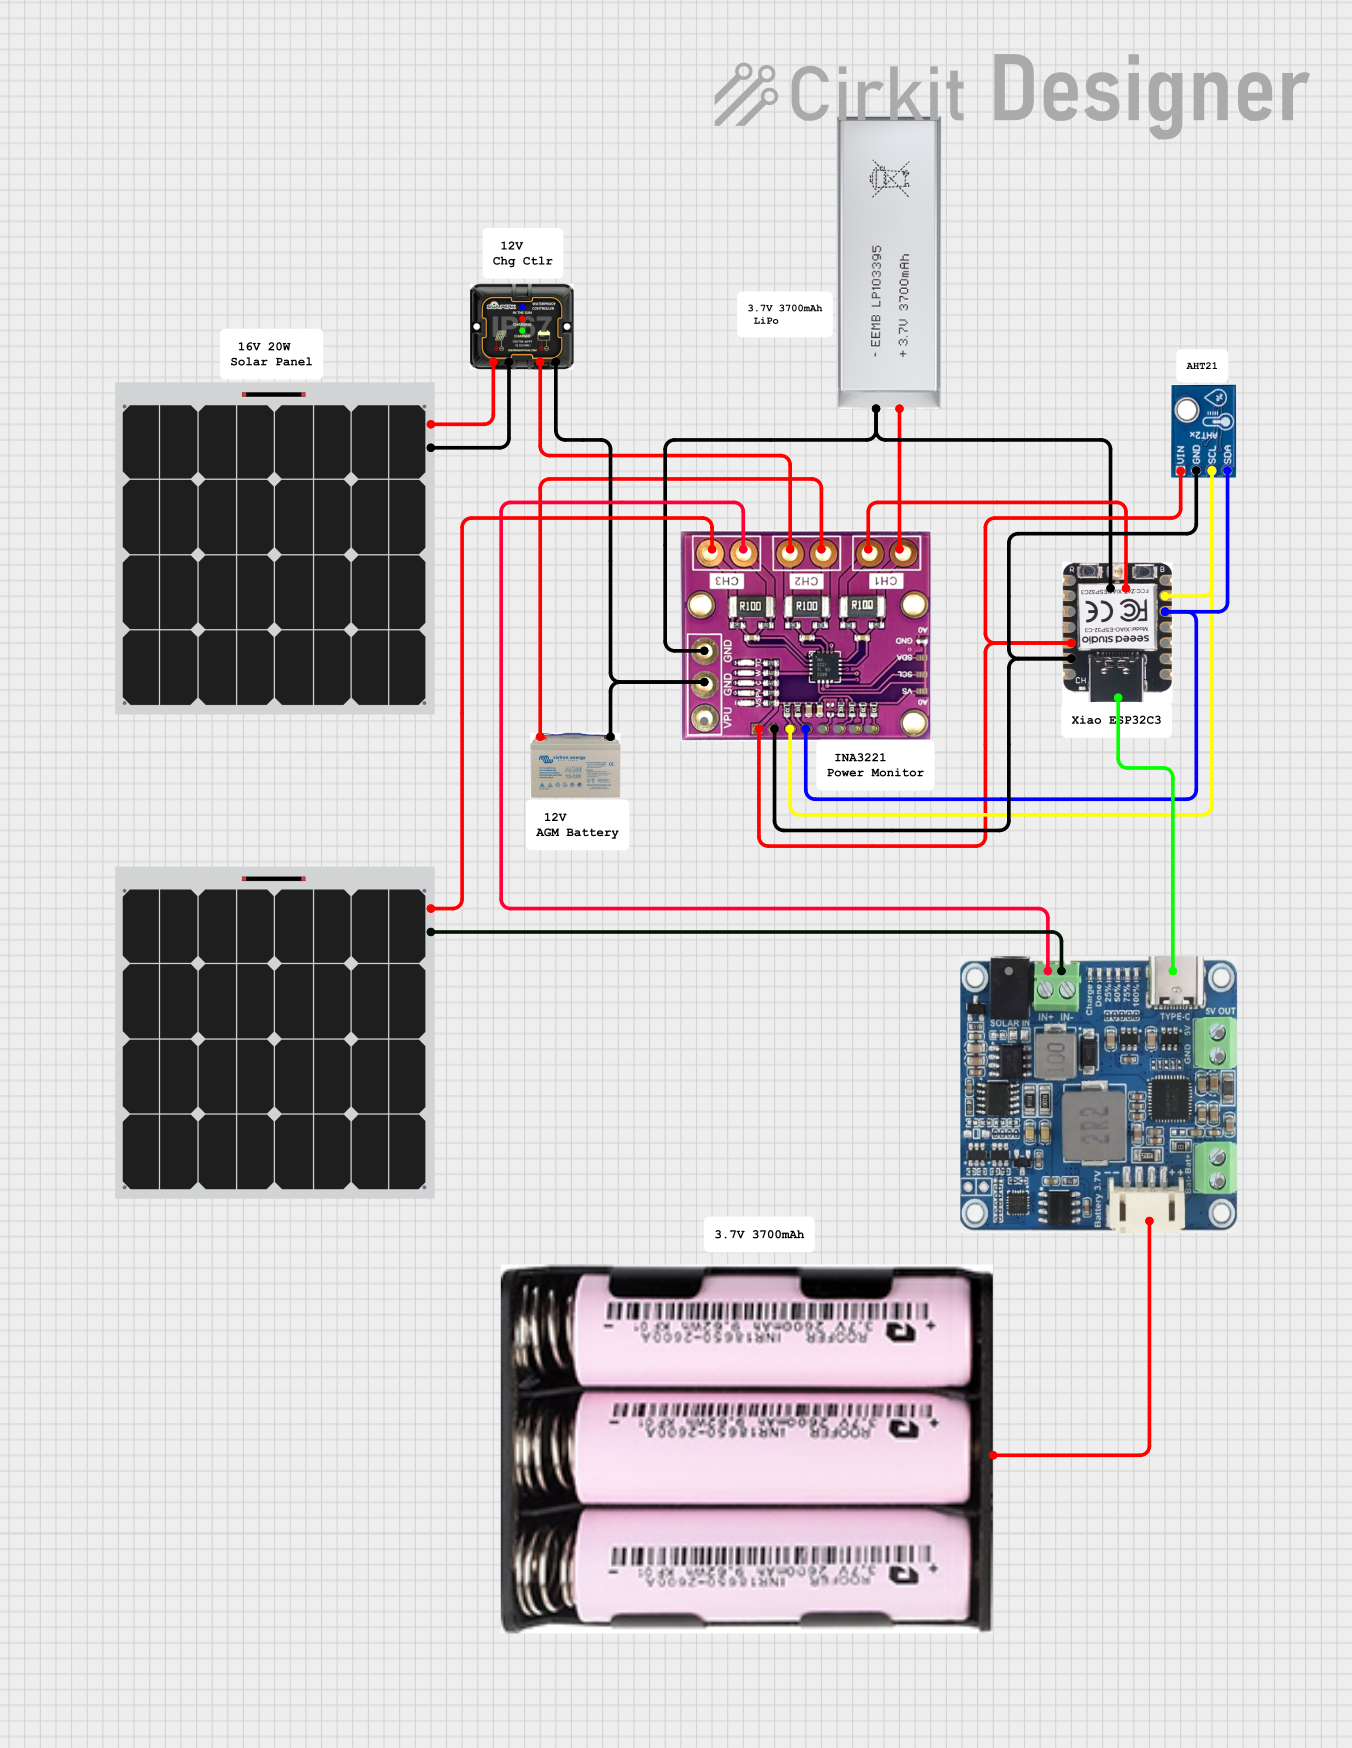

Explore Projects Built with 3000mah 12v Battery
Common Applications and Use Cases
- Powering small to medium-sized electronic circuits
- Backup power for routers, modems, and other devices
- Robotics and remote-controlled vehicles
- Portable lighting systems
- DIY projects and prototyping
Technical Specifications
Below are the key technical details of the 3000mAh 12V battery:
| Specification | Value |
|---|---|
| Nominal Voltage | 12V |
| Capacity | 3000mAh (3Ah) |
| Chemistry | Lithium-ion or Lead-acid (varies by model) |
| Maximum Discharge Current | Typically 1C (3A) |
| Charging Voltage | 12.6V (for Li-ion) or 14.4V (for Lead-acid) |
| Charging Current | Recommended: 0.5C (1.5A) |
| Dimensions | Varies by manufacturer |
| Weight | Varies by manufacturer |
| Cycle Life | 300-500 cycles (Li-ion) or 200-300 cycles (Lead-acid) |
Pin Configuration and Descriptions
The battery typically has two terminals:
| Pin/Terminal | Description |
|---|---|
| Positive (+) | Connects to the positive side of the circuit. Supplies 12V. |
| Negative (-) | Connects to the ground (GND) of the circuit. |
Note: Some batteries may include additional terminals for features like temperature sensing or battery management systems (BMS). Refer to the specific battery datasheet for details.
Usage Instructions
How to Use the 3000mAh 12V Battery in a Circuit
Connection:
- Connect the positive terminal of the battery to the positive rail of your circuit.
- Connect the negative terminal to the ground (GND) of your circuit.
- Ensure proper polarity to avoid damage to the battery or connected devices.
Charging:
- Use a compatible charger designed for the battery's chemistry (e.g., Li-ion or Lead-acid).
- Set the charger to the appropriate charging voltage and current (e.g., 12.6V and 1.5A for Li-ion).
- Avoid overcharging or deep discharging the battery to extend its lifespan.
Protection:
- Use a Battery Management System (BMS) to protect against overcharging, over-discharging, and short circuits.
- Ensure proper ventilation to prevent overheating during use or charging.
Important Considerations and Best Practices
- Voltage Monitoring: Use a voltmeter or a voltage monitoring circuit to ensure the battery voltage stays within safe limits.
- Current Limiting: Avoid drawing more current than the battery's maximum discharge rating (e.g., 3A for 1C).
- Storage: Store the battery in a cool, dry place at around 40-60% charge for long-term storage.
- Safety: Do not puncture, crush, or expose the battery to fire or water.
Example: Connecting to an Arduino UNO
The 3000mAh 12V battery can be used to power an Arduino UNO via its barrel jack or VIN pin. Below is an example:
- Connect the positive terminal of the battery to the Arduino's VIN pin or barrel jack's center pin.
- Connect the negative terminal to the Arduino's GND pin or barrel jack's outer sleeve.
Sample Code for Monitoring Battery Voltage
You can use a voltage divider circuit to measure the battery voltage with the Arduino UNO. Here's an example:
// Define the analog pin connected to the voltage divider
const int voltagePin = A0;

// Define the voltage divider ratio (e.g., 10k and 2k resistors)
const float voltageDividerRatio = 6.0; // Adjust based on your resistor values

void setup() {
  Serial.begin(9600); // Initialize serial communication
}

void loop() {
  int sensorValue = analogRead(voltagePin); // Read the analog pin
  float voltage = (sensorValue * 5.0 / 1023.0) * voltageDividerRatio;

  // Print the measured voltage to the Serial Monitor
  Serial.print("Battery Voltage: ");
  Serial.print(voltage);
  Serial.println(" V");

  delay(1000); // Wait for 1 second before the next reading
}
Note: Use appropriate resistor values in the voltage divider to ensure the input voltage to the Arduino does not exceed 5V.
Troubleshooting and FAQs
Common Issues and Solutions
Battery Not Charging:
- Cause: Incorrect charger or damaged battery.
- Solution: Verify the charger specifications and ensure compatibility with the battery. Check for physical damage.
Battery Drains Quickly:
- Cause: Overloading or aging battery.
- Solution: Reduce the load current or replace the battery if it has reached the end of its cycle life.
Overheating During Use:
- Cause: Excessive current draw or poor ventilation.
- Solution: Ensure the load does not exceed the battery's maximum discharge current. Improve ventilation.
Arduino Not Powering On:
- Cause: Incorrect wiring or insufficient voltage.
- Solution: Check the connections and ensure the battery voltage is within the Arduino's operating range.
FAQs
Q: Can I use this battery to power a 5V device?
A: Yes, but you will need a voltage regulator or DC-DC converter to step down the voltage from 12V to 5V.
Q: How do I know when the battery is fully charged?
A: For Li-ion batteries, the charger typically indicates full charge when the current drops to a trickle. For Lead-acid batteries, the voltage stabilizes at the charging voltage.
Q: Can I connect multiple batteries in series or parallel?
A: Yes, you can connect batteries in series to increase voltage or in parallel to increase capacity. Ensure all batteries are of the same type, capacity, and charge level.
Q: Is it safe to leave the battery connected to the charger?
A: It depends on the charger. Use a charger with overcharge protection to prevent damage. Avoid leaving the battery connected for extended periods.