How to Use co2 sensor: Examples, Pinouts, and Specs
Introduction
A CO2 sensor is an electronic device designed to measure the concentration of carbon dioxide (CO2) in the air. It is widely used in applications such as air quality monitoring, HVAC systems, greenhouses, and industrial safety systems. By providing real-time CO2 level readings, this sensor helps ensure proper ventilation, maintain healthy indoor environments, and optimize energy efficiency.
The Arduino UNO-compatible CO2 sensor (Manufacturer Part ID: UNO) is a versatile and easy-to-use module, making it ideal for hobbyists, students, and professionals alike.
Explore Projects Built with co2 sensor
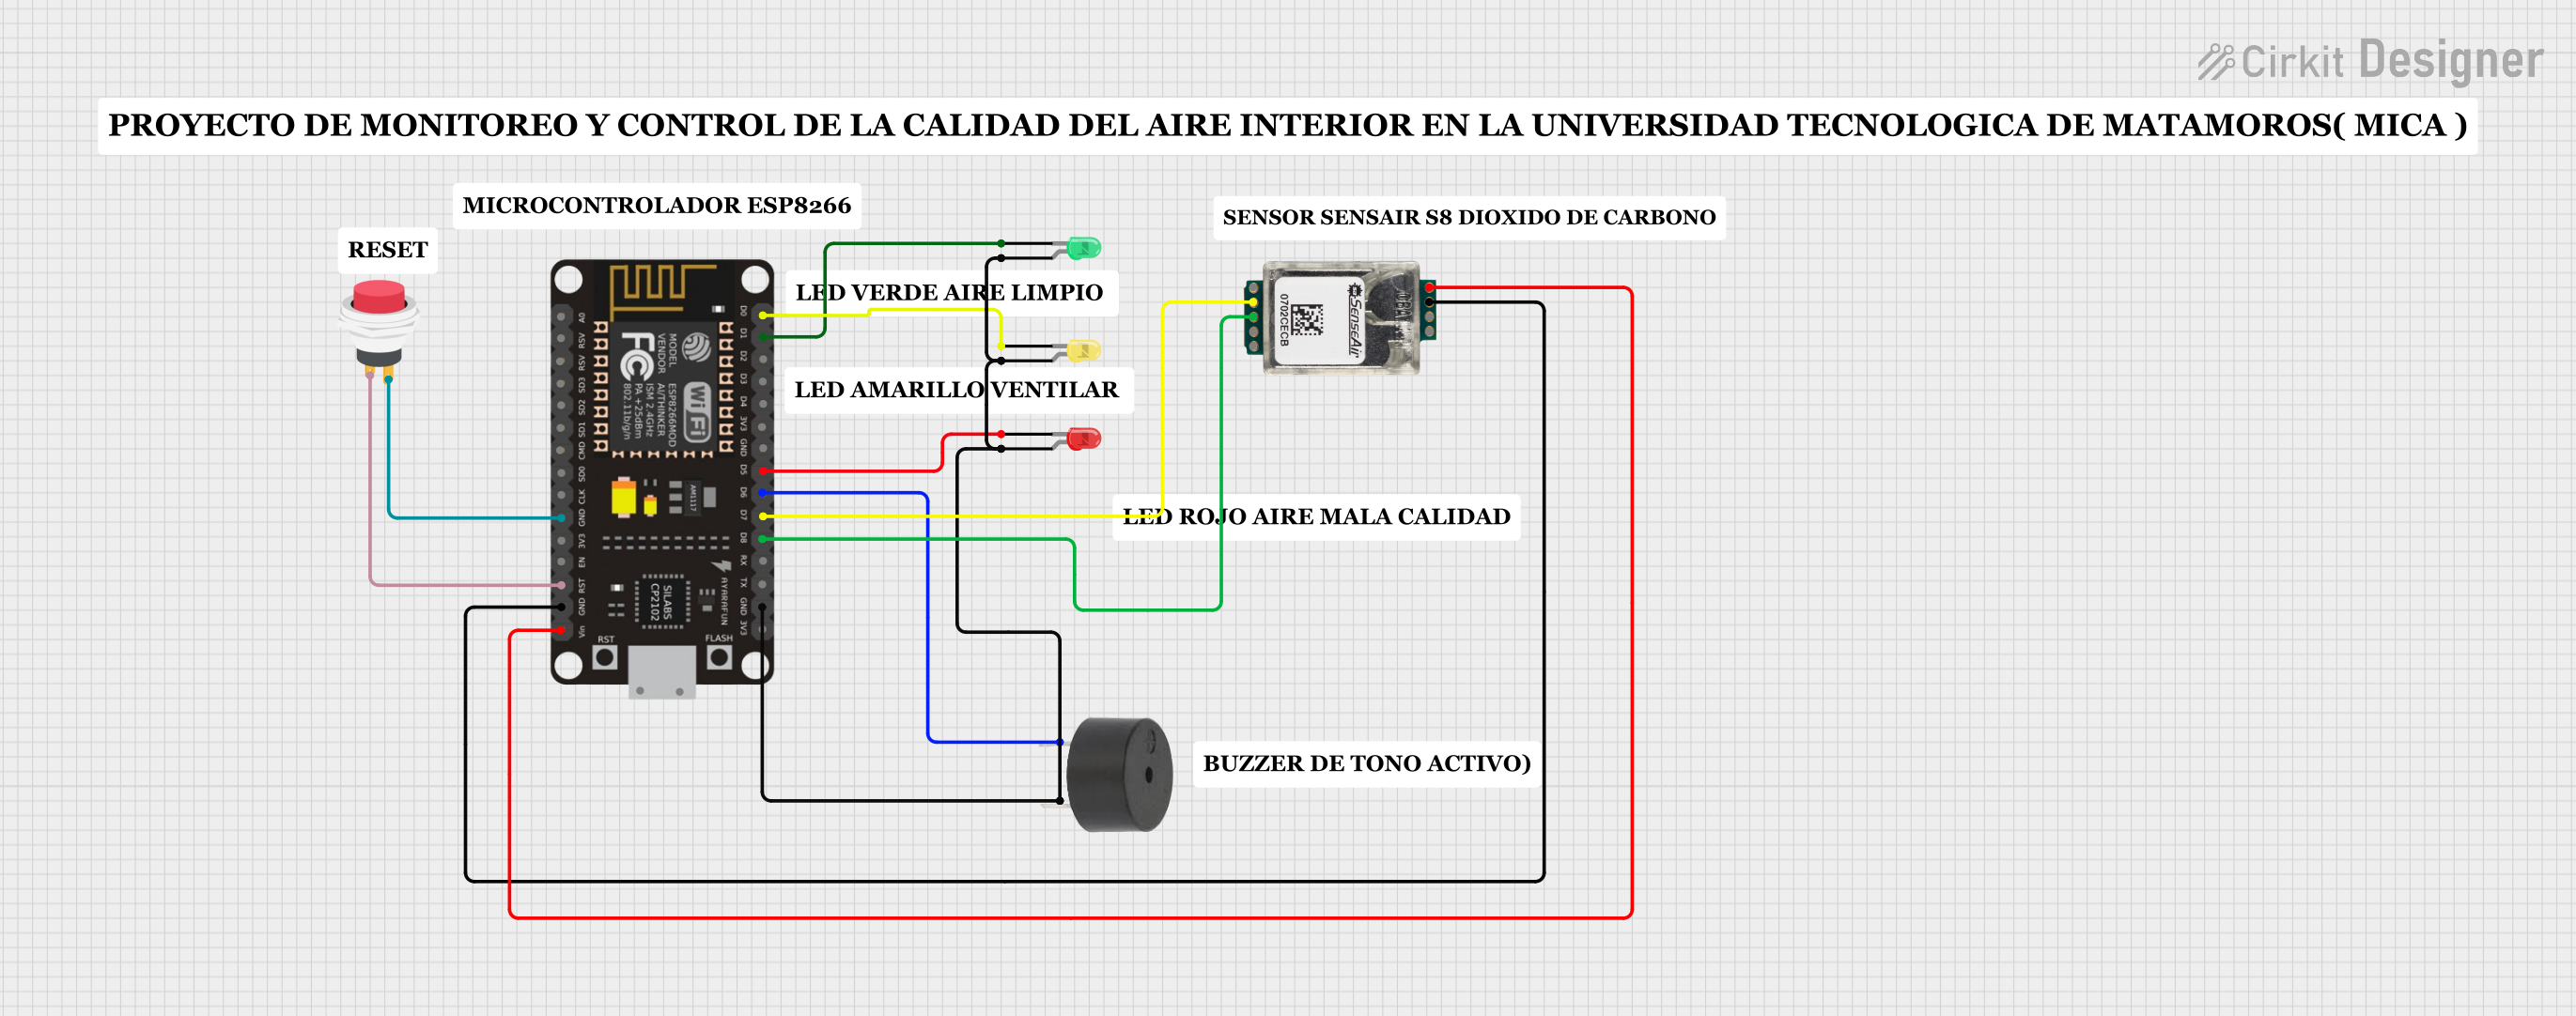
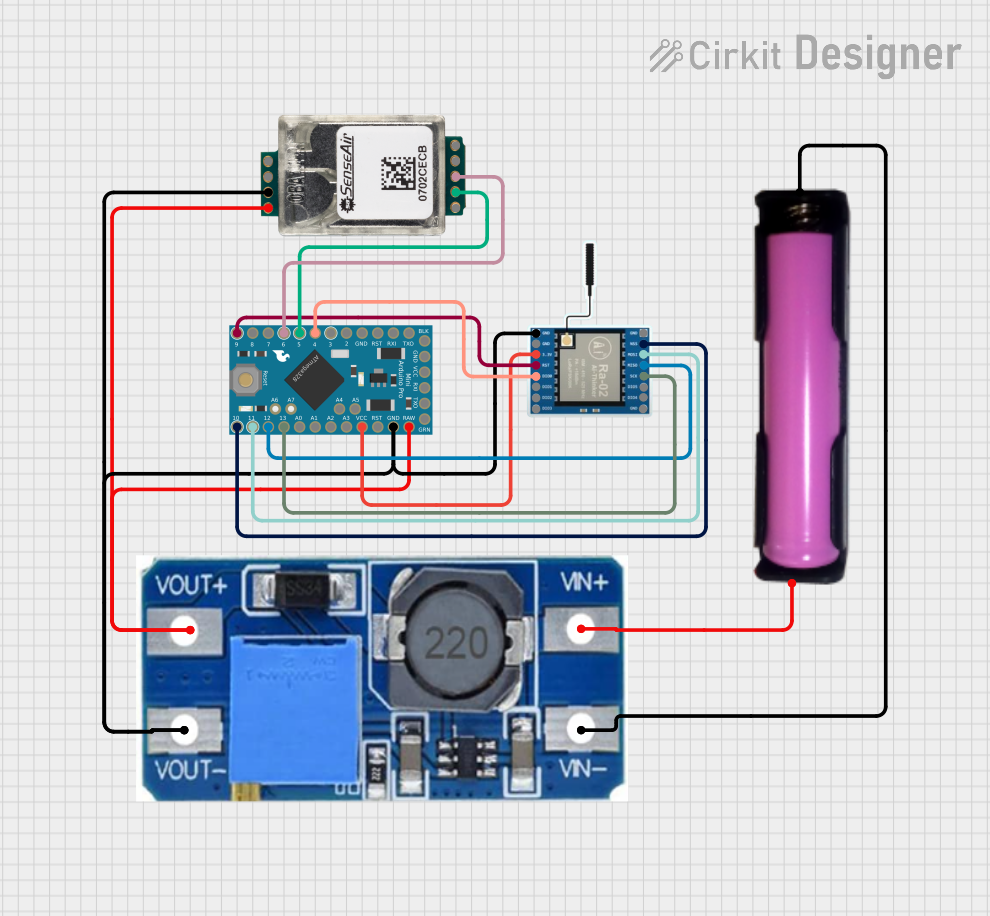
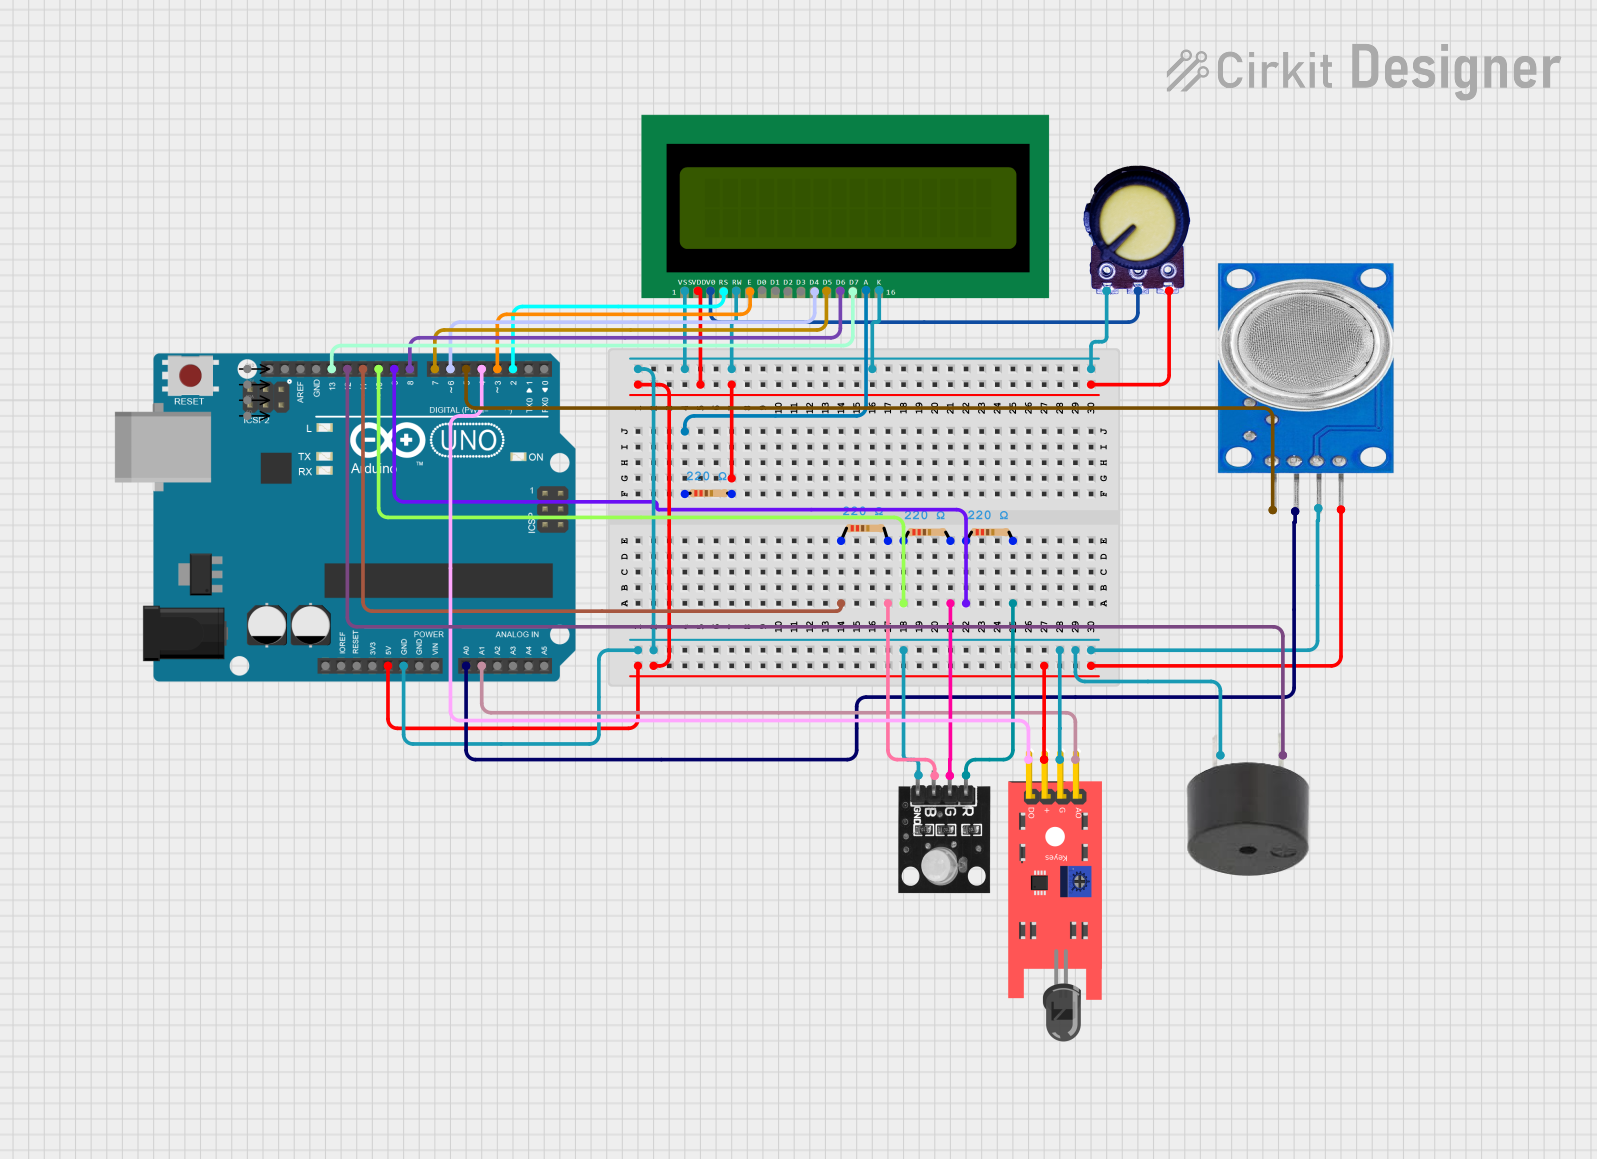
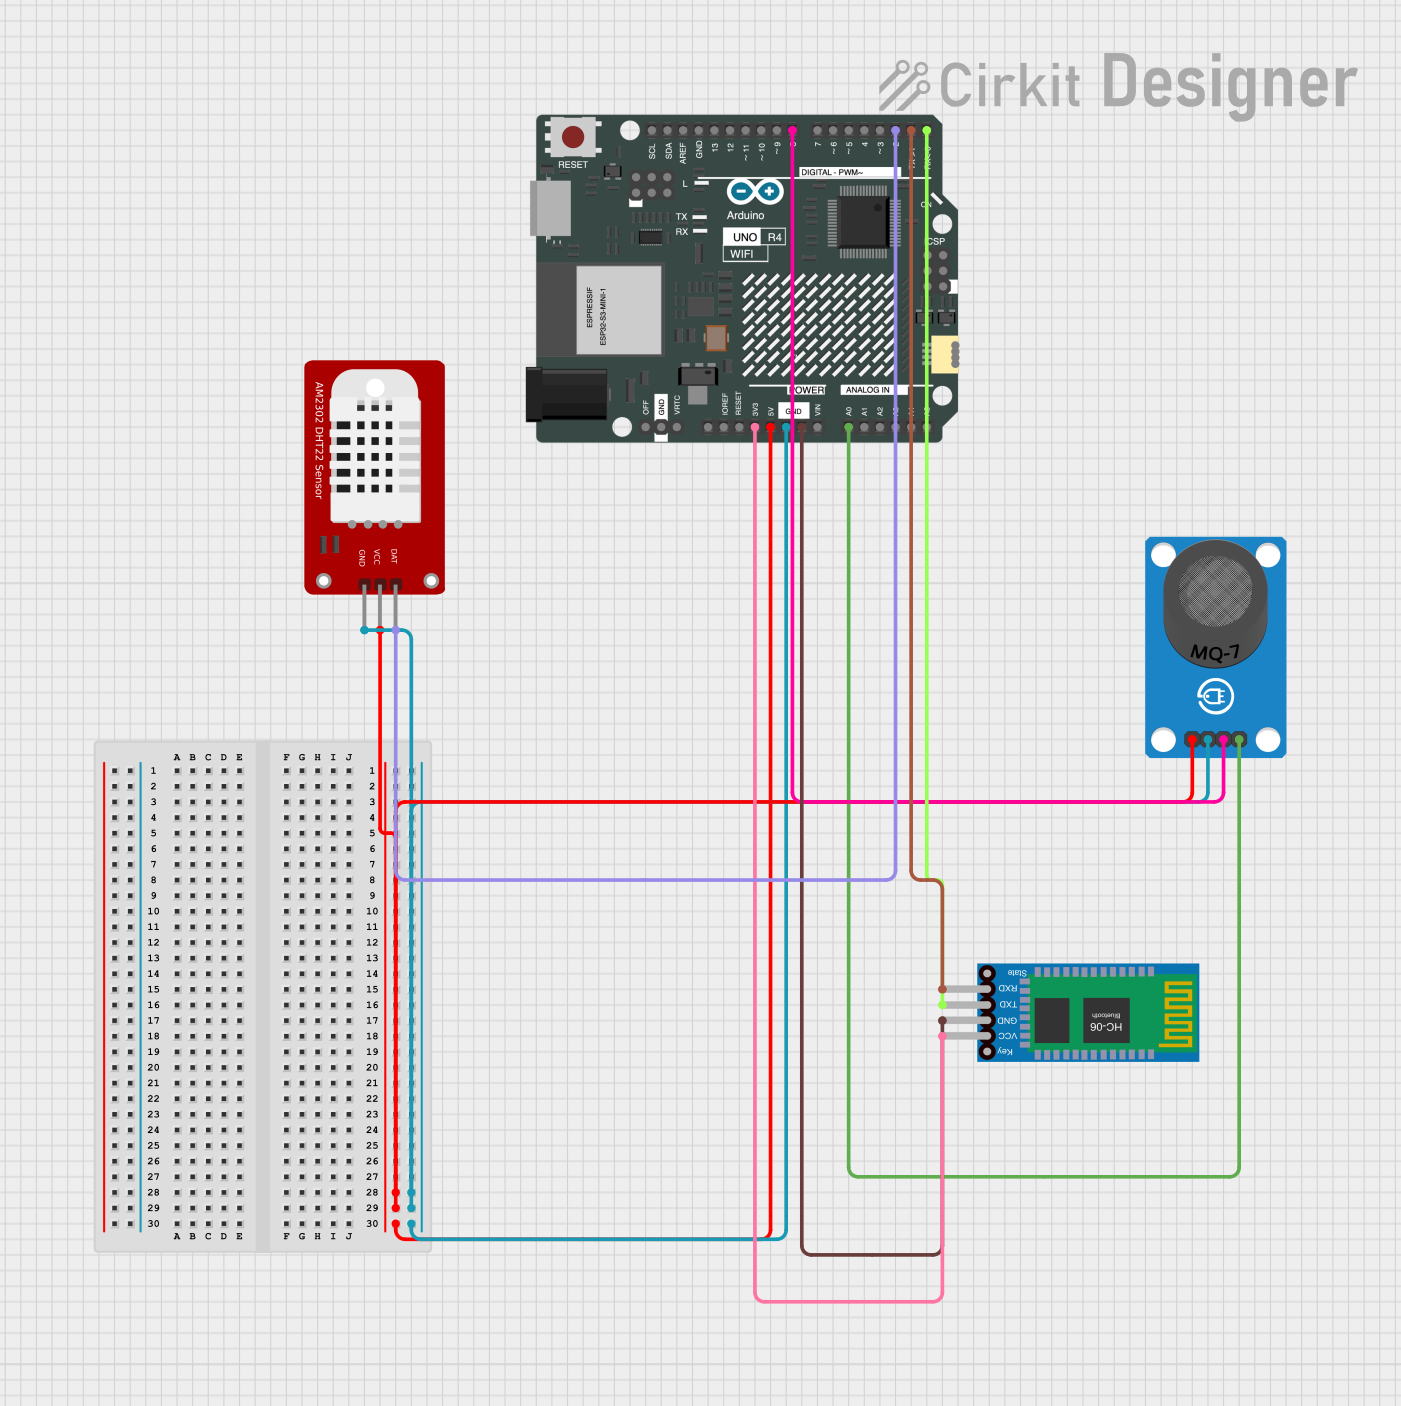
Explore Projects Built with co2 sensor
Technical Specifications
Below are the key technical details of the CO2 sensor:
| Parameter | Value |
|---|---|
| Operating Voltage | 5V DC |
| Operating Current | < 150 mA |
| Measurement Range | 0 - 5000 ppm (parts per million) |
| Accuracy | ±50 ppm or ±5% of reading |
| Response Time | < 30 seconds |
| Operating Temperature | -10°C to 50°C |
| Communication Protocol | Analog or UART (depending on model) |
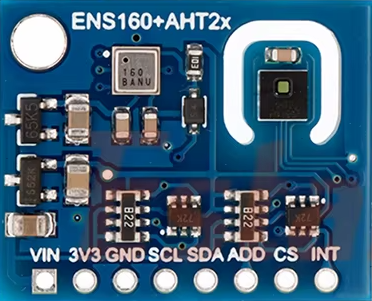
Pin Configuration
The CO2 sensor module typically has the following pin configuration:
| Pin Name | Description |
|---|---|
| VCC | Power supply input (5V DC) |
| GND | Ground |
| AOUT | Analog output for CO2 concentration |
| TX | UART transmit pin (for digital output) |
| RX | UART receive pin (for digital input) |
Usage Instructions
Connecting the CO2 Sensor to an Arduino UNO
To use the CO2 sensor with an Arduino UNO, follow these steps:
Wiring:
- Connect the sensor's
VCCpin to the Arduino's5Vpin. - Connect the sensor's
GNDpin to the Arduino'sGNDpin. - For analog output:
- Connect the sensor's
AOUTpin to one of the Arduino's analog input pins (e.g.,A0).
- Connect the sensor's
- For UART communication:
- Connect the sensor's
TXpin to the Arduino'sRXpin (digital pin 0). - Connect the sensor's
RXpin to the Arduino'sTXpin (digital pin 1).
- Connect the sensor's
- Connect the sensor's
Arduino Code: Below is an example code snippet for reading CO2 levels using the analog output of the sensor:
// CO2 Sensor Example Code for Arduino UNO
// This code reads the analog output of the CO2 sensor and prints the CO2 level
// to the Serial Monitor. Ensure the sensor is connected to pin A0.

const int sensorPin = A0; // Analog pin connected to the CO2 sensor
int sensorValue = 0;      // Variable to store the sensor reading

void setup() {
  Serial.begin(9600); // Initialize serial communication at 9600 baud
  Serial.println("CO2 Sensor Initialized");
}

void loop() {
  // Read the analog value from the sensor
  sensorValue = analogRead(sensorPin);

  // Convert the analog value to a CO2 concentration (ppm)
  // Note: The conversion formula depends on the sensor's datasheet.
  float co2Concentration = sensorValue * (5000.0 / 1023.0);

  // Print the CO2 concentration to the Serial Monitor
  Serial.print("CO2 Concentration: ");
  Serial.print(co2Concentration);
  Serial.println(" ppm");

  delay(1000); // Wait for 1 second before the next reading
}
Upload the Code:
- Open the Arduino IDE, paste the code, and upload it to your Arduino UNO.
- Open the Serial Monitor to view the CO2 concentration readings.
Important Considerations
- Calibration: Some CO2 sensors require calibration before use. Refer to the sensor's datasheet for calibration instructions.
- Ventilation: Ensure the sensor is placed in a well-ventilated area for accurate readings.
- Power Supply: Use a stable 5V power source to avoid fluctuations in sensor readings.
- Warm-Up Time: Allow the sensor to warm up for a few minutes after powering it on for optimal performance.
Troubleshooting and FAQs
Common Issues
No Output or Incorrect Readings:
- Cause: Loose or incorrect wiring.
- Solution: Double-check all connections and ensure the sensor is powered correctly.
Fluctuating Readings:
- Cause: Unstable power supply or environmental interference.
- Solution: Use a regulated power source and avoid placing the sensor near strong electromagnetic fields.
Serial Monitor Shows Gibberish:
- Cause: Incorrect baud rate setting in the Arduino IDE.
- Solution: Ensure the Serial Monitor baud rate matches the
Serial.begin()value in the code (e.g., 9600).
Sensor Takes Too Long to Respond:
- Cause: Insufficient warm-up time.
- Solution: Allow the sensor to warm up for the recommended duration (typically 2-5 minutes).
FAQs
Q: Can this sensor detect gases other than CO2?
A: No, this sensor is specifically designed to measure CO2 concentration. It cannot detect other gases.
Q: How do I know if the sensor needs calibration?
A: Refer to the sensor's datasheet. Some sensors include a self-calibration feature, while others may require manual calibration periodically.
Q: Can I use this sensor outdoors?
A: This sensor is designed for indoor use. Outdoor use may expose it to extreme temperatures and humidity, which can affect its performance.
Q: What is the lifespan of the sensor?
A: The typical lifespan of a CO2 sensor is 5-10 years, depending on usage and environmental conditions.
By following this documentation, you can effectively integrate the CO2 sensor into your projects and ensure accurate air quality monitoring.