How to Use Square FSR: Examples, Pinouts, and Specs
Introduction
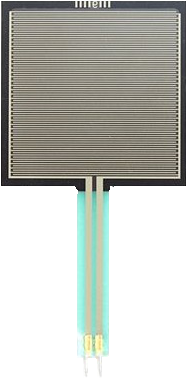
A Square FSR (Force-Sensitive Resistor) is an electronic component that changes its resistance in response to an applied force or pressure. This property makes it an invaluable sensor in a variety of applications, including touch-sensitive devices, robotics, interactive installations, and custom input devices. The FSR is simple to use and can be easily interfaced with microcontrollers such as the Arduino UNO.
Explore Projects Built with Square FSR
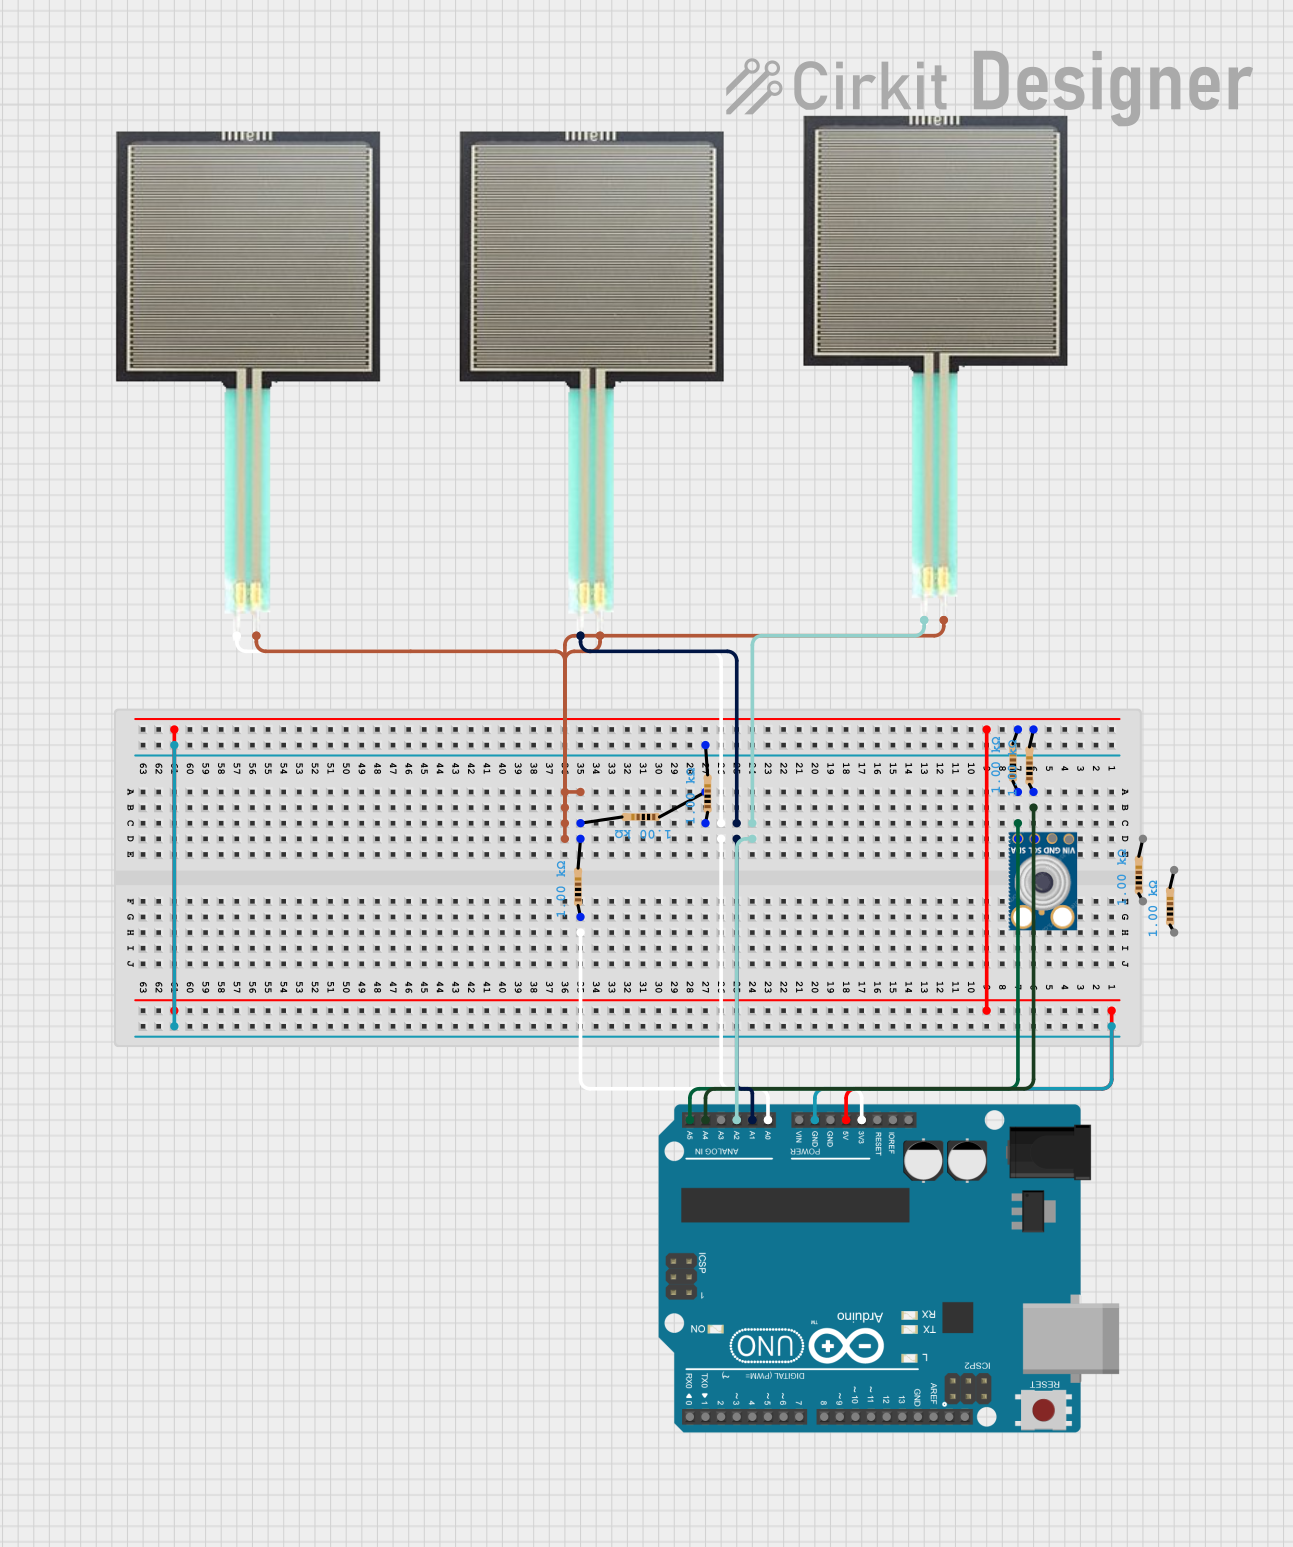

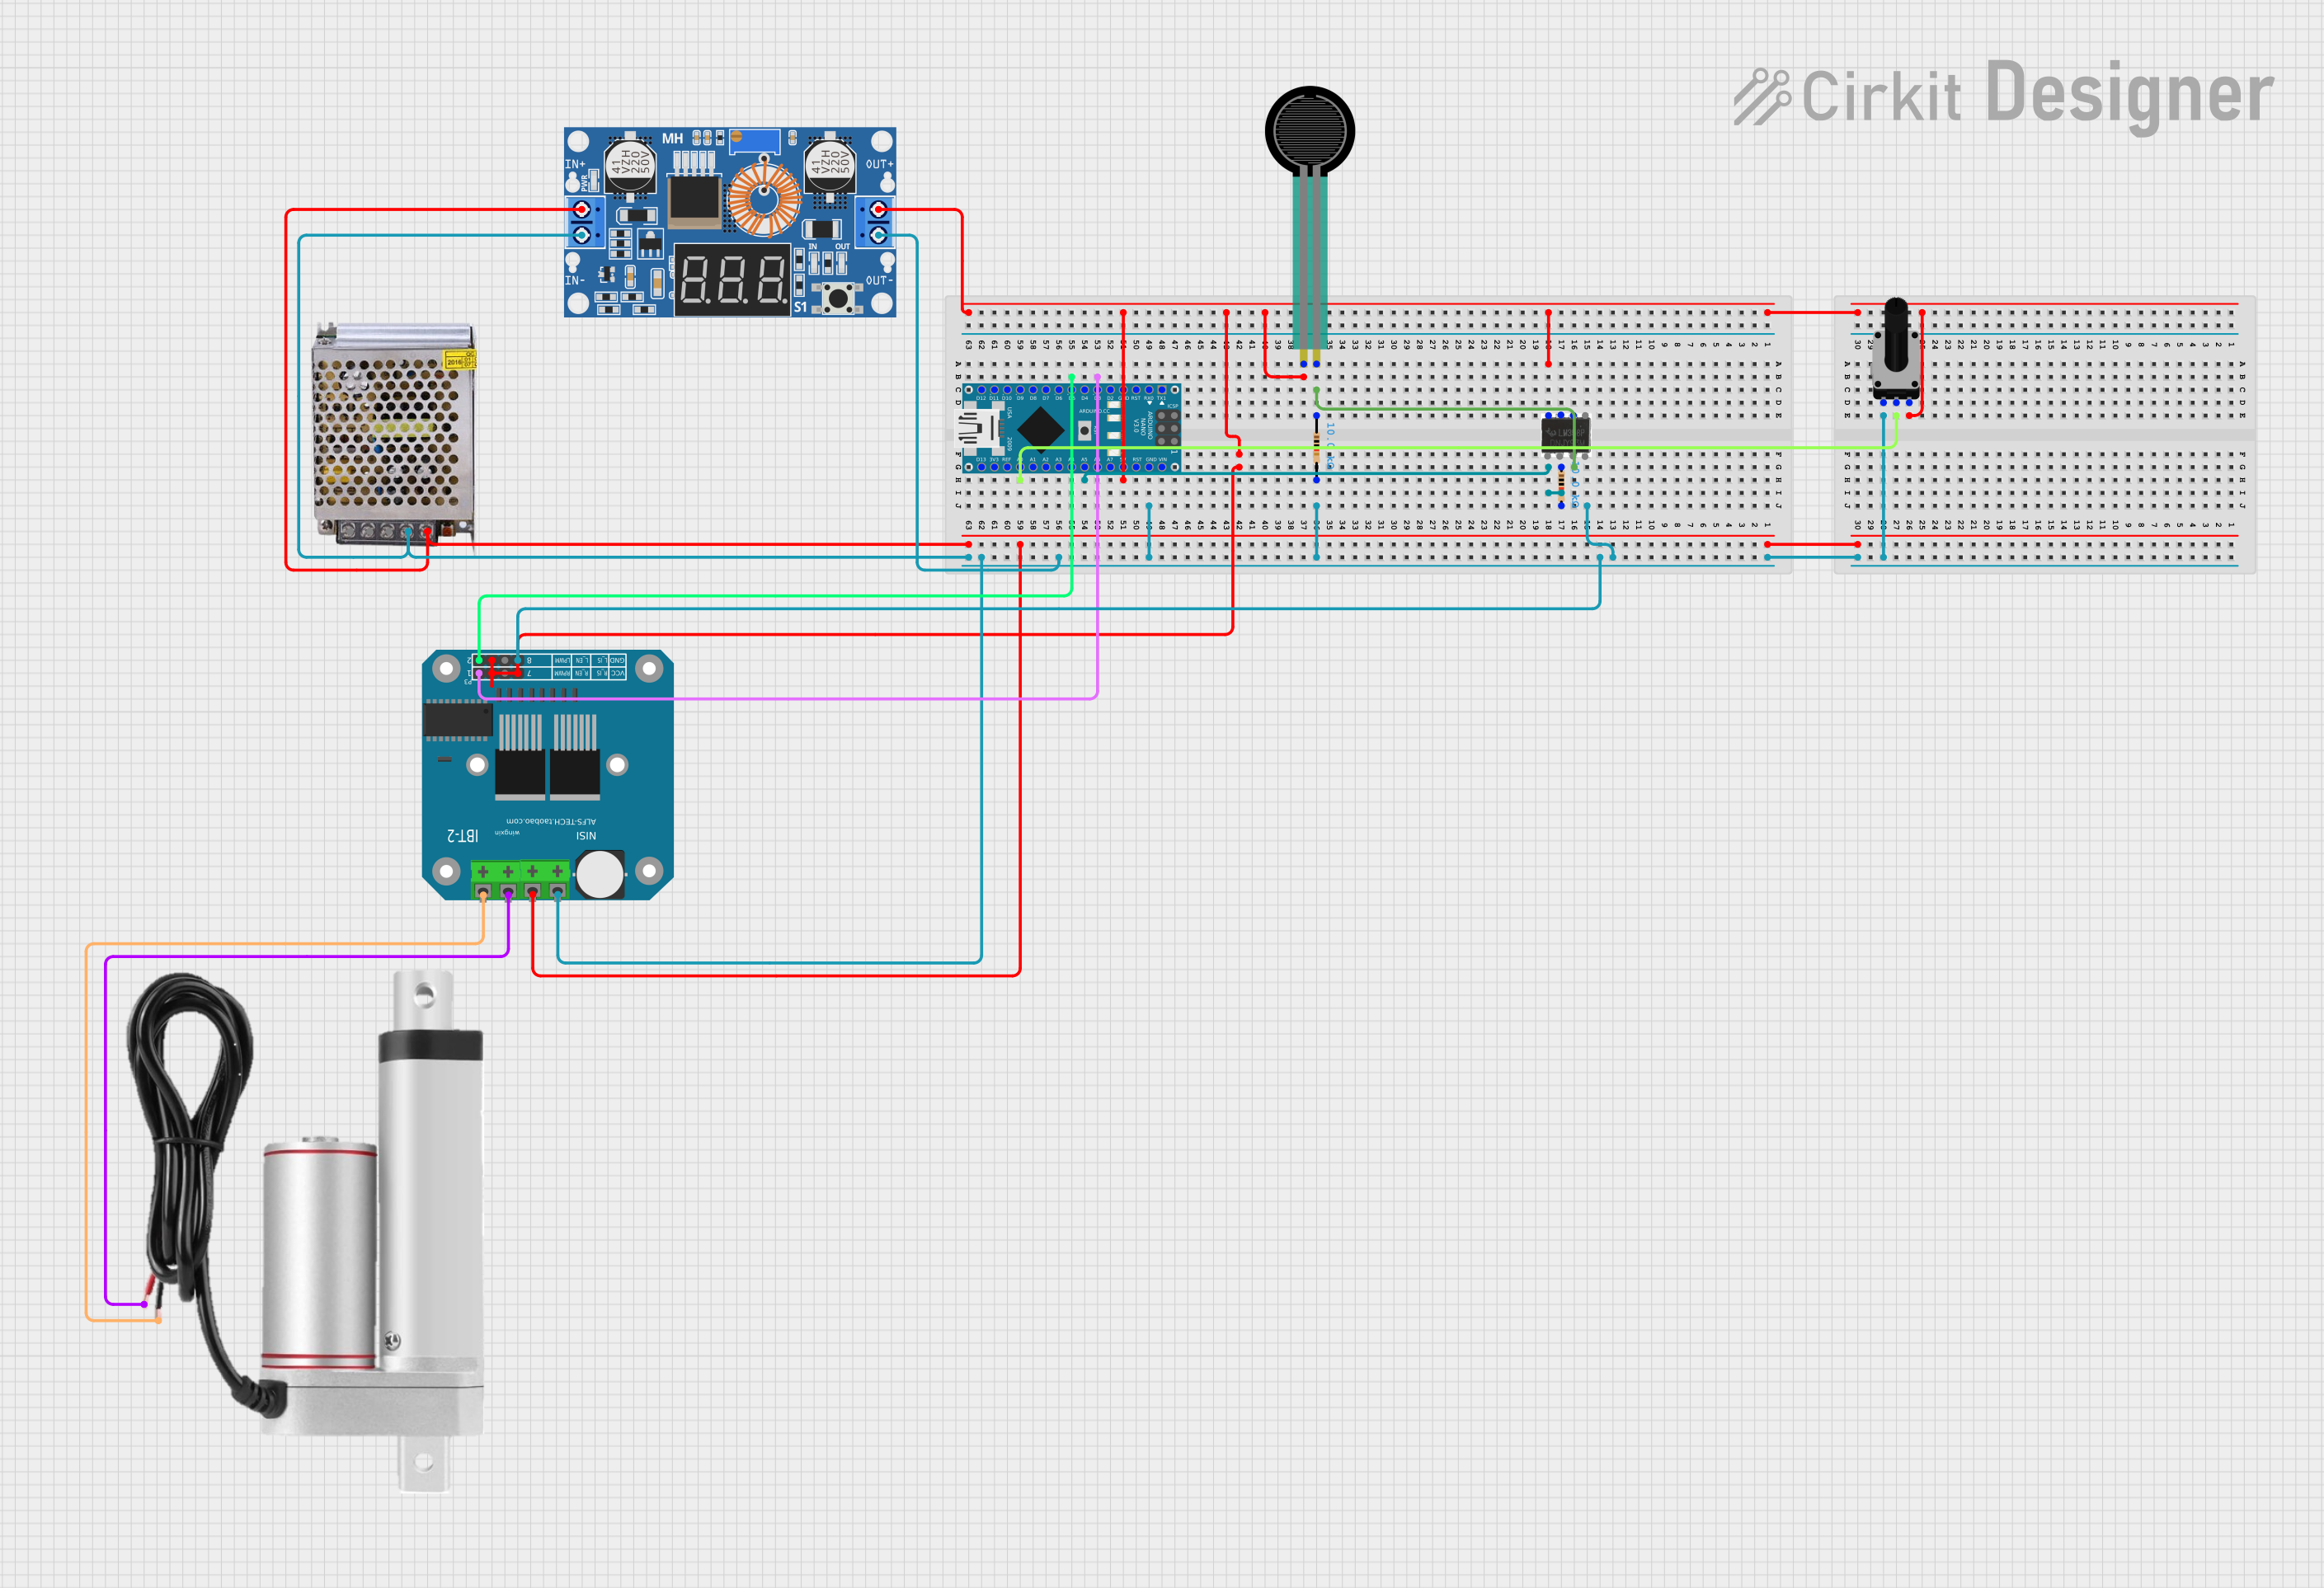
Explore Projects Built with Square FSR
Technical Specifications
Key Technical Details
- Resistance Range: Typically from a few hundred kilohms to a few ohms when pressure is applied.
- Force Sensitivity Range: Usually from a few grams to several kilograms.
- Response Time: Typically less than 1 ms.
- Operating Temperature: Usually between -30°C to 70°C.
- Active Area: The area where force can be applied, usually square in shape.
Pin Configuration and Descriptions
| Pin Number | Description |
|---|---|
| 1 | Active Area (Top) |
| 2 | Active Area (Bottom) |
Note: The FSR is not polarized, meaning the pins are interchangeable.
Usage Instructions
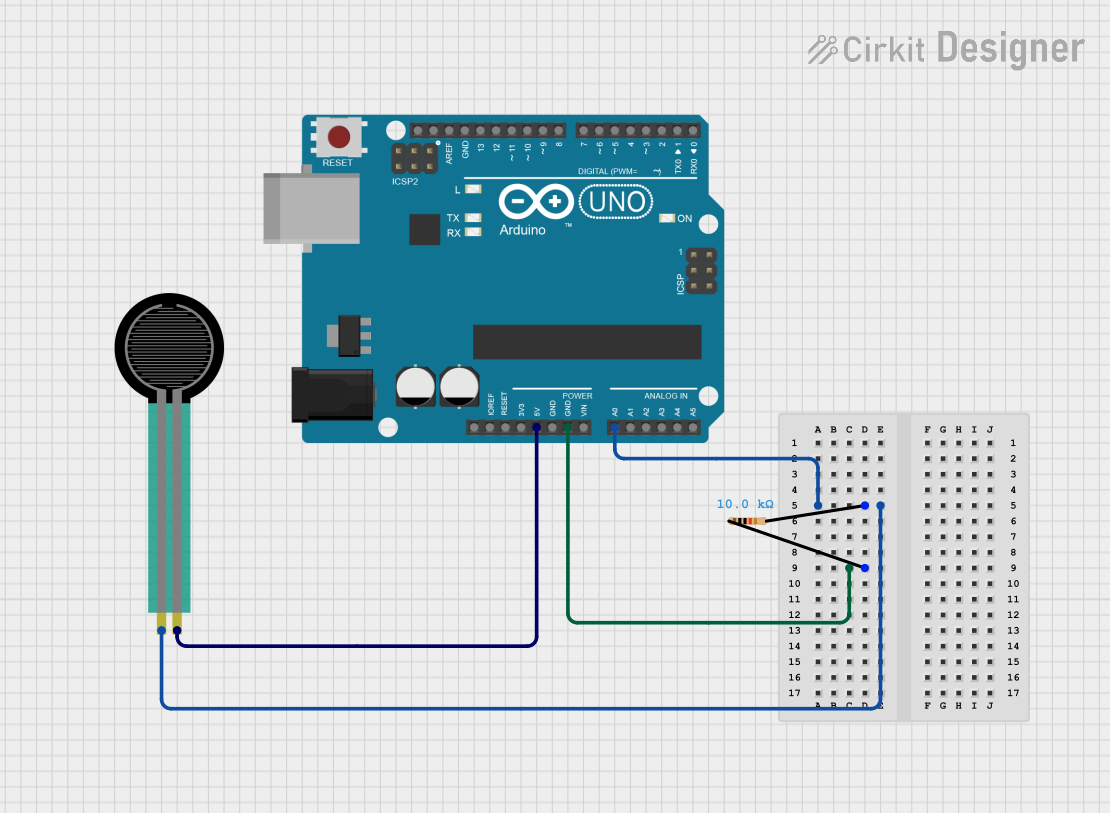
Interfacing with a Circuit
To use the Square FSR in a circuit, you can create a voltage divider by connecting it in series with a pull-down resistor to the analog input of a microcontroller. Here's a simple schematic:
Vcc (5V) --- FSR --- Analog Pin --- Resistor (10kΩ) --- GND
Best Practices
- Calibration: Since FSRs can vary slightly, it's important to calibrate your sensor for the specific range of forces you expect in your application.
- Protection: Avoid applying excessive force that exceeds the sensor's maximum rating, as this can permanently damage the FSR.
- Stable Mounting: Ensure the FSR is mounted on a stable surface to get consistent readings.
- Avoid Sharp Objects: Sharp objects can puncture or otherwise damage the sensing area.
Example Code for Arduino UNO
// Define the FSR pin and the pull-down resistor value
const int fsrPin = A0; // FSR connected to analog pin A0
const int fsrResistance = 10000; // 10kΩ pull-down resistor

void setup() {
  Serial.begin(9600); // Start serial communication at 9600 baud
}

void loop() {
  int fsrReading = analogRead(fsrPin); // Read the FSR value
  // Convert the reading to voltage
  float voltage = fsrReading * (5.0 / 1023.0);
  // Calculate the resistance of the FSR
  float fsrR = 5.0 / voltage - 1.0;
  fsrR = fsrResistance * fsrR;
  // Print the resistance value
  Serial.println("FSR Resistance: " + String(fsrR) + " ohms");
  delay(500); // Wait half a second before reading again
}
Note: The above code assumes a 5V supply from the Arduino UNO. Adjust the voltage in the code if using a different supply voltage.
Troubleshooting and FAQs
Common Issues
- Inconsistent Readings: Ensure that the FSR is mounted on a stable surface and that connections are secure.
- No Change in Resistance: Verify that the FSR is properly connected in the circuit and that there are no breaks in the circuit path.
- Damaged FSR: If the FSR has been subjected to excessive force or sharp objects, it may be damaged and need replacement.
FAQs
Q: Can I use the FSR with a 3.3V system? A: Yes, but you will need to adjust the voltage reference in your code accordingly.
Q: How do I calibrate the FSR for my application? A: Apply known weights or forces to the FSR and record the resistance or voltage changes. Use these values to create a calibration curve or table for your application.
Q: What is the lifespan of an FSR? A: The lifespan depends on the application and how frequently the FSR is used. In general, FSRs can withstand thousands to millions of actuations.
Q: Can I connect multiple FSRs to a single microcontroller? A: Yes, you can connect multiple FSRs to different analog pins on a microcontroller. Remember to use separate pull-down resistors for each FSR.
For further assistance or technical support, please contact the supplier or manufacturer of your Square FSR.