How to Use Proto Board: Examples, Pinouts, and Specs
Introduction
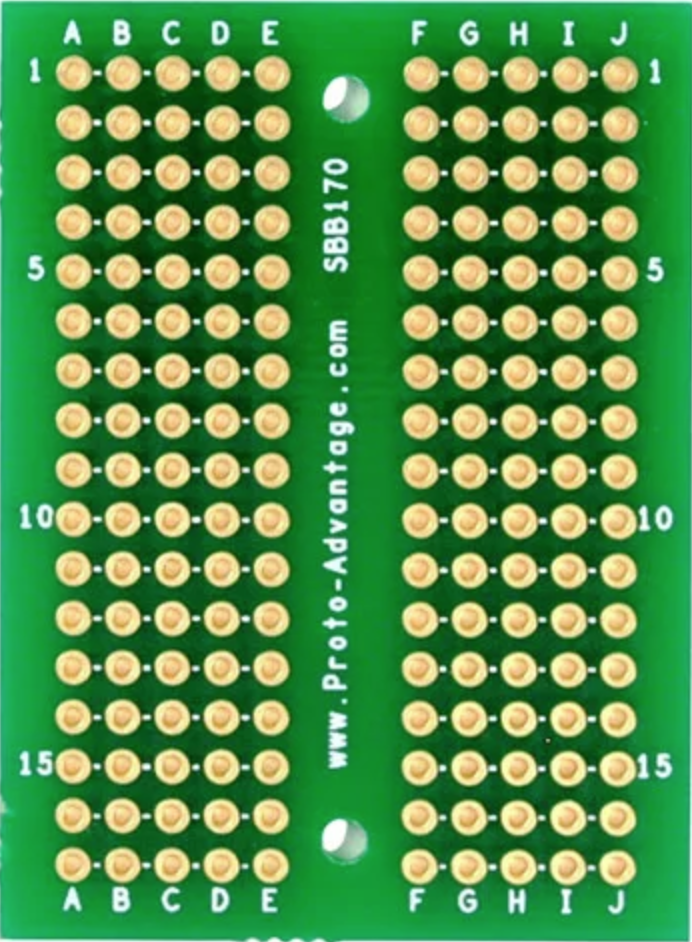
The Proto Board (Part ID: SBB170), manufactured by Proto Advantage, is a reusable platform designed for prototyping electronic circuits. Commonly referred to as a breadboard, this component allows users to easily insert and remove electronic components without the need for soldering. It is an essential tool for testing and developing circuit designs, making it a staple in educational, hobbyist, and professional electronics projects.
Explore Projects Built with Proto Board


Explore Projects Built with Proto Board
Common Applications and Use Cases
- Rapid prototyping of electronic circuits
- Testing and debugging circuit designs
- Educational purposes for learning circuit assembly
- Temporary setups for proof-of-concept designs
- Experimenting with microcontroller-based projects (e.g., Arduino, Raspberry Pi)
Technical Specifications
The Proto Board (SBB170) is designed to provide a flexible and reusable platform for circuit assembly. Below are its key technical details:
General Specifications
| Parameter | Value |
|---|---|
| Manufacturer | Proto Advantage |
| Part ID | SBB170 |
| Board Dimensions | 47mm x 35mm |
| Total Tie Points | 170 |
| Material | ABS Plastic |
| Contact Material | Phosphor Bronze with Nickel Plating |
| Operating Voltage Range | 0V to 36V |
| Maximum Current per Pin | 1A |
| Temperature Range | -40°C to 85°C |
Pin Configuration and Layout
The Proto Board (SBB170) features a standard layout for prototyping. Below is a description of its sections:
| Section Name | Description |
|---|---|
| Power Rails | Two horizontal rows at the top and bottom for power distribution (Vcc/GND). |
| Terminal Strips | 170 tie points arranged in 17 vertical columns and 10 horizontal rows. |
| Connection Type | Spring-loaded contacts for component insertion. |
Layout Diagram
The board is divided into two main areas:
- Power Rails: Used for distributing power (e.g., 5V and GND).
- Terminal Strips: Used for connecting components and creating circuits.
Usage Instructions
The Proto Board (SBB170) is straightforward to use and requires no soldering. Follow the steps below to use it effectively:
How to Use the Proto Board
Power Distribution:
- Connect the power supply (e.g., 5V and GND) to the power rails.
- Use jumper wires to distribute power to different parts of the circuit.
Component Placement:
- Insert the leads of components (e.g., resistors, capacitors, ICs) into the terminal strip holes.
- Ensure that components are securely seated in the spring-loaded contacts.
Connections:
- Use jumper wires to connect components as per your circuit design.
- Verify connections to avoid short circuits or incorrect wiring.
Testing:
- Power the circuit and test its functionality.
- Make adjustments as needed by easily removing or repositioning components.
Important Considerations and Best Practices
- Avoid Overcurrent: Do not exceed the maximum current rating of 1A per pin to prevent damage.
- Use Proper Wire Gauges: Use 22-28 AWG solid-core wires for reliable connections.
- Check Connections: Double-check all connections before powering the circuit to avoid short circuits.
- Avoid Excessive Force: Insert and remove components gently to prevent damage to the contacts.
- Keep the Board Clean: Dust and debris can affect connections; clean the board periodically.
Example: Connecting an LED to an Arduino UNO
Below is an example of how to use the Proto Board (SBB170) to connect an LED to an Arduino UNO:
Circuit Diagram
- Components:
- 1 x LED
- 1 x 220Ω Resistor
- Jumper Wires
- Arduino UNO
Code Example
// Example code to blink an LED connected to pin 13 of the Arduino UNO
// Ensure the LED's anode (longer leg) is connected to pin 13 via a 220Ω resistor
// and the cathode (shorter leg) is connected to GND.

void setup() {
  pinMode(13, OUTPUT); // Set pin 13 as an output pin
}

void loop() {
  digitalWrite(13, HIGH); // Turn the LED on
  delay(1000);            // Wait for 1 second
  digitalWrite(13, LOW);  // Turn the LED off
  delay(1000);            // Wait for 1 second
}
Troubleshooting and FAQs
Common Issues and Solutions
| Issue | Possible Cause | Solution |
|---|---|---|
| Components not working | Loose or incorrect connections | Verify all connections and reinsert wires. |
| Short circuit | Wires or components touching improperly | Check for accidental shorts and fix them. |
| Power rails not distributing power | Improper power supply connection | Ensure power supply is connected correctly. |
| Difficulty inserting components | Using thick or incompatible wires | Use 22-28 AWG solid-core wires. |
FAQs
Can I use the Proto Board for high-power circuits?
- No, the board is designed for low-power circuits with a maximum current of 1A per pin.
How do I clean the Proto Board?
- Use a soft brush or compressed air to remove dust and debris. Avoid using liquids.
Can I solder components to the Proto Board?
- No, the Proto Board is designed for temporary, solder-free connections.
What is the lifespan of the Proto Board?
- With proper use, the board can last for hundreds of cycles of component insertion and removal.
By following this documentation, users can effectively utilize the Proto Board (SBB170) for their prototyping needs.