How to Use POWER SUPPLY 12V: Examples, Pinouts, and Specs
Introduction
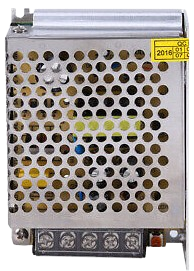
The POWER SUPPLY 12V is a device designed to convert electrical energy from an input source (such as AC mains or a DC source) into a stable 12V DC output. It is widely used to power electronic circuits, modules, and devices that require a consistent 12V supply. This component is essential in applications ranging from hobbyist projects to industrial systems, ensuring reliable operation of connected devices.
Explore Projects Built with POWER SUPPLY 12V


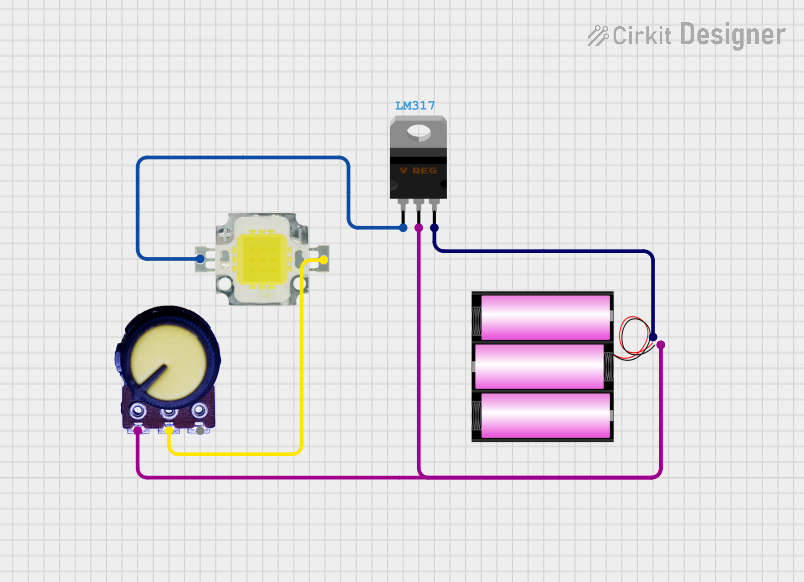

Explore Projects Built with POWER SUPPLY 12V
Common Applications and Use Cases
- Powering microcontrollers, sensors, and modules in embedded systems
- Driving DC motors, relays, and solenoids
- Supplying power to LED strips and lighting systems
- Providing stable voltage for audio amplifiers and communication devices
- General-purpose power supply for laboratory and prototyping work
Technical Specifications
The following table outlines the key technical details of the POWER SUPPLY 12V:
| Parameter | Value |
|---|---|
| Input Voltage Range | 100-240V AC (for AC-DC models) |
| Output Voltage | 12V DC |
| Output Current | Typically 1A to 10A (varies by model) |
| Power Rating | 12W to 120W (depending on current) |
| Efficiency | ≥ 85% |
| Ripple and Noise | ≤ 120mV (peak-to-peak) |
| Operating Temperature | -10°C to +50°C |
| Protection Features | Overload, overvoltage, short-circuit |
Pin Configuration and Descriptions
For a typical AC-DC POWER SUPPLY 12V, the pin configuration is as follows:
| Pin Name | Description |
|---|---|
| L (Line) | AC mains live input |
| N (Neutral) | AC mains neutral input |
| GND | Ground connection for DC output |
| +12V | Positive 12V DC output |
For DC-DC converters, the pin configuration may differ:
| Pin Name | Description |
|---|---|
| VIN | Positive input voltage (e.g., 24V DC) |
| GND | Ground connection for input and output |
| VOUT | Positive 12V DC output |
Usage Instructions
How to Use the POWER SUPPLY 12V in a Circuit
- Verify Input Voltage: Ensure the input voltage matches the specifications of the power supply. For AC-DC models, connect the live (L) and neutral (N) wires to the mains power source.
- Connect the Output: Attach the +12V and GND terminals to the load or circuit requiring power. Double-check polarity to avoid damage.
- Power On: Switch on the power supply and measure the output voltage with a multimeter to confirm it is 12V before connecting sensitive devices.
- Load Considerations: Ensure the total current drawn by the connected devices does not exceed the rated output current of the power supply.
Important Considerations and Best Practices
- Heat Dissipation: High-power models may generate heat. Use proper ventilation or heatsinks to prevent overheating.
- Overcurrent Protection: If the power supply includes overload protection, it will shut down automatically when the load exceeds its capacity. Reduce the load and restart the power supply.
- Noise Filtering: For sensitive applications, consider adding capacitors or filters to reduce ripple and noise.
- Arduino Compatibility: The POWER SUPPLY 12V can be used to power Arduino boards via the VIN pin or an external regulator. Ensure the current rating is sufficient for the Arduino and connected peripherals.
Example: Powering an Arduino UNO
To power an Arduino UNO using the POWER SUPPLY 12V:
- Connect the +12V output of the power supply to the VIN pin of the Arduino.
- Connect the GND output of the power supply to the GND pin of the Arduino.
Here is a simple Arduino sketch to blink an LED while powered by the 12V supply:
// Blink an LED connected to pin 13
// Ensure the Arduino is powered via the 12V power supply

void setup() {
  pinMode(13, OUTPUT); // Set pin 13 as an output
}

void loop() {
  digitalWrite(13, HIGH); // Turn the LED on
  delay(1000);            // Wait for 1 second
  digitalWrite(13, LOW);  // Turn the LED off
  delay(1000);            // Wait for 1 second
}
Troubleshooting and FAQs
Common Issues and Solutions
No Output Voltage
- Cause: Input power is not connected or is outside the specified range.
- Solution: Verify the input voltage and connections. Check for blown fuses in the power supply.
Output Voltage is Not 12V
- Cause: Overloaded power supply or faulty internal components.
- Solution: Reduce the load and measure the output again. If the issue persists, replace the power supply.
Power Supply Overheats
- Cause: Insufficient ventilation or excessive load.
- Solution: Ensure proper airflow around the power supply and reduce the load if necessary.
Ripple or Noise in Output
- Cause: Poor filtering or interference from nearby devices.
- Solution: Add external capacitors or use a power supply with better ripple specifications.
FAQs
Q: Can I use the POWER SUPPLY 12V to charge a 12V battery?
A: No, a dedicated battery charger with appropriate charging profiles should be used to charge batteries. The POWER SUPPLY 12V is not designed for this purpose.
Q: Is the POWER SUPPLY 12V safe to use with sensitive electronics?
A: Yes, as long as the output voltage is stable and within specifications. For added safety, use additional filtering components if needed.
Q: Can I connect multiple devices to the POWER SUPPLY 12V?
A: Yes, as long as the total current draw does not exceed the rated output current of the power supply.