How to Use Fingerprint AS608: Examples, Pinouts, and Specs
Introduction
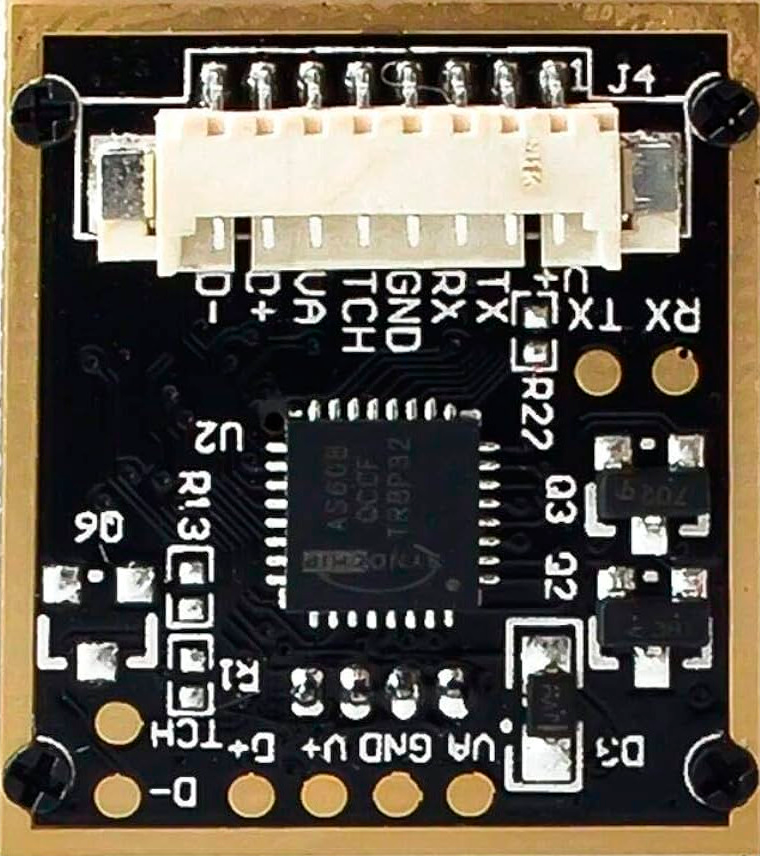
The Fingerprint AS608 is a biometric sensor module designed for capturing and processing fingerprint data for identification and authentication purposes. Manufactured by Arduino, this compact and reliable module integrates a high-accuracy optical sensor and a built-in algorithm for fingerprint matching. It is widely used in security systems, access control, time attendance systems, and other applications requiring biometric authentication.
Explore Projects Built with Fingerprint AS608
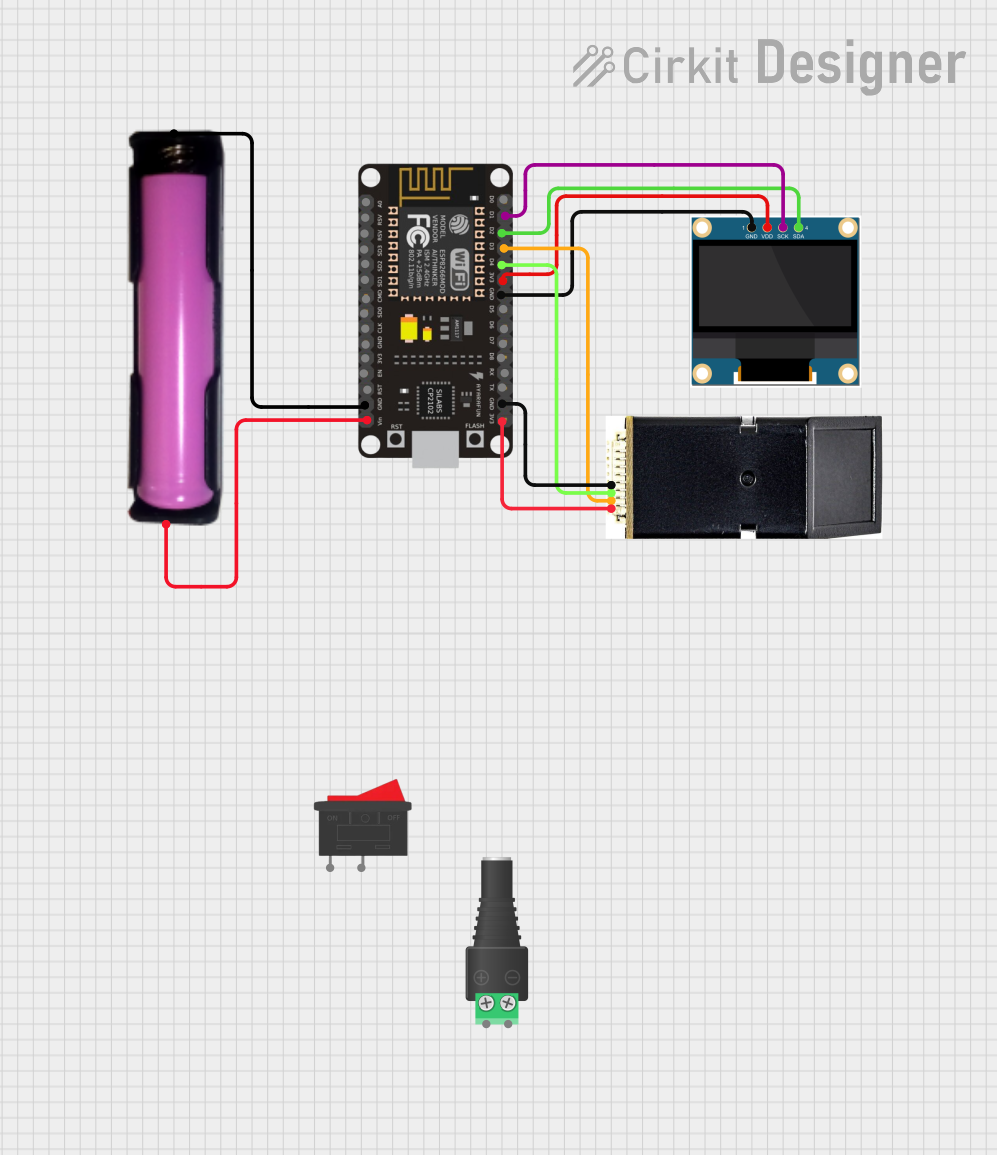
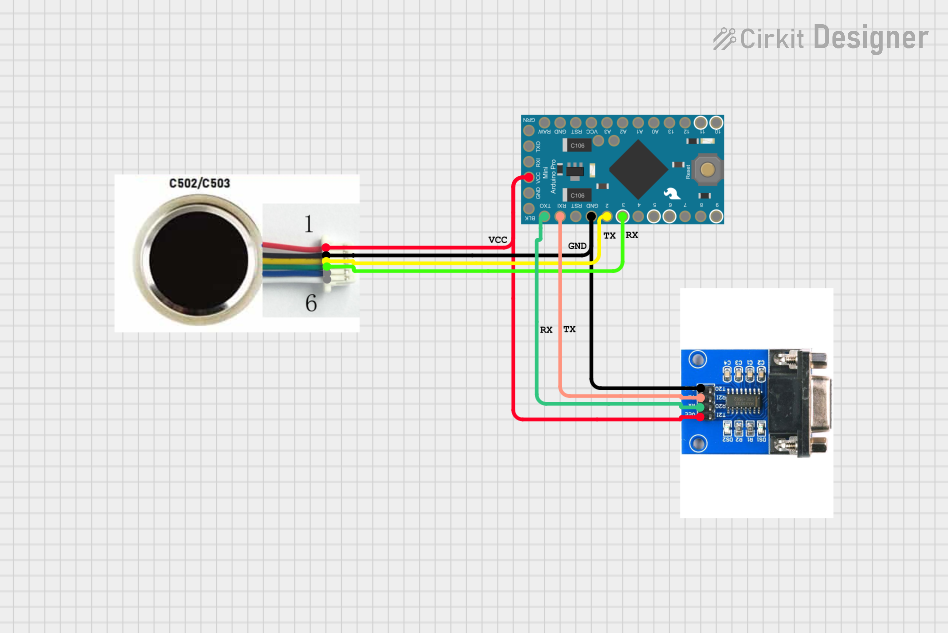
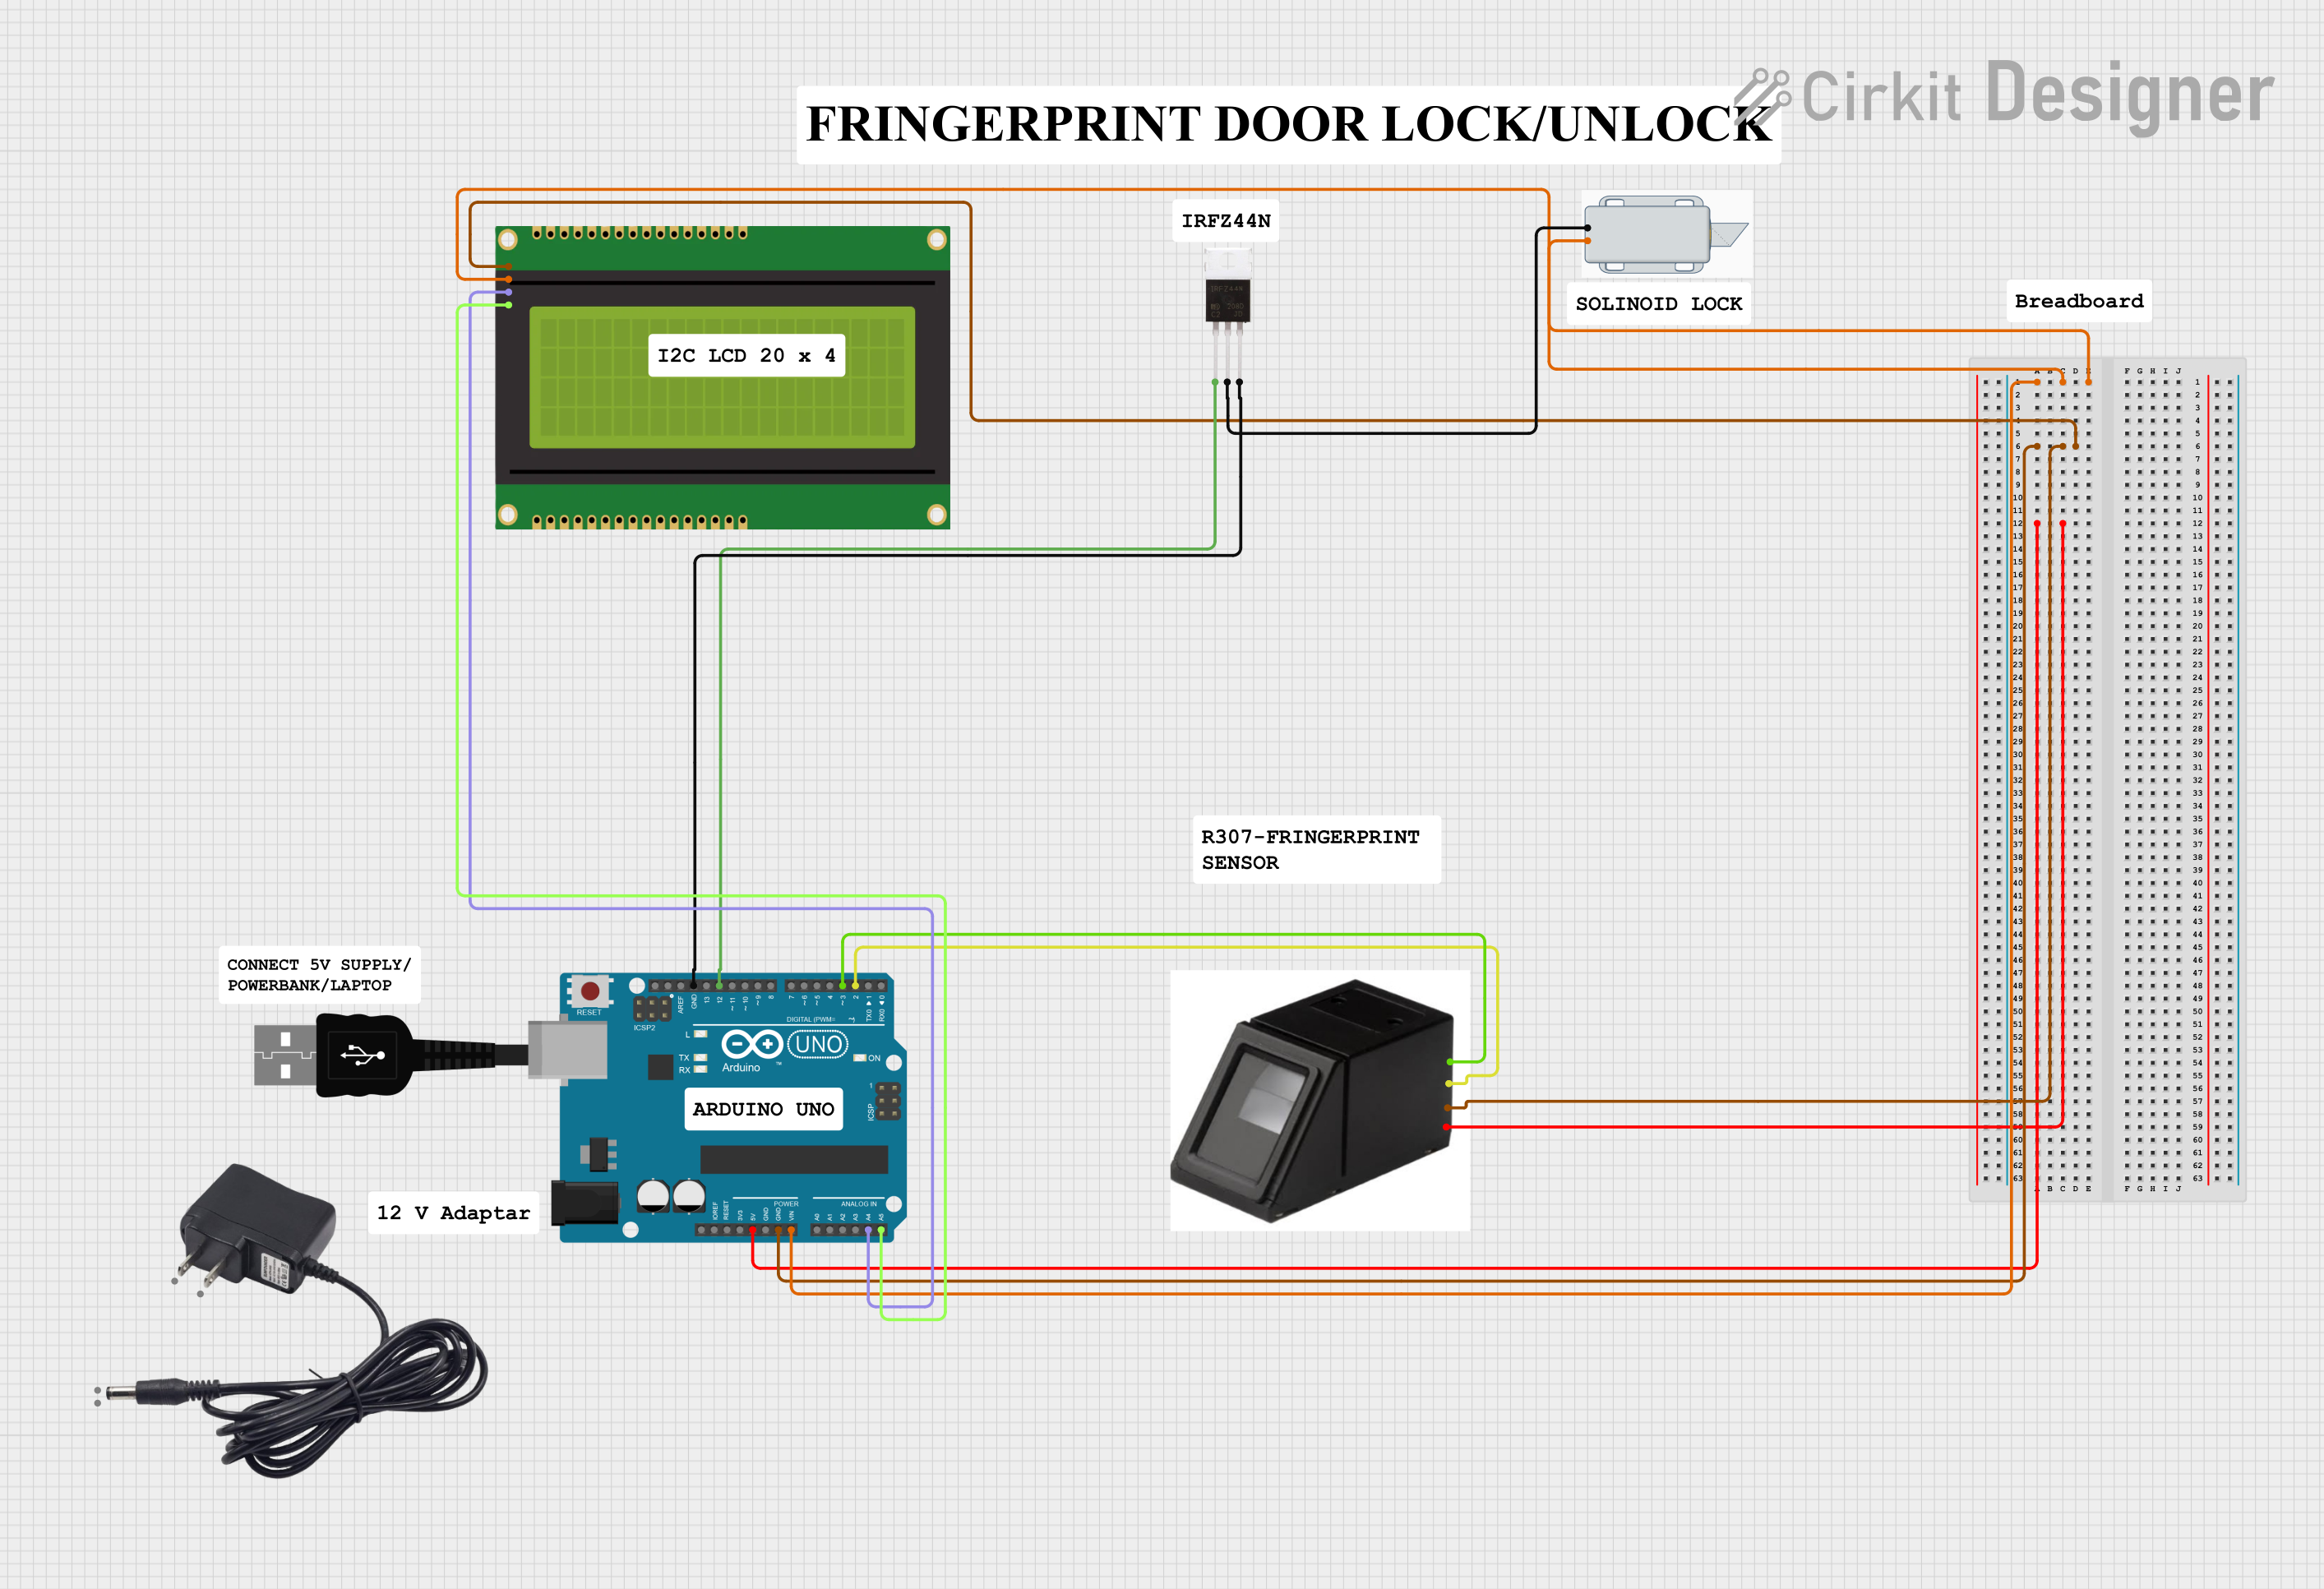

Explore Projects Built with Fingerprint AS608
Common Applications
- Door lock systems for secure access control
- Time and attendance tracking in workplaces
- Personal identification in embedded systems
- ATM and banking security systems
- IoT devices requiring biometric authentication
Technical Specifications
The AS608 fingerprint sensor module is designed to deliver high performance and reliability. Below are its key technical specifications:
| Parameter | Specification |
|---|---|
| Manufacturer | Arduino |
| Part ID | AS608 |
| Operating Voltage | 3.6V - 6.0V |
| Operating Current | 50mA (typical) |
| Peak Current | 120mA |
| Fingerprint Capacity | 162 templates |
| Interface | UART (TTL) |
| Baud Rate | 9600 (default), adjustable |
| Image Resolution | 508 DPI |
| Working Temperature | -20°C to +50°C |
| Storage Temperature | -40°C to +85°C |
| Dimensions | 56mm x 20mm x 21.5mm |
Pin Configuration
The AS608 module has a 6-pin interface for communication and power. Below is the pin configuration:
| Pin | Name | Description |
|---|---|---|
| 1 | VCC | Power supply (3.6V - 6.0V) |
| 2 | GND | Ground |
| 3 | TX | UART Transmit (connect to RX of MCU) |
| 4 | RX | UART Receive (connect to TX of MCU) |
| 5 | PS | Power Sleep Control (optional) |
| 6 | TOUT | Touch Output (optional, not commonly used) |
Usage Instructions
Connecting the AS608 to an Arduino UNO
To use the AS608 fingerprint sensor with an Arduino UNO, follow these steps:
Wiring the Module:
- Connect the
VCCpin of the AS608 to the 5V pin on the Arduino UNO. - Connect the
GNDpin of the AS608 to the GND pin on the Arduino UNO. - Connect the
TXpin of the AS608 to theD2pin (digital pin 2) on the Arduino UNO. - Connect the
RXpin of the AS608 to theD3pin (digital pin 3) on the Arduino UNO.
- Connect the
Install the Required Library:
- Open the Arduino IDE.
- Go to
Sketch > Include Library > Manage Libraries. - Search for "Adafruit Fingerprint Sensor Library" and install it.
Upload Example Code: Use the following example code to enroll and verify fingerprints:
#include <Adafruit_Fingerprint.h> #include <SoftwareSerial.h> // Define the pins for SoftwareSerial SoftwareSerial mySerial(2, 3); // RX, TX // Initialize the fingerprint sensor Adafruit_Fingerprint finger(&mySerial); void setup() { Serial.begin(9600); // Initialize serial monitor while (!Serial); // Wait for serial monitor to open Serial.println("Fingerprint AS608 Test"); // Start the fingerprint sensor finger.begin(57600); if (finger.verifyPassword()) { Serial.println("Found fingerprint sensor!"); } else { Serial.println("Did not find fingerprint sensor :("); while (1) { delay(1); } } } void loop() { Serial.println("Waiting for valid finger..."); uint8_t result = finger.getImage(); if (result == FINGERPRINT_OK) { Serial.println("Fingerprint image taken"); } else if (result == FINGERPRINT_NOFINGER) { Serial.println("No finger detected"); } else { Serial.println("Error reading fingerprint"); } delay(1000); // Wait before next attempt }- Upload the code to your Arduino UNO.
- Open the Serial Monitor (set baud rate to 9600) to interact with the fingerprint sensor.
Important Considerations
- Ensure the sensor is powered within the specified voltage range (3.6V - 6.0V).
- Avoid exposing the sensor to direct sunlight or dusty environments, as this may affect its accuracy.
- Use a stable power source to prevent voltage fluctuations that could disrupt the sensor's operation.
- When connecting the sensor to an Arduino, use SoftwareSerial for communication to free up the hardware UART for debugging.
Troubleshooting and FAQs
Common Issues and Solutions
| Issue | Possible Cause | Solution |
|---|---|---|
| Sensor not detected | Incorrect wiring or loose connections | Double-check wiring and ensure secure connections. |
| Fingerprint not recognized | Poor fingerprint placement or dirty sensor | Clean the sensor and ensure proper finger placement. |
| "Did not find fingerprint sensor" error | Incorrect baud rate or damaged sensor | Verify the baud rate and check for hardware damage. |
| No response from the sensor | Power supply issue | Ensure the sensor is receiving 3.6V - 6.0V. |
FAQs
Can the AS608 store multiple fingerprints?
- Yes, it can store up to 162 fingerprint templates.
Can I adjust the baud rate of the AS608?
- Yes, the baud rate is adjustable via commands sent to the module.
What is the default baud rate of the AS608?
- The default baud rate is 9600.
Can the AS608 be used with other microcontrollers?
- Yes, it can be used with any microcontroller that supports UART communication.
By following this documentation, you can effectively integrate the Fingerprint AS608 module into your projects for reliable biometric authentication.