Cirkit Designer Logo
Cirkit Designer
Your all-in-one circuit design IDE
Home / 
Component Documentation

How to Use bluetooth: Examples, Pinouts, and Specs

Image of bluetooth
Cirkit Designer LogoDesign with bluetooth in Cirkit Designer

Introduction

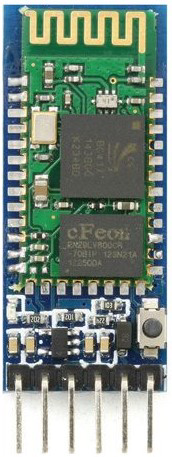
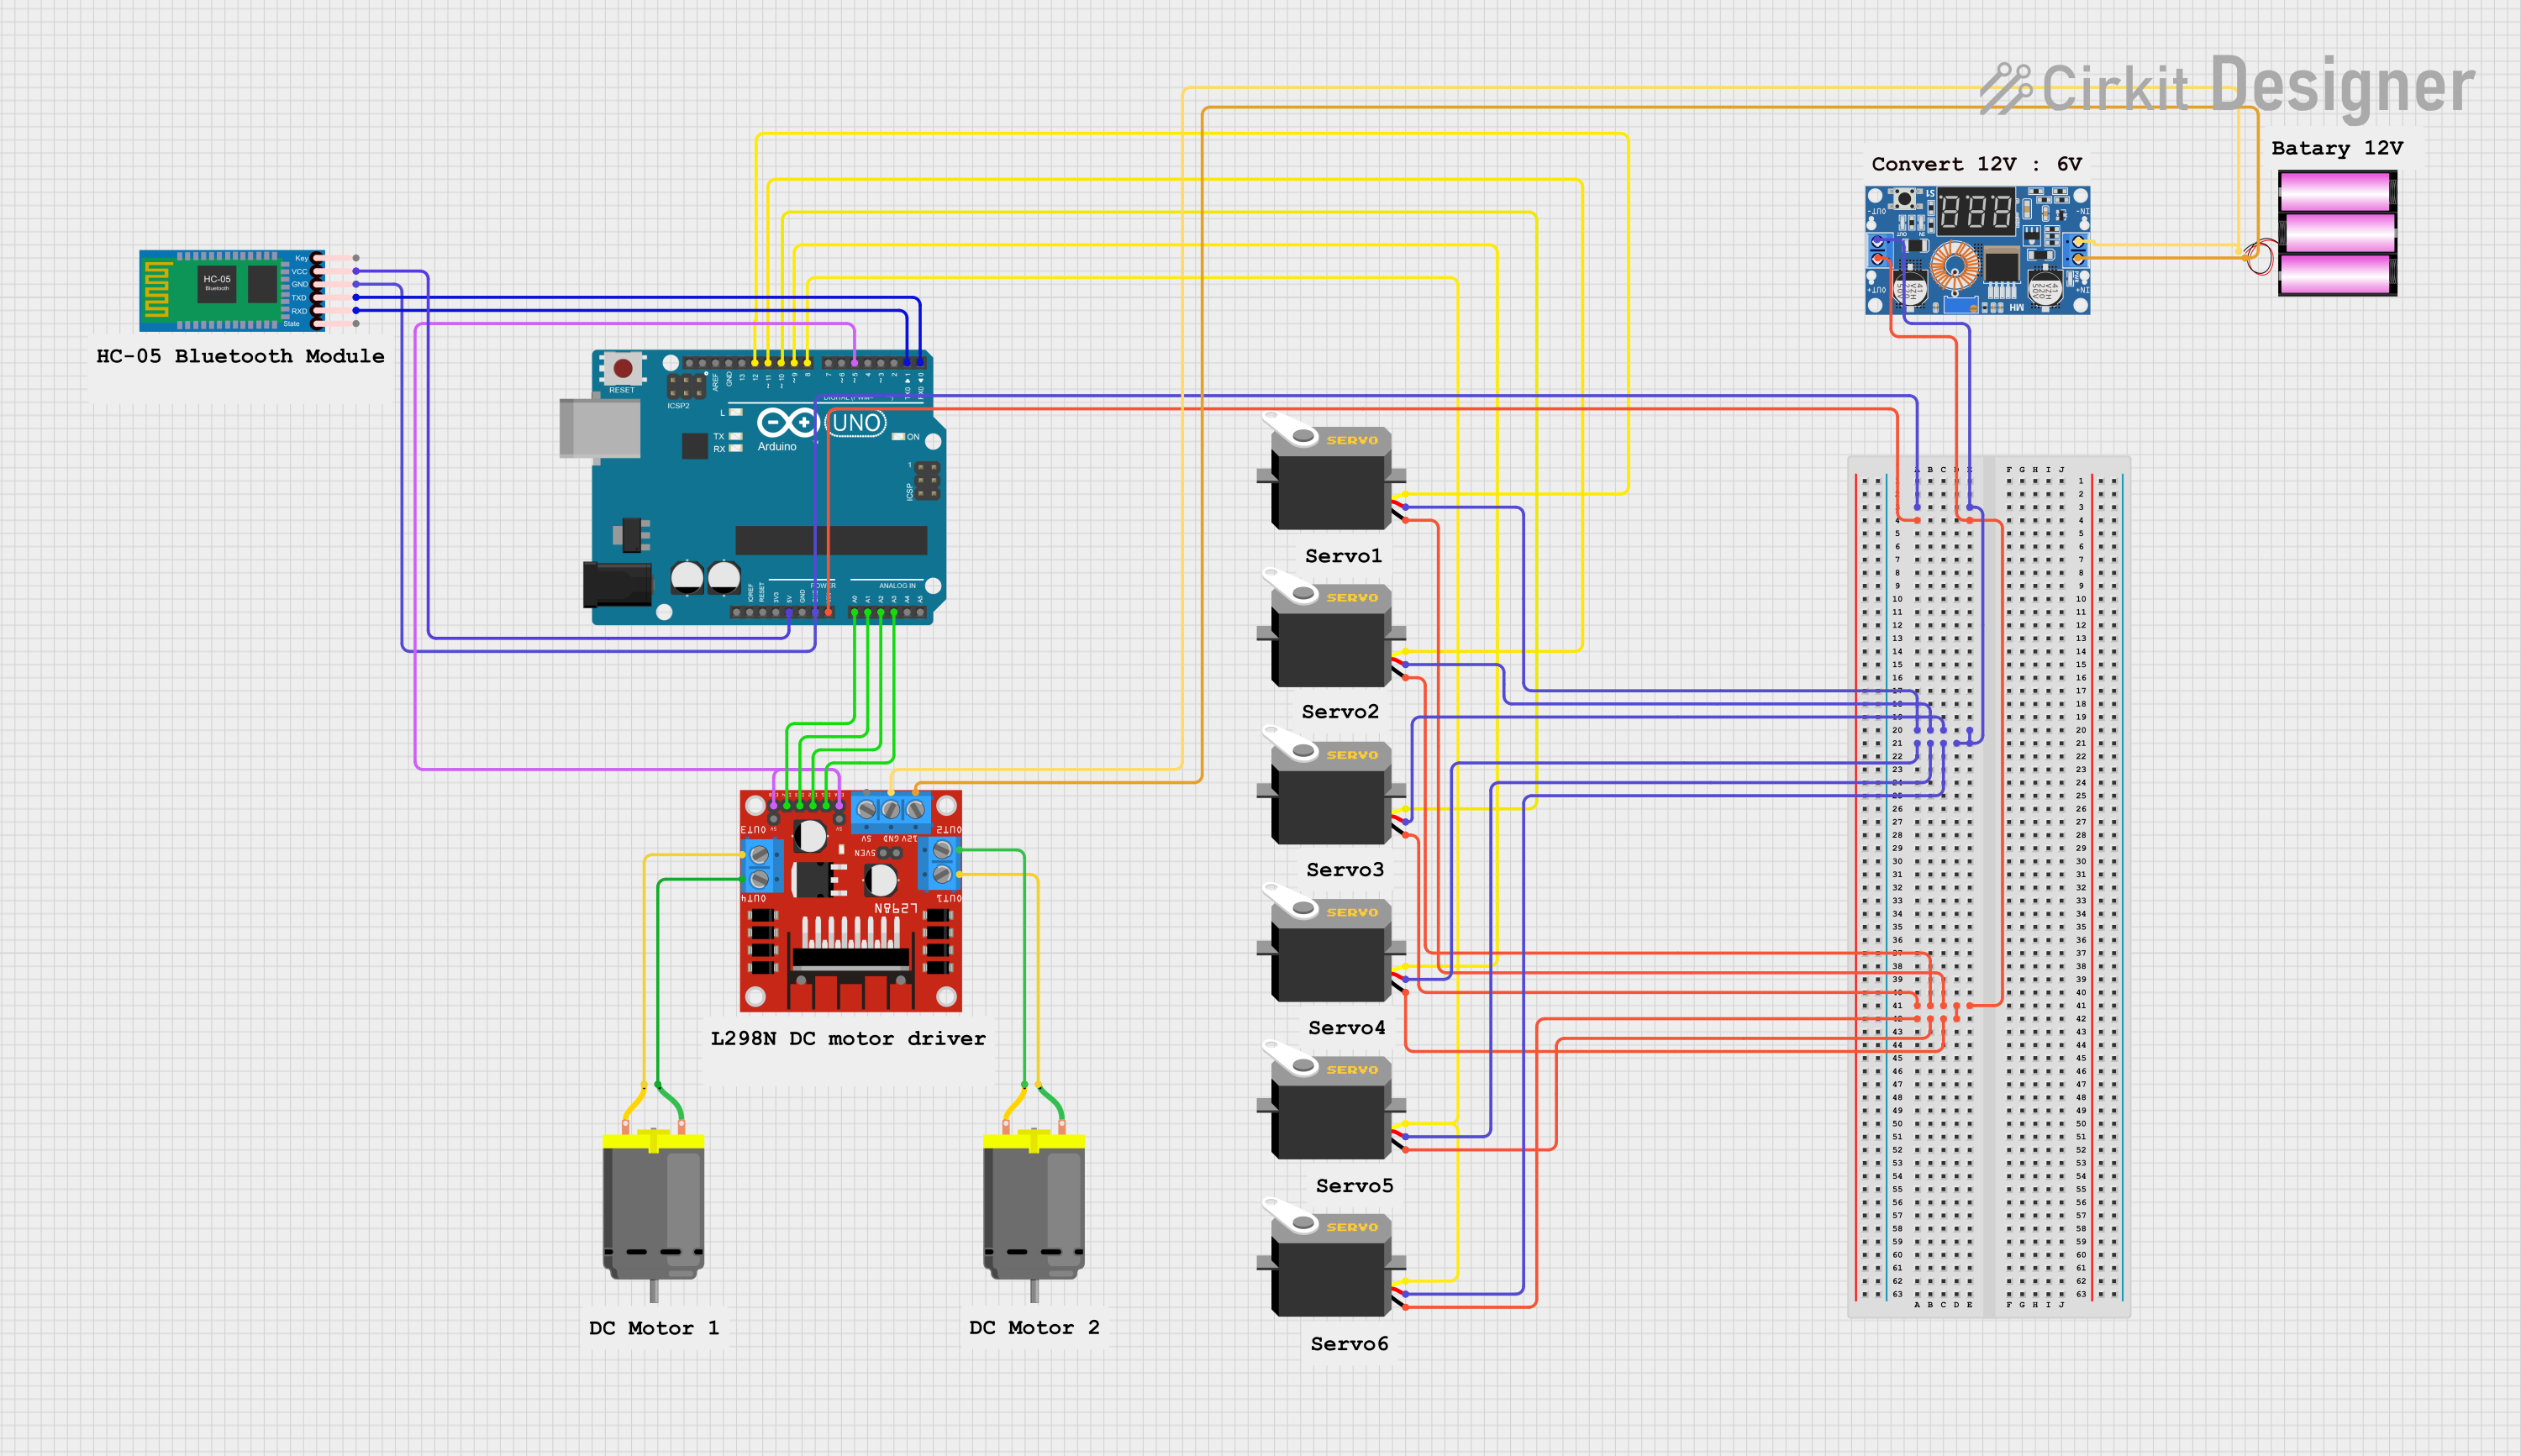
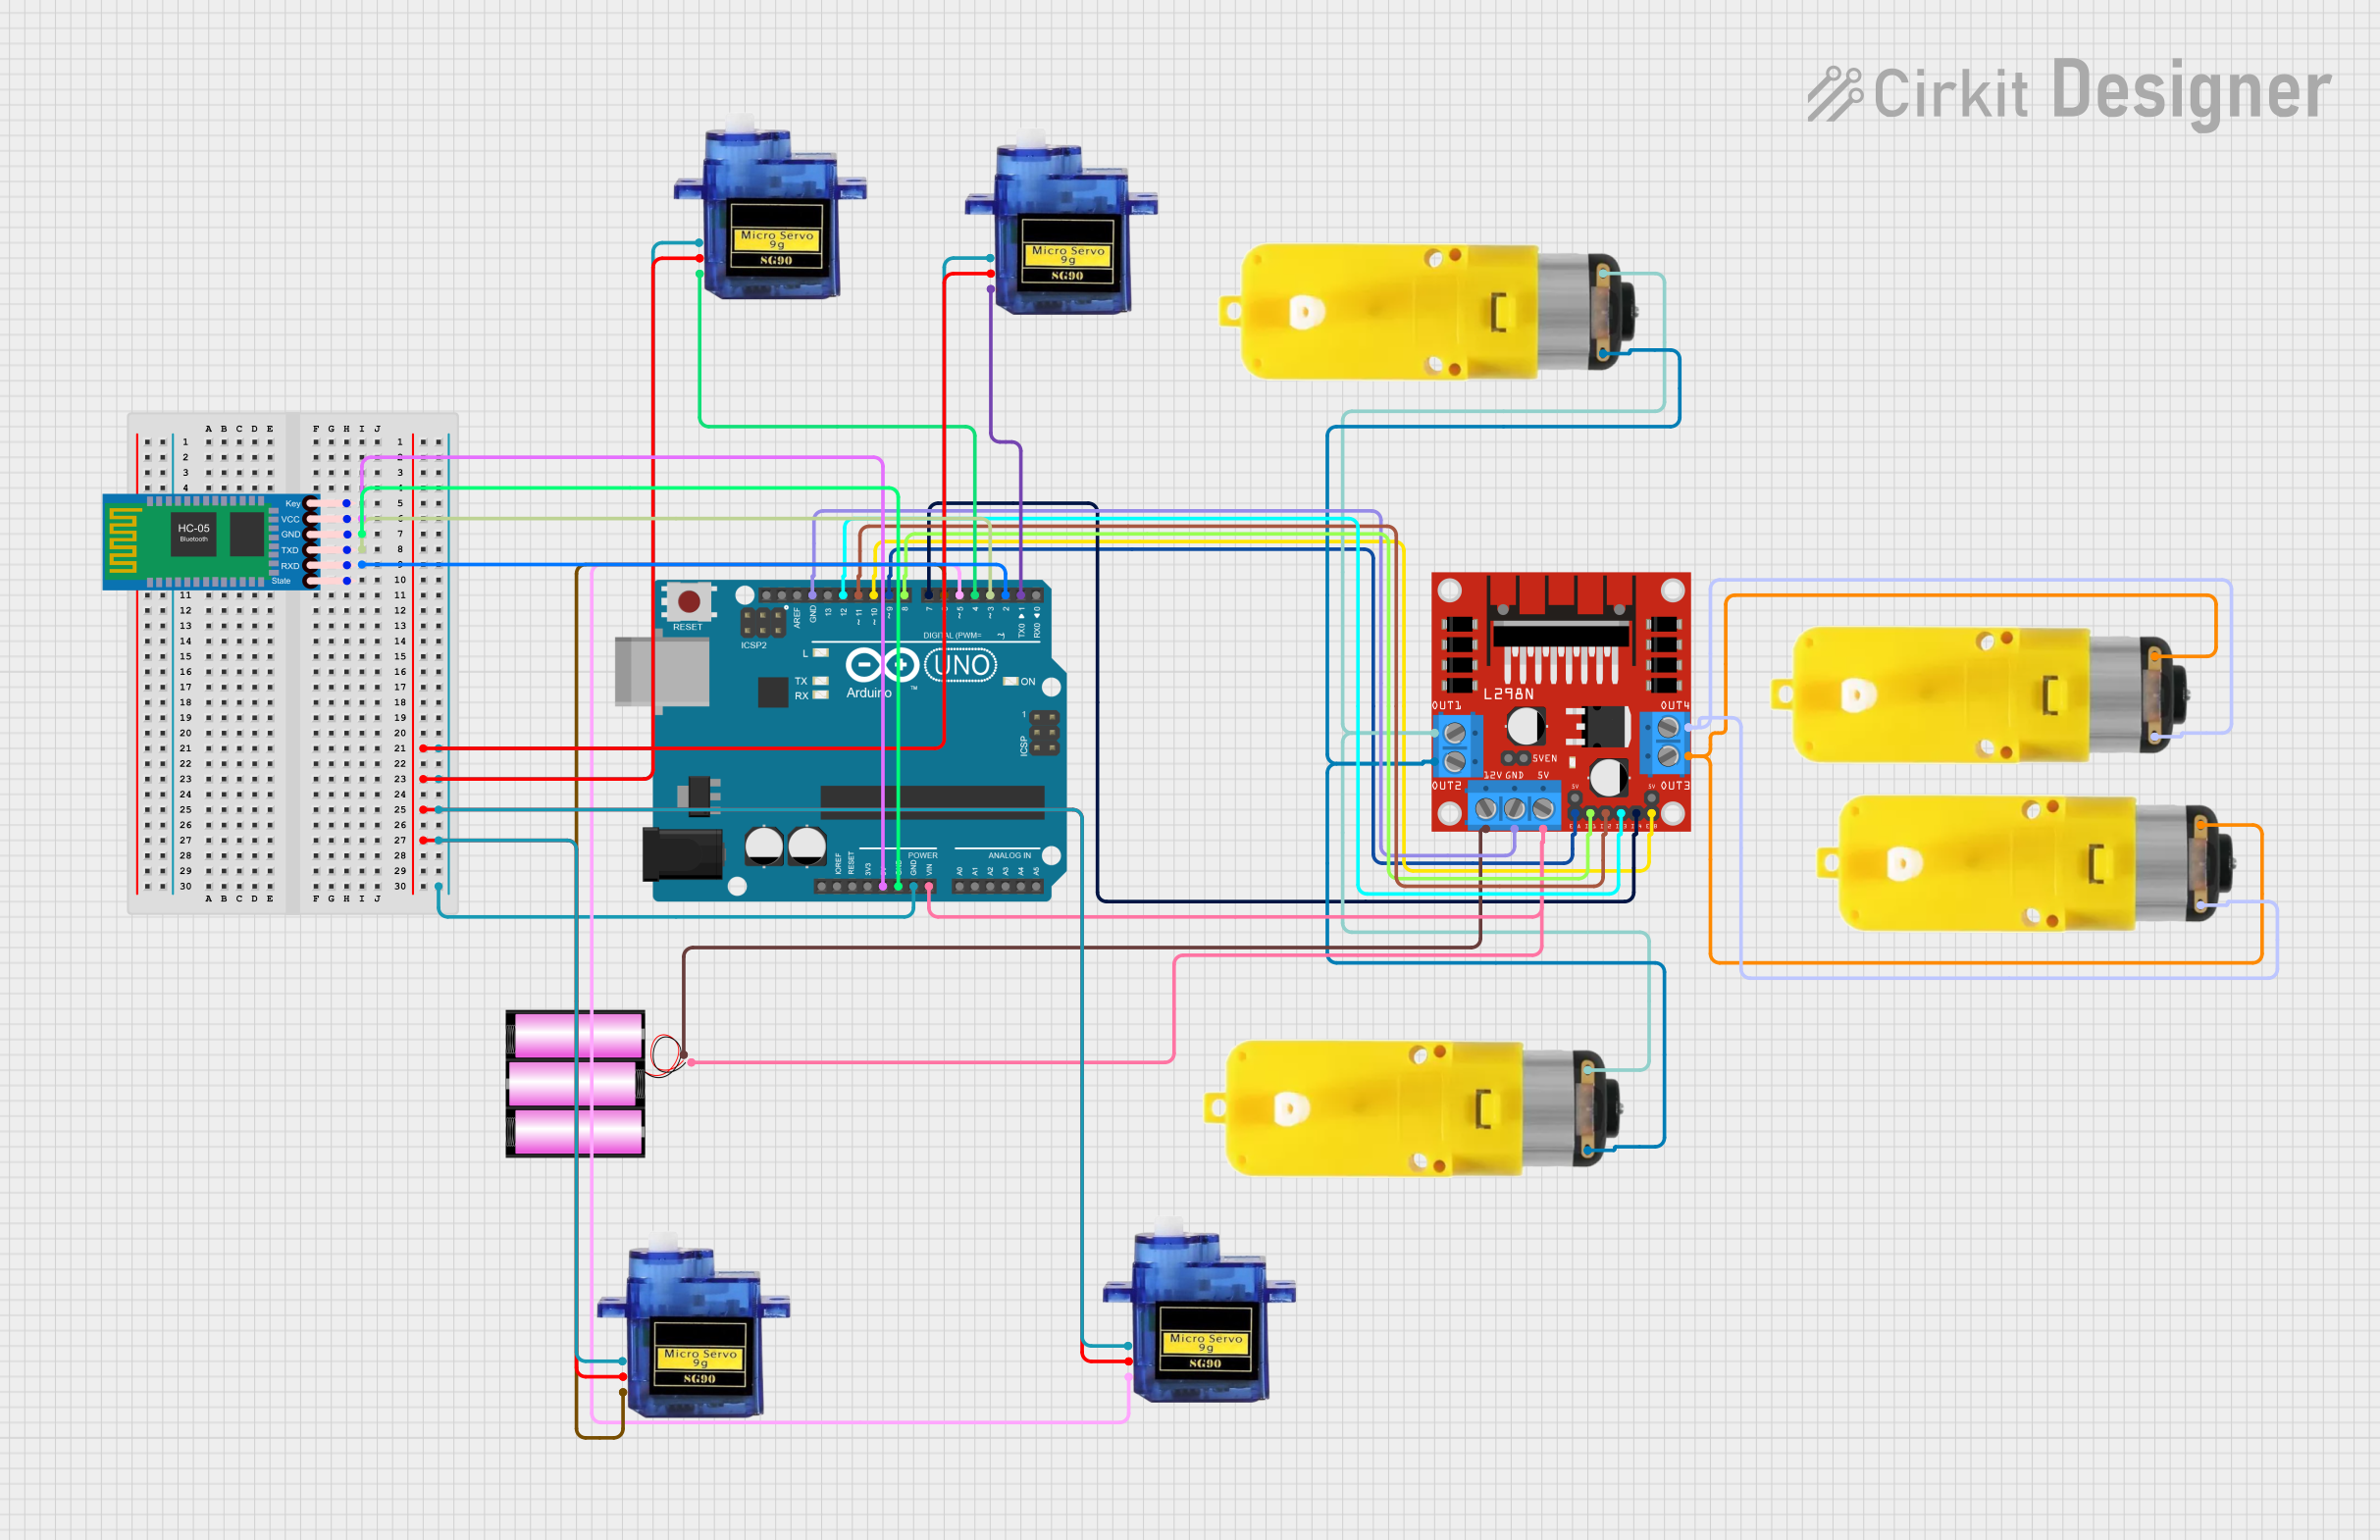
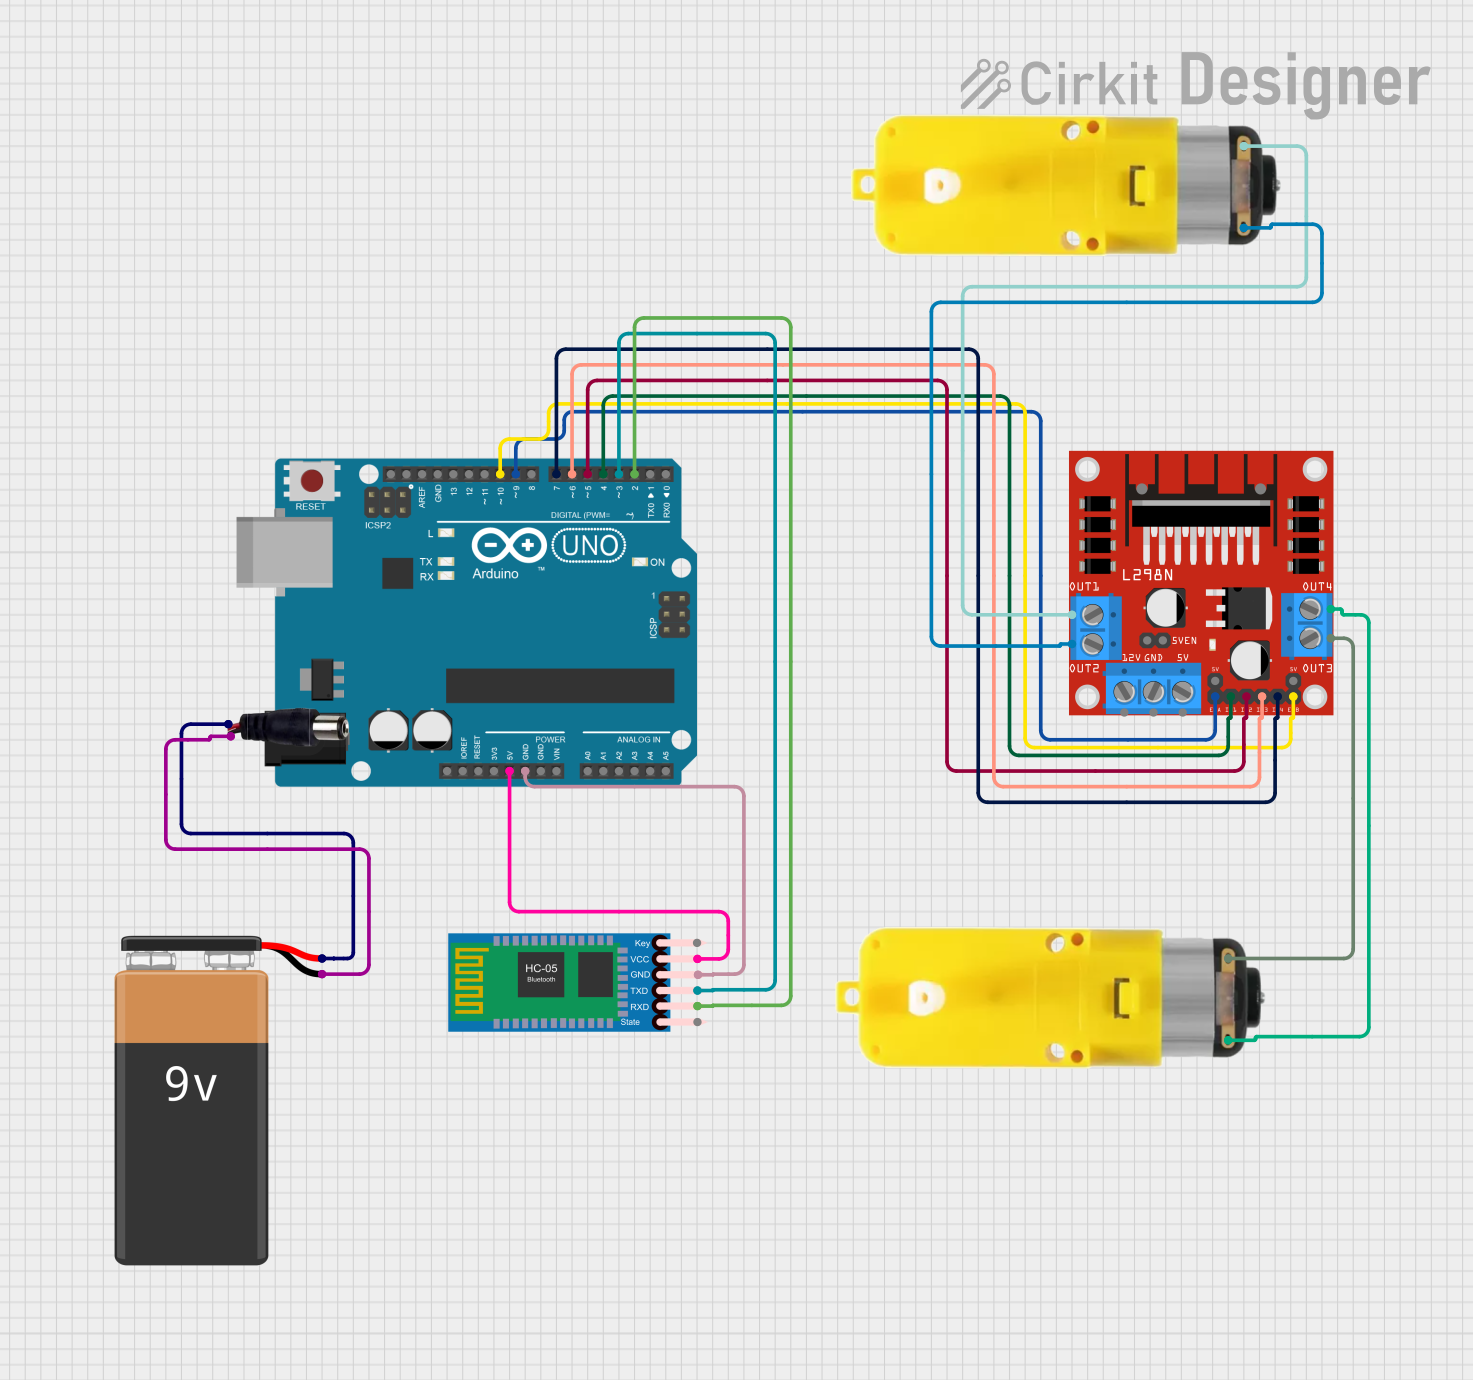
The HC-05 is a widely used Bluetooth module that enables wireless communication between devices. It operates in the 2.4 GHz ISM band and can be used to establish a serial connection between microcontrollers, computers, smartphones, and other Bluetooth-enabled devices. Common applications include wireless control systems, data logging, and user interface components for various electronic projects.

Explore Projects Built with bluetooth

Use Cirkit Designer to design, explore, and prototype these projects online. Some projects support real-time simulation. Click "Open Project" to start designing instantly!
Arduino UNO Bluetooth-Controlled Robotic Arm with Servo Motors and DC Motors
Image of ROBOTIC_ARM: A project utilizing bluetooth in a practical application
This circuit is a Bluetooth-controlled robotic system powered by an Arduino UNO, which drives two DC motors via an L298N motor driver and controls six servos. The system includes an HC-05 Bluetooth module for wireless communication, and a DC-DC buck converter to step down the voltage from a 12V battery to power the servos and other components.
Cirkit Designer LogoOpen Project in Cirkit Designer
Arduino UNO Bluetooth-Controlled Robotic Car with Motor Drivers and Servos
Image of kinematics project: A project utilizing bluetooth in a practical application
This circuit is a Bluetooth-controlled car using an Arduino UNO, an HC-05 Bluetooth module, an L298N motor driver, and multiple motors and servos. The Arduino receives commands via Bluetooth to control the direction and speed of the motors, enabling the car to move forward, backward, turn left, and turn right.
Cirkit Designer LogoOpen Project in Cirkit Designer
Arduino UNO and Bluetooth Module HM-10 Based Wireless Communication System
Image of 1: A project utilizing bluetooth in a practical application
This circuit consists of an Arduino UNO connected to an HM-10 Bluetooth module. The Arduino provides power to the Bluetooth module and facilitates serial communication between the two devices, enabling wireless data transmission.
Cirkit Designer LogoOpen Project in Cirkit Designer
Arduino UNO Bluetooth-Controlled Robotic Car with L298N Motor Driver
Image of JEA: A project utilizing bluetooth in a practical application
This circuit is a Bluetooth-controlled car using an Arduino UNO, an HC-05 Bluetooth module, and an L298N motor driver to control two DC motors. The Arduino receives commands via Bluetooth to move the car forward, backward, left, or right, and adjusts the motor speeds accordingly.
Cirkit Designer LogoOpen Project in Cirkit Designer

Explore Projects Built with bluetooth

Use Cirkit Designer to design, explore, and prototype these projects online. Some projects support real-time simulation. Click "Open Project" to start designing instantly!
Image of ROBOTIC_ARM: A project utilizing bluetooth in a practical application
Arduino UNO Bluetooth-Controlled Robotic Arm with Servo Motors and DC Motors
This circuit is a Bluetooth-controlled robotic system powered by an Arduino UNO, which drives two DC motors via an L298N motor driver and controls six servos. The system includes an HC-05 Bluetooth module for wireless communication, and a DC-DC buck converter to step down the voltage from a 12V battery to power the servos and other components.
Cirkit Designer LogoOpen Project in Cirkit Designer
Image of kinematics project: A project utilizing bluetooth in a practical application
Arduino UNO Bluetooth-Controlled Robotic Car with Motor Drivers and Servos
This circuit is a Bluetooth-controlled car using an Arduino UNO, an HC-05 Bluetooth module, an L298N motor driver, and multiple motors and servos. The Arduino receives commands via Bluetooth to control the direction and speed of the motors, enabling the car to move forward, backward, turn left, and turn right.
Cirkit Designer LogoOpen Project in Cirkit Designer
Image of 1: A project utilizing bluetooth in a practical application
Arduino UNO and Bluetooth Module HM-10 Based Wireless Communication System
This circuit consists of an Arduino UNO connected to an HM-10 Bluetooth module. The Arduino provides power to the Bluetooth module and facilitates serial communication between the two devices, enabling wireless data transmission.
Cirkit Designer LogoOpen Project in Cirkit Designer
Image of JEA: A project utilizing bluetooth in a practical application
Arduino UNO Bluetooth-Controlled Robotic Car with L298N Motor Driver
This circuit is a Bluetooth-controlled car using an Arduino UNO, an HC-05 Bluetooth module, and an L298N motor driver to control two DC motors. The Arduino receives commands via Bluetooth to move the car forward, backward, left, or right, and adjusts the motor speeds accordingly.
Cirkit Designer LogoOpen Project in Cirkit Designer

Technical Specifications

Key Technical Details

  • Bluetooth Technology: Bluetooth 2.0+EDR (Enhanced Data Rate)
  • Frequency: 2.4 to 2.485 GHz ISM band
  • Operating Voltage: 3.3V to 6V (Typically 5V compatible)
  • Operating Current: 30mA (pairing mode), 10mA (communication mode)
  • Communication Interface: Serial (UART)
  • Default Baud Rate: 9600 bps (configurable)
  • Security: Authentication and encryption
  • Range: Up to 10 meters (Class 2)

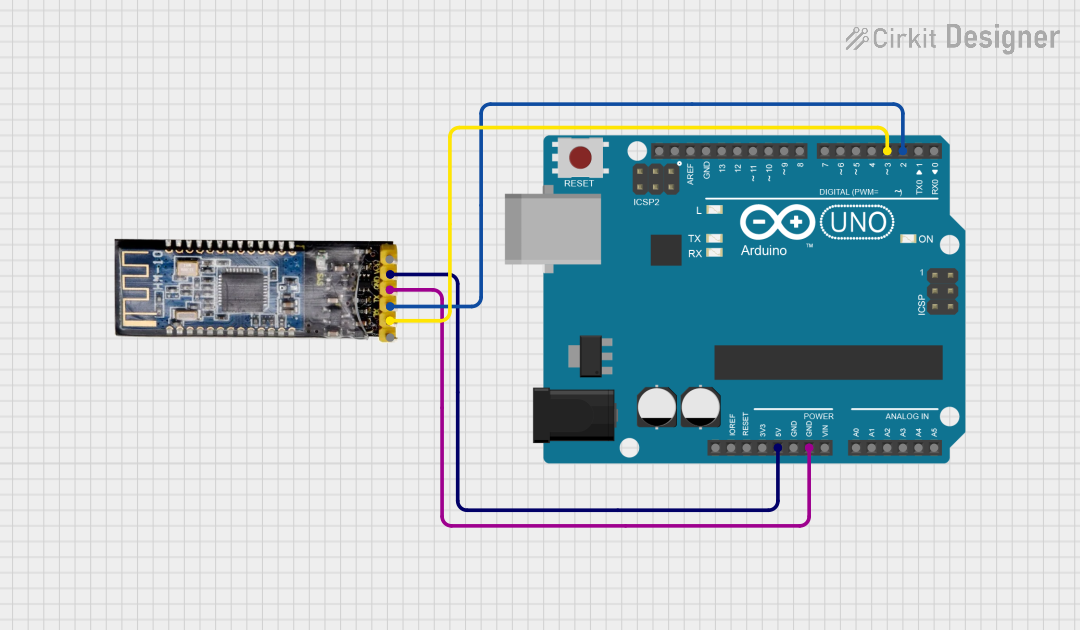
Pin Configuration and Descriptions

Pin Number Name Description
1 KEY Used to switch between command and data mode (active high)
2 VCC Power supply (3.3V to 6V)
3 GND Ground connection
4 TXD Transmit Data (connect to RXD of MCU)
5 RXD Receive Data (connect to TXD of MCU)
6 STATE Indicates the connection status

Usage Instructions

Integrating with a Circuit

  1. Power Supply: Connect the VCC pin to a 5V output on your microcontroller board and the GND pin to a ground pin.
  2. Serial Connection: Connect the TXD pin of the HC-05 to the RXD pin of your microcontroller, and the RXD pin of the HC-05 to the TXD pin of your microcontroller.
  3. Mode Selection: The KEY pin can be left disconnected for normal operation or connected to a digital pin on your microcontroller for mode switching.

Important Considerations and Best Practices

  • Ensure that the power supply is stable and within the specified voltage range.
  • Use a voltage divider or level shifter if your microcontroller operates at a different logic level than the HC-05.
  • Pairing and connection procedures should be followed as per the HC-05 datasheet.
  • Avoid placing the module near sources of interference or physical obstructions that may reduce its range.

Example Code for Arduino UNO

#include <SoftwareSerial.h>

SoftwareSerial BTSerial(10, 11); // RX | TX

void setup() {
  pinMode(9, OUTPUT);  // KEY pin if needed for mode switching
  digitalWrite(9, LOW); // Normal operation mode
  Serial.begin(9600);
  BTSerial.begin(9600);  // HC-05 default speed in AT command more
}

void loop() {
  // Read from HC-05 and send to the Arduino Serial Monitor
  if (BTSerial.available()) {
    char c = BTSerial.read();
    Serial.write(c);
  }

  // Read from the Serial Monitor and send to HC-05
  if (Serial.available()) {
    char c = Serial.read();
    BTSerial.write(c);
  }
}

Troubleshooting and FAQs

Common Issues

  • Device not pairing: Ensure the module is in pairing mode and that the device you are trying to pair is within range.
  • Serial communication not working: Check the wiring, especially the TX and RX connections. Also, verify the baud rate settings.
  • Intermittent connection: This could be due to power supply issues or environmental interference. Ensure a stable power source and clear line of sight.

Solutions and Tips

  • Reset the module: Sometimes simply resetting the HC-05 can resolve connection issues.
  • AT Commands: Use AT commands to configure the HC-05 settings such as baud rate, device name, and pairing password.
  • LED Indicator: The STATE pin can be monitored for connection status, which can be helpful for debugging.

FAQs

Q: How do I change the baud rate of the HC-05? A: You can change the baud rate using AT commands. Enter AT mode by pulling the KEY pin high and use the command AT+UART=<baud rate>,<stop bits>,<parity> to set the desired baud rate.

Q: Can I connect multiple devices to the HC-05 at the same time? A: No, the HC-05 can only be connected to one device at a time in slave mode.

Q: How do I know if my HC-05 is in AT command mode? A: The HC-05 enters AT command mode when the KEY pin is held high on power-up. The LED will blink in a different pattern compared to normal mode, typically a slower blink rate.

Q: What is the default password for pairing the HC-05? A: The default password is usually '1234' or '0000'.