How to Use Placa Amplificador De Áudio Digital Xh-m544 150w Mono: Examples, Pinouts, and Specs
Introduction
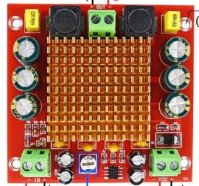
The Placa Amplificador De Áudio Digital XH-M544 150W Mono is a high-performance digital audio amplifier board designed to deliver up to 150 watts of mono output. It is based on the TPA3116D2 amplifier chip, which ensures efficient power delivery and high-quality audio output. This module is ideal for driving speakers in various audio applications, such as home audio systems, DIY speaker projects, and public address systems.
Explore Projects Built with Placa Amplificador De Áudio Digital Xh-m544 150w Mono


Explore Projects Built with Placa Amplificador De Áudio Digital Xh-m544 150w Mono
Common Applications
- DIY audio amplifier projects
- Home theater systems
- Public address (PA) systems
- Portable speaker systems
- Audio enhancement for TVs or computers
Technical Specifications
Below are the key technical details and pin configurations for the XH-M544 module:
Key Technical Details
| Parameter | Specification |
|---|---|
| Amplifier Chip | TPA3116D2 |
| Output Power | 150W (Mono) |
| Operating Voltage Range | 12V - 24V DC |
| Recommended Voltage | 24V DC |
| Input Signal Type | Analog (via 3.5mm AUX or RCA) |
| Output Load Impedance | 4Ω - 8Ω |
| Efficiency | Up to 90% |
| Frequency Response | 20Hz - 20kHz |
| Dimensions | 70mm x 50mm x 20mm |
Pin Configuration and Descriptions
| Pin/Connector Name | Description |
|---|---|
| DC IN (+, -) | Power input terminals for 12V-24V DC. Ensure correct polarity. |
| Speaker OUT (+, -) | Output terminals for connecting the speaker. Supports 4Ω or 8Ω impedance. |
| AUX IN | 3.5mm audio input jack for connecting audio sources like phones or PCs. |
| RCA IN (L, R) | RCA input connectors for stereo audio sources. Internally mixed to mono. |
| Volume Knob | Potentiometer for adjusting the output volume. |
Usage Instructions
How to Use the XH-M544 in a Circuit
- Power Supply: Connect a DC power supply (12V-24V) to the
DC INterminals. A 24V power supply is recommended for maximum output power. - Audio Input:
- Use the 3.5mm AUX jack or RCA connectors to input an audio signal.
- Ensure the audio source is powered and functional.
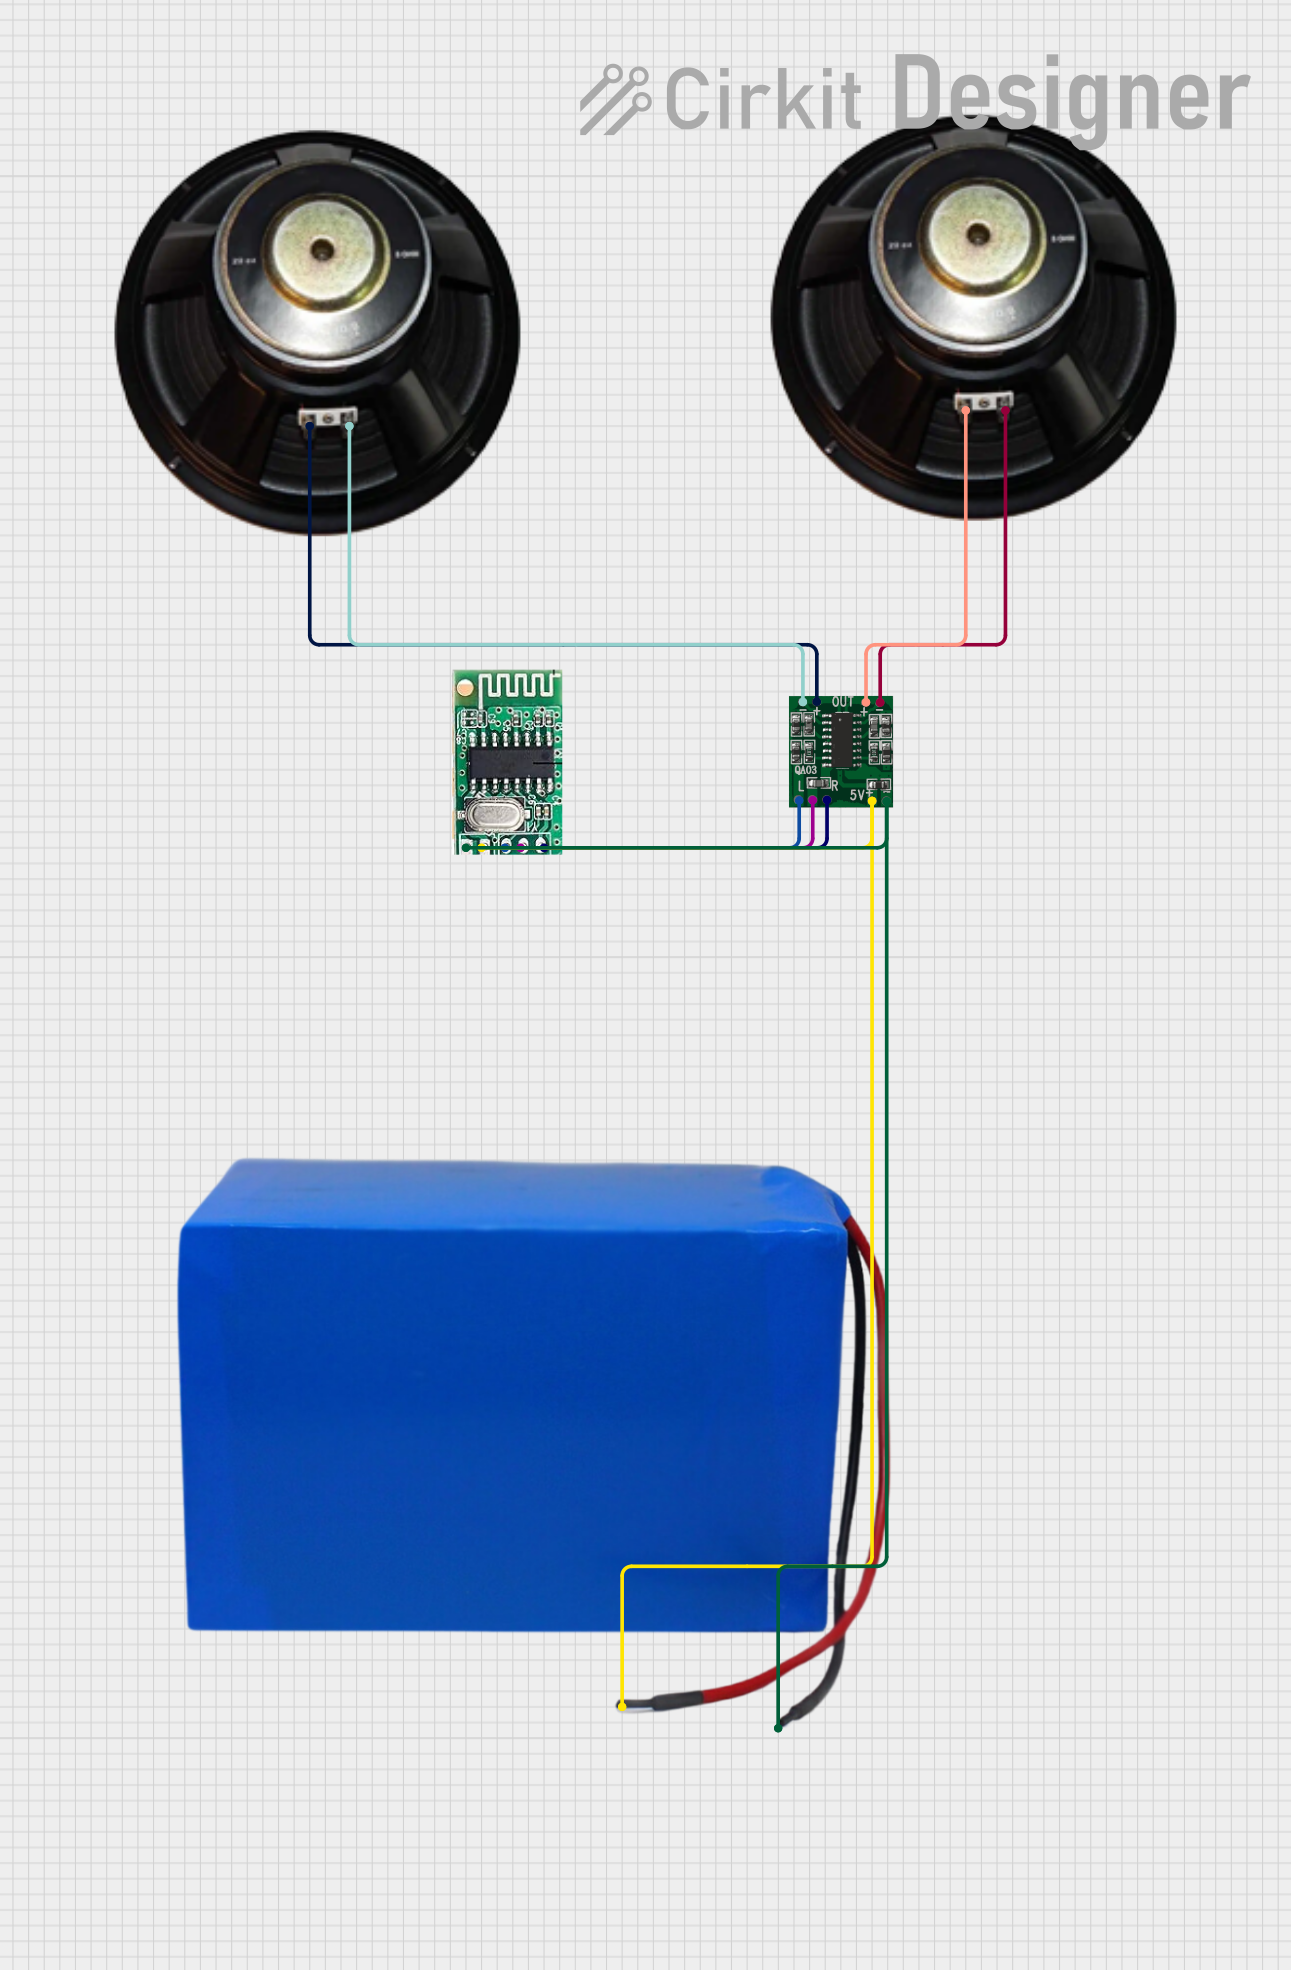
- Speaker Connection: Connect a 4Ω or 8Ω speaker to the
Speaker OUTterminals. Ensure proper polarity for optimal sound quality. - Volume Adjustment: Use the onboard volume knob to adjust the output volume to the desired level.
Important Considerations and Best Practices
- Heat Dissipation: The XH-M544 module can generate heat during operation. Ensure adequate ventilation or attach a heatsink to the TPA3116D2 chip for prolonged use at high power.
- Power Supply: Use a stable and regulated DC power supply to avoid noise or damage to the module.
- Speaker Compatibility: Ensure the speaker impedance matches the module's specifications (4Ω or 8Ω).
- Audio Input: Avoid overdriving the input signal to prevent distortion or damage to the amplifier.
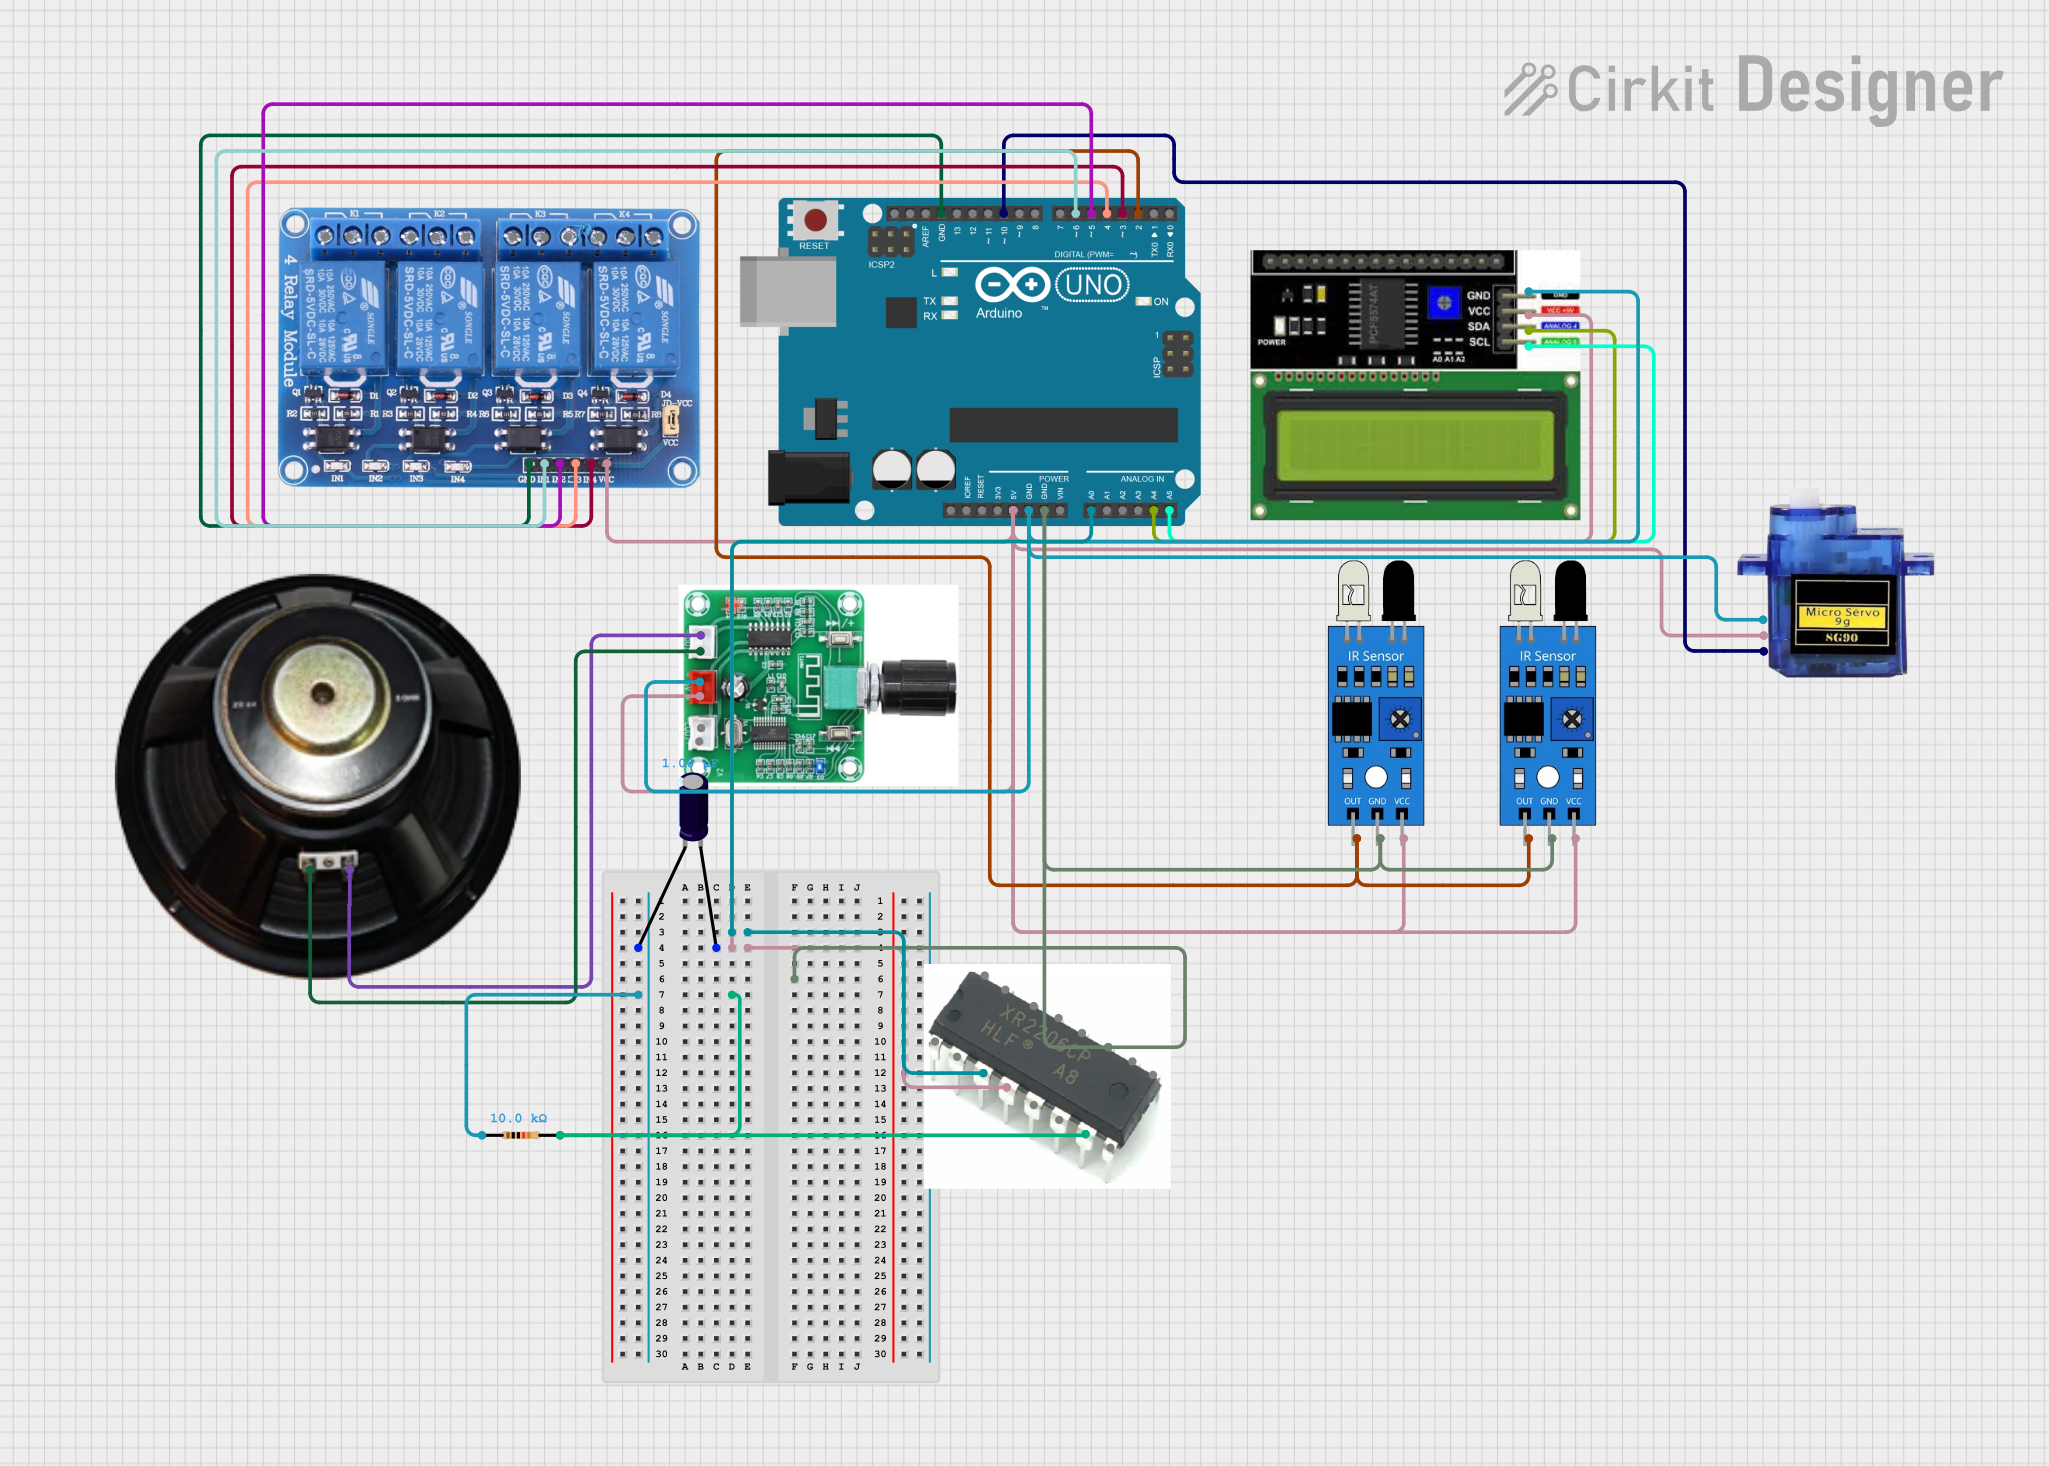
Example: Connecting to an Arduino UNO
While the XH-M544 is not directly programmable, it can be used with an Arduino UNO to control audio playback. Below is an example of using an Arduino to control an audio source via a relay:
/*
  Example: Controlling Audio Playback with Arduino and XH-M544
  This code demonstrates how to use an Arduino to toggle an audio source
  connected to the XH-M544 amplifier using a relay module.
*/

const int relayPin = 7; // Pin connected to the relay module

void setup() {
  pinMode(relayPin, OUTPUT); // Set relay pin as output
  digitalWrite(relayPin, LOW); // Ensure relay is off at startup
}

void loop() {
  // Turn on the audio source
  digitalWrite(relayPin, HIGH);
  delay(10000); // Play audio for 10 seconds

  // Turn off the audio source
  digitalWrite(relayPin, LOW);
  delay(5000); // Pause for 5 seconds
}
Note: This example assumes the audio source is connected to the XH-M544 via AUX or RCA input, and the relay module is used to control power to the audio source.
Troubleshooting and FAQs
Common Issues and Solutions
| Issue | Possible Cause | Solution |
|---|---|---|
| No sound output | Incorrect wiring or loose connections | Verify all connections and wiring. |
| Distorted audio | Overdriven input signal or low voltage | Reduce input volume or check power supply. |
| Amplifier overheating | Insufficient cooling | Add a heatsink or improve ventilation. |
| Low volume output | Low input signal or incorrect settings | Increase input volume or adjust the knob. |
| Noise or hum in audio | Poor power supply or ground loop | Use a regulated power supply and proper grounding. |
FAQs
Can I use a 12V power supply with the XH-M544?
- Yes, but the output power will be lower compared to using a 24V power supply.
What type of speakers can I connect to this amplifier?
- You can connect 4Ω or 8Ω speakers. Ensure the speaker's power rating matches the amplifier's output.
Can I use this amplifier with a stereo audio source?
- Yes, the RCA inputs accept stereo signals, which are internally mixed to mono.
Why is the amplifier overheating during use?
- This may occur if the amplifier is running at high power for extended periods without proper cooling. Attach a heatsink or ensure adequate airflow.
Is the XH-M544 compatible with Bluetooth modules?
- Yes, you can connect a Bluetooth audio receiver module to the AUX or RCA input for wireless audio playback.
By following this documentation, you can effectively use the XH-M544 amplifier module in your audio projects and troubleshoot common issues with ease.