How to Use TMP007 Thermopile Sensor: Examples, Pinouts, and Specs
Introduction
The TMP007 Thermopile Sensor is a sophisticated non-contact temperature measurement device that captures infrared energy emitted from objects without requiring physical contact. This sensor is ideal for a variety of applications, including but not limited to, consumer electronics, industrial process control, HVAC systems, and thermal imaging. Its ability to measure temperature from a distance makes it a versatile component for projects that require thermal monitoring.
Explore Projects Built with TMP007 Thermopile Sensor

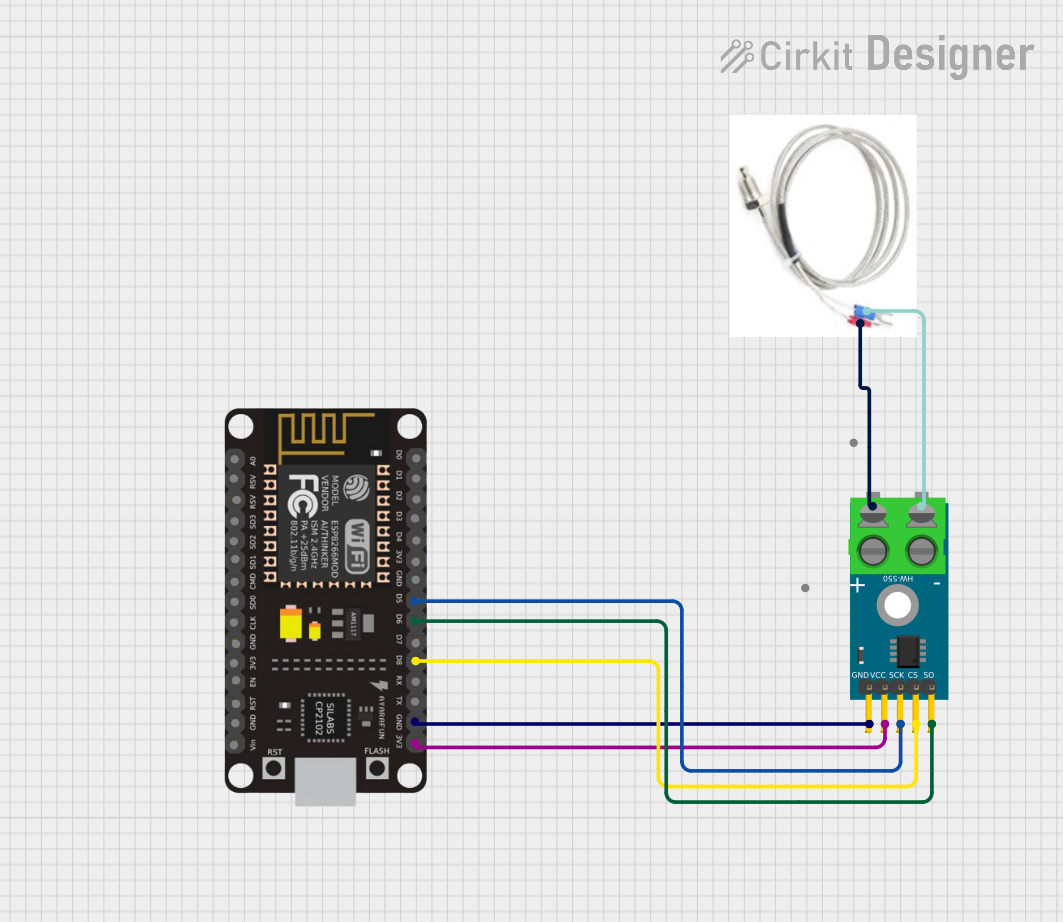
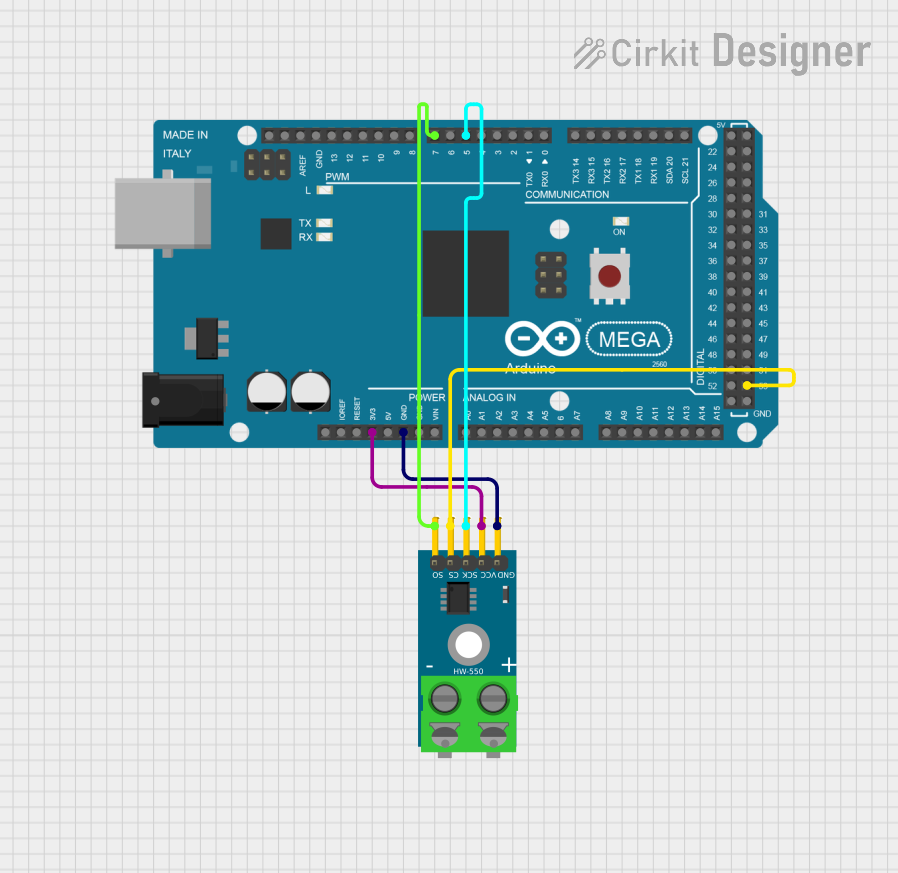
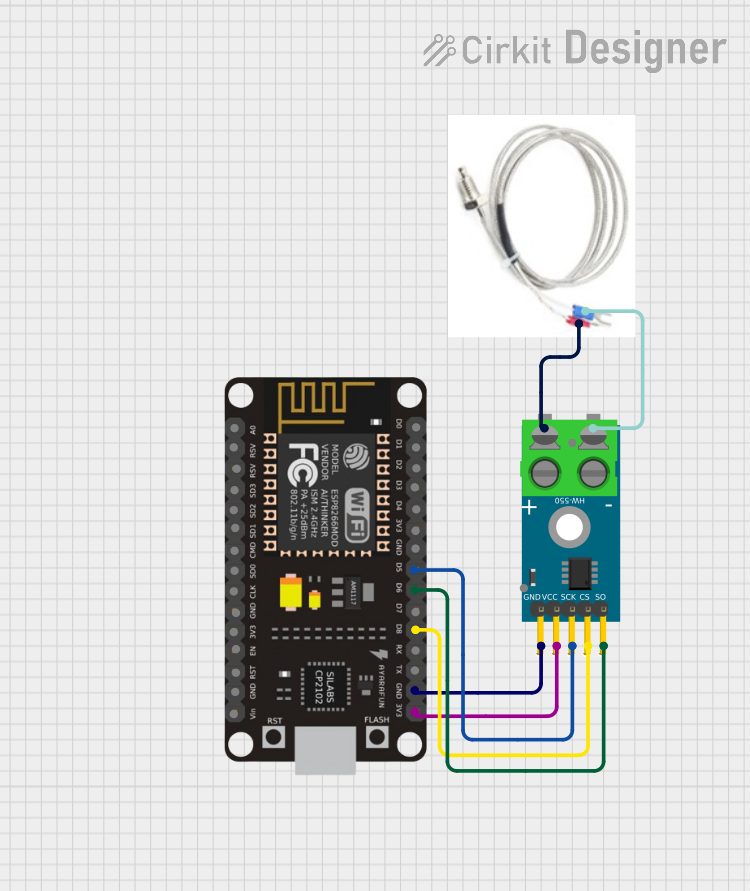
Explore Projects Built with TMP007 Thermopile Sensor
Technical Specifications
Key Technical Details
- Supply Voltage (Vdd): 2.5V to 5.5V
- Temperature Range (Object): -40°C to +125°C
- Temperature Range (Sensor): -40°C to +125°C
- Temperature Resolution: 14 bits
- Interface: I2C-compatible, two-wire serial interface
- I2C Address Options: 0x40, 0x41, 0x44, 0x45 (selectable via pins)
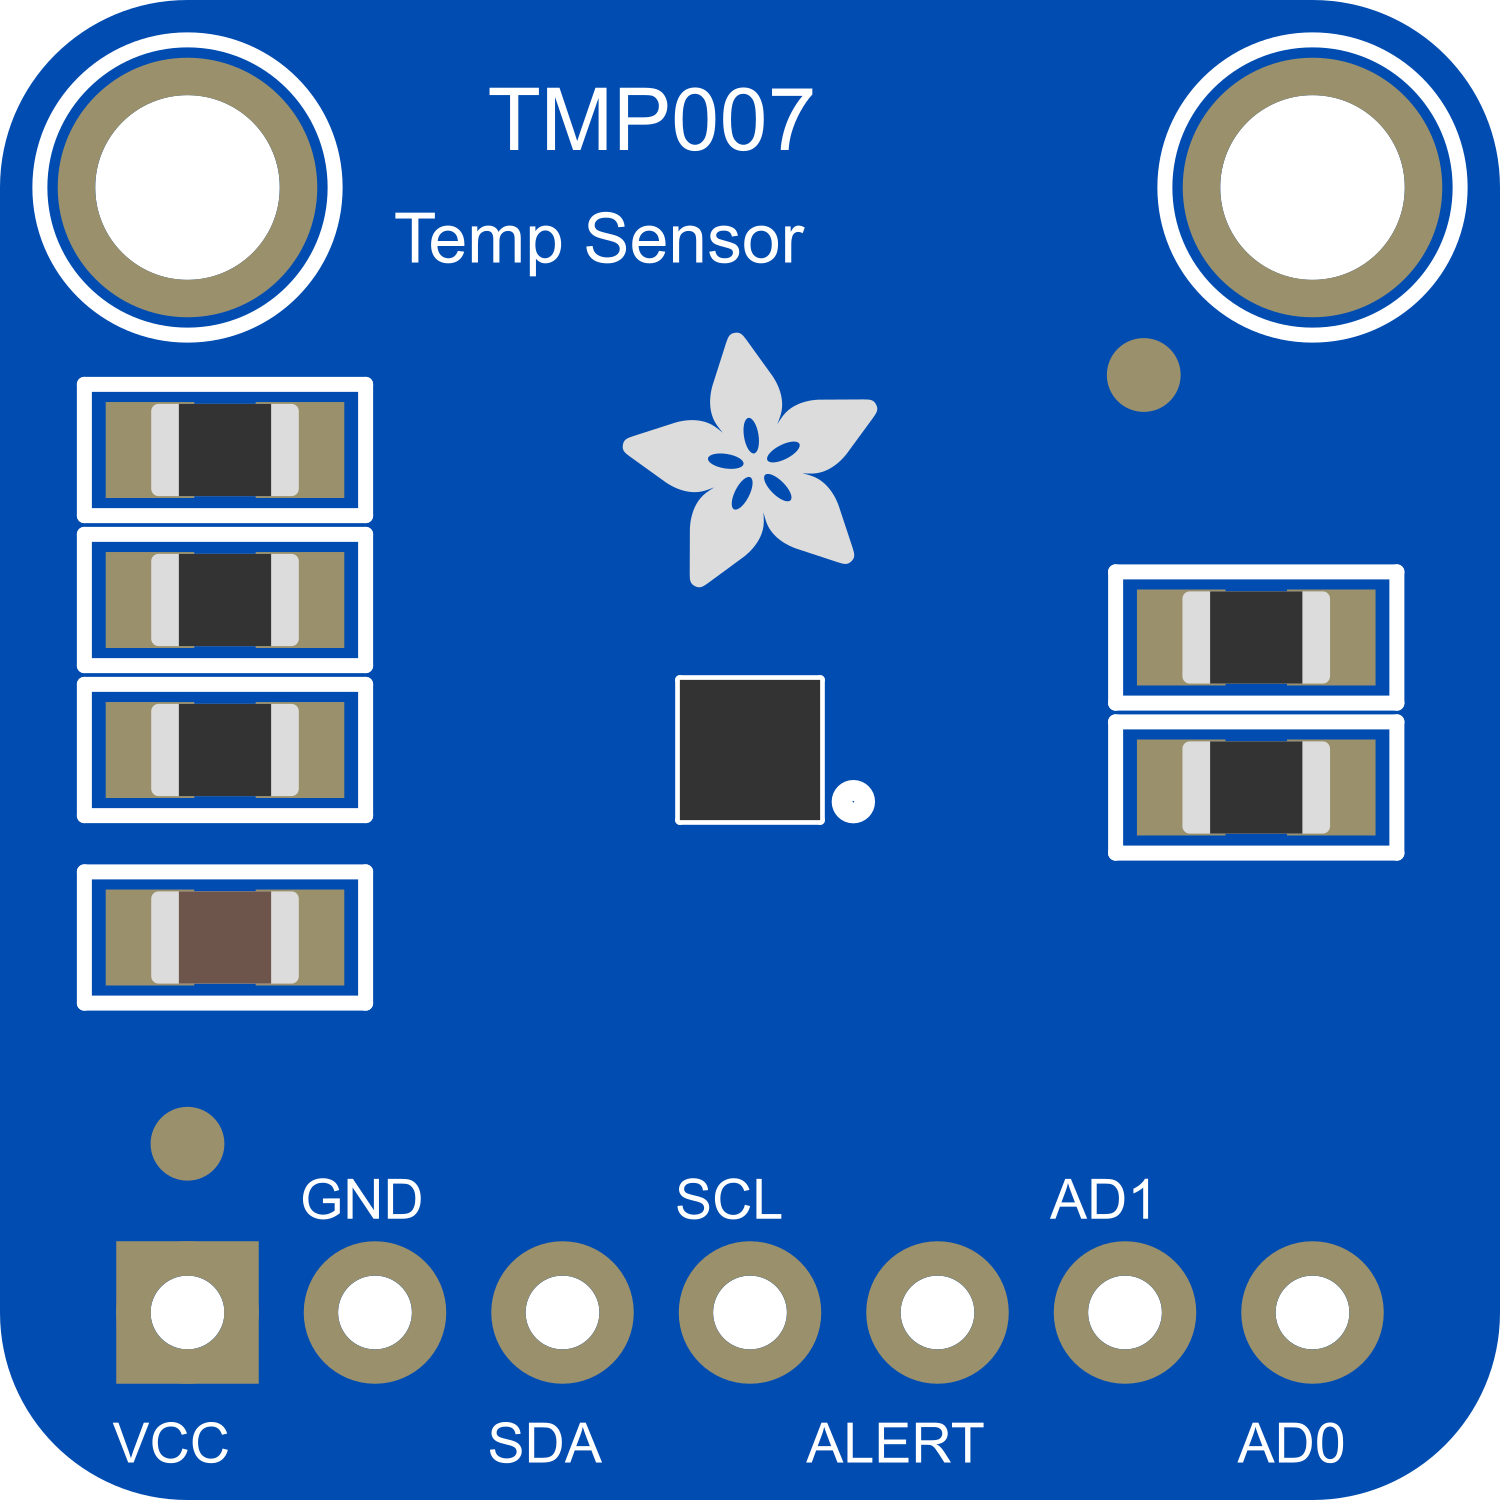
Pin Configuration and Descriptions
| Pin Number | Name | Description |
|---|---|---|
| 1 | VDD | Power supply (2.5V to 5.5V) |
| 2 | GND | Ground reference for the power supply |
| 3 | SDA | I2C Data line |
| 4 | SCL | I2C Clock line |
| 5 | ADD0 | Address select pin 0 |
| 6 | ADD1 | Address select pin 1 |
| 7 | DRDY | Data ready output (optional use) |
| 8 | INT | Interrupt output (optional use) |
Usage Instructions
Integrating the TMP007 Sensor into a Circuit
- Power Supply: Connect the VDD pin to a 2.5V to 5.5V power source and the GND pin to the ground.
- I2C Communication: Connect the SDA and SCL pins to the corresponding I2C data and clock lines on your microcontroller.
- Address Selection: If using multiple TMP007 sensors on the same I2C bus, set the ADD0 and ADD1 pins to different combinations to assign unique addresses to each sensor.
- Data Ready (DRDY) and Interrupt (INT): These pins can be used for advanced functionality such as interrupt-driven measurements. Connect them if required by your application.
Best Practices
- Ensure that the power supply is stable and within the specified voltage range.
- Use pull-up resistors on the I2C data and clock lines as required by your microcontroller's I2C interface.
- Avoid placing the sensor near heat sources or objects that may emit high levels of infrared radiation, unless they are the subject of measurement.
- For accurate measurements, consider the field of view of the sensor and ensure that the target object fills the entire field of view.
Example Code for Arduino UNO
#include <Wire.h>

// TMP007 I2C address is 0x40(64) by default
#define Addr 0x40

void setup() {
  // Initialise I2C communication as MASTER
  Wire.begin();
  // Initialise serial communication, set baud rate = 9600
  Serial.begin(9600);

  // Start I2C Transmission
  Wire.beginTransmission(Addr);
  // Select configuration register
  Wire.write(0x02);
  // Continuous conversion mode, Comparator mode
  Wire.write(0x1540);
  // Stop I2C Transmission
  Wire.endTransmission();
  delay(300);
}

void loop() {
  unsigned int data[2];

  // Start I2C Transmission
  Wire.beginTransmission(Addr);
  // Select data register
  Wire.write(0x01);
  // Stop I2C Transmission
  Wire.endTransmission();

  // Request 2 bytes of data
  Wire.requestFrom(Addr, 2);

  // Read 2 bytes of data
  // temp msb, temp lsb
  if (Wire.available() == 2) {
    data[0] = Wire.read();
    data[1] = Wire.read();
  }

  // Convert the data to 14-bits
  int temp = ((data[0] * 256) + (data[1] & 0xFC)) / 4;
  float cTemp = temp * 0.03125;
  float fTemp = cTemp * 1.8 + 32;

  // Output data to serial monitor
  Serial.print("Object Temperature in Celsius : ");
  Serial.print(cTemp);
  Serial.println(" C");
  Serial.print("Object Temperature in Fahrenheit : ");
  Serial.print(fTemp);
  Serial.println(" F");

  delay(500);
}
Troubleshooting and FAQs
Common Issues
- Inaccurate Temperature Readings: Ensure that the sensor is not exposed to sudden temperature changes and that the target object fills the sensor's field of view.
- No Data on I2C: Check the connections and ensure that the correct I2C address is used. Also, verify that pull-up resistors are in place if required.
FAQs
Q: Can the TMP007 sensor measure the temperature of liquids? A: The TMP007 is designed for non-contact temperature measurements, primarily of solid surfaces. It may not provide accurate readings for liquids due to their varying emissivity and transparency.
Q: How can I change the I2C address of the TMP007? A: The I2C address can be changed by connecting the ADD0 and ADD1 pins to either VDD or GND to form the combinations corresponding to the desired address.
Q: What is the field of view of the TMP007 sensor? A: The TMP007 has a typical field of view of approximately 90 degrees. Ensure that the target object is within this area for accurate measurements.
Q: Is calibration required for the TMP007 sensor? A: The TMP007 comes factory-calibrated. However, for critical applications, you may perform additional calibration to account for systematic errors specific to your application's environment.
For further assistance, consult the TMP007 datasheet or contact technical support.