How to Use USB UDP: Examples, Pinouts, and Specs
Introduction
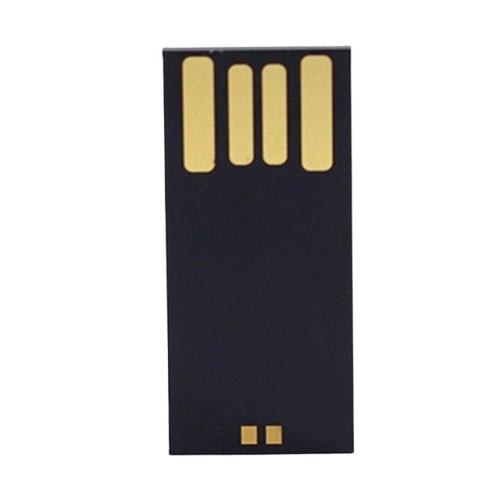
The USB UDP (Universal Serial Bus Universal Data Packet) is a versatile and widely used electronic component that facilitates data communication between devices. It is commonly used in applications requiring reliable and high-speed data transfer, such as computer peripherals, embedded systems, and consumer electronics. The USB UDP component is essential for enabling USB communication protocols, making it a critical element in modern electronic design.
Explore Projects Built with USB UDP

Explore Projects Built with USB UDP
Technical Specifications
Key Technical Details
| Parameter | Value |
|---|---|
| Voltage | 5V |
| Current | 500mA (standard), 900mA (USB 3.0) |
| Data Transfer Rate | Up to 5 Gbps (USB 3.0) |
| Connector Type | USB Type-A, Type-B, Type-C |
| Protocols Supported | USB 1.1, USB 2.0, USB 3.0 |
Pin Configuration and Descriptions
USB Type-A Connector
| Pin Number | Name | Description |
|---|---|---|
| 1 | VBUS | +5V Power Supply |
| 2 | D- | Data Negative |
| 3 | D+ | Data Positive |
| 4 | GND | Ground |
USB Type-B Connector
| Pin Number | Name | Description |
|---|---|---|
| 1 | VBUS | +5V Power Supply |
| 2 | D- | Data Negative |
| 3 | D+ | Data Positive |
| 4 | GND | Ground |
USB Type-C Connector
| Pin Number | Name | Description |
|---|---|---|
| A1 | GND | Ground |
| A2 | SSTXp | SuperSpeed Transmit Positive |
| A3 | SSTXn | SuperSpeed Transmit Negative |
| A4 | VBUS | +5V Power Supply |
| A5 | CC1 | Configuration Channel 1 |
| A6 | D+ | Data Positive |
| A7 | D- | Data Negative |
| A8 | SBU1 | Sideband Use 1 |
| A9 | VBUS | +5V Power Supply |
| A10 | SSRXn | SuperSpeed Receive Negative |
| A11 | SSRXp | SuperSpeed Receive Positive |
| A12 | GND | Ground |
| B1 | GND | Ground |
| B2 | SSRXp | SuperSpeed Transmit Positive |
| B3 | SSRXn | SuperSpeed Transmit Negative |
| B4 | VBUS | +5V Power Supply |
| B5 | CC2 | Configuration Channel 2 |
| B6 | D+ | Data Positive |
| B7 | D- | Data Negative |
| B8 | SBU2 | Sideband Use 2 |
| B9 | VBUS | +5V Power Supply |
| B10 | SSRXn | SuperSpeed Receive Negative |
| B11 | SSRXp | SuperSpeed Receive Positive |
| B12 | GND | Ground |
Usage Instructions
How to Use the Component in a Circuit
- Power Supply: Ensure that the USB UDP component is connected to a stable 5V power supply. This is typically provided by the VBUS pin.
- Data Lines: Connect the D+ and D- pins to the corresponding data lines of the device you are interfacing with. For USB 3.0, also connect the SuperSpeed lines (SSTXp, SSTXn, SSRXp, SSRXn).
- Ground: Connect the GND pin to the ground of your circuit to complete the electrical connection.
- Configuration Channels (Type-C): For USB Type-C connectors, connect the CC1 and CC2 pins to manage the configuration and orientation of the connection.
Important Considerations and Best Practices
- Cable Quality: Use high-quality USB cables to ensure reliable data transfer and power delivery.
- EMI Shielding: Implement proper electromagnetic interference (EMI) shielding to prevent data corruption.
- Overcurrent Protection: Use overcurrent protection mechanisms to safeguard the USB UDP component and connected devices.
- Firmware Updates: Ensure that the firmware of the connected devices supports the USB protocol version you are using.
Example: Connecting USB UDP to Arduino UNO
To connect a USB UDP component to an Arduino UNO, you can use the following example code to read data from a USB device:
#include <USBHost.h>

// Initialize USB host object
USBHost usb;

// Initialize USB device object
USBDevice device(usb);

void setup() {
  Serial.begin(9600);
  while (!Serial); // Wait for serial port to connect
  Serial.println("USB Host Shield Starting...");

  if (usb.Init() == -1) {
    Serial.println("USB Host Shield Initialization Failed");
    while (1); // Halt if initialization fails
  }
  Serial.println("USB Host Shield Initialized");
}

void loop() {
  usb.Task(); // Poll the USB host

  if (device) {
    Serial.println("USB Device Connected");
    // Add code to interact with the USB device
  } else {
    Serial.println("No USB Device Connected");
  }

  delay(1000); // Wait for 1 second before next poll
}
Troubleshooting and FAQs
Common Issues Users Might Face
- No Power to USB Device: Ensure that the VBUS pin is correctly connected to a 5V power supply.
- Data Transfer Errors: Check the quality of the USB cable and ensure proper EMI shielding.
- Device Not Recognized: Verify that the device firmware supports the USB protocol version in use.
Solutions and Tips for Troubleshooting
- Check Connections: Ensure all connections are secure and correctly oriented.
- Use Quality Components: Use high-quality USB cables and connectors to avoid data loss and power issues.
- Update Firmware: Keep the firmware of connected devices up to date to ensure compatibility with the USB UDP component.
- Monitor Power Supply: Ensure that the power supply is stable and within the specified voltage and current ratings.
By following this documentation, users can effectively integrate and troubleshoot the USB UDP component in their electronic projects, ensuring reliable and high-speed data communication.