Cirkit Designer Logo
Cirkit Designer
Your all-in-one circuit design IDE
Home / 
Component Documentation

How to Use 12V PSU: Examples, Pinouts, and Specs

Image of 12V PSU
Cirkit Designer LogoDesign with 12V PSU in Cirkit Designer

Introduction

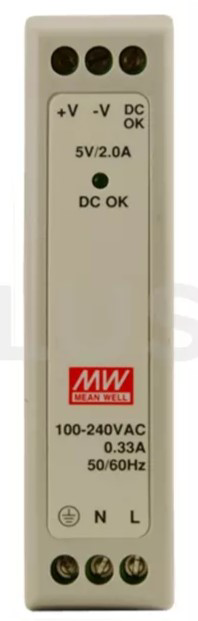
The MEANWELL MRD-10-12 is a reliable and efficient 12V Power Supply Unit (PSU) designed to convert AC power to a stable 12V DC output. This PSU is ideal for a wide range of applications, including industrial automation, telecommunications, and consumer electronics where a consistent voltage is crucial for the operation of electronic devices and circuits.

Explore Projects Built with 12V PSU

Use Cirkit Designer to design, explore, and prototype these projects online. Some projects support real-time simulation. Click "Open Project" to start designing instantly!
12V UPS System with Dual 18650 Li-ion Battery Backup and Voltage Regulation
Image of Power supply: A project utilizing 12V PSU in a practical application
This circuit is designed to provide an uninterruptible power supply (UPS) system with a 12V DC output. It includes a 12V 5A power supply connected to an AC source through a toggle switch, which charges a pair of 18650 Li-ion batteries via a voltage regulator (XL4016). The UPS module ensures a continuous power supply to the load by switching between the power supply and the battery bank.
Cirkit Designer LogoOpen Project in Cirkit Designer
Modular Power Distribution System with Multiple SMPS Units and 120V Outlet
Image of Cellion-Tesla: A project utilizing 12V PSU in a practical application
This circuit is designed to convert 240V AC power to both 12V and 24V DC outputs using multiple SMPS units. Terminal blocks are used to organize and distribute the power, while a 120V outlet provides additional AC power access. The circuit is likely used for powering various electronic devices that require different voltage levels.
Cirkit Designer LogoOpen Project in Cirkit Designer
24V Pushbutton Control Interface with 40-Pin Connector
Image of 4 på rad: A project utilizing 12V PSU in a practical application
This circuit consists of a 24V power supply unit (PSU) connected to four pushbuttons. Each pushbutton is wired such that pressing it will send a 24V signal to a corresponding general-purpose input (GP In) on a 40-pin connector. The common return path for the pushbuttons is connected to the 0V of the PSU, which is also connected to the common (Com) for input pins on the 40-pin connector, completing the circuit for each button press.
Cirkit Designer LogoOpen Project in Cirkit Designer
12V to 5V Power Supply with LED Indicator and Push Switch
Image of Power Supply LVCO: A project utilizing 12V PSU in a practical application
This circuit is a 12V to 5V regulated power supply with an LED indicator. It uses a 5408 diode for reverse polarity protection, an LM340T5 7805 voltage regulator to step down the voltage to 5V, and a push switch to control the LED indicator. The circuit also includes capacitors for filtering and a resistor to limit the current through the LED.
Cirkit Designer LogoOpen Project in Cirkit Designer

Explore Projects Built with 12V PSU

Use Cirkit Designer to design, explore, and prototype these projects online. Some projects support real-time simulation. Click "Open Project" to start designing instantly!
Image of Power supply: A project utilizing 12V PSU in a practical application
12V UPS System with Dual 18650 Li-ion Battery Backup and Voltage Regulation
This circuit is designed to provide an uninterruptible power supply (UPS) system with a 12V DC output. It includes a 12V 5A power supply connected to an AC source through a toggle switch, which charges a pair of 18650 Li-ion batteries via a voltage regulator (XL4016). The UPS module ensures a continuous power supply to the load by switching between the power supply and the battery bank.
Cirkit Designer LogoOpen Project in Cirkit Designer
Image of Cellion-Tesla: A project utilizing 12V PSU in a practical application
Modular Power Distribution System with Multiple SMPS Units and 120V Outlet
This circuit is designed to convert 240V AC power to both 12V and 24V DC outputs using multiple SMPS units. Terminal blocks are used to organize and distribute the power, while a 120V outlet provides additional AC power access. The circuit is likely used for powering various electronic devices that require different voltage levels.
Cirkit Designer LogoOpen Project in Cirkit Designer
Image of 4 på rad: A project utilizing 12V PSU in a practical application
24V Pushbutton Control Interface with 40-Pin Connector
This circuit consists of a 24V power supply unit (PSU) connected to four pushbuttons. Each pushbutton is wired such that pressing it will send a 24V signal to a corresponding general-purpose input (GP In) on a 40-pin connector. The common return path for the pushbuttons is connected to the 0V of the PSU, which is also connected to the common (Com) for input pins on the 40-pin connector, completing the circuit for each button press.
Cirkit Designer LogoOpen Project in Cirkit Designer
Image of Power Supply LVCO: A project utilizing 12V PSU in a practical application
12V to 5V Power Supply with LED Indicator and Push Switch
This circuit is a 12V to 5V regulated power supply with an LED indicator. It uses a 5408 diode for reverse polarity protection, an LM340T5 7805 voltage regulator to step down the voltage to 5V, and a push switch to control the LED indicator. The circuit also includes capacitors for filtering and a resistor to limit the current through the LED.
Cirkit Designer LogoOpen Project in Cirkit Designer

Technical Specifications

General Features

  • Model: MRD-10-12
  • Manufacturer: MEANWELL
  • Output Voltage: 12V DC
  • Output Current: 0.84A
  • Power: 10W
  • Input Voltage Range: 85 to 264V AC, 120 to 370V DC
  • Efficiency: 82%
  • Operating Temperature: -30 to +70°C
  • Dimensions: 62.5 x 51 x 28mm (L x W x H)
  • Certifications: UL, CE, CB, TUV

Pin Configuration and Descriptions

Pin No. Description Notes
1 AC/L Live wire input
2 AC/N Neutral wire input
3 FG Frame ground
4 V- Negative DC output
5 V+ Positive DC output

Usage Instructions

Integration into a Circuit

  1. Wiring AC Input: Connect the live (L) and neutral (N) wires from the AC mains to pins 1 and 2, respectively. Ensure proper grounding by connecting the frame ground (FG) to a reliable earth ground.

  2. DC Output Connection: Connect your device or circuit to the V+ (pin 5) and V- (pin 4) for the DC output. Ensure that the total load does not exceed the rated 0.84A current.

  3. Mounting: Secure the PSU to a surface using the mounting holes provided, ensuring adequate ventilation for cooling.

Best Practices

  • Verify the input voltage compatibility before powering the PSU.
  • Always disconnect the power before making or altering connections.
  • Use a fuse or circuit breaker on the AC input for additional safety.
  • Ensure the load does not exceed the PSU's maximum ratings to prevent overheating or damage.
  • Provide adequate air circulation around the PSU to maintain optimal operating temperature.

Troubleshooting and FAQs

Common Issues

  • PSU does not power on: Check the AC mains connection for proper voltage and secure connections. Ensure the PSU switch is in the ON position if applicable.
  • Output voltage is unstable or incorrect: Verify that the load does not exceed the rated capacity. Check for loose connections at the DC output terminals.
  • PSU overheats: Ensure there is adequate ventilation around the PSU. Check if the ambient temperature is within the specified operating range.

FAQs

Q: Can the MRD-10-12 be used in a 24V system? A: No, the MRD-10-12 is designed to provide a 12V output. Using it in a 24V system could damage the PSU and the connected devices.

Q: Is the MRD-10-12 PSU suitable for outdoor use? A: The MRD-10-12 is not rated for outdoor use unless additional protection against moisture and environmental factors is provided.

Q: How can I adjust the output voltage of the PSU? A: The MRD-10-12 has a fixed output voltage of 12V and cannot be adjusted.

For further assistance, please refer to the manufacturer's detailed datasheet and installation guide, or contact MEANWELL's technical support.


Note: This documentation is provided for informational purposes only. The manufacturer's specifications should always be consulted for the most accurate and up-to-date information.