How to Use r4: Examples, Pinouts, and Specs

Introduction
R4 is a resistor, a passive electrical component that opposes the flow of current in a circuit. Resistors are fundamental components in electronics, used to control voltage and current levels, divide voltages, and protect sensitive components from excessive current. R4, like other resistors, is characterized by its resistance value, measured in ohms (Ω), and its power rating, which determines how much power it can safely dissipate.
Explore Projects Built with r4
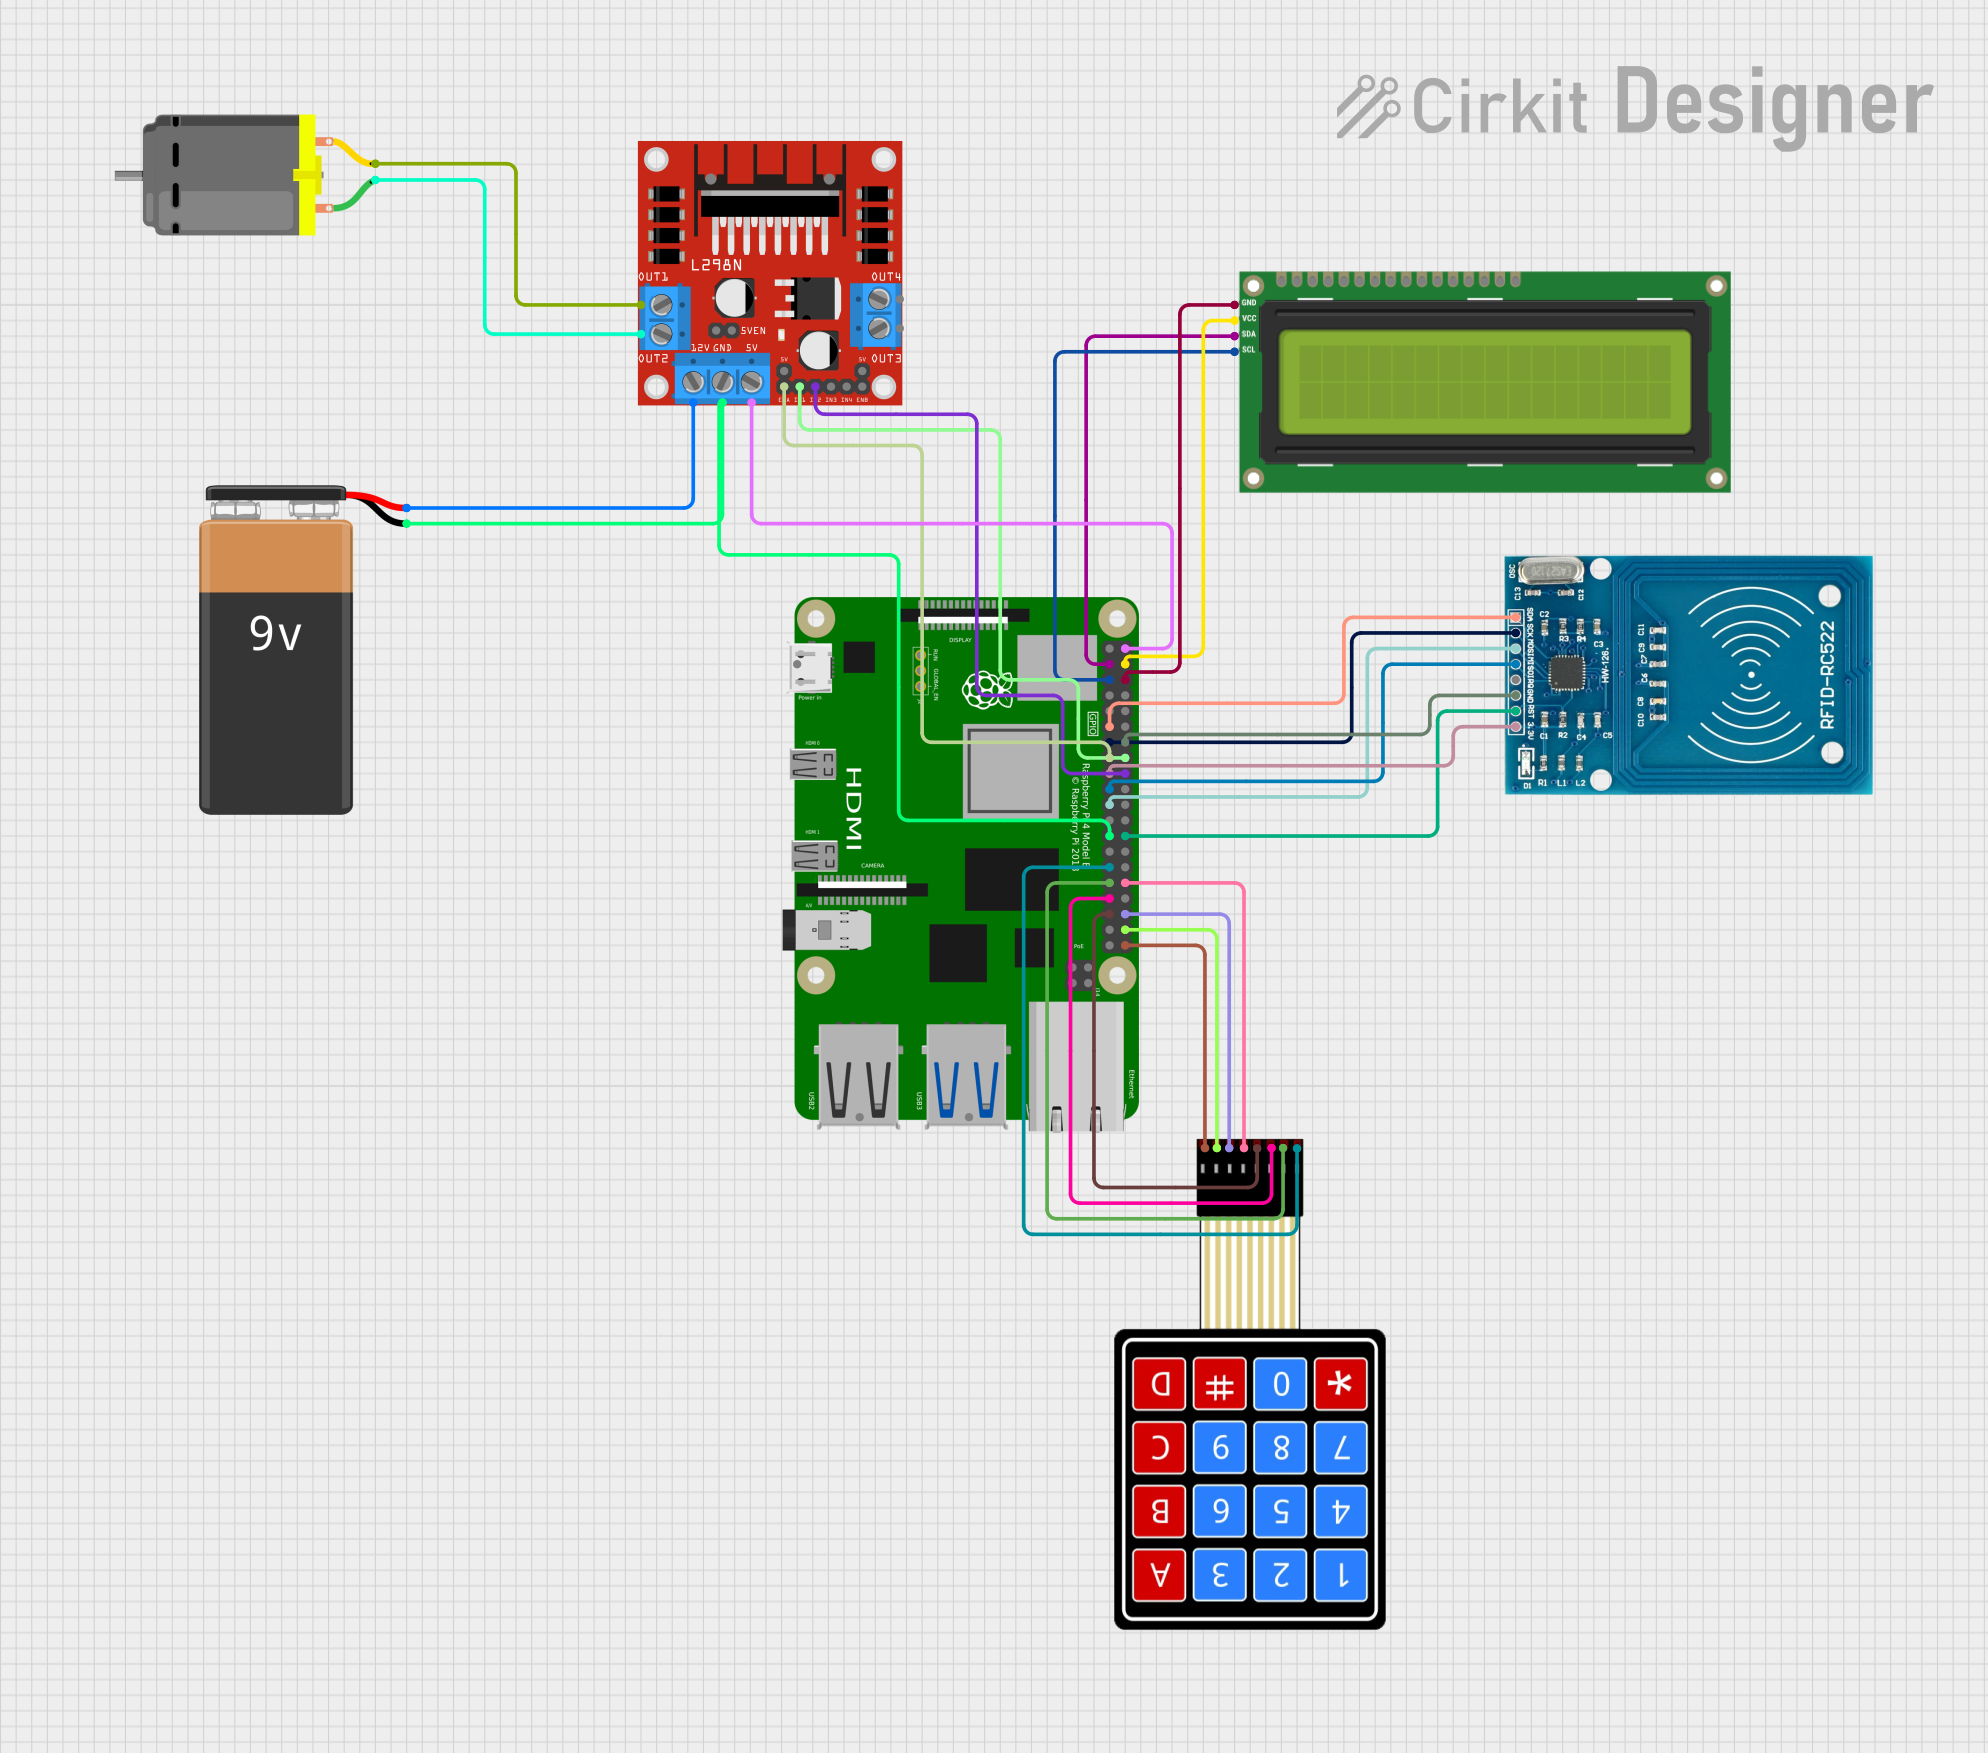
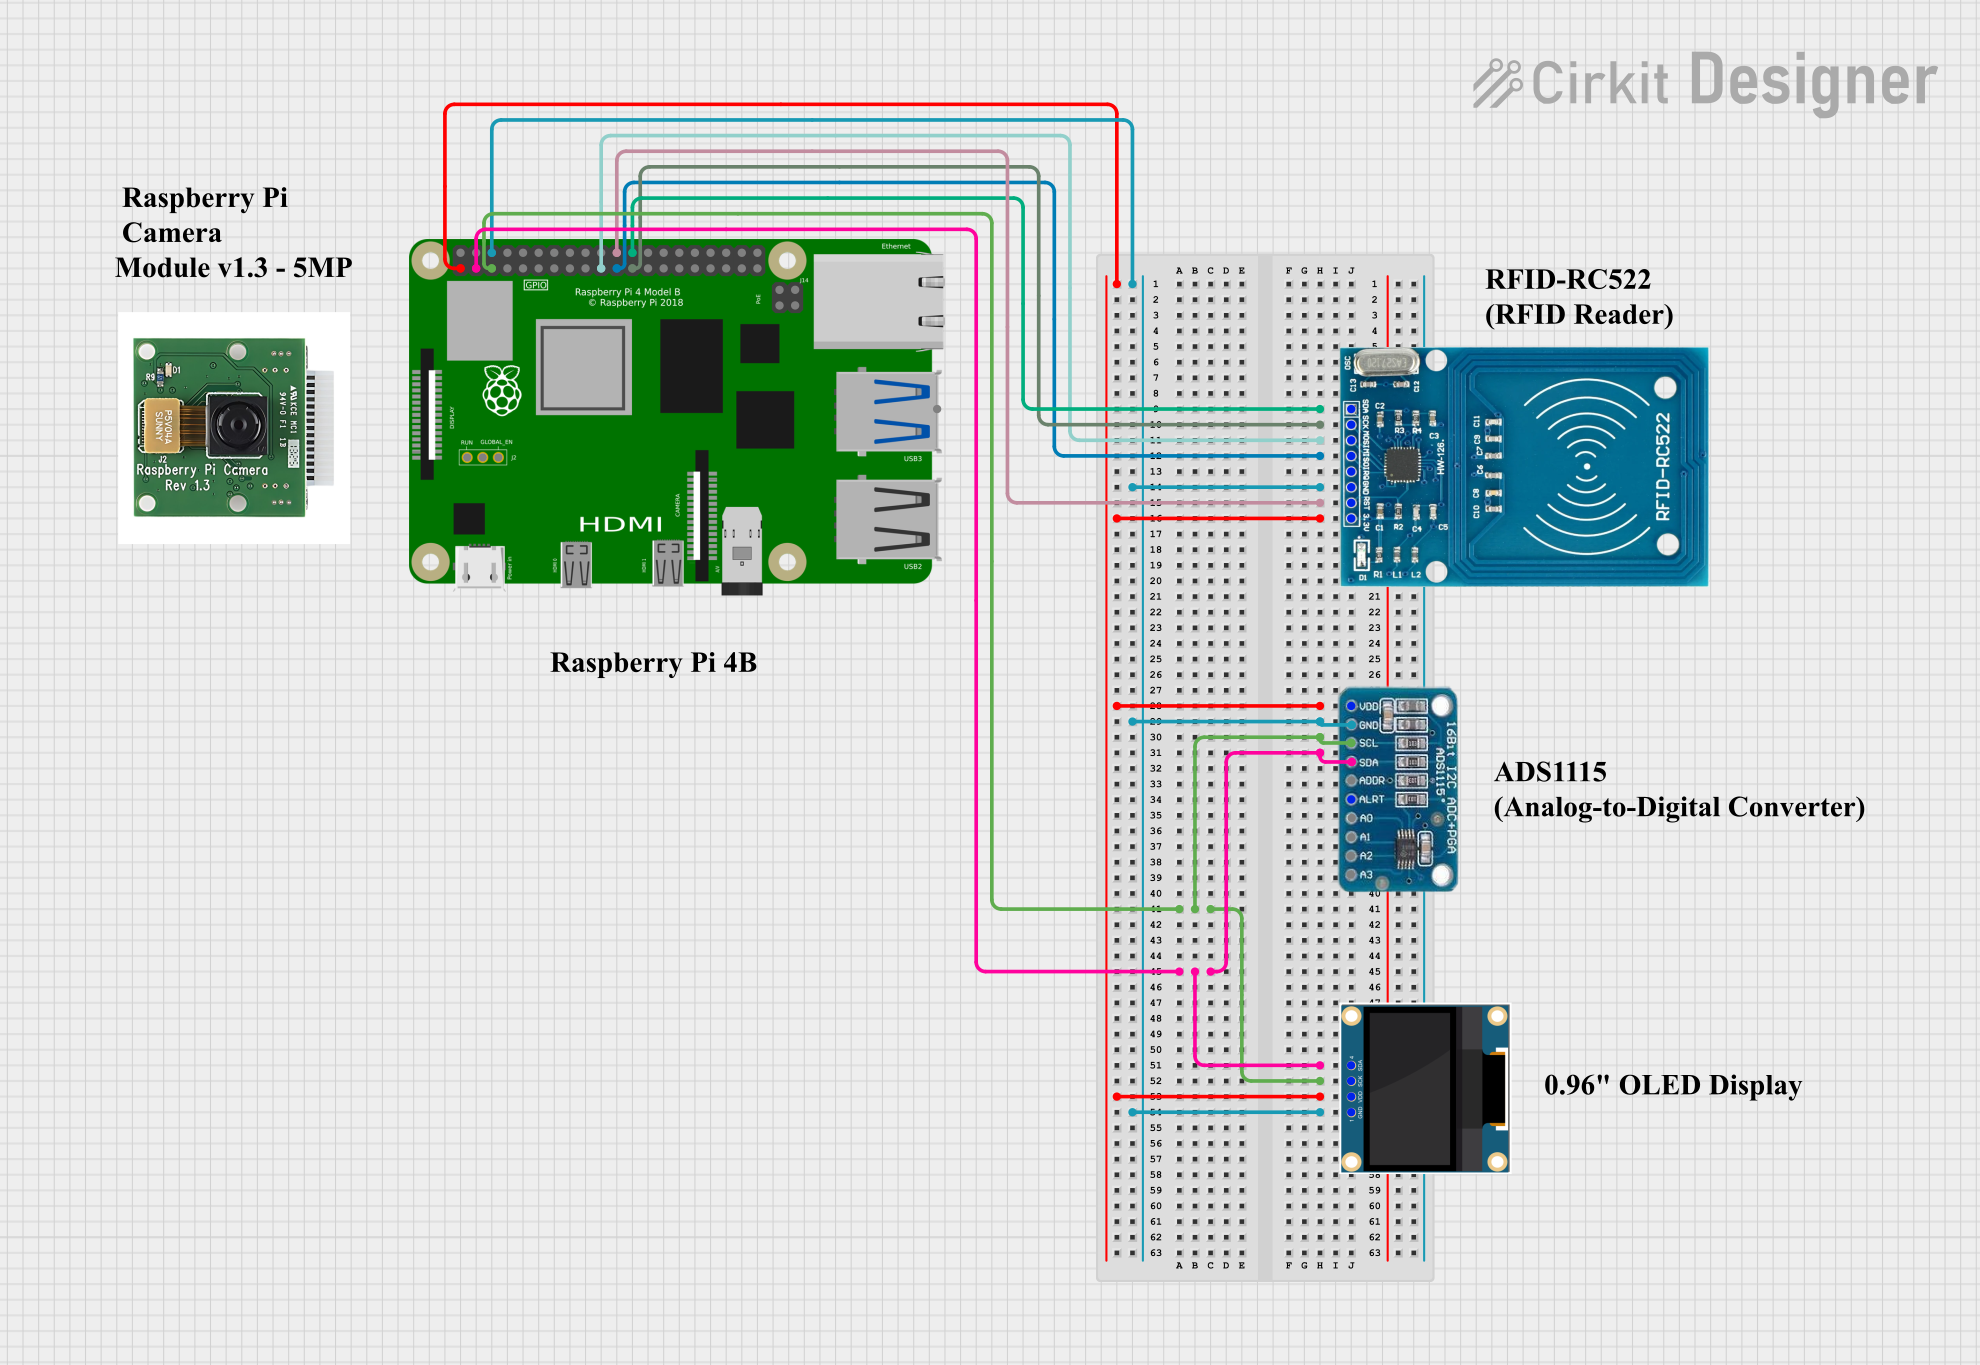
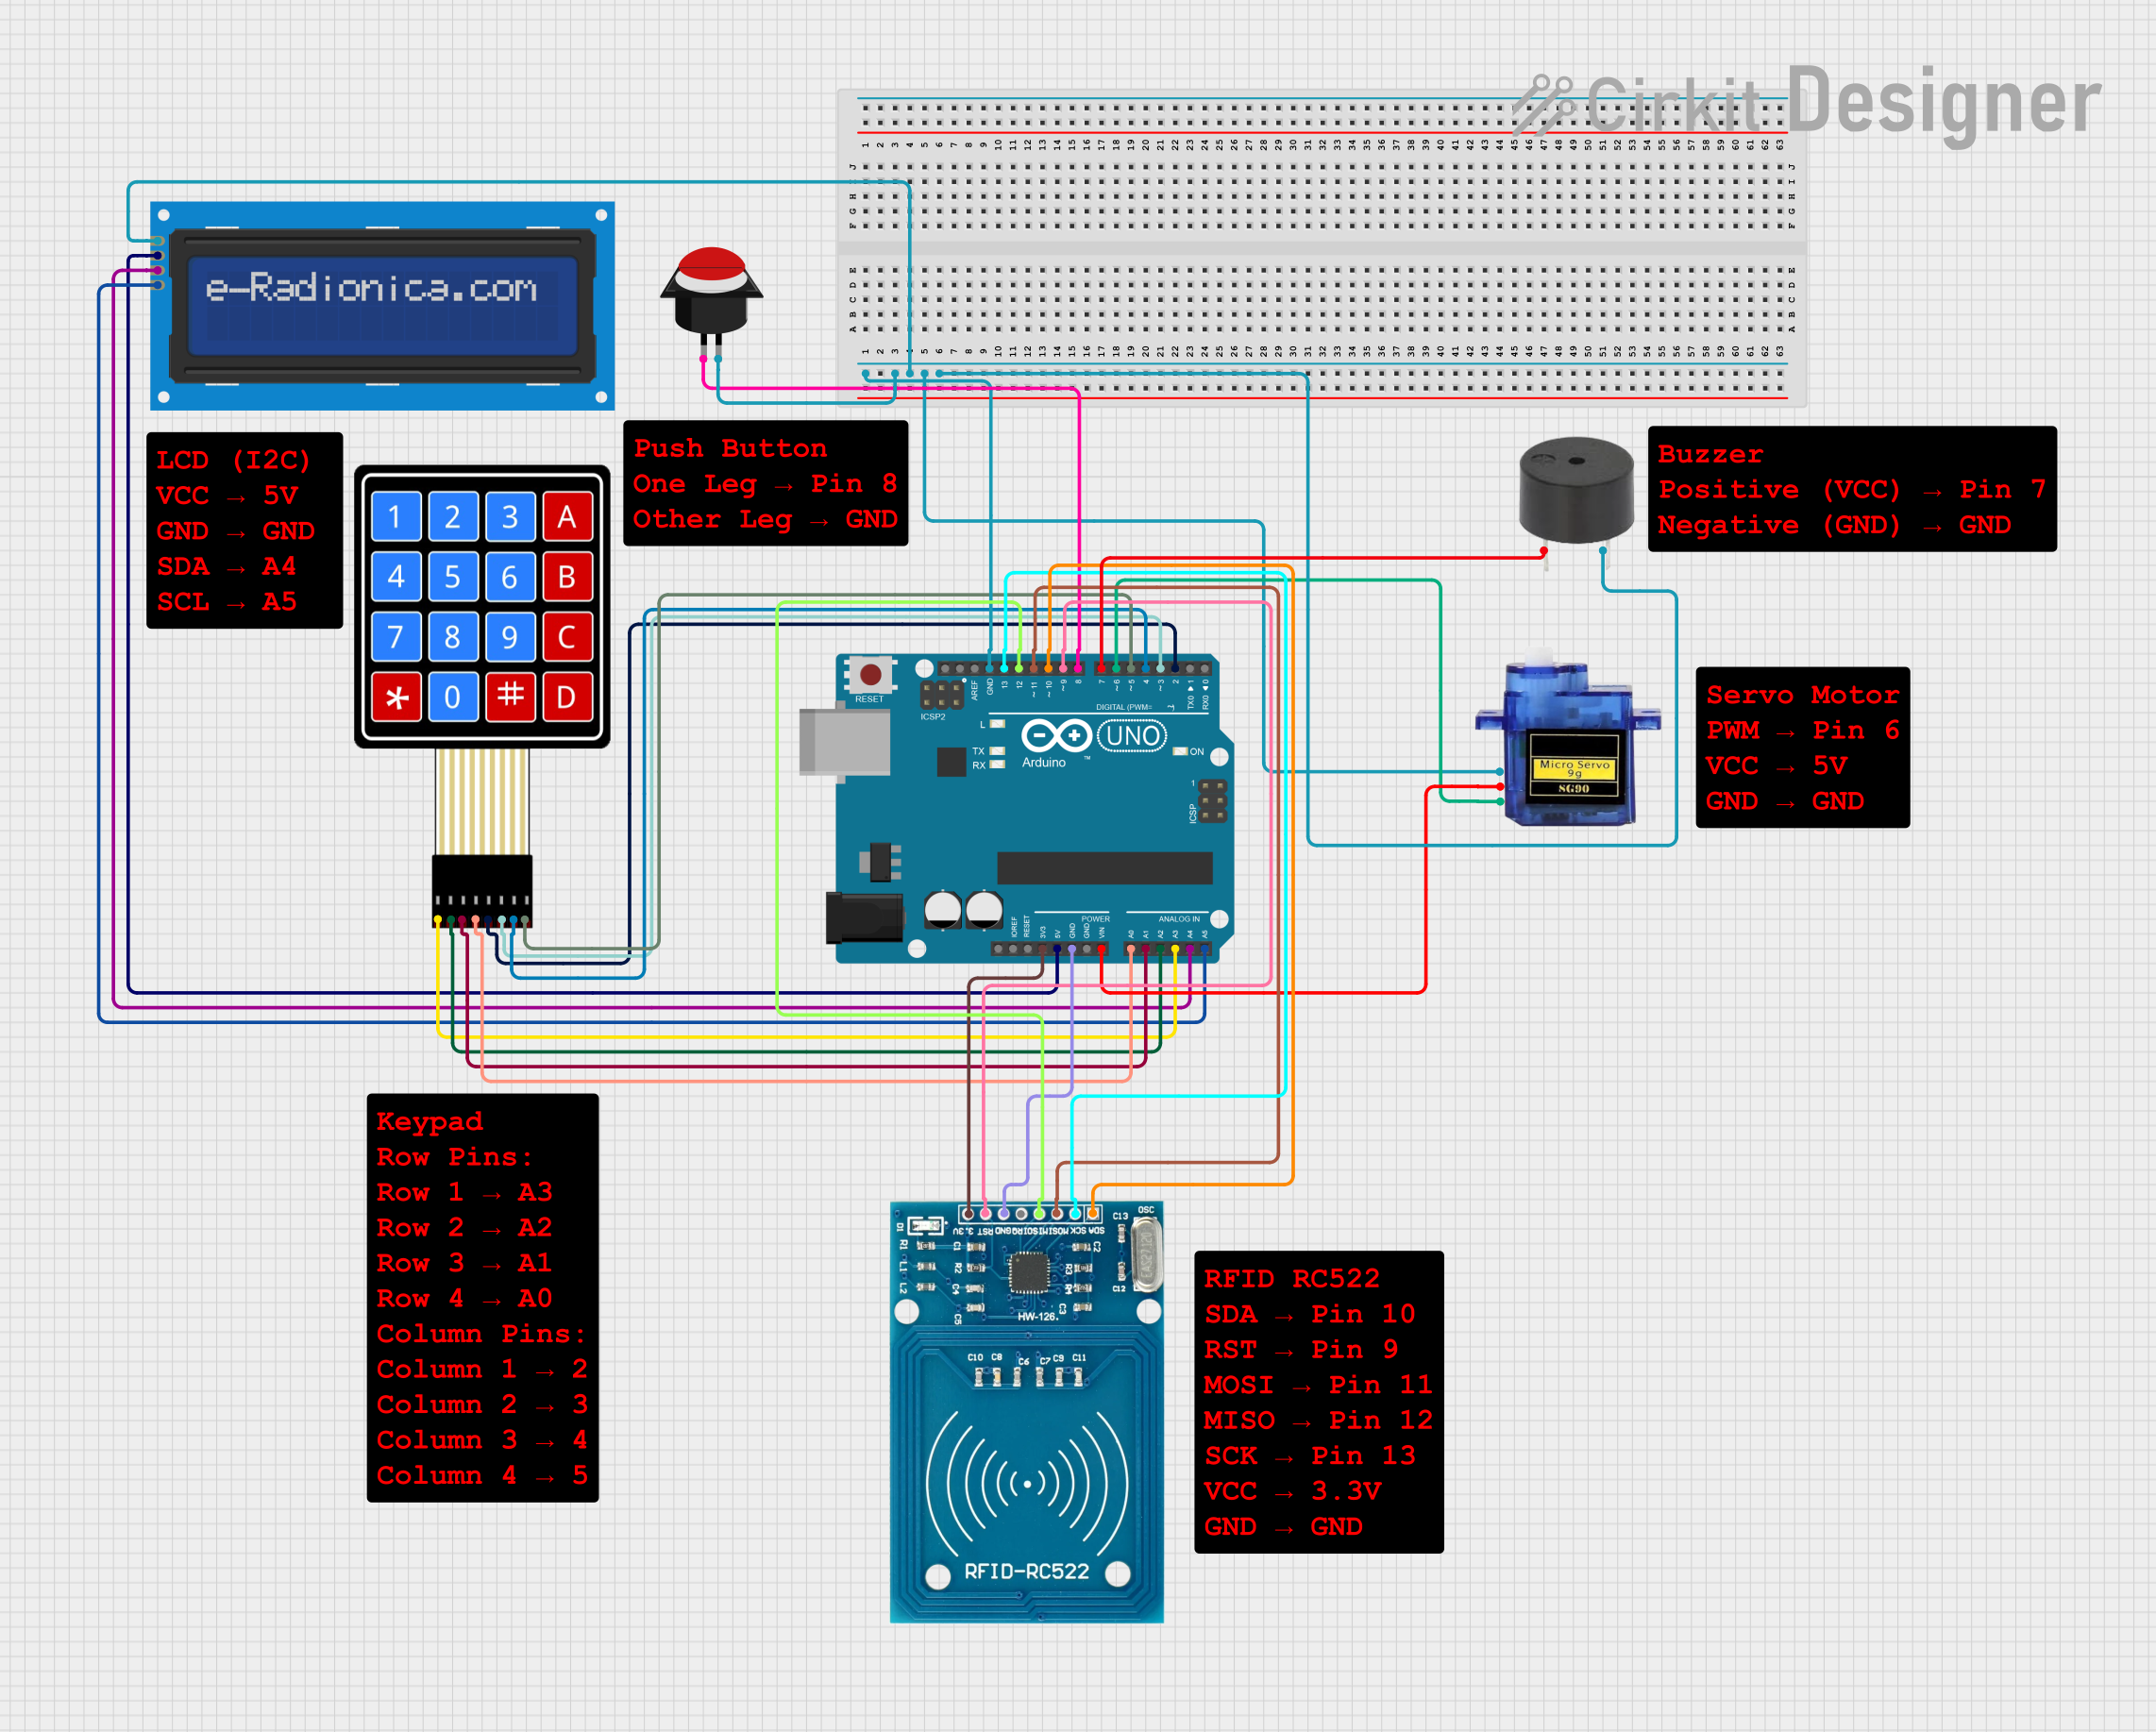

Explore Projects Built with r4
Common Applications and Use Cases
- Voltage Division: Used in voltage divider circuits to create reference voltages.
- Current Limiting: Protects LEDs, transistors, and other components by limiting current flow.
- Signal Conditioning: Shapes or attenuates signals in analog circuits.
- Pull-up/Pull-down Resistors: Ensures stable logic levels in digital circuits.
- Heat Dissipation: Converts excess electrical energy into heat to prevent damage to other components.
Technical Specifications
Below are the general technical specifications for R4. Note that the exact values depend on the specific resistor chosen for your application.
Key Technical Details
- Resistance Range: Typically available from 1Ω to several MΩ.
- Tolerance: ±1% (precision resistors) to ±5% (general-purpose resistors).
- Power Rating: Commonly 0.125W (1/8W), 0.25W (1/4W), 0.5W (1/2W), or higher.
- Temperature Coefficient: ±100 ppm/°C to ±200 ppm/°C for standard resistors.
- Maximum Voltage: Varies by type, typically 200V to 500V for standard resistors.
Pin Configuration and Descriptions
Resistors are non-polarized components, meaning they do not have a specific orientation in a circuit. They have two terminals, as described below:
| Pin Number | Description |
|---|---|
| 1 | First terminal for connection to the circuit. |
| 2 | Second terminal for connection to the circuit. |
Usage Instructions
How to Use R4 in a Circuit
- Determine the Required Resistance: Use Ohm's Law (V = IR) to calculate the resistance needed for your application.
- Select the Appropriate Resistor: Choose a resistor with the correct resistance value, tolerance, and power rating.
- Insert into the Circuit: Connect R4 in series or parallel, depending on the circuit design. Since resistors are non-polarized, orientation does not matter.
- Verify Connections: Ensure that the resistor is securely connected to the circuit and that the resistance value matches the design requirements.
Important Considerations and Best Practices
- Power Dissipation: Ensure the resistor's power rating exceeds the power it will dissipate in the circuit. Use the formula ( P = I^2R ) or ( P = V^2/R ) to calculate power dissipation.
- Tolerance: For precision applications, use resistors with a low tolerance (e.g., ±1%).
- Temperature Effects: Be aware of the resistor's temperature coefficient, as resistance can vary with temperature changes.
- Series and Parallel Configurations: Combine resistors in series to increase resistance or in parallel to decrease resistance.
Example: Using R4 with an Arduino UNO
Below is an example of using R4 as a current-limiting resistor for an LED connected to an Arduino UNO.
// Example: Using R4 as a current-limiting resistor for an LED
// Connect the LED's anode to pin 9 of the Arduino through R4 (220Ω resistor).
// Connect the LED's cathode to GND.

const int ledPin = 9; // Pin connected to the LED

void setup() {
  pinMode(ledPin, OUTPUT); // Set the LED pin as an output
}

void loop() {
  digitalWrite(ledPin, HIGH); // Turn the LED on
  delay(1000);                // Wait for 1 second
  digitalWrite(ledPin, LOW);  // Turn the LED off
  delay(1000);                // Wait for 1 second
}
Note: In this example, R4 (220Ω) limits the current through the LED to prevent damage. The resistance value can be adjusted based on the LED's forward voltage and desired current.
Troubleshooting and FAQs
Common Issues
Resistor Overheating:
- Cause: Power dissipation exceeds the resistor's power rating.
- Solution: Use a resistor with a higher power rating or reduce the current/voltage in the circuit.
Incorrect Resistance Value:
- Cause: Misreading the resistor's color code or using the wrong resistor.
- Solution: Double-check the color code or measure the resistance with a multimeter.
Circuit Malfunction:
- Cause: Poor connections or incorrect placement of the resistor.
- Solution: Verify all connections and ensure the resistor is properly installed.
FAQs
Q: Can I use multiple resistors to achieve a specific resistance value?
- A: Yes, you can combine resistors in series or parallel to achieve the desired resistance. For series, ( R_{total} = R_1 + R_2 + \dots ). For parallel, ( 1/R_{total} = 1/R_1 + 1/R_2 + \dots ).
Q: How do I calculate the resistor value for an LED?
- A: Use the formula ( R = (V_{supply} - V_{LED}) / I_{LED} ), where ( V_{supply} ) is the supply voltage, ( V_{LED} ) is the LED's forward voltage, and ( I_{LED} ) is the desired current.
Q: Can resistors fail over time?
- A: Yes, resistors can fail due to excessive heat, mechanical stress, or aging. Always use resistors within their specified ratings to ensure longevity.