How to Use Till de Mercurio: Examples, Pinouts, and Specs
Introduction
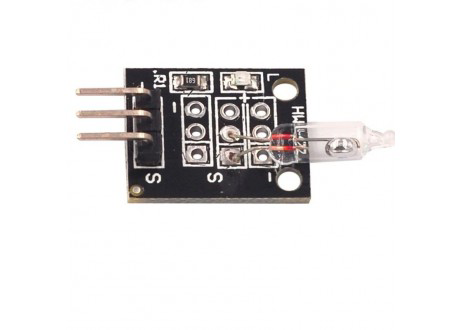
The Till de Mercurio is a mercury switch manufactured by Keys with the part ID Mercury Swich. This component operates by utilizing the movement of mercury within a sealed container to open or close an electrical circuit. It is commonly used for detecting tilt, orientation, or motion in various applications.
Mercury switches like the Till de Mercurio are highly reliable due to their simple design and resistance to environmental factors such as dust and moisture. They are widely used in industrial equipment, safety devices, and consumer electronics.
Explore Projects Built with Till de Mercurio

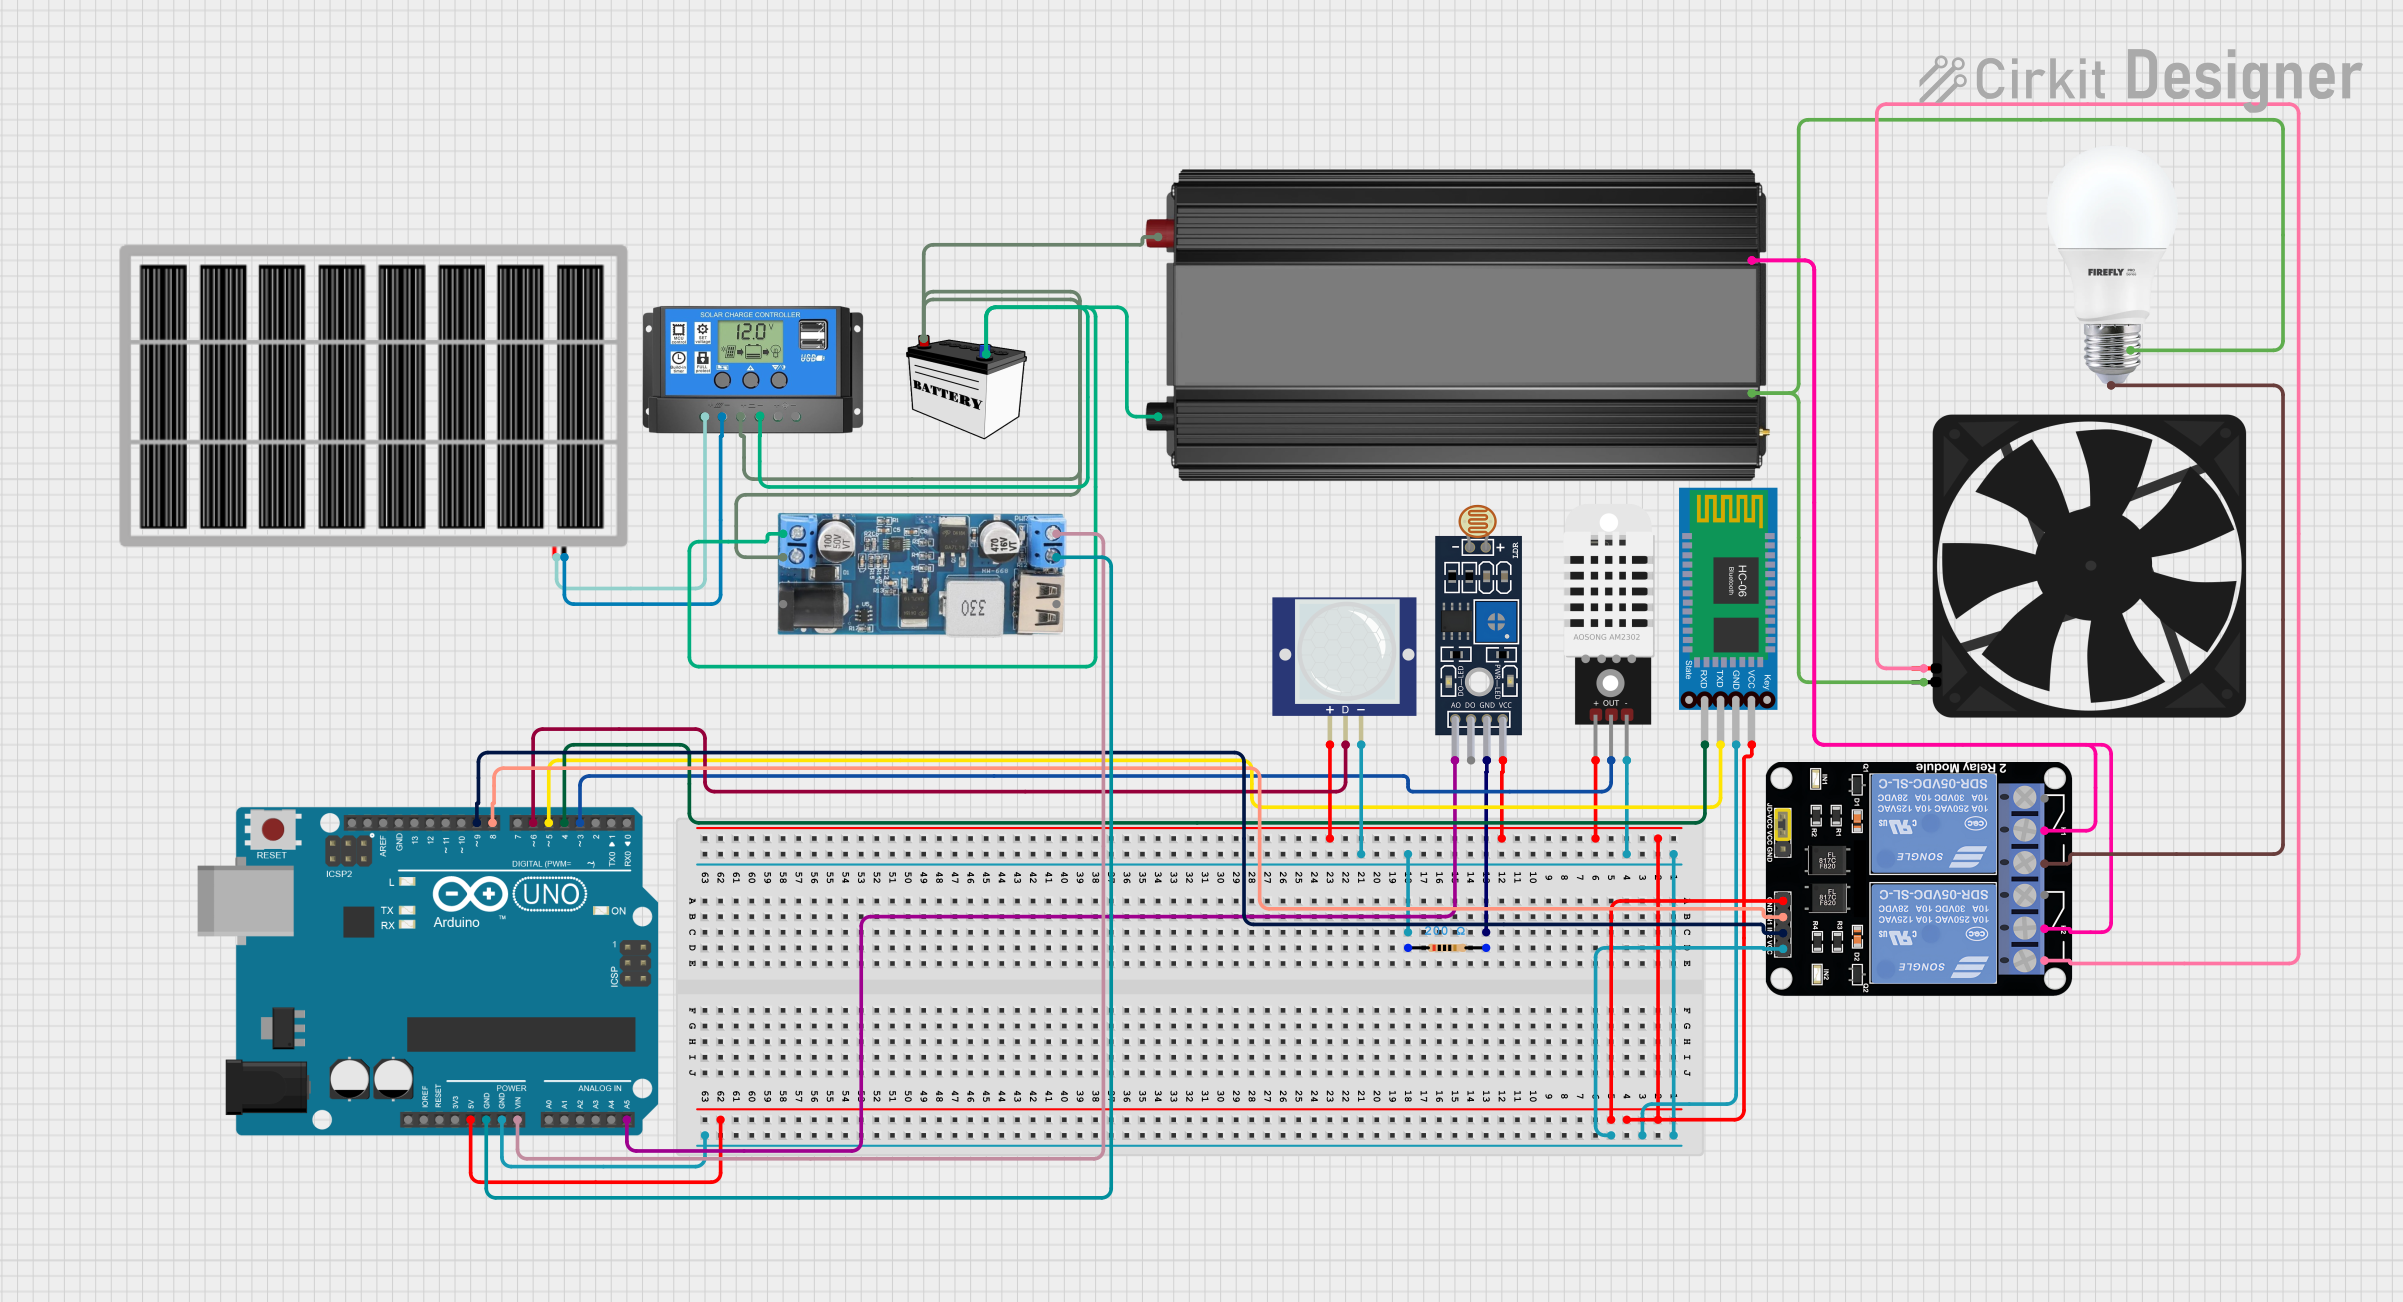
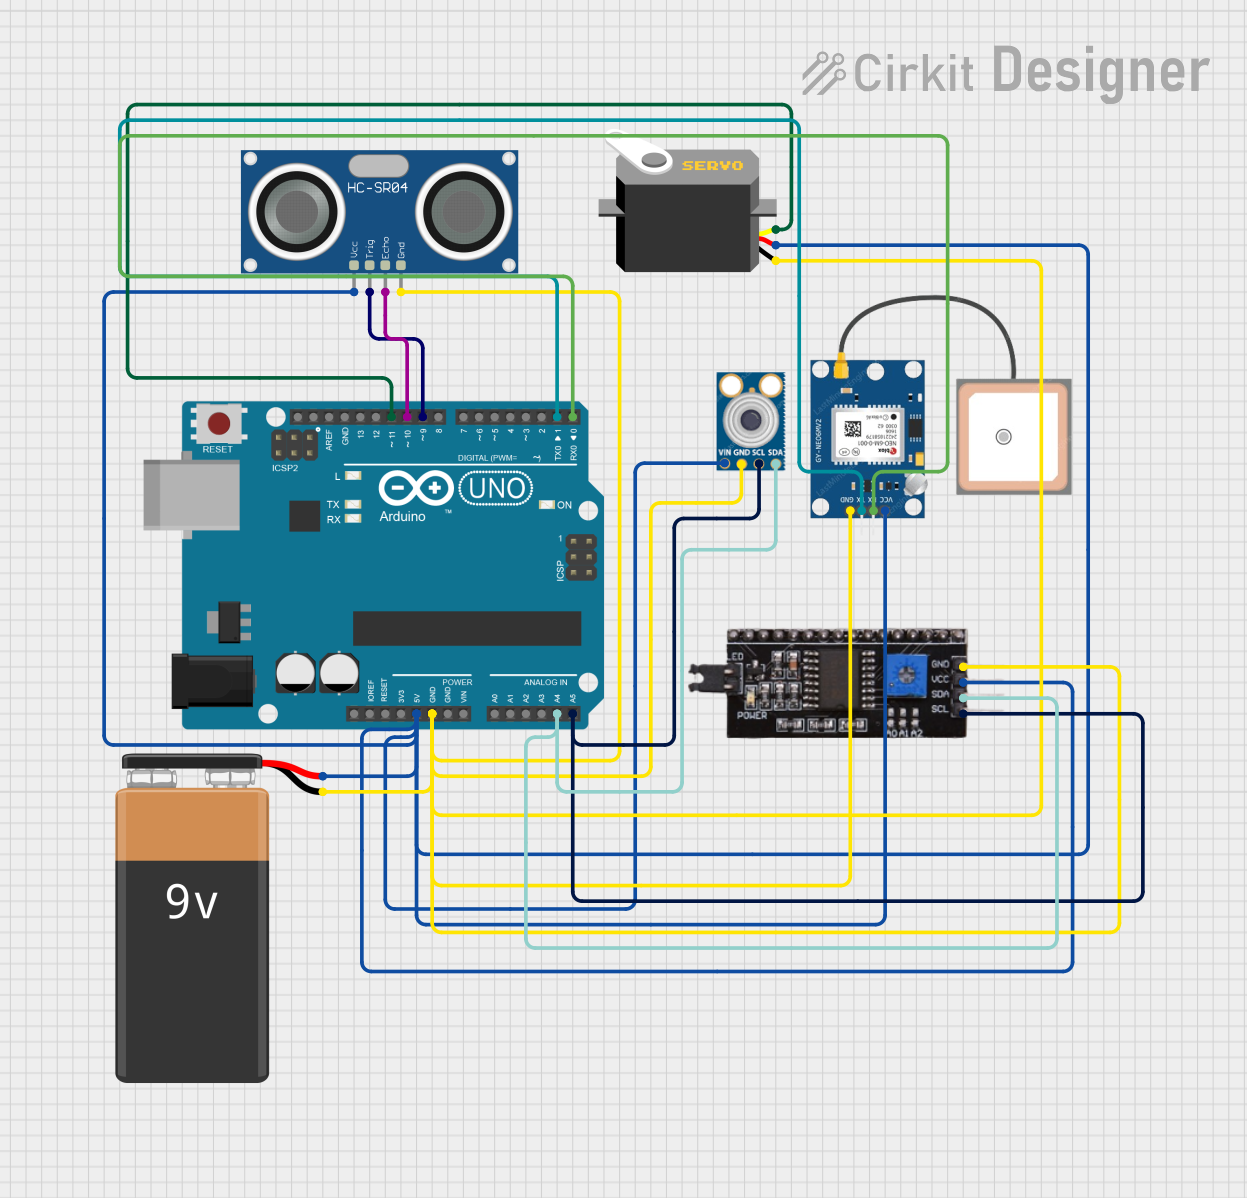
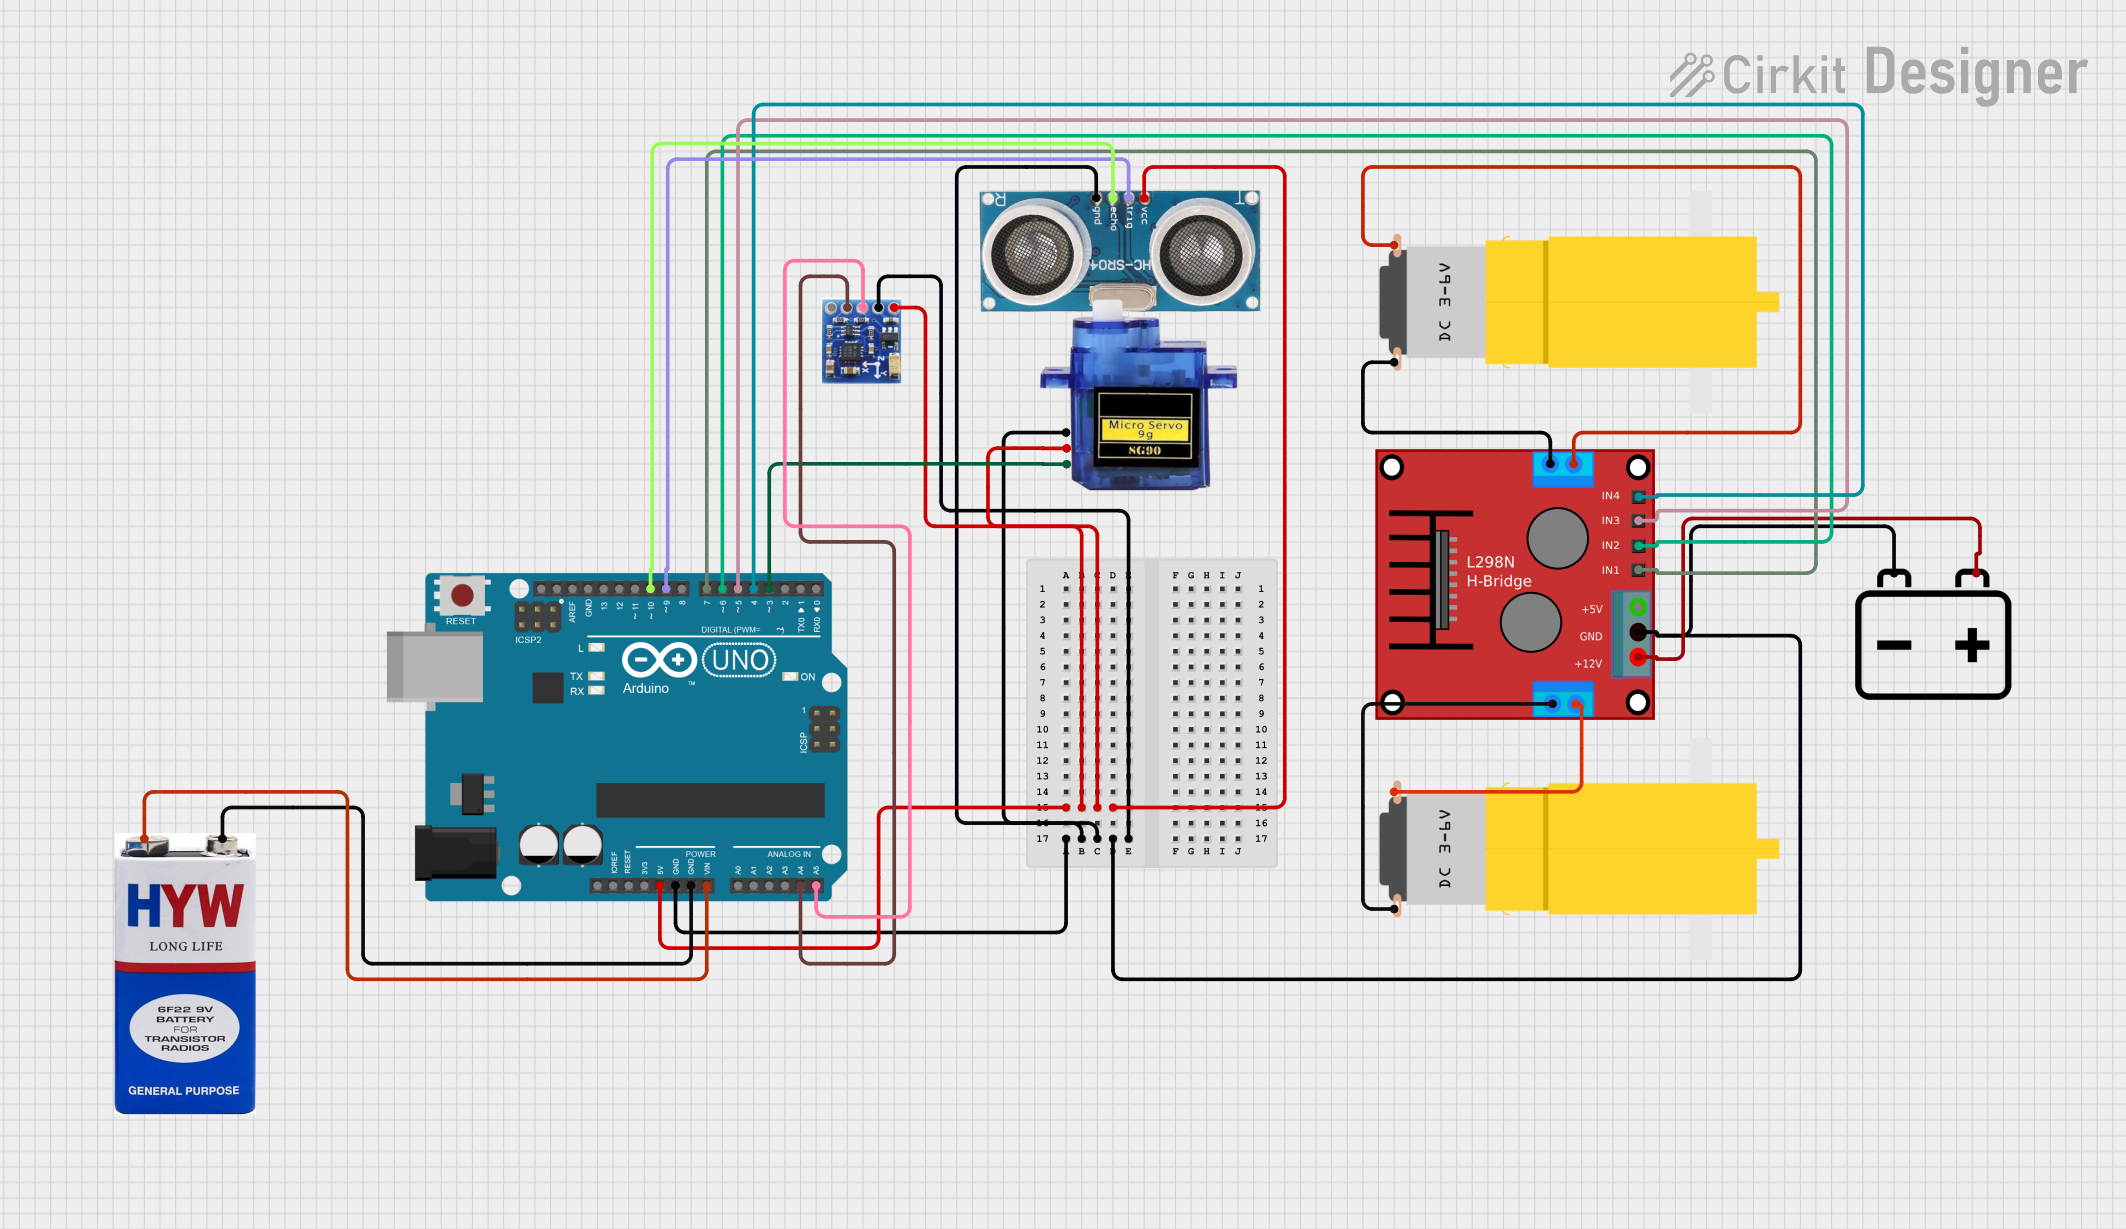
Explore Projects Built with Till de Mercurio
Common Applications:
- Tilt detection in industrial machinery
- Orientation sensing in portable devices
- Safety switches in thermostats and appliances
- Motion detection in alarm systems
Technical Specifications
Key Technical Details:
- Operating Voltage: 3V to 24V DC
- Maximum Current Rating: 500mA
- Contact Resistance: < 100 milliohms
- Switching Angle: ±10° to ±15° (depending on orientation)
- Operating Temperature Range: -40°C to 85°C
- Housing Material: Glass or metal (sealed to prevent mercury leakage)
- Dimensions: 10mm x 5mm x 5mm (typical)
Pin Configuration and Descriptions:
The Till de Mercurio has two terminals for electrical connection. The following table describes the pin configuration:
| Pin | Name | Description |
|---|---|---|
| 1 | Terminal A | Connects to the positive or input side of the circuit. |
| 2 | Terminal B | Connects to the negative or output side of the circuit. |
Note: The orientation of the switch affects its operation. Ensure proper alignment for accurate tilt detection.
Usage Instructions
How to Use the Component in a Circuit:
- Determine the Orientation: Identify the desired tilt or motion angle for your application. The switch will close the circuit when tilted beyond its switching angle (±10° to ±15°).
- Connect the Terminals:
- Connect Terminal A to the positive voltage source or input signal.
- Connect Terminal B to the load or ground, depending on the circuit design.
- Add a Pull-Down Resistor (if needed): To prevent floating signals, use a pull-down resistor (e.g., 10kΩ) on the output side.
- Test the Circuit: Tilt the switch to verify that it opens and closes the circuit as expected.
Important Considerations:
- Avoid Excessive Vibration: Mercury switches are sensitive to motion. Excessive vibration may cause false triggering.
- Environmental Safety: Mercury is toxic. Handle the component carefully and dispose of it according to local regulations.
- Mounting Orientation: Ensure the switch is mounted in the correct orientation for reliable operation.
- Voltage and Current Limits: Do not exceed the specified voltage and current ratings to avoid damaging the switch.
Example: Using Till de Mercurio with Arduino UNO
The following example demonstrates how to use the Till de Mercurio to detect tilt with an Arduino UNO:
// Arduino example for using the Till de Mercurio mercury switch
// This code reads the state of the switch and lights up an LED when tilted.

const int switchPin = 2;  // Pin connected to the mercury switch
const int ledPin = 13;    // Pin connected to the onboard LED

void setup() {
  pinMode(switchPin, INPUT);  // Set the switch pin as input
  pinMode(ledPin, OUTPUT);    // Set the LED pin as output
  digitalWrite(ledPin, LOW);  // Turn off the LED initially
  Serial.begin(9600);         // Initialize serial communication
}

void loop() {
  int switchState = digitalRead(switchPin);  // Read the state of the switch

  if (switchState == HIGH) {
    // If the switch is tilted, turn on the LED
    digitalWrite(ledPin, HIGH);
    Serial.println("Switch is tilted!");
  } else {
    // If the switch is not tilted, turn off the LED
    digitalWrite(ledPin, LOW);
    Serial.println("Switch is not tilted.");
  }

  delay(100);  // Small delay to stabilize readings
}
Note: Use a pull-down resistor (e.g., 10kΩ) on the switch pin to ensure stable readings.
Troubleshooting and FAQs
Common Issues and Solutions:
Switch Not Responding to Tilt:
- Ensure the switch is mounted in the correct orientation.
- Verify that the tilt angle exceeds the specified switching angle (±10° to ±15°).
- Check the electrical connections for loose wires or poor soldering.
False Triggering:
- Minimize vibrations or shocks in the environment.
- Use a debounce circuit or software debounce in your microcontroller code.
No Output Signal:
- Confirm that the voltage and current ratings are within the specified range.
- Test the switch with a multimeter to ensure it is functioning correctly.
Mercury Leakage:
- Stop using the switch immediately if mercury leakage is detected.
- Dispose of the component safely according to local hazardous waste regulations.
FAQs:
Q: Can the Till de Mercurio be used in outdoor applications?
A: Yes, the sealed design makes it resistant to dust and moisture. However, ensure it is protected from extreme environmental conditions.Q: Is the switch polarity-sensitive?
A: No, the switch is not polarity-sensitive. You can connect the terminals in either direction.Q: Can I use this switch for high-frequency switching?
A: No, mercury switches are not suitable for high-frequency applications due to their mechanical nature.Q: How do I safely dispose of a damaged switch?
A: Mercury is hazardous. Follow local regulations for disposing of mercury-containing components.
This concludes the documentation for the Till de Mercurio mercury switch. For further assistance, refer to the manufacturer's datasheet or contact Keys support.