How to Use Nucleo 401RE: Examples, Pinouts, and Specs
Introduction
The Nucleo F401RE is a versatile development board from STMicroelectronics that features the STM32F401RE microcontroller. This board is part of the STM32 Nucleo ecosystem and is designed for rapid prototyping. It is a powerful tool for developers as it provides a flexible way for users to try out new concepts and build prototypes with the STM32 microcontroller, choosing from the various combinations of performance, power consumption, and features.
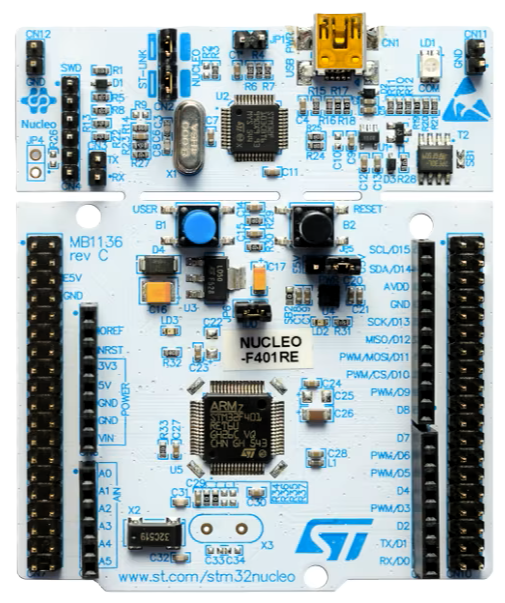
Explore Projects Built with Nucleo 401RE

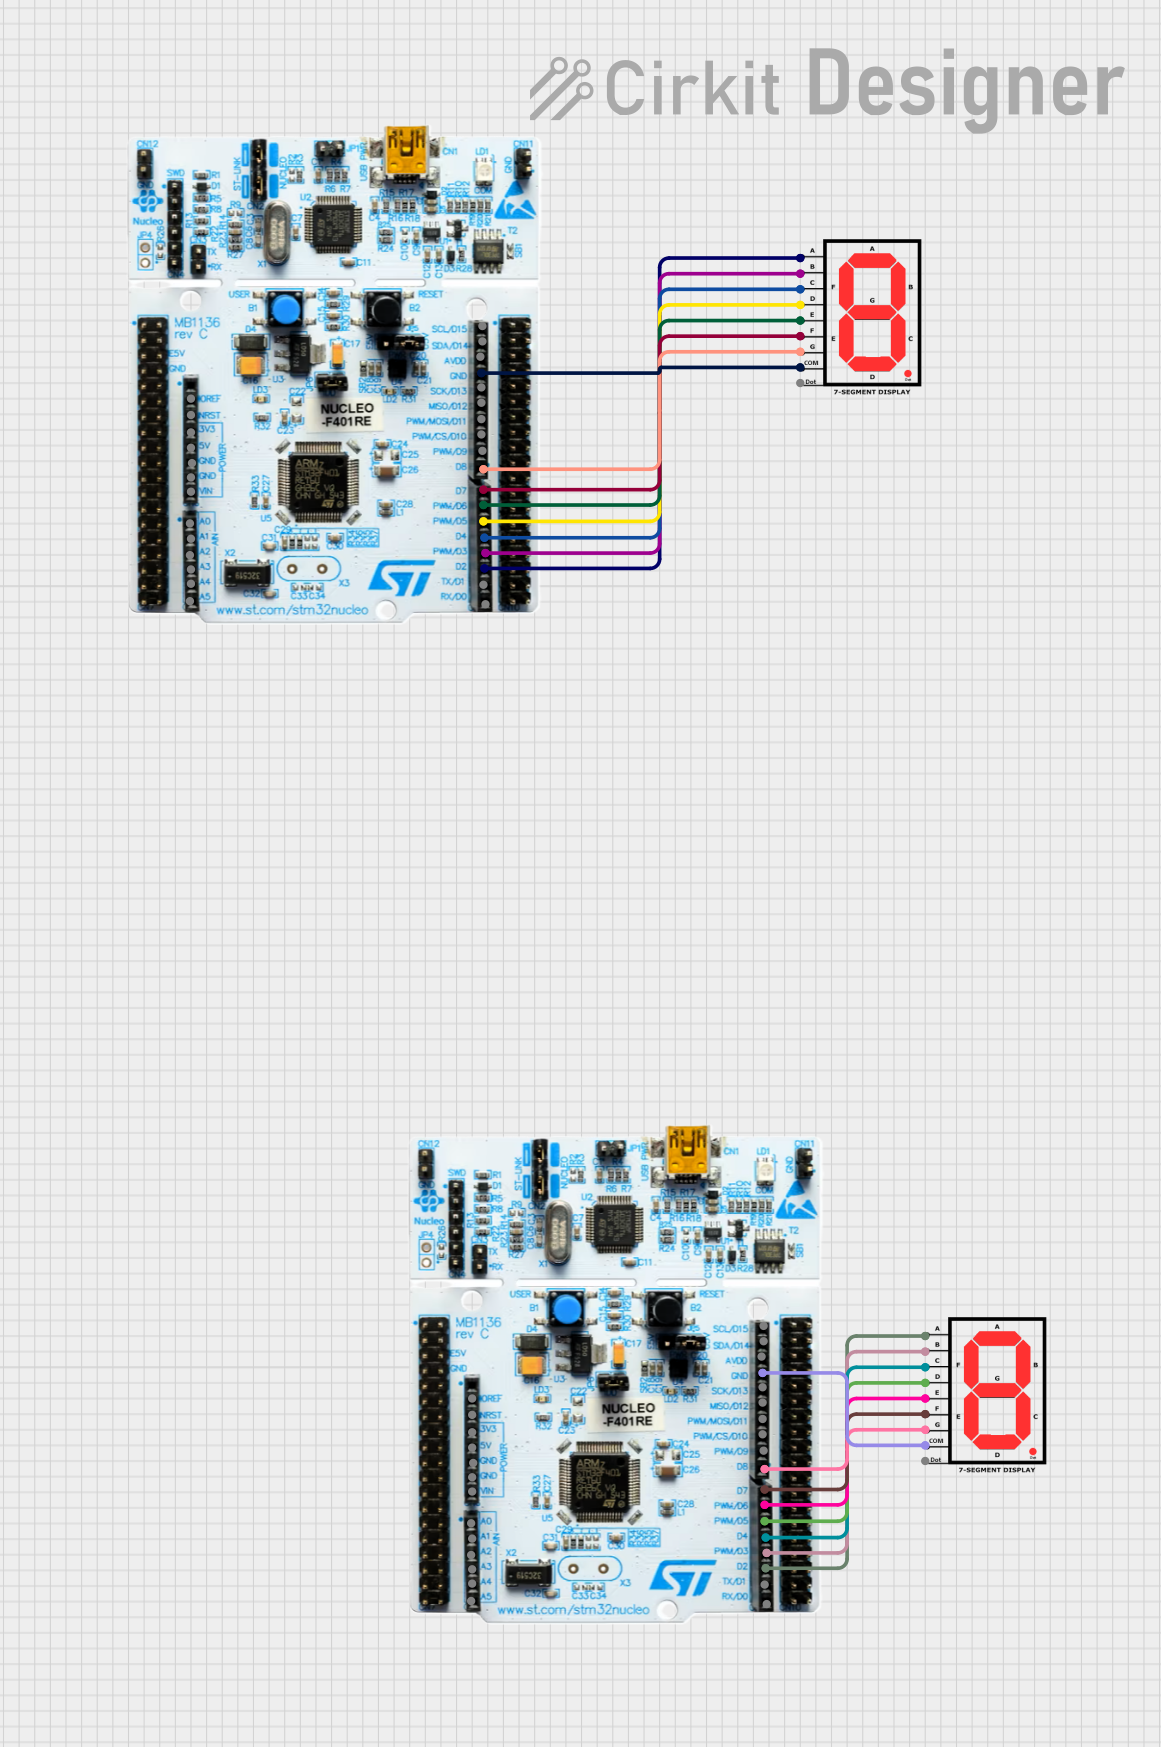
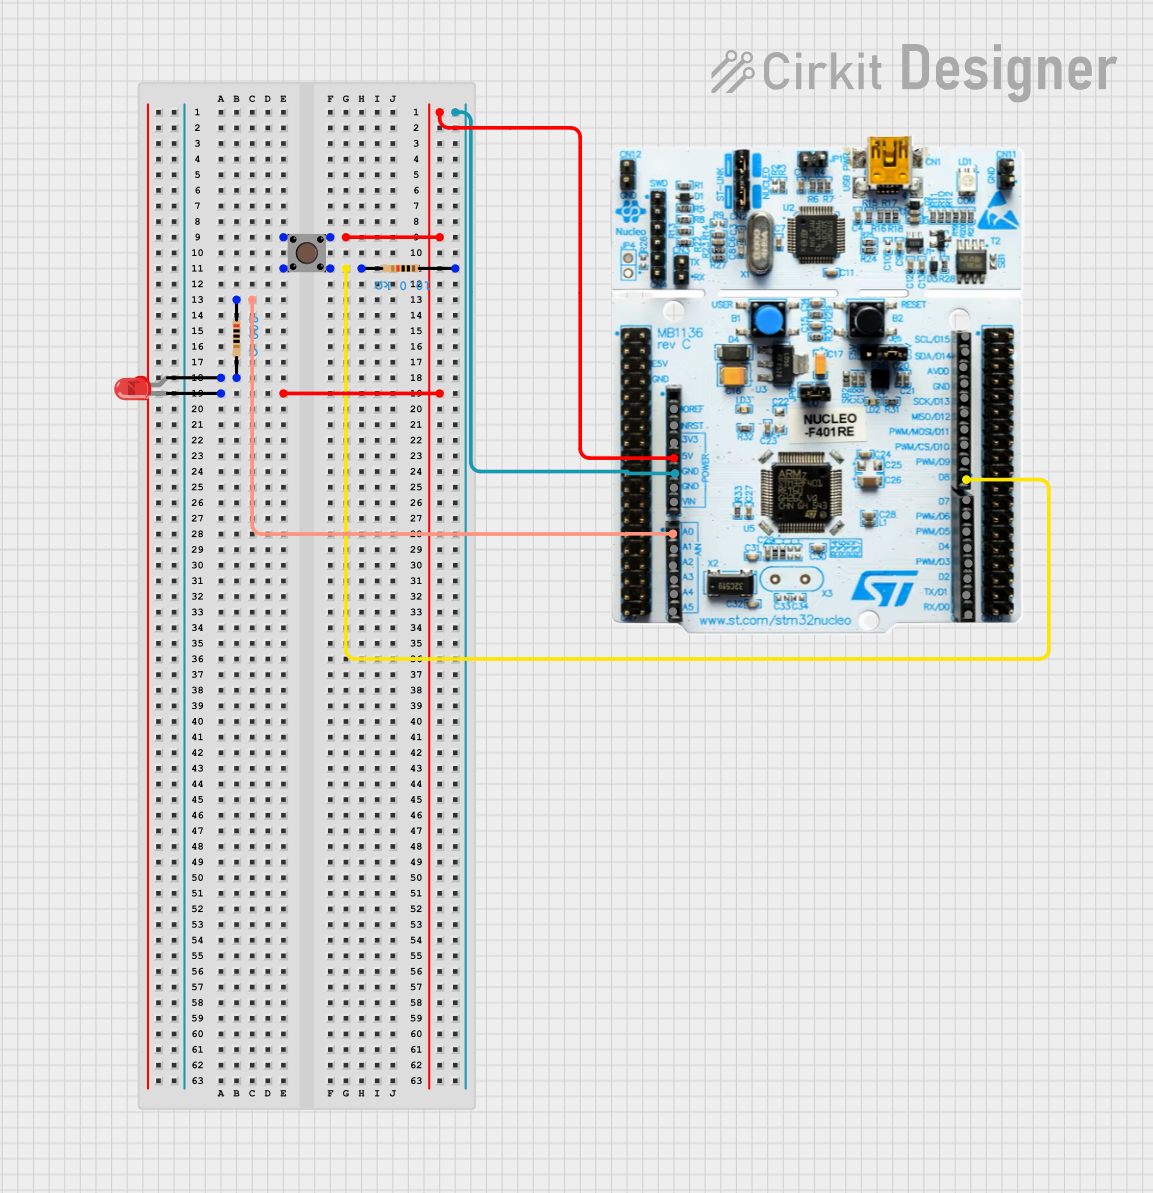
Explore Projects Built with Nucleo 401RE
Common Applications and Use Cases
- Rapid prototyping of embedded systems
- Educational purposes for learning microcontroller programming
- Development of IoT devices
- Motor control systems
- Industrial automation
- Prototyping of consumer electronics
Technical Specifications
Key Technical Details
- Microcontroller: STM32F401RE
- Core: ARM® Cortex®-M4 32-bit RISC core
- Operating Voltage: 3.3V
- Digital I/O Pins: 50
- Analog Input Pins: 16
- Flash Memory: 512 KB
- SRAM: 96 KB
- Clock Speed: 84 MHz
- Connectivity: USB, SPI, I2C, USART, CAN
- Debugging: On-board ST-LINK/V2-1 debugger/programmer
Pin Configuration and Descriptions
| Pin Name | Function | Description |
|---|---|---|
| CN7 | Digital I/O | GPIOs, SPI, I2C, USART, etc. |
| CN10 | Digital I/O | GPIOs, SPI, I2C, USART, etc. |
| CN9 | USB | USB OTG FS connector |
| CN5 | ST-LINK | Debugger/Programmer USB connector |
| CN8 | Power | E5V, VIN, 3V3, 5V, GND |
| ARD | Arduino™ Uno V3 | Compatibility headers for Arduino™ Uno V3 shields |
Usage Instructions
How to Use the Component in a Circuit
Powering the Board:
- The Nucleo F401RE can be powered via the USB connector (CN5) or an external power source.
- Ensure that the jumper JP5 is in the U5V position if you are powering through USB.
Programming the Board:
- Connect the board to your computer using a USB cable through the CN5 connector.
- The board is programmable via various development environments, including STM32CubeIDE, Keil, IAR, or mbed online.
- The on-board ST-LINK/V2-1 provides an integrated debugger/programmer solution.
Connecting Peripherals:
- Use the Arduino™ Uno V3 compatibility headers to connect Arduino shields.
- The CN7 and CN10 connectors provide access to the STM32 microcontroller's GPIOs and other functions.
Important Considerations and Best Practices
- Always observe electrostatic discharge precautions when handling the board.
- Verify the power supply and I/O voltage levels to prevent damage to the board.
- When designing custom peripherals, ensure that the pin current and voltage ratings are not exceeded.
- Disconnect the board from power sources before making or altering connections.
Troubleshooting and FAQs
Common Issues Users Might Face
Board Not Recognized by Computer:
- Ensure the USB cable is properly connected and the computer's USB ports are functioning.
- Check that the jumper JP5 is in the correct position for the selected power source.
Unable to Program the Board:
- Verify that the correct drivers for the ST-LINK/V2-1 are installed on your computer.
- Ensure that the board is selected correctly within your development environment.
Peripheral Malfunction:
- Double-check the wiring and connections to the peripheral.
- Confirm that the code is correctly configured for the peripheral in use.
Solutions and Tips for Troubleshooting
- If the board is not recognized, try using a different USB cable or port.
- For driver issues, visit the STMicroelectronics website to download the latest drivers.
- Review the Nucleo F401RE user manual for detailed information on board features and setup.
- Consult the STM32F401RE datasheet for in-depth technical specifications.
FAQs
Q: Can I use Arduino IDE to program the Nucleo F401RE? A: Yes, you can use the Arduino IDE with the appropriate board configuration.
Q: What is the maximum operating temperature of the Nucleo F401RE? A: The maximum operating temperature is 85°C.
Q: How do I reset the board? A: Press the black push-button (B1) to reset the board.
Q: Is it possible to use external power sources? A: Yes, you can use an external power source connected to the E5V or VIN pins.
For further assistance, refer to the ST Community Forum or the Nucleo F401RE User Manual.
Please note that this documentation is a general guide and may not cover all aspects of the Nucleo F401RE development board. Always refer to the official STMicroelectronics documentation for the most accurate and detailed information.