Cirkit Designer Logo
Cirkit Designer
Your all-in-one circuit design IDE
Home / 
Component Documentation

How to Use Caddx Farsight: Examples, Pinouts, and Specs

Image of Caddx Farsight
Cirkit Designer LogoDesign with Caddx Farsight in Cirkit Designer

Introduction

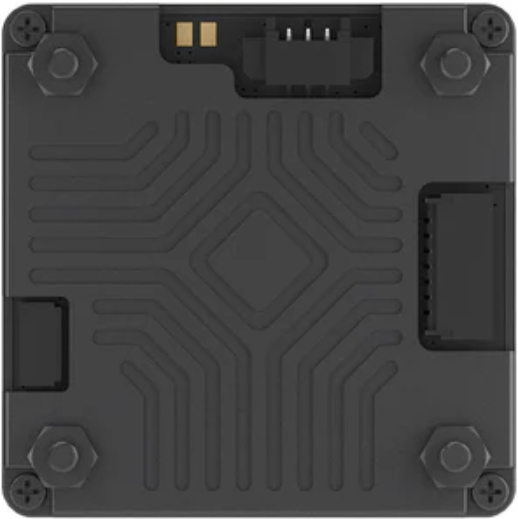
The Caddx Farsight (Manufacturer Part ID: MN13-0014B) is a high-definition FPV (First Person View) camera designed by CaddxFPV. It is tailored for drone racing, aerial photography, and other applications requiring real-time video transmission with low latency and superior image quality. This camera is a popular choice among drone enthusiasts and professionals due to its compact design, robust build, and excellent performance in various lighting conditions.

Explore Projects Built with Caddx Farsight

Use Cirkit Designer to design, explore, and prototype these projects online. Some projects support real-time simulation. Click "Open Project" to start designing instantly!
Satellite-Based Timing and Navigation System with SDR and Atomic Clock Synchronization
Image of GPS 시스템 측정 구성도_Confirm: A project utilizing Caddx Farsight in a practical application
This circuit appears to be a complex system involving power supply management, GPS and timing synchronization, and data communication. It includes a SI-TEX G1 Satellite Compass for GPS data, an XHTF1021 Atomic Rubidium Clock for precise timing, and Ettus USRP B200 units for software-defined radio communication. Power is supplied through various SMPS units and distributed via terminal blocks and DC jacks. Data communication is facilitated by Beelink MINI S12 N95 computers, RS232 splitters, and a 1000BASE-T Media Converter for network connectivity. RF Directional Couplers are used to interface antennas with the USRP units, and the entire system is likely contained within cases for protection and organization.
Cirkit Designer LogoOpen Project in Cirkit Designer
Satellite Compass and Network-Integrated GPS Data Processing System
Image of GPS 시스템 측정 구성도_241016: A project utilizing Caddx Farsight in a practical application
This circuit comprises a satellite compass, a mini PC, two GPS antennas, power supplies, a network switch, media converters, and an atomic rubidium clock. The satellite compass is powered by a triple output DC power supply and interfaces with an RS232 splitter for 1PPS signals. The mini PCs are connected to the USRP B200 devices via USB for data and power, and to media converters via Ethernet, which in turn connect to a network switch using fiber optic links. The antennas are connected to the USRP B200s through RF directional couplers, and the atomic clock provides a 1PPS input to the RS232 splitter.
Cirkit Designer LogoOpen Project in Cirkit Designer
ESP32-S3 GPS Logger and Wind Speed Display with Dual OLED and CAN Bus
Image of Copy of esp32-s3-ellipse: A project utilizing Caddx Farsight in a practical application
This circuit features an ESP32-S3 microcontroller interfaced with an SD card, two OLED displays, a GPS module, and a CAN bus module. It records GPS data to the SD card every second, displays speed in knots on one OLED display, and shows wind speed from the CAN bus in NMEA 2000 format on the other OLED display.
Cirkit Designer LogoOpen Project in Cirkit Designer
Cellular-Enabled IoT Device with Real-Time Clock and Power Management
Image of LRCM PHASE 2 BASIC: A project utilizing Caddx Farsight in a practical application
This circuit features a LilyGo-SIM7000G module for cellular communication and GPS functionality, interfaced with an RTC DS3231 for real-time clock capabilities. It includes voltage sensing through two voltage sensor modules, and uses an 8-channel opto-coupler for isolating different parts of the circuit. Power management is handled by a buck converter connected to a DC power source and batteries, with a fuse for protection and a rocker switch for on/off control. Additionally, there's an LED for indication purposes.
Cirkit Designer LogoOpen Project in Cirkit Designer

Explore Projects Built with Caddx Farsight

Use Cirkit Designer to design, explore, and prototype these projects online. Some projects support real-time simulation. Click "Open Project" to start designing instantly!
Image of GPS 시스템 측정 구성도_Confirm: A project utilizing Caddx Farsight in a practical application
Satellite-Based Timing and Navigation System with SDR and Atomic Clock Synchronization
This circuit appears to be a complex system involving power supply management, GPS and timing synchronization, and data communication. It includes a SI-TEX G1 Satellite Compass for GPS data, an XHTF1021 Atomic Rubidium Clock for precise timing, and Ettus USRP B200 units for software-defined radio communication. Power is supplied through various SMPS units and distributed via terminal blocks and DC jacks. Data communication is facilitated by Beelink MINI S12 N95 computers, RS232 splitters, and a 1000BASE-T Media Converter for network connectivity. RF Directional Couplers are used to interface antennas with the USRP units, and the entire system is likely contained within cases for protection and organization.
Cirkit Designer LogoOpen Project in Cirkit Designer
Image of GPS 시스템 측정 구성도_241016: A project utilizing Caddx Farsight in a practical application
Satellite Compass and Network-Integrated GPS Data Processing System
This circuit comprises a satellite compass, a mini PC, two GPS antennas, power supplies, a network switch, media converters, and an atomic rubidium clock. The satellite compass is powered by a triple output DC power supply and interfaces with an RS232 splitter for 1PPS signals. The mini PCs are connected to the USRP B200 devices via USB for data and power, and to media converters via Ethernet, which in turn connect to a network switch using fiber optic links. The antennas are connected to the USRP B200s through RF directional couplers, and the atomic clock provides a 1PPS input to the RS232 splitter.
Cirkit Designer LogoOpen Project in Cirkit Designer
Image of Copy of esp32-s3-ellipse: A project utilizing Caddx Farsight in a practical application
ESP32-S3 GPS Logger and Wind Speed Display with Dual OLED and CAN Bus
This circuit features an ESP32-S3 microcontroller interfaced with an SD card, two OLED displays, a GPS module, and a CAN bus module. It records GPS data to the SD card every second, displays speed in knots on one OLED display, and shows wind speed from the CAN bus in NMEA 2000 format on the other OLED display.
Cirkit Designer LogoOpen Project in Cirkit Designer
Image of LRCM PHASE 2 BASIC: A project utilizing Caddx Farsight in a practical application
Cellular-Enabled IoT Device with Real-Time Clock and Power Management
This circuit features a LilyGo-SIM7000G module for cellular communication and GPS functionality, interfaced with an RTC DS3231 for real-time clock capabilities. It includes voltage sensing through two voltage sensor modules, and uses an 8-channel opto-coupler for isolating different parts of the circuit. Power management is handled by a buck converter connected to a DC power source and batteries, with a fuse for protection and a rocker switch for on/off control. Additionally, there's an LED for indication purposes.
Cirkit Designer LogoOpen Project in Cirkit Designer

Common Applications and Use Cases

  • Drone Racing: Provides low-latency video for real-time piloting.
  • Aerial Photography: Captures high-definition footage for professional-grade results.
  • FPV Freestyle Flying: Ensures smooth and immersive video for freestyle drone pilots.
  • Surveillance Systems: Can be integrated into lightweight surveillance drones.
  • Hobbyist Projects: Ideal for DIY FPV setups and robotics.

Technical Specifications

Key Technical Details

Parameter Specification
Manufacturer CaddxFPV
Model Farsight (MN13-0014B)
Image Sensor 1/2.7" CMOS
Resolution 1920 x 1080 (Full HD)
Lens 2.1mm (FOV: 150°)
Video Format NTSC/PAL switchable
Latency < 10ms
Input Voltage 5V - 40V
Power Consumption ≤ 200mA @ 12V
Dimensions 19mm x 19mm x 19mm
Weight 8g
Operating Temperature -20°C to 60°C

Pin Configuration and Descriptions

The Caddx Farsight camera has a 4-pin connector for power, video output, and control.

Pin Number Pin Name Description
1 GND Ground connection
2 VCC Power input (5V - 40V)
3 VIDEO Analog video output
4 OSD On-Screen Display control (for camera settings)

Usage Instructions

How to Use the Component in a Circuit

  1. Power Connection: Connect the VCC pin to a power source within the range of 5V to 40V. Ensure the GND pin is connected to the ground of the power source.
  2. Video Output: Connect the VIDEO pin to the video input of your FPV transmitter or display device.
  3. OSD Control: Use the OSD pin to configure camera settings via an OSD controller or compatible flight controller.
  4. Mounting: Secure the camera to your drone or project using the provided mounting hardware. Ensure the lens is unobstructed for optimal image quality.

Important Considerations and Best Practices

  • Voltage Range: Ensure the input voltage does not exceed 40V to avoid damaging the camera.
  • Heat Management: Operate the camera within the specified temperature range (-20°C to 60°C) to prevent overheating.
  • Lens Protection: Use a lens cap or cover when the camera is not in use to prevent scratches or damage.
  • Signal Interference: Keep the camera's wiring away from high-power components to minimize video signal interference.

Example: Connecting to an Arduino UNO

The Caddx Farsight can be used with an Arduino UNO for basic control of the OSD settings. Below is an example code snippet for controlling the OSD pin.

// Example: Controlling the OSD pin of the Caddx Farsight using Arduino UNO

const int osdPin = 7; // Connect the OSD pin of the camera to Arduino pin 7

void setup() {
  pinMode(osdPin, OUTPUT); // Set the OSD pin as an output
  digitalWrite(osdPin, LOW); // Initialize the OSD pin to LOW
}

void loop() {
  // Example: Toggle the OSD pin to simulate a control signal
  digitalWrite(osdPin, HIGH); // Send a HIGH signal to the OSD pin
  delay(1000); // Wait for 1 second
  digitalWrite(osdPin, LOW); // Send a LOW signal to the OSD pin
  delay(1000); // Wait for 1 second
}

Troubleshooting and FAQs

Common Issues and Solutions

  1. No Video Output:

    • Cause: Incorrect wiring or power supply issues.
    • Solution: Verify the connections to the VIDEO and VCC pins. Ensure the power supply is within the specified voltage range.
  2. High Latency or Video Lag:

    • Cause: Signal interference or poor-quality FPV transmitter.
    • Solution: Check for sources of interference near the camera and use a high-quality FPV transmitter.
  3. Blurry or Distorted Image:

    • Cause: Dirty or damaged lens.
    • Solution: Clean the lens with a microfiber cloth. Replace the lens if it is damaged.
  4. Camera Overheating:

    • Cause: Prolonged use in high-temperature environments.
    • Solution: Ensure proper ventilation and avoid operating the camera beyond its temperature limits.

FAQs

  • Q: Can the Caddx Farsight be used in low-light conditions?

    • A: Yes, the camera performs well in low-light environments, but additional lighting may improve image quality.
  • Q: Is the camera compatible with all FPV transmitters?

    • A: The camera outputs standard analog video (NTSC/PAL), making it compatible with most FPV transmitters.
  • Q: How do I switch between NTSC and PAL video formats?

    • A: Use the OSD control to access the camera settings and toggle between NTSC and PAL formats.
  • Q: Can I use the camera with a 3.3V power source?

    • A: No, the minimum input voltage is 5V. Using a lower voltage may result in malfunction or damage.

This concludes the documentation for the Caddx Farsight. For further assistance, refer to the manufacturer's user manual or contact CaddxFPV support.