Cirkit Designer Logo
Cirkit Designer
Your all-in-one circuit design IDE
Home / 
Component Documentation

How to Use Adafruit 2.4in TFT FeatherWing: Examples, Pinouts, and Specs

Image of Adafruit 2.4in TFT FeatherWing
Cirkit Designer LogoDesign with Adafruit 2.4in TFT FeatherWing in Cirkit Designer

Introduction

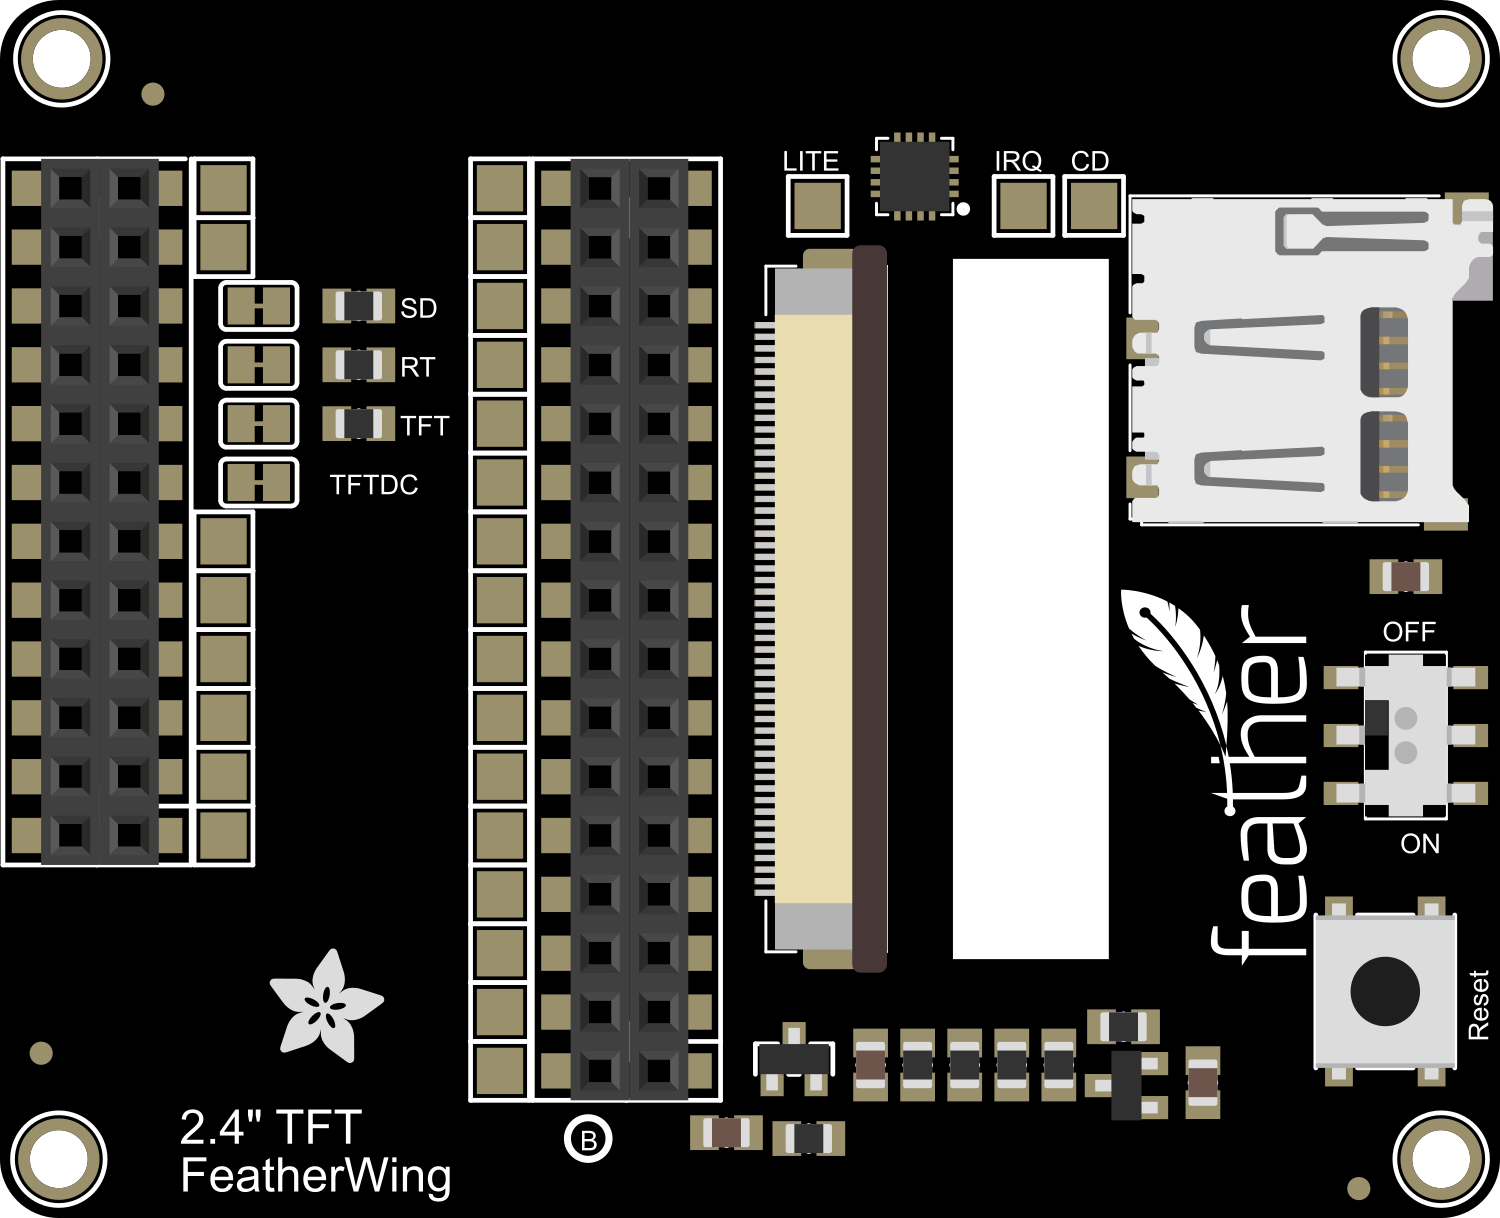
The Adafruit 2.4in TFT FeatherWing is a versatile and vibrant display module that features a 2.4-inch color TFT LCD screen with a resolution of 320x240 pixels. This display is capable of showing detailed graphics and text, making it an excellent choice for a wide range of applications, including handheld instruments, user interfaces, and dynamic visual outputs. Its compatibility with the Adafruit Feather ecosystem allows for quick integration and prototyping with a variety of microcontrollers.

Explore Projects Built with Adafruit 2.4in TFT FeatherWing

Use Cirkit Designer to design, explore, and prototype these projects online. Some projects support real-time simulation. Click "Open Project" to start designing instantly!
Arduino UNO and OLED FeatherWing Display: Battery-Powered Hello World Project
Image of ARDUINO_SSD1306: A project utilizing Adafruit 2.4in TFT FeatherWing in a practical application
This circuit consists of an Arduino UNO connected to an Adafruit OLED FeatherWing display via I2C communication (SDA and SCL lines). The Arduino is powered through a Vcc source and provides 3.3V and GND connections to the OLED display. The Arduino runs a program to display 'Hello, World!' on the OLED screen.
Cirkit Designer LogoOpen Project in Cirkit Designer
Arduino Mega 2560 Controlled TFT Touchscreen Interface
Image of Tablero Moto: A project utilizing Adafruit 2.4in TFT FeatherWing in a practical application
This circuit connects an Arduino Mega 2560 microcontroller to a 3.5-inch 480x320 TFT LCD display. The Arduino provides power, ground, and digital signals to control the display, including data lines for pixel information and control lines for reset, write, and command/data selection. The embedded code initializes the display and configures the Arduino's pins for communication, likely to create a user interface or visual output for a project.
Cirkit Designer LogoOpen Project in Cirkit Designer
ESP32-Based Vibration Feedback System with Quad Alphanumeric Display and ADXL343 Accelerometer
Image of EC444 - Quest 3: A project utilizing Adafruit 2.4in TFT FeatherWing in a practical application
This circuit features an Adafruit HUZZAH32 ESP32 Feather board as the central microcontroller, which is connected to an Adafruit Quad AlphaNumeric Featherwing display and an Adafruit ADXL343 accelerometer via I2C communication (SCL and SDA lines). The ESP32 controls a vibration motor connected to one of its GPIO pins (A5_IO4) and shares a common power supply (3.3V) and ground (GND) with the other components. The purpose of this circuit is likely to read acceleration data, display information on the alphanumeric display, and provide haptic feedback through the vibration motor.
Cirkit Designer LogoOpen Project in Cirkit Designer
Arduino Nano and 3.5 TFT LCD Shield Display Interface
Image of BAROMETR BMP280 TFT 9488: A project utilizing Adafruit 2.4in TFT FeatherWing in a practical application
This circuit interfaces an Arduino Nano with a 3.5-inch TFT LCD Shield, allowing the Arduino to control the display and read/write data to it. The connections include data lines, control signals, and power, enabling the Arduino to drive the LCD for various display applications.
Cirkit Designer LogoOpen Project in Cirkit Designer

Explore Projects Built with Adafruit 2.4in TFT FeatherWing

Use Cirkit Designer to design, explore, and prototype these projects online. Some projects support real-time simulation. Click "Open Project" to start designing instantly!
Image of ARDUINO_SSD1306: A project utilizing Adafruit 2.4in TFT FeatherWing in a practical application
Arduino UNO and OLED FeatherWing Display: Battery-Powered Hello World Project
This circuit consists of an Arduino UNO connected to an Adafruit OLED FeatherWing display via I2C communication (SDA and SCL lines). The Arduino is powered through a Vcc source and provides 3.3V and GND connections to the OLED display. The Arduino runs a program to display 'Hello, World!' on the OLED screen.
Cirkit Designer LogoOpen Project in Cirkit Designer
Image of Tablero Moto: A project utilizing Adafruit 2.4in TFT FeatherWing in a practical application
Arduino Mega 2560 Controlled TFT Touchscreen Interface
This circuit connects an Arduino Mega 2560 microcontroller to a 3.5-inch 480x320 TFT LCD display. The Arduino provides power, ground, and digital signals to control the display, including data lines for pixel information and control lines for reset, write, and command/data selection. The embedded code initializes the display and configures the Arduino's pins for communication, likely to create a user interface or visual output for a project.
Cirkit Designer LogoOpen Project in Cirkit Designer
Image of EC444 - Quest 3: A project utilizing Adafruit 2.4in TFT FeatherWing in a practical application
ESP32-Based Vibration Feedback System with Quad Alphanumeric Display and ADXL343 Accelerometer
This circuit features an Adafruit HUZZAH32 ESP32 Feather board as the central microcontroller, which is connected to an Adafruit Quad AlphaNumeric Featherwing display and an Adafruit ADXL343 accelerometer via I2C communication (SCL and SDA lines). The ESP32 controls a vibration motor connected to one of its GPIO pins (A5_IO4) and shares a common power supply (3.3V) and ground (GND) with the other components. The purpose of this circuit is likely to read acceleration data, display information on the alphanumeric display, and provide haptic feedback through the vibration motor.
Cirkit Designer LogoOpen Project in Cirkit Designer
Image of BAROMETR BMP280 TFT 9488: A project utilizing Adafruit 2.4in TFT FeatherWing in a practical application
Arduino Nano and 3.5 TFT LCD Shield Display Interface
This circuit interfaces an Arduino Nano with a 3.5-inch TFT LCD Shield, allowing the Arduino to control the display and read/write data to it. The connections include data lines, control signals, and power, enabling the Arduino to drive the LCD for various display applications.
Cirkit Designer LogoOpen Project in Cirkit Designer

Common Applications and Use Cases

  • Portable gaming consoles
  • Data monitoring displays
  • Interactive control panels
  • DIY smartwatches
  • Educational projects

Technical Specifications

Key Technical Details

  • Display Type: 2.4" TFT LCD
  • Resolution: 320x240 pixels
  • Interface: SPI
  • Touch Screen: Resistive touch overlay (optional)
  • Operating Voltage: 3.3V - 5V DC
  • Logic Level: 3.3V compatible

Pin Configuration and Descriptions

Pin Number Name Description
1 GND Ground connection
2 3V 3.3V power supply
3 RST Reset pin
4 CS Chip Select for the TFT
5 SCK SPI Clock
6 MOSI SPI Master Out Slave In
7 MISO SPI Master In Slave Out (not used)
8 DC Data/Command control pin
9 BL Backlight control pin

Usage Instructions

Integrating with a Circuit

  1. Power Connections: Connect the 3V pin to the 3.3V output on your Feather board and GND to ground.
  2. SPI Connections: Connect SCK, MOSI, and CS to the corresponding SPI pins on your Feather board.
  3. Control Pins: Connect the RST and DC pins to any available digital I/O pins on your Feather board, noting which pins you use as they will be specified in your code.
  4. Backlight Control (Optional): Connect the BL pin to a PWM-capable pin if you wish to control the backlight brightness.

Important Considerations and Best Practices

  • Always ensure that the power supply is within the specified range to prevent damage.
  • Use a level shifter if you are interfacing with a 5V logic microcontroller.
  • When handling the display, be cautious not to apply pressure to the screen surface.
  • For optimal performance, update the display contents sparingly to minimize flickering.

Example Code for Arduino UNO

#include <Adafruit_GFX.h>    // Core graphics library
#include <Adafruit_TFTLCD.h> // Hardware-specific library

#define LCD_CS A3 // Chip Select goes to Analog 3
#define LCD_CD A2 // Command/Data goes to Analog 2
#define LCD_WR A1 // LCD Write goes to Analog 1
#define LCD_RD A0 // LCD Read goes to Analog 0
#define LCD_RESET A4 // Can alternately just connect to Arduino's reset pin

Adafruit_TFTLCD tft(LCD_CS, LCD_CD, LCD_WR, LCD_RD, LCD_RESET);

void setup() {
  tft.begin(); // Initialize the display
  tft.setRotation(1); // Set orientation
  tft.fillScreen(BLACK); // Clear the screen with a black background
}

void loop() {
  // Example: Draw a red rectangle
  tft.fillRect(50, 50, 100, 150, RED);
  delay(1000);
  
  // Example: Display text
  tft.setCursor(60, 60);
  tft.setTextColor(WHITE);  
  tft.setTextSize(2);
  tft.println("Hello, World!");
  delay(2000);
}

Troubleshooting and FAQs

Common Issues

  • Display Not Powering On: Check the power connections and ensure the voltage is within the specified range.
  • No Display Output: Verify that the SPI connections are correct and that the correct pins are defined in your code.
  • Flickering or Unstable Display: Reduce the frequency of screen updates or check for loose connections.

Solutions and Tips for Troubleshooting

  • Double-check wiring against the pin configuration table.
  • Ensure that the library versions you are using are compatible with your hardware.
  • If using the backlight control, ensure that the PWM signal is correctly configured.

FAQs

Q: Can I use this display with a 5V microcontroller? A: Yes, but ensure that the logic levels are shifted to 3.3V to avoid damaging the display.

Q: Is the touch screen feature available by default? A: The resistive touch overlay is optional and requires additional connections and libraries if implemented.

Q: How can I control the backlight brightness? A: Connect the BL pin to a PWM-capable pin and use analogWrite() in your code to adjust the brightness.

For further assistance, consult the Adafruit forums or the detailed product guides available on the Adafruit website.