How to Use KY-008 Laser Emitter: Examples, Pinouts, and Specs
Introduction
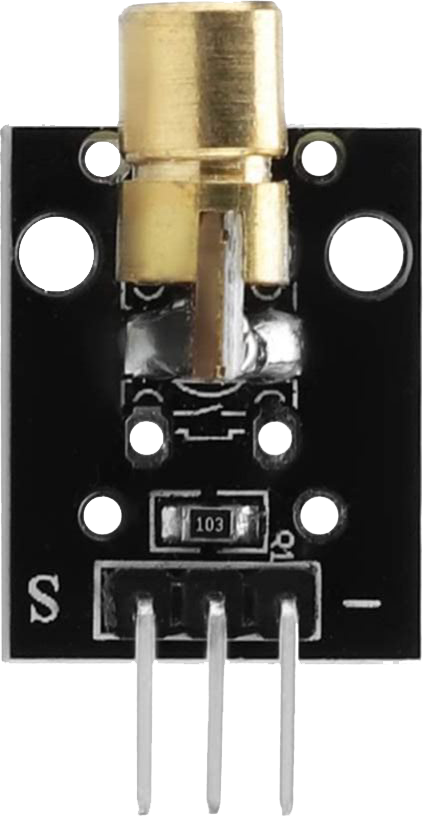
The KY-008 Laser Emitter module is a compact and efficient device that emits a focused beam of visible red light. It is commonly used in hobbyist and educational projects for applications such as distance measurement, optical communication, and positioning systems. The module is straightforward to use and can be easily interfaced with microcontrollers like the Arduino UNO.
Explore Projects Built with KY-008 Laser Emitter
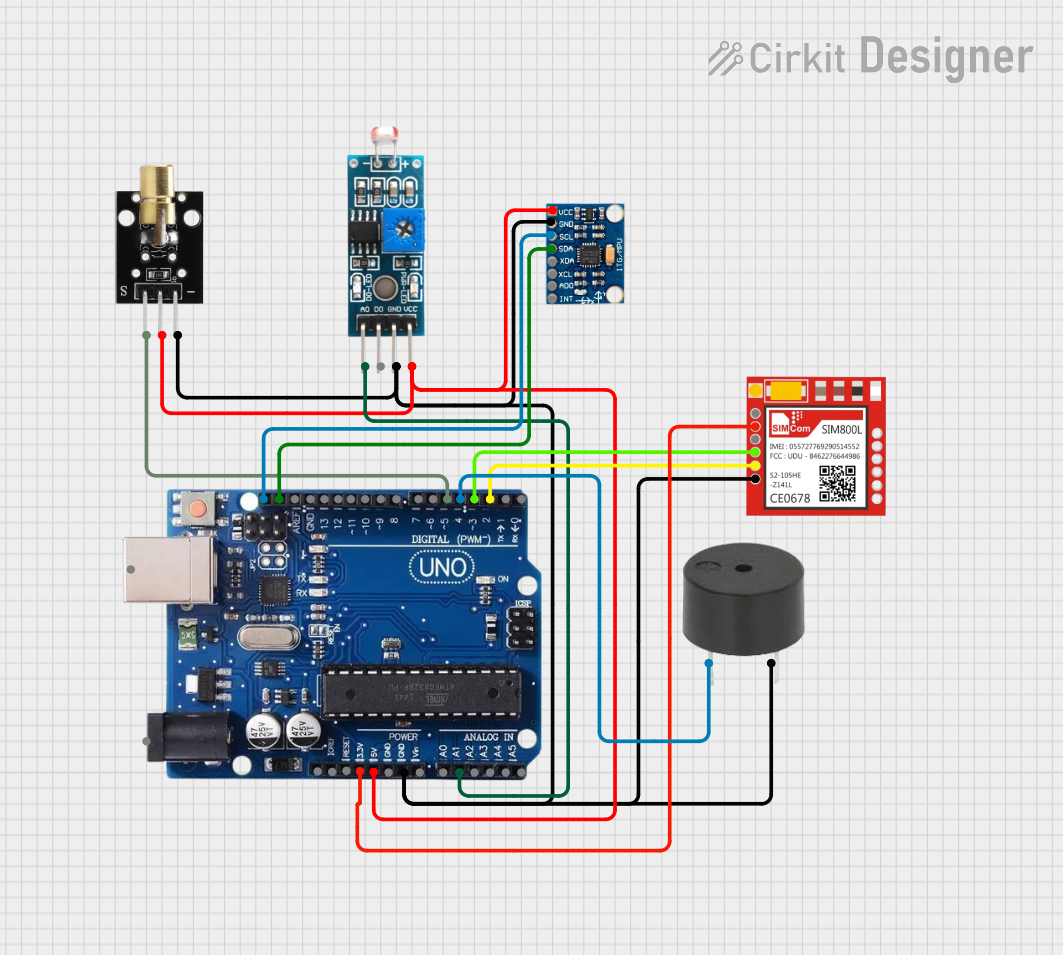

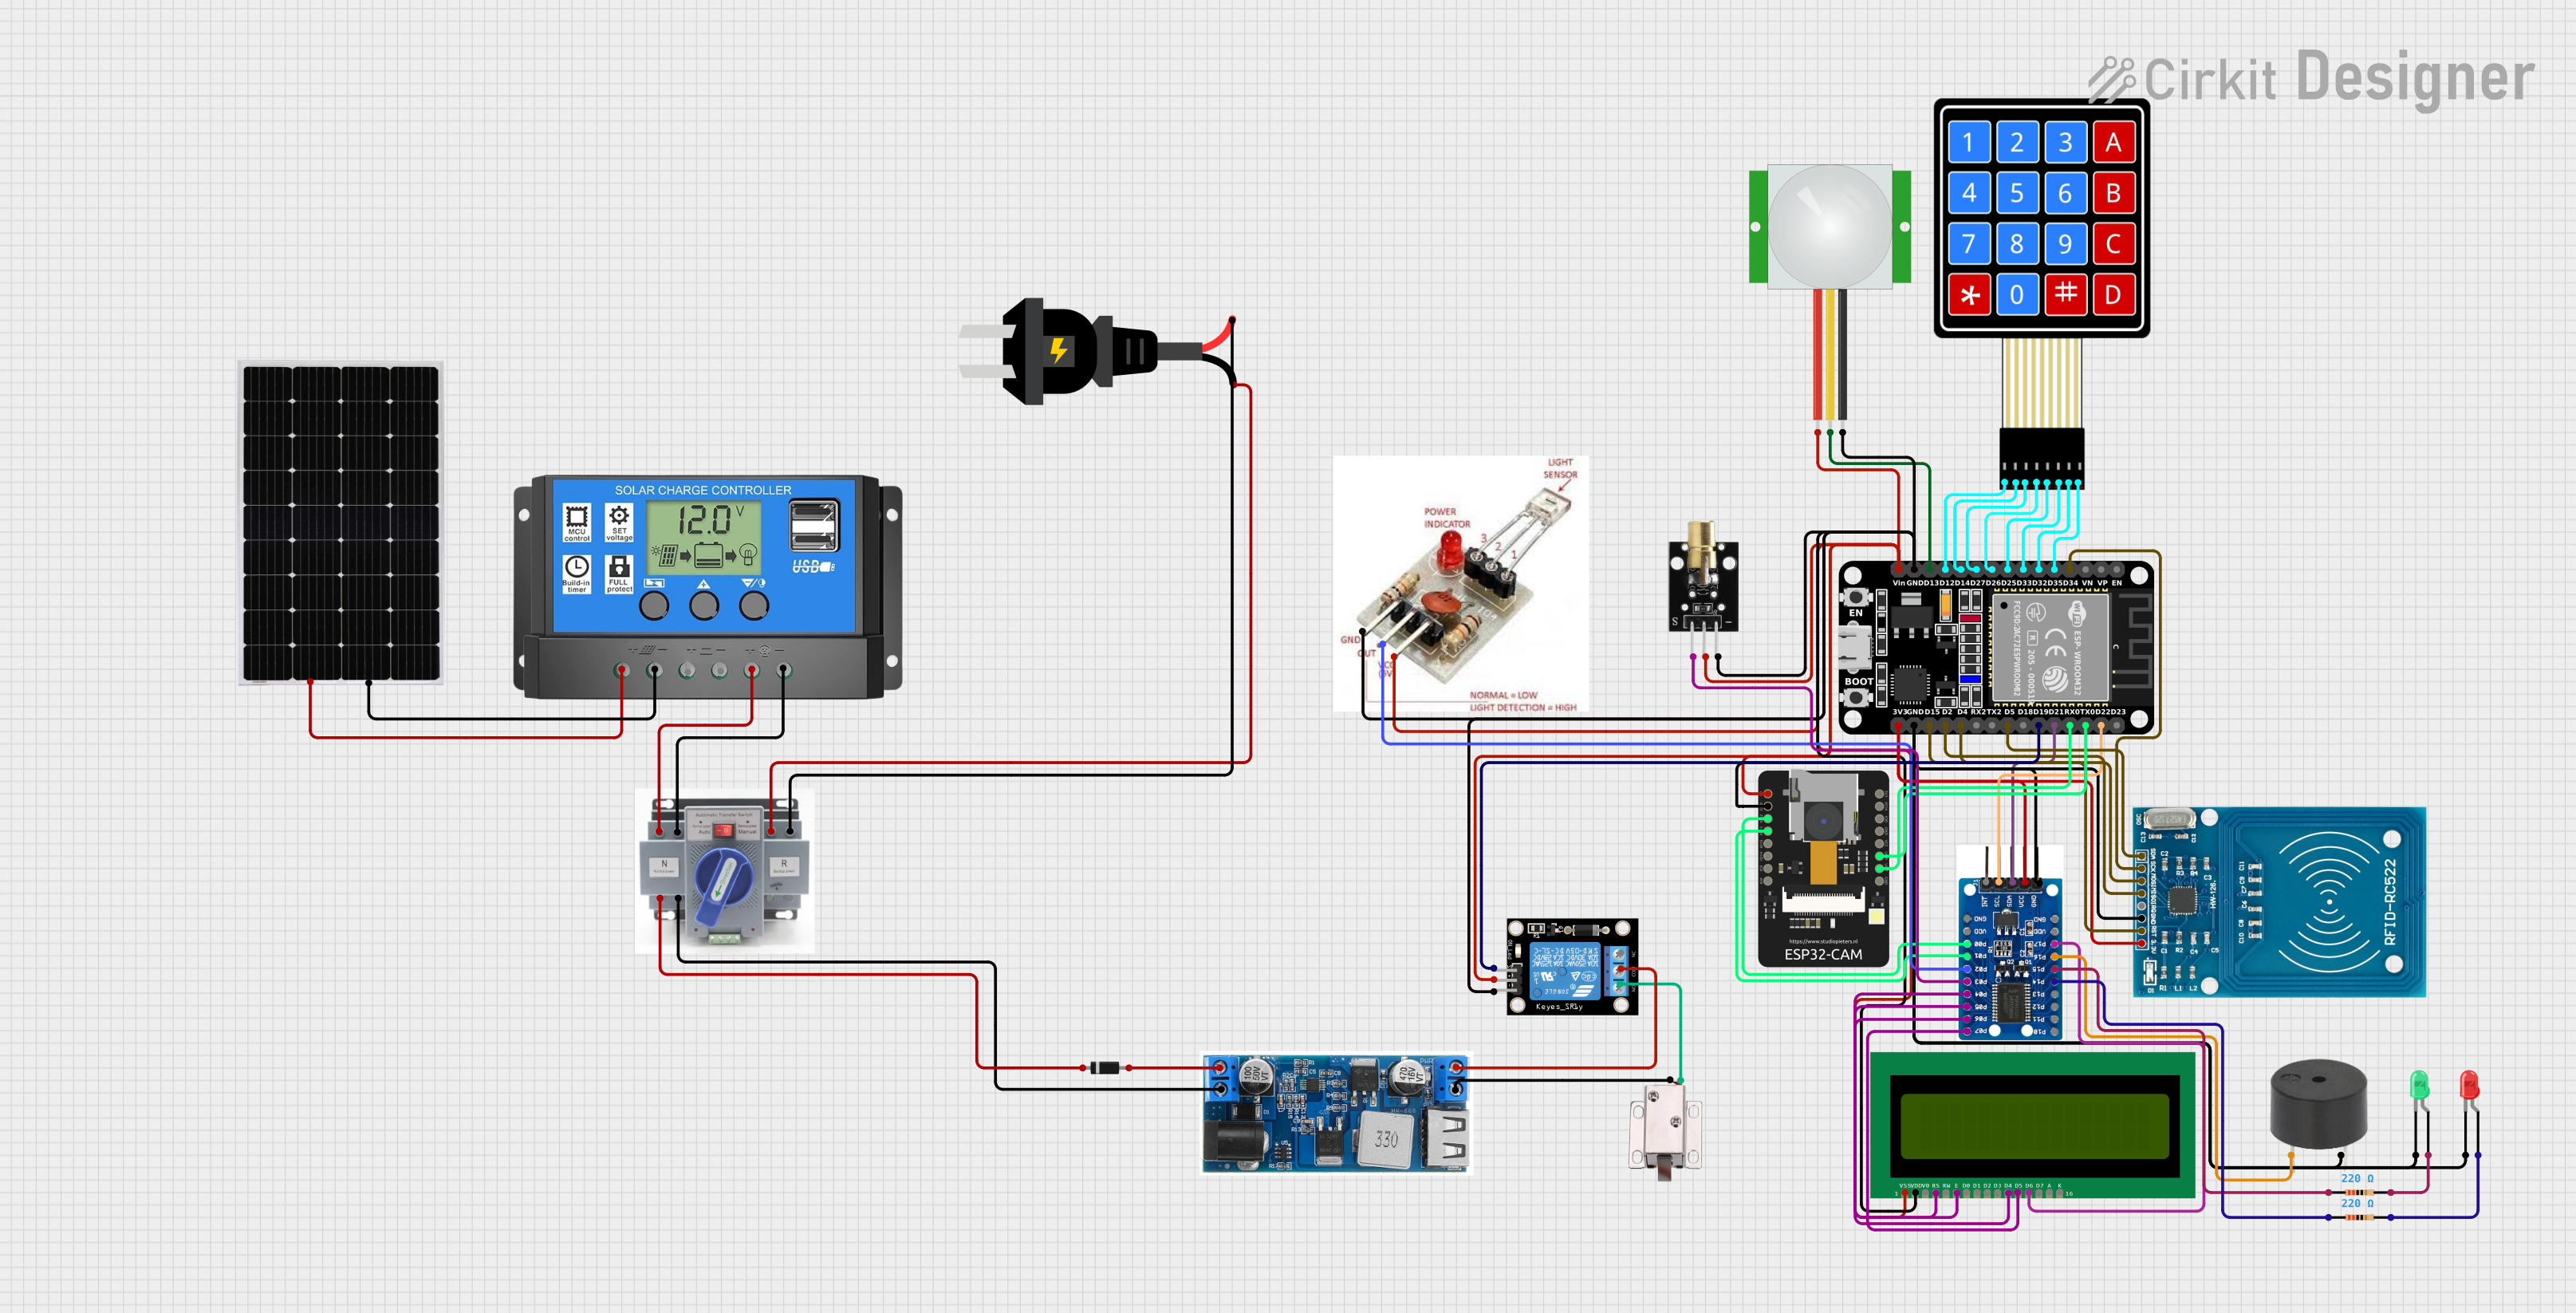
Explore Projects Built with KY-008 Laser Emitter
Technical Specifications
Key Technical Details
- Laser Type: Semiconductor laser
- Operating Voltage: 5V
- Operating Current: <40mA
- Wavelength: 650nm (red light)
- Output Power: <5mW
- Operating Temperature: -10°C to +40°C
Pin Configuration and Descriptions
| Pin | Description |
|---|---|
| S | Signal input (TTL level) |
| + | 5V power supply |
| - | Ground (GND) |
Usage Instructions
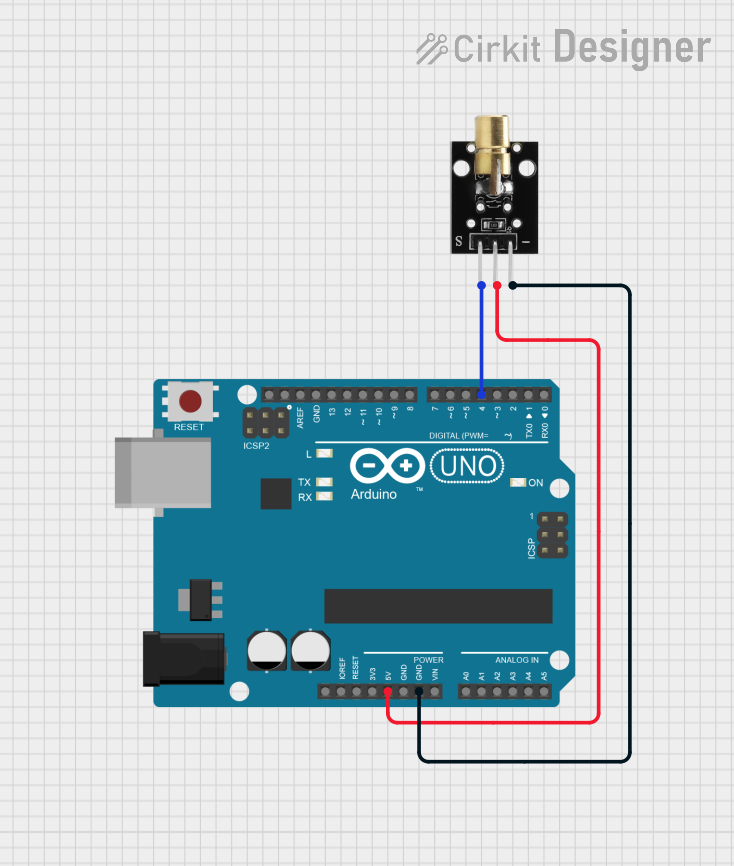
Interfacing with an Arduino UNO
Connecting the Module:
- Connect the KY-008 module's
Spin to a digital I/O pin on the Arduino UNO (e.g., pin 13). - Connect the
+pin to the 5V output on the Arduino. - Connect the
-pin to one of the GND pins on the Arduino.
- Connect the KY-008 module's
Sample Code:
// KY-008 Laser Emitter Module Example Code
const int laserPin = 13; // Laser module connected to digital pin 13

void setup() {
  pinMode(laserPin, OUTPUT); // Set laser pin as output
}

void loop() {
  digitalWrite(laserPin, HIGH); // Turn on the laser
  delay(1000);                 // Keep the laser on for 1 second
  digitalWrite(laserPin, LOW);  // Turn off the laser
  delay(1000);                 // Keep the laser off for 1 second
}
Important Considerations and Best Practices
- Safety: Avoid direct eye exposure to the laser beam as it can cause eye damage.
- Heat Dissipation: Ensure adequate ventilation around the module to prevent overheating.
- Power Supply: Do not exceed the recommended voltage as it may damage the module.
Troubleshooting and FAQs
Common Issues
- Laser Not Emitting: Check connections and ensure the Arduino is supplying power.
- Weak Laser Beam: Verify that the power supply is stable and at the correct voltage.
Solutions and Tips
- Connection Issues: Double-check wiring against the pin configuration.
- Code Problems: Ensure the correct pin is defined in the code and that the Arduino IDE is configured for the correct board and port.
FAQs
Q: Can I use the KY-008 with a 3.3V system? A: The KY-008 is designed for 5V operation. Using it with 3.3V may result in a weaker beam or no emission.
Q: Is it possible to modulate the laser for communication purposes? A: Yes, you can modulate the input signal to encode information.
Q: How can I adjust the focus of the laser beam? A: The KY-008 module typically does not have an adjustable focus. It emits a fixed narrow beam.
Q: How far can the laser beam go? A: The range depends on ambient light conditions and the sensitivity of the receiving sensor. In a clear and dark environment, the beam can be visible for several meters.
Q: Is the KY-008 Laser Emitter legal to use? A: Yes, but always comply with local regulations regarding laser devices, especially concerning exposure and safety standards.
Remember to always prioritize safety when working with laser components. Avoid looking directly into the laser beam and do not point it at others. Use the module responsibly to ensure a safe and enjoyable experience with your projects.