How to Use Shifting microSD: Examples, Pinouts, and Specs
Introduction
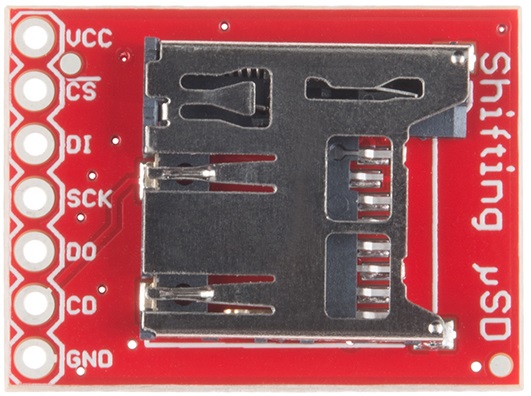
The shifting microSD card slot is a compact and versatile connector that allows users to easily insert and remove microSD cards from electronic devices. This component is widely used in portable devices such as smartphones, digital cameras, GPS units, and IoT devices where space is at a premium and data portability is essential. It is also commonly found in development boards and can be interfaced with microcontrollers like the Arduino UNO for data logging, file storage, and multimedia projects.
Explore Projects Built with Shifting microSD
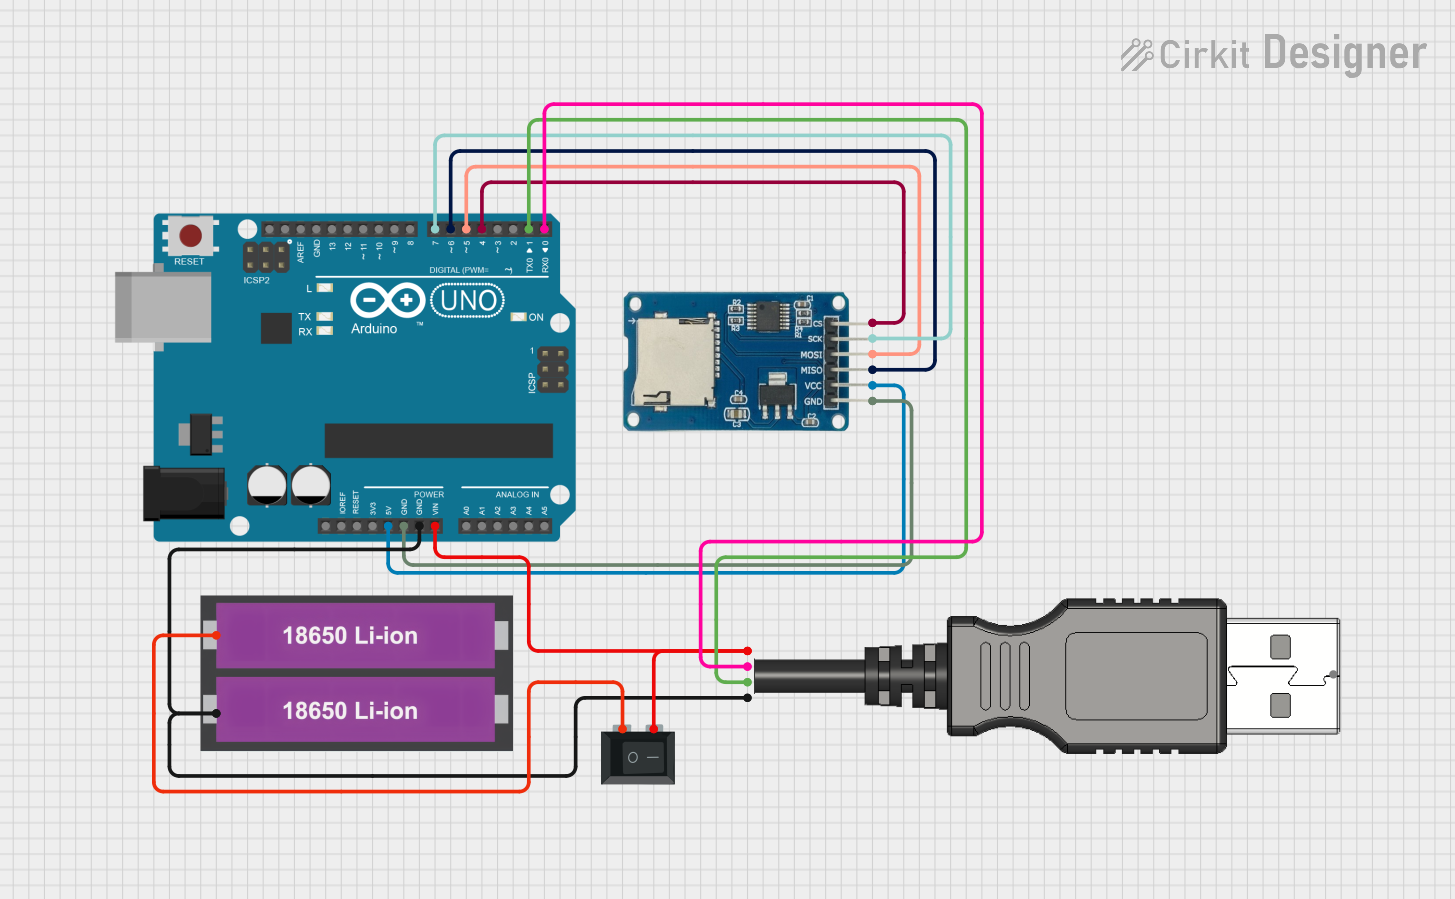
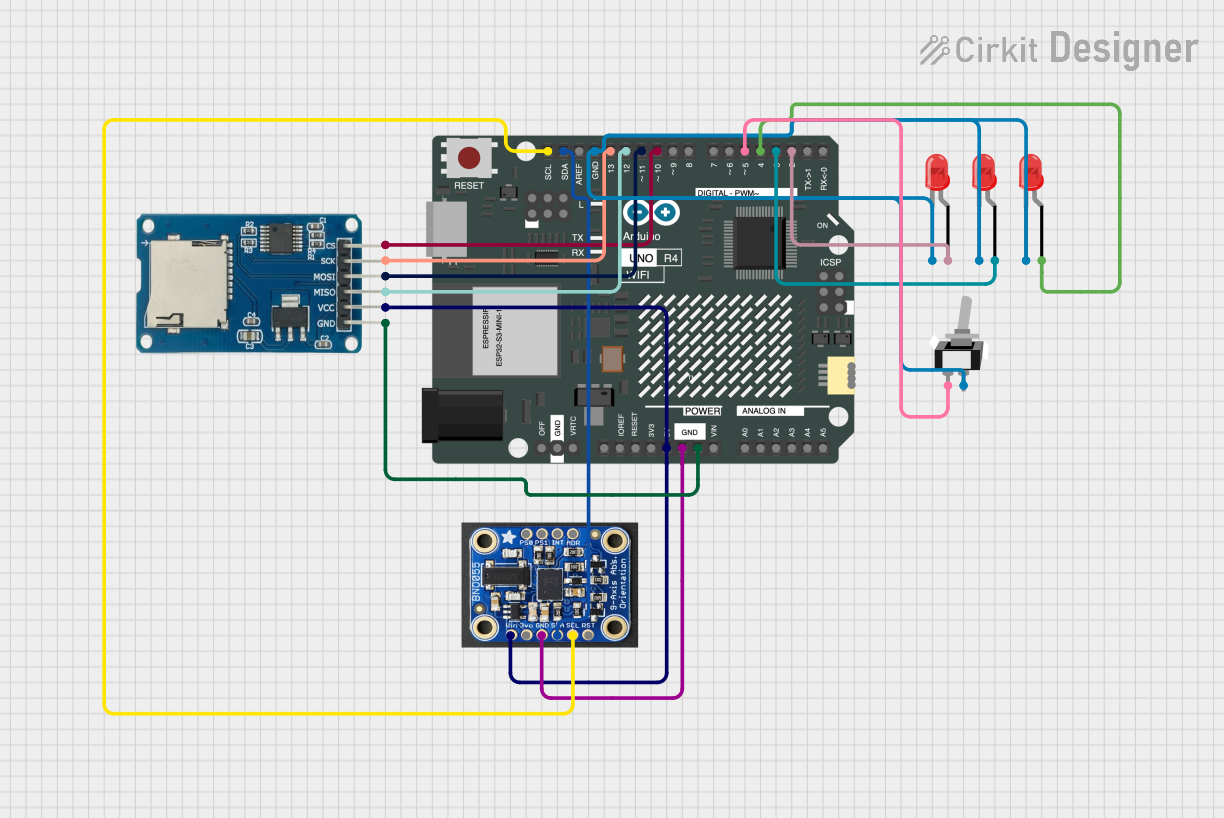
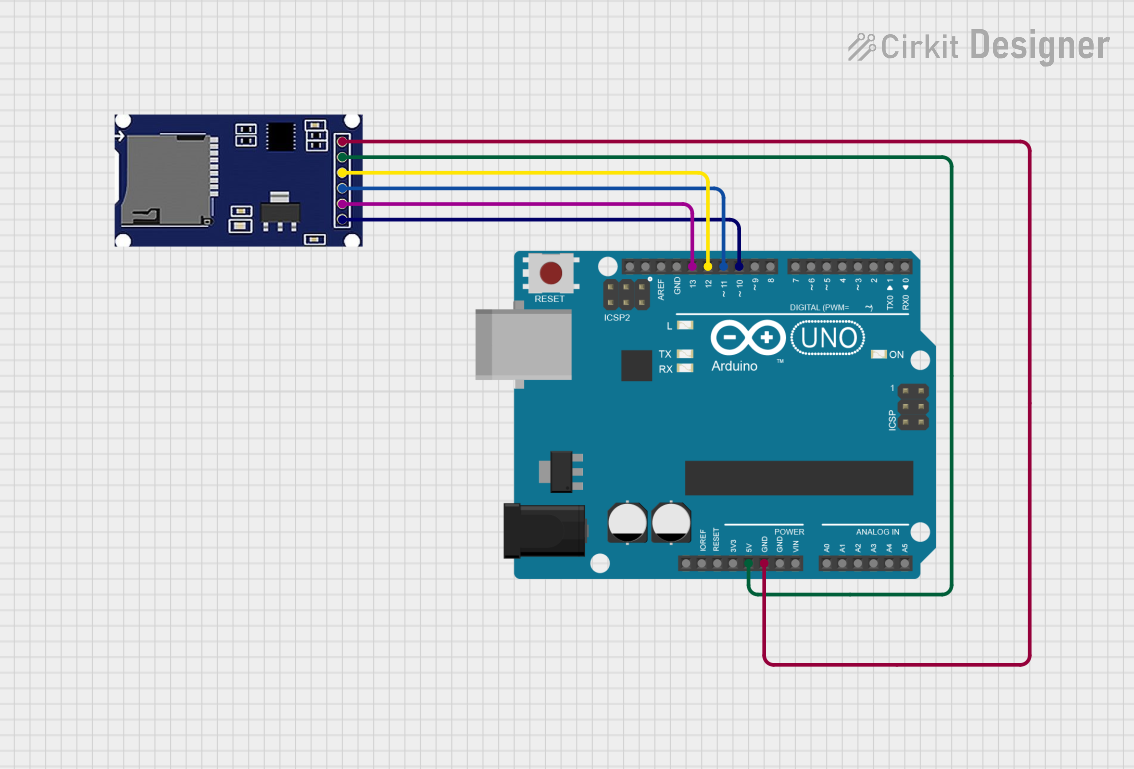
Explore Projects Built with Shifting microSD
Technical Specifications
General Specifications
- Type: Push-Pull/ Push-Push microSD card slot
- Compatibility: Supports microSD, microSDHC, and microSDXC cards
- Durability: Typically rated for 10,000 insertion/removal cycles
- Operating Temperature: -25°C to +85°C
Electrical Specifications
- Supply Voltage (Vcc): 3.3V typically
- Maximum Current Rating: 0.5A for contact pin
- Contact Resistance: 100 mOhms maximum
- Insulation Resistance: 1000 MOhms minimum at 500V DC
Pin Configuration and Descriptions
| Pin Number | Name | Description |
|---|---|---|
| 1 | DAT0 | Data line 0 |
| 2 | CD/DAT3 | Card Detect/Data line 3 |
| 3 | CMD | Command line |
| 4 | VCC | Supply Voltage |
| 5 | CLK | Clock |
| 6 | GND | Ground |
| 7 | DAT1 | Data line 1 |
| 8 | DAT2 | Data line 2 |
Usage Instructions
Interfacing with a Circuit
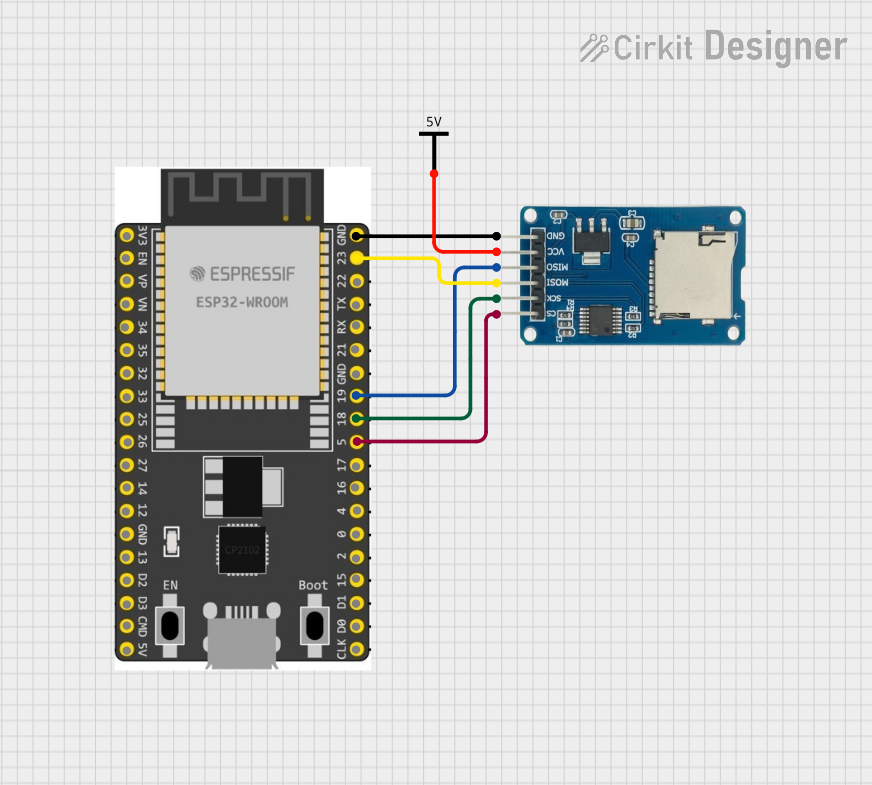
To use the shifting microSD card slot with a microcontroller like the Arduino UNO, follow these steps:
Power Connections:
- Connect the VCC pin to a 3.3V supply from the Arduino.
- Connect the GND pin to the ground on the Arduino.
Data Connections:
- Connect the CLK, CMD, and DAT0-DAT3 pins to the corresponding SPI pins on the Arduino. For Arduino UNO, these are typically pins 11-13 and pin 4 for CS (Chip Select).
Card Detection:
- Optionally, connect the CD/DAT3 pin to a digital input pin if card detection functionality is needed.
Best Practices
- Ensure that the power supply is stable and clean to prevent data corruption.
- Use a level shifter if the microcontroller operates at a voltage higher than 3.3V to avoid damaging the microSD card.
- Format the microSD card to the appropriate file system (usually FAT32) before use.
- Handle the microSD card with care to avoid static discharge or physical damage.
Example Code for Arduino UNO
#include <SPI.h>
#include <SD.h>

const int chipSelect = 4; // Chip select pin for the microSD card

void setup() {
  Serial.begin(9600);
  while (!Serial) {
    ; // Wait for serial port to connect.
  }

  Serial.print("Initializing SD card...");

  if (!SD.begin(chipSelect)) {
    Serial.println("initialization failed!");
    return;
  }
  Serial.println("initialization done.");
}

void loop() {
  // Open a new file and immediately close it:
  File dataFile = SD.open("example.txt", FILE_WRITE);

  // If the file is available, write to it:
  if (dataFile) {
    dataFile.println("Hello, World!");
    dataFile.close();
    Serial.println("Data written to example.txt");
  } else {
    // If the file isn't open, pop up an error:
    Serial.println("error opening example.txt");
  }
}
Troubleshooting and FAQs
Common Issues
- Card Not Detected: Ensure the card is inserted correctly and the pins are properly connected.
- Read/Write Errors: Check if the microSD card is formatted correctly and not locked.
- Corrupted Data: Make sure the power supply is stable and the card is not removed during a write operation.
FAQs
Q: Can I use a 5V supply with the microSD card slot? A: No, a 5V supply can damage the microSD card. Always use a 3.3V supply.
Q: How do I know if the microSD card is properly inserted? A: Some microSD card slots have a tactile click when the card is inserted. Additionally, you can check the card detection pin if connected.
Q: What is the maximum storage capacity supported? A: The shifting microSD card slot supports microSD, microSDHC, and microSDXC cards, which can range up to several terabytes, depending on the specific model.
Q: Can I hot-swap the microSD card while the device is powered? A: It is not recommended to hot-swap the microSD card as it may lead to data corruption or hardware damage. Always power down the device before inserting or removing the card.