How to Use HotRC: Examples, Pinouts, and Specs

Introduction
HotRC is a high-performance resistor designed for use in electronic circuits where stability and reliability are critical. Manufactured by HotRC, this component is known for its ability to handle high temperatures and maintain consistent resistance values even under varying environmental and electrical conditions. Its robust design makes it suitable for a wide range of applications, including power supplies, motor controllers, and industrial equipment.
Explore Projects Built with HotRC
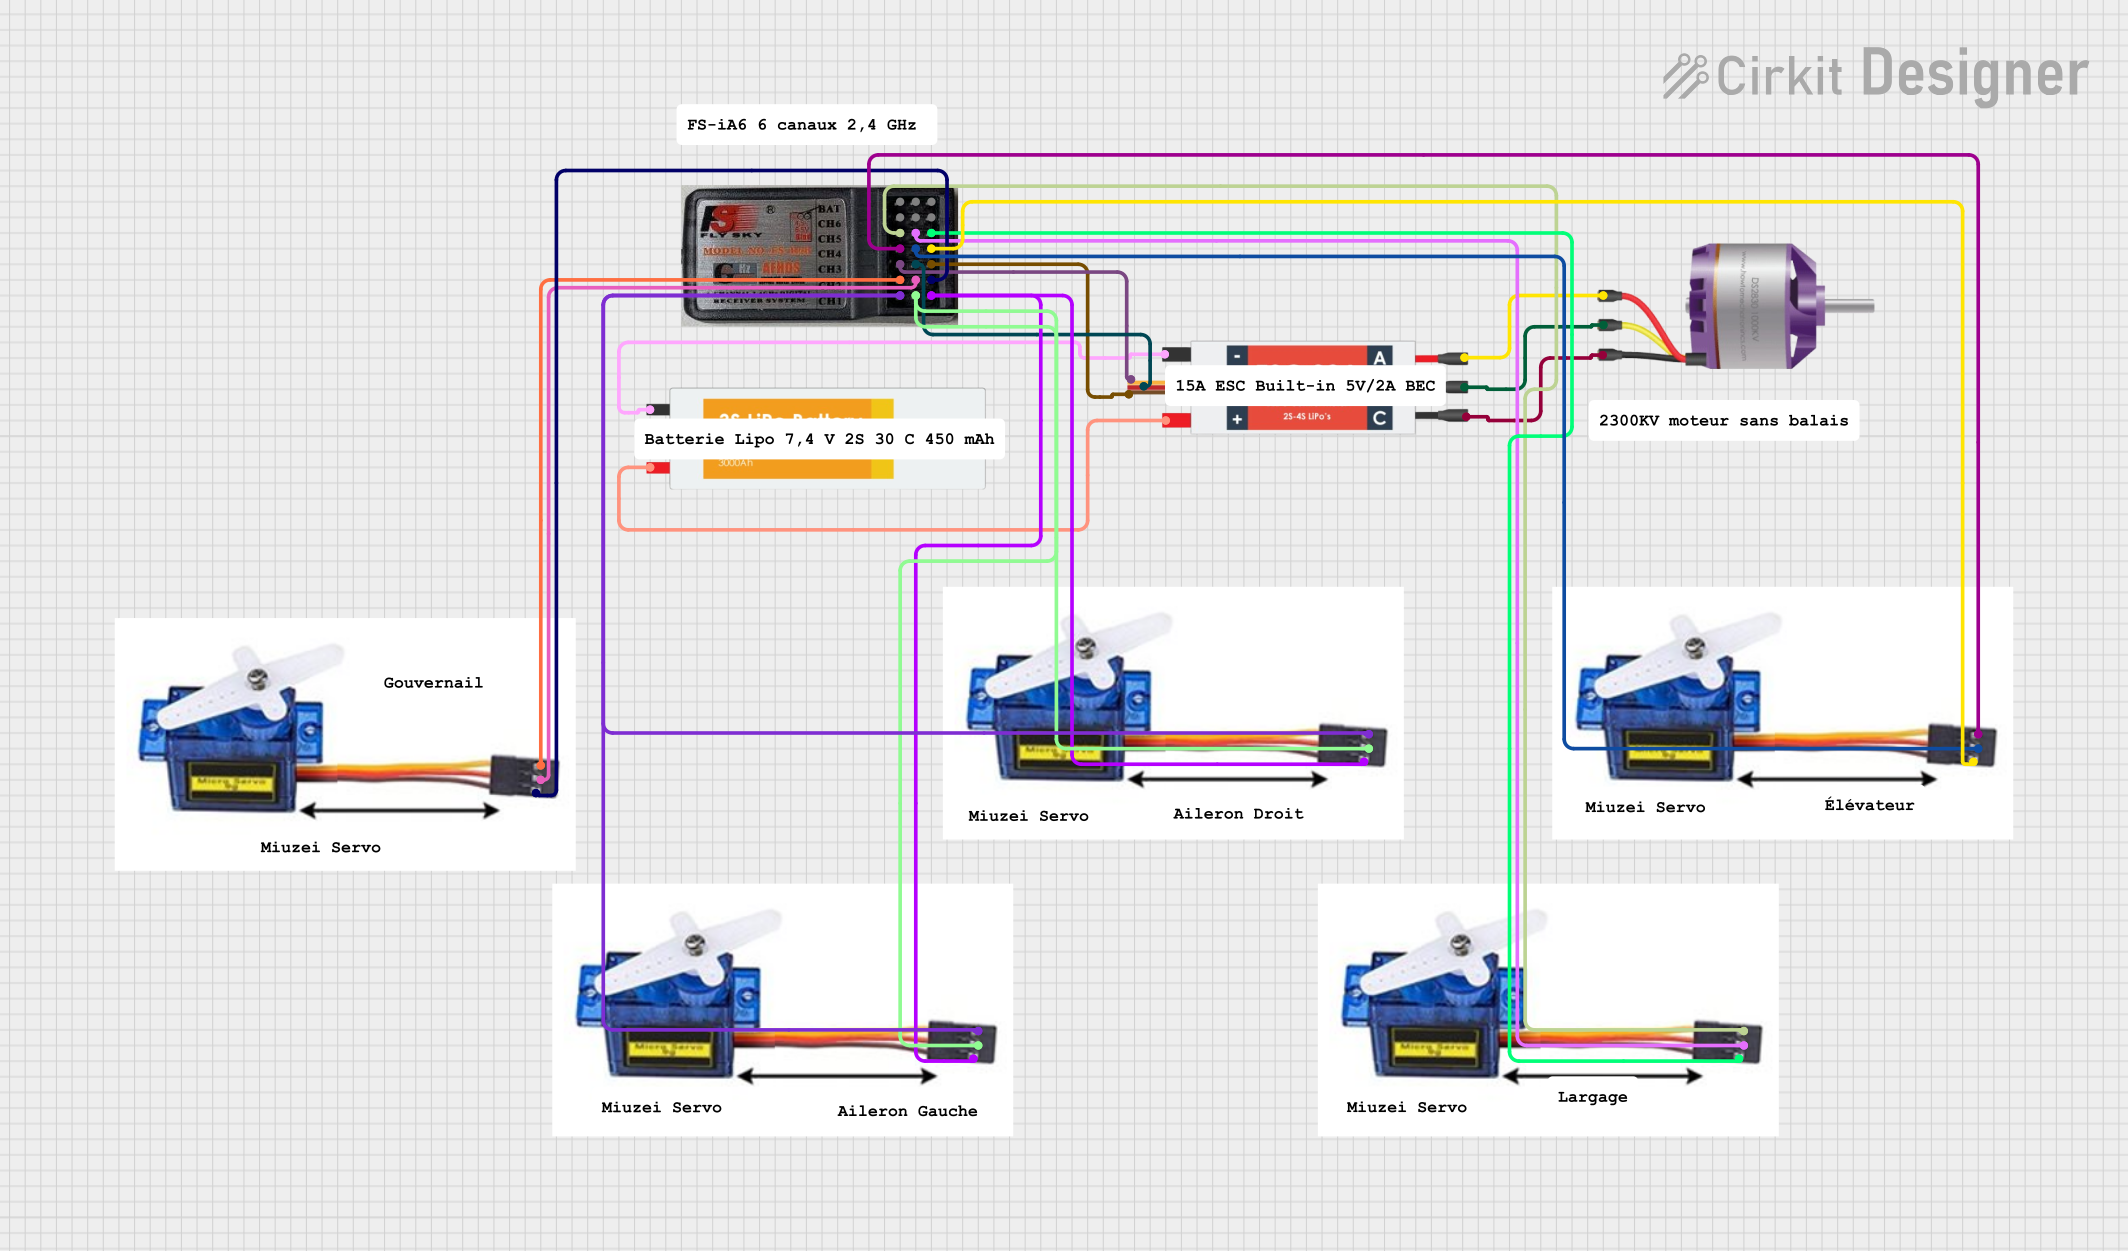
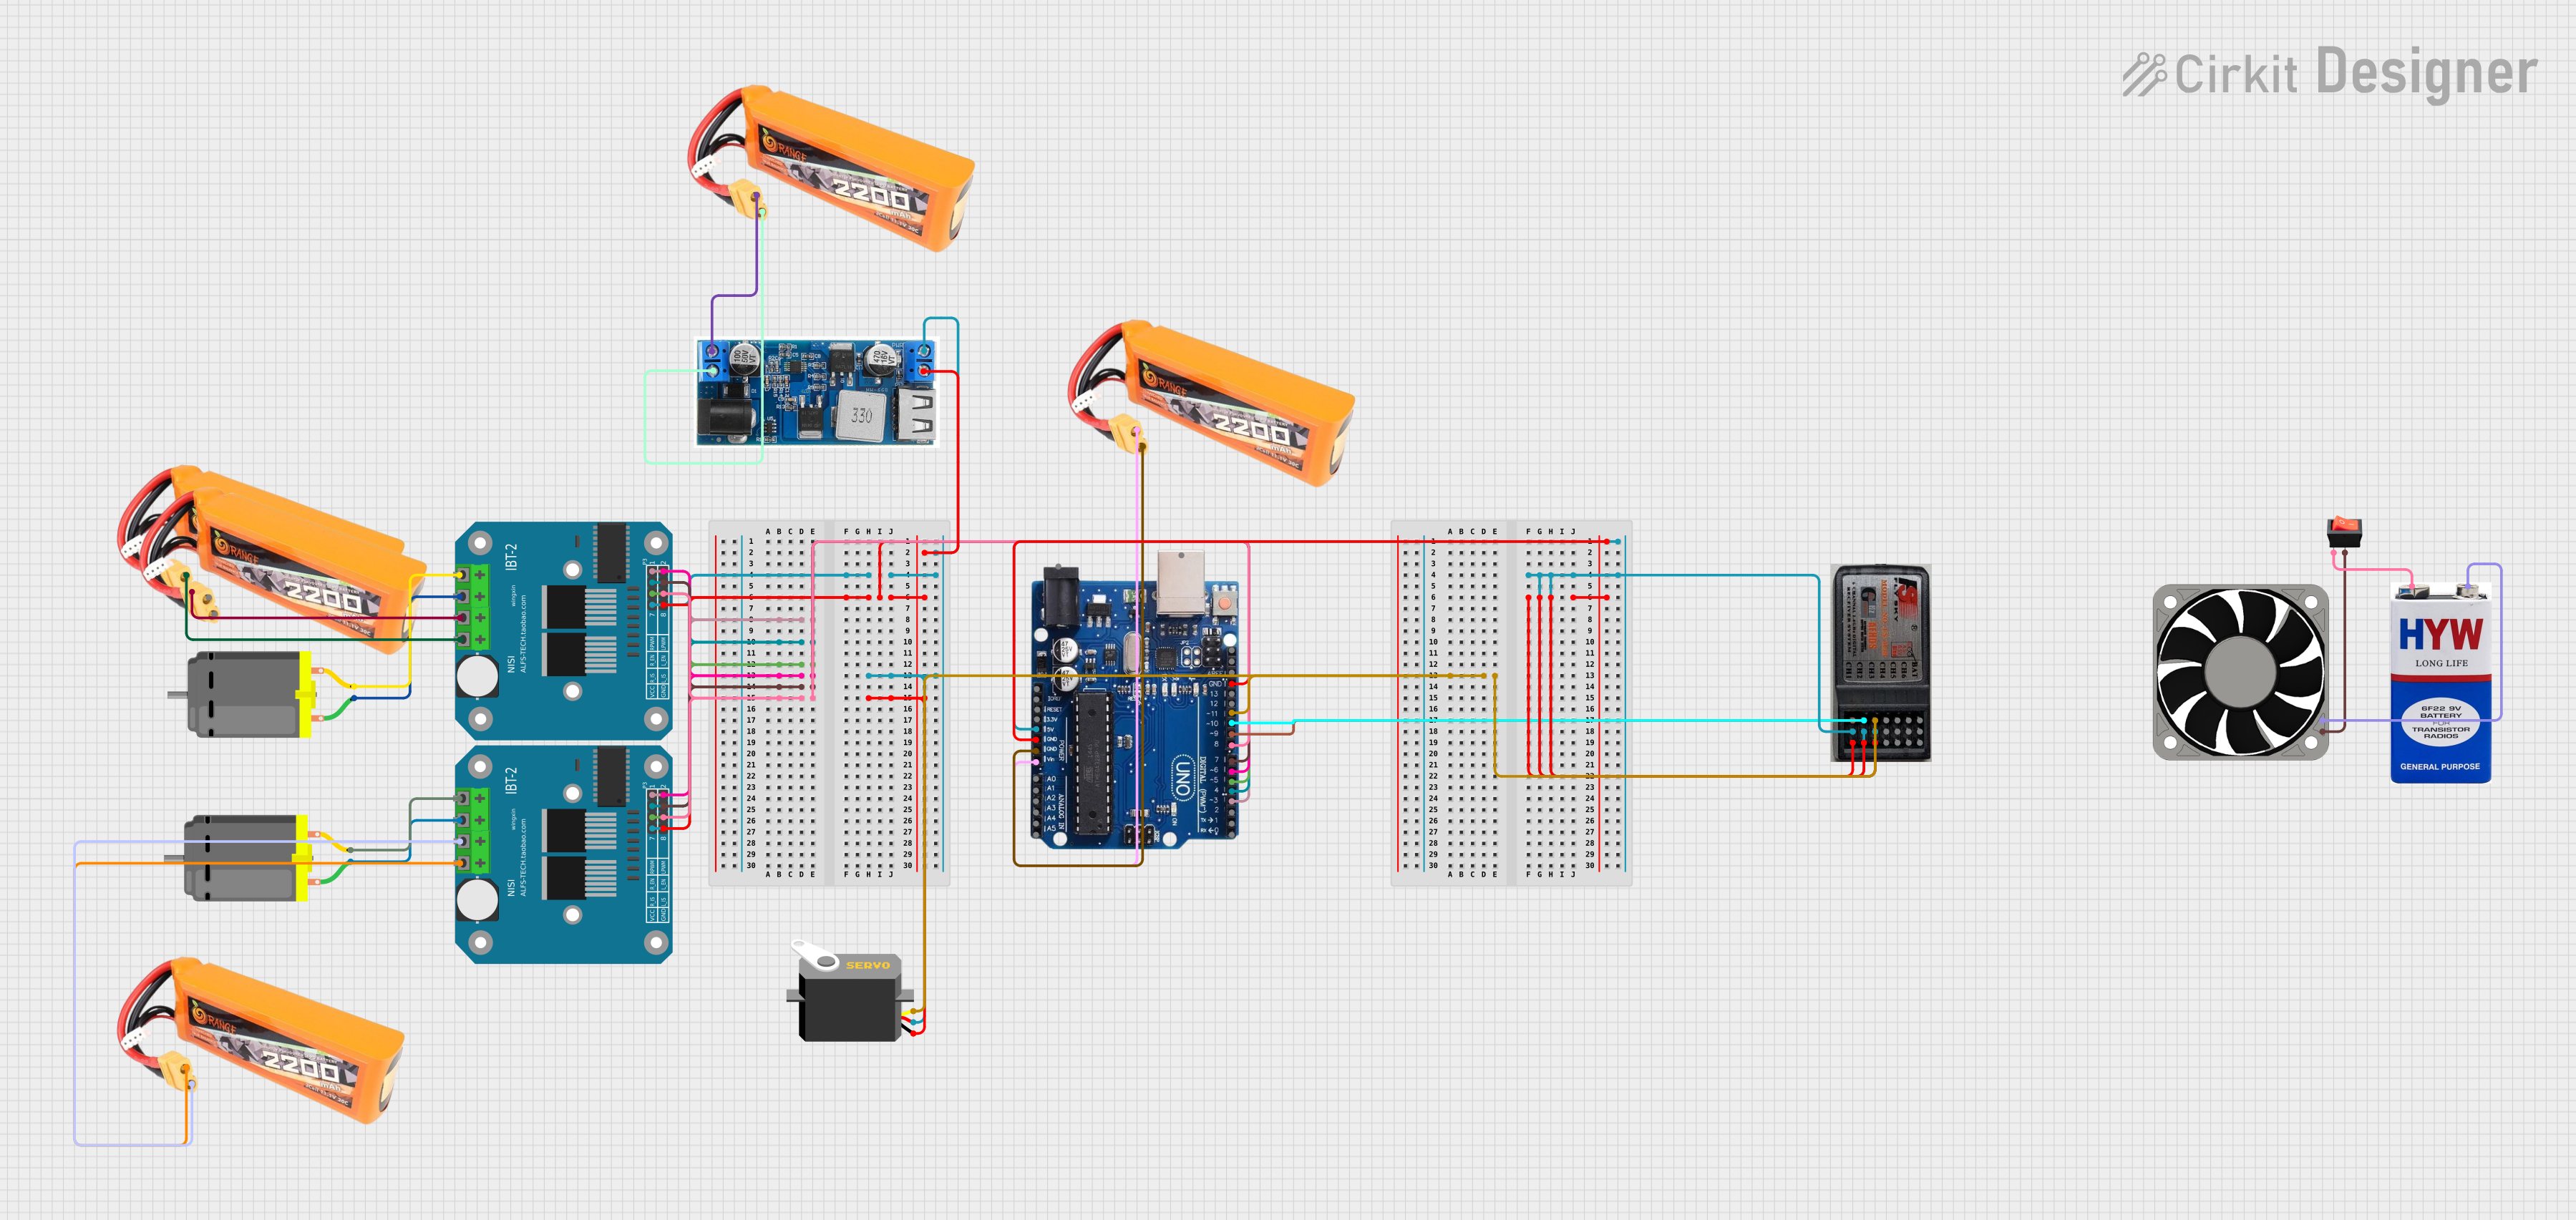
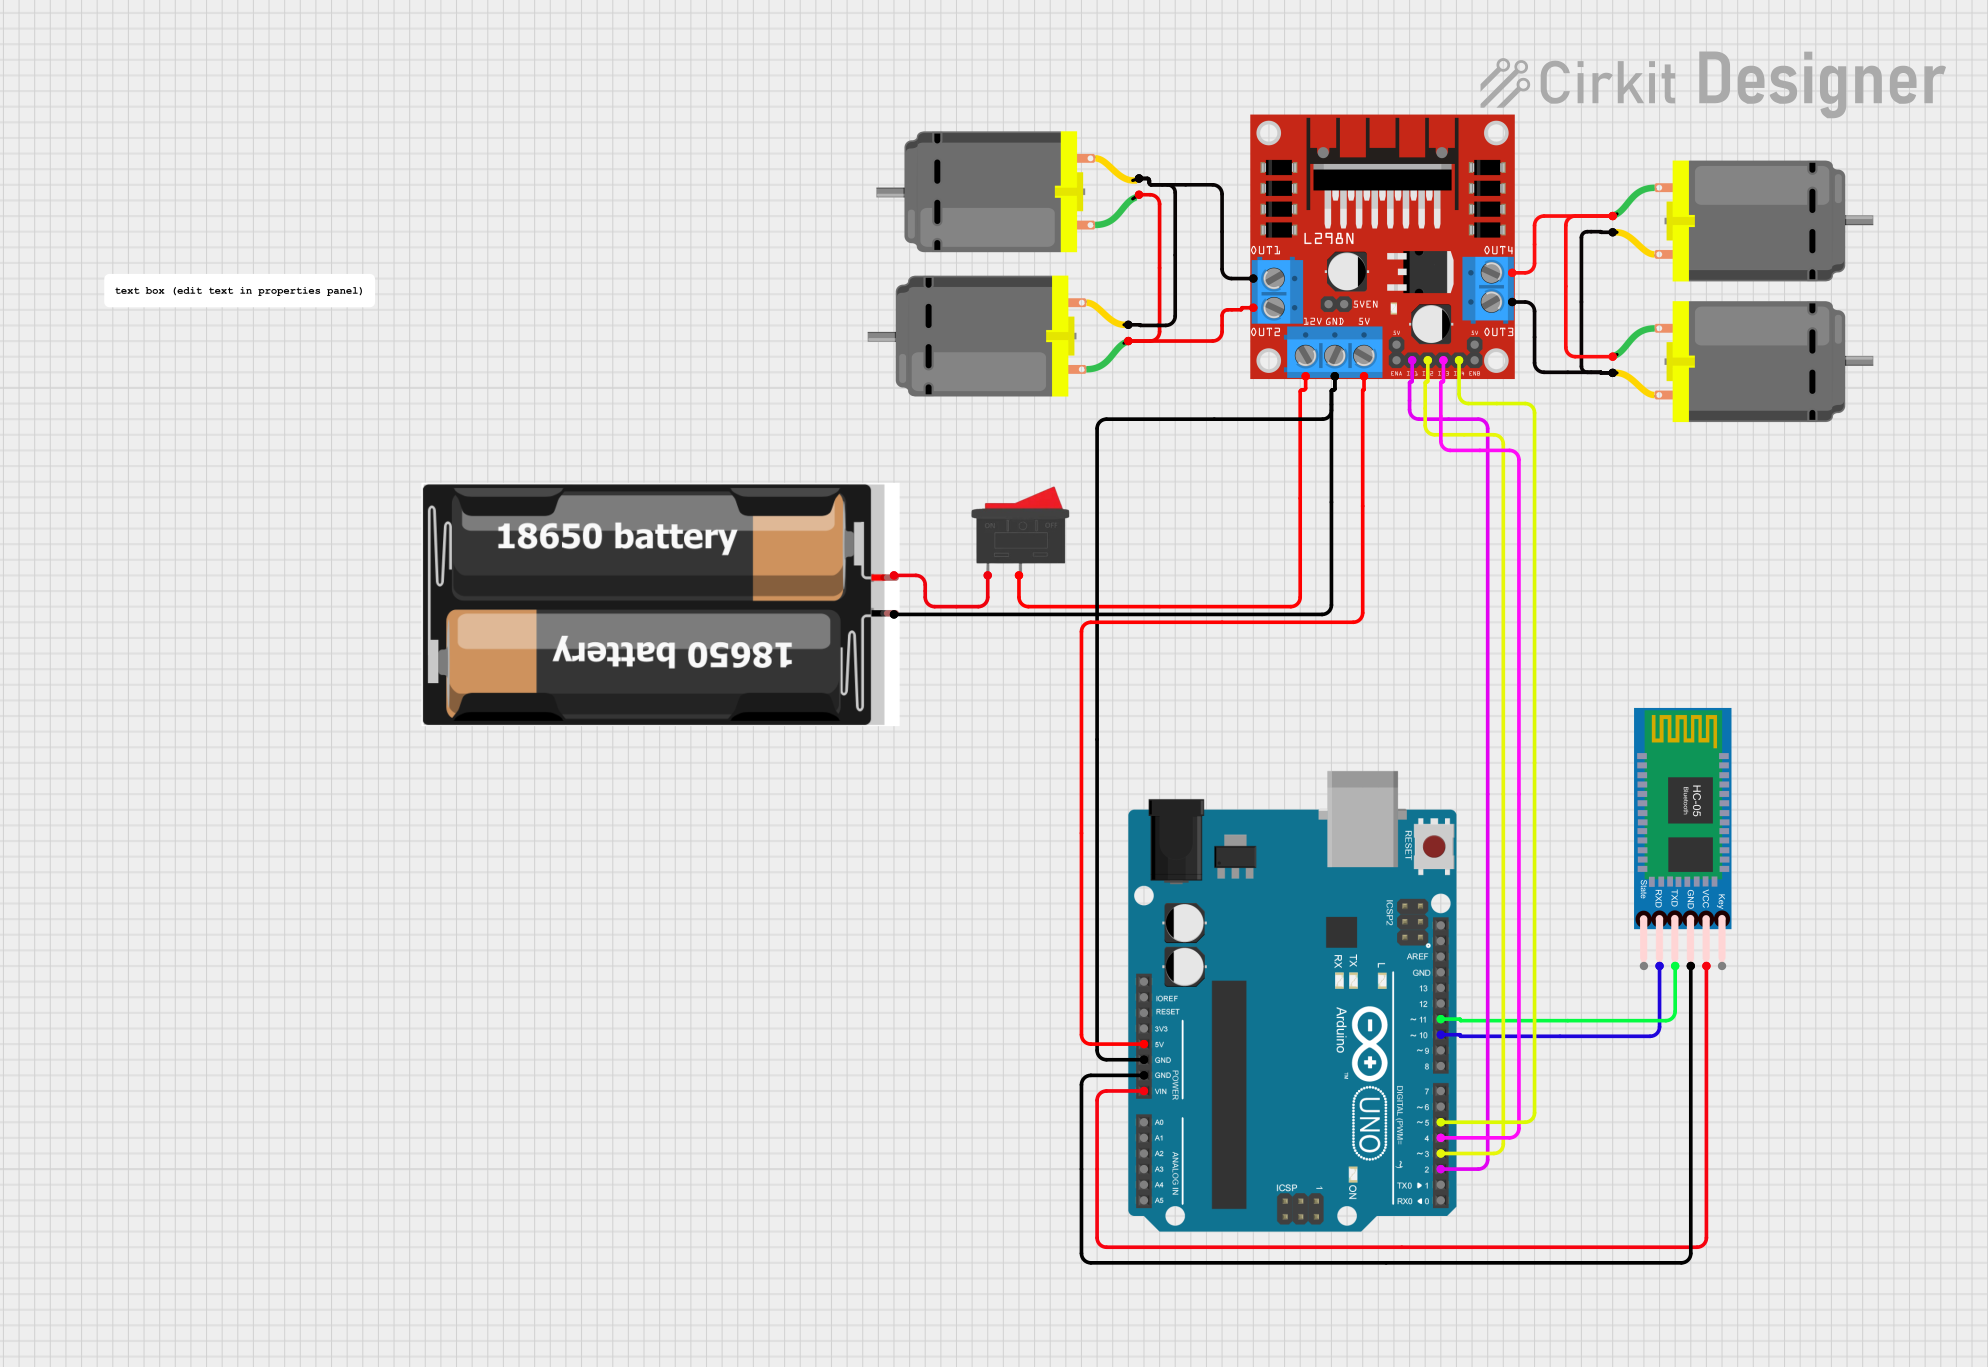
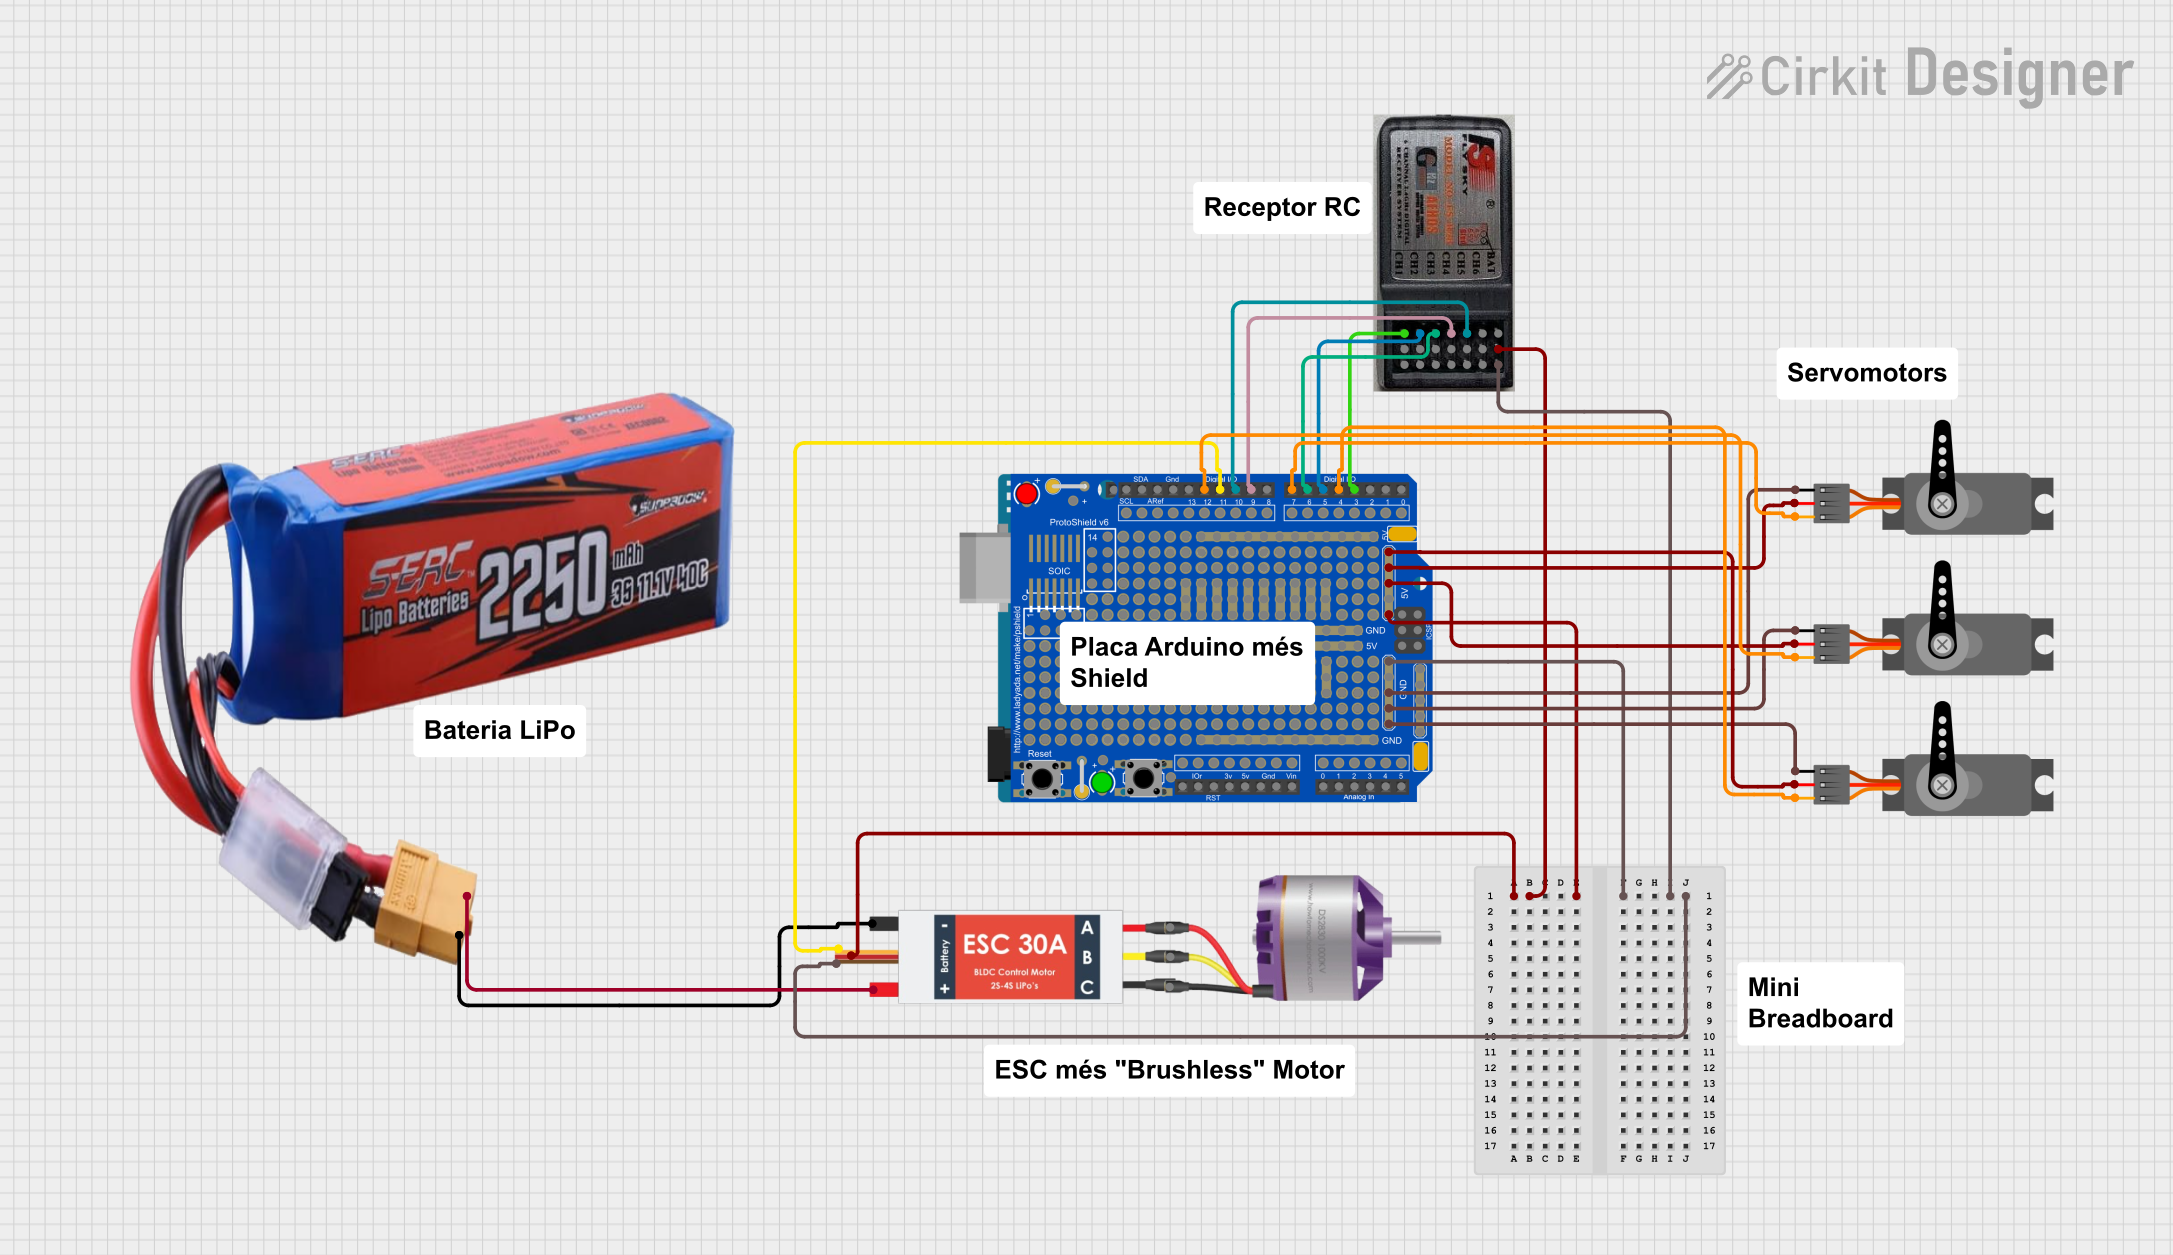
Explore Projects Built with HotRC
Common Applications and Use Cases
- Power supply circuits requiring high-temperature tolerance
- Motor control systems
- Industrial automation and equipment
- High-precision measurement devices
- Circuits exposed to harsh environmental conditions
Technical Specifications
The HotRC resistor is engineered to meet demanding performance requirements. Below are its key technical specifications:
| Parameter | Value |
|---|---|
| Resistance Range | 1 Ω to 1 MΩ |
| Tolerance | ±1%, ±5% |
| Power Rating | 0.25 W, 0.5 W, 1 W, 2 W |
| Maximum Operating Temp | 200°C |
| Temperature Coefficient | ±50 ppm/°C |
| Material | High-grade ceramic and metal film |
Pin Configuration and Descriptions
The HotRC resistor is a two-terminal passive component. Below is the pin configuration:
| Pin | Description |
|---|---|
| Pin 1 | Connects to one side of the circuit |
| Pin 2 | Connects to the other side of the circuit |
Usage Instructions
How to Use the Component in a Circuit
- Determine the Required Resistance Value: Use Ohm's Law (V = IR) to calculate the resistance needed for your circuit.
- Select the Appropriate Power Rating: Ensure the resistor's power rating exceeds the power it will dissipate in the circuit. Use the formula:
[ P = I^2 \times R ]
where ( P ) is power, ( I ) is current, and ( R ) is resistance. - Place the Resistor in the Circuit: Connect the resistor in series or parallel, depending on the circuit design.
- Solder the Resistor: If using a PCB, solder the resistor securely to the board, ensuring proper thermal management.
Important Considerations and Best Practices
- Avoid Overloading: Do not exceed the resistor's power rating to prevent overheating or failure.
- Check for Tolerance: Ensure the resistor's tolerance is suitable for your application, especially in precision circuits.
- Thermal Management: In high-power applications, consider using heat sinks or proper ventilation to dissipate heat.
- Verify Connections: Double-check the resistor's placement and connections before powering the circuit.
Example: Using HotRC with Arduino UNO
The HotRC resistor can be used in conjunction with an Arduino UNO for various applications, such as current limiting for LEDs. Below is an example:
Circuit Description
This example demonstrates how to use a 220 Ω HotRC resistor to limit current to an LED connected to an Arduino UNO.
Code Example
// Arduino code to blink an LED using a HotRC resistor
// The resistor limits the current to protect the LED and Arduino pin

const int ledPin = 9; // Pin connected to the LED (via a 220 Ω resistor)

void setup() {
  pinMode(ledPin, OUTPUT); // Set the LED pin as an output
}

void loop() {
  digitalWrite(ledPin, HIGH); // Turn the LED on
  delay(1000);               // Wait for 1 second
  digitalWrite(ledPin, LOW);  // Turn the LED off
  delay(1000);               // Wait for 1 second
}
Notes:
- Connect the 220 Ω HotRC resistor in series with the LED and the Arduino pin.
- Ensure the resistor's power rating is sufficient for the current flowing through the LED.
Troubleshooting and FAQs
Common Issues Users Might Face
Resistor Overheating:
- Cause: Exceeding the power rating.
- Solution: Use a resistor with a higher power rating or reduce the current in the circuit.
Incorrect Resistance Value:
- Cause: Misreading the resistor's color code or selecting the wrong part.
- Solution: Double-check the resistor's value using a multimeter or refer to the color code chart.
Circuit Malfunction:
- Cause: Poor soldering or loose connections.
- Solution: Inspect and re-solder the connections as needed.
LED Not Lighting Up (in Arduino Example):
- Cause: Incorrect wiring or insufficient current.
- Solution: Verify the connections and ensure the resistor value is appropriate for the LED.
Solutions and Tips for Troubleshooting
- Use a multimeter to measure the resistor's actual resistance and verify it matches the expected value.
- If the resistor is overheating, calculate the power dissipation and ensure it is within the resistor's rated capacity.
- For precision circuits, consider using resistors with tighter tolerances (e.g., ±1%).
By following these guidelines and best practices, you can ensure reliable performance and longevity of the HotRC resistor in your electronic projects.