
Cirkit Designer
Your all-in-one circuit design IDE
Home /
Component Documentation
How to Use Heltec WiFi Lora 32V3: Examples, Pinouts, and Specs
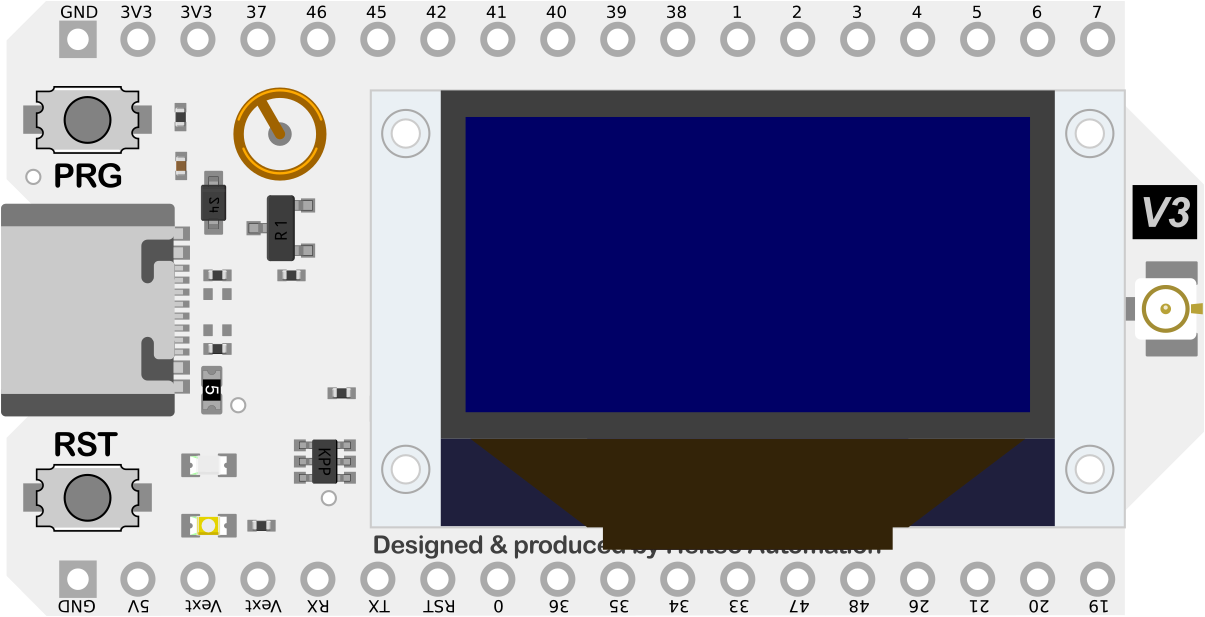
 Design with Heltec WiFi Lora 32V3 in Cirkit Designer
Introduction
The Heltec WiFi LoRa 32 V3 is a versatile development board that integrates WiFi, Bluetooth, and LoRa communication capabilities, making it ideal for a wide range of IoT applications. This board is based on the powerful ESP32 microcontroller and features an OLED display, multiple GPIO pins, and various interfaces for connecting sensors and other peripherals.
Explore Projects Built with Heltec WiFi Lora 32V3
WiFi LoRa Environmental Monitoring System with INMP441 Mic and Multiple Sensors
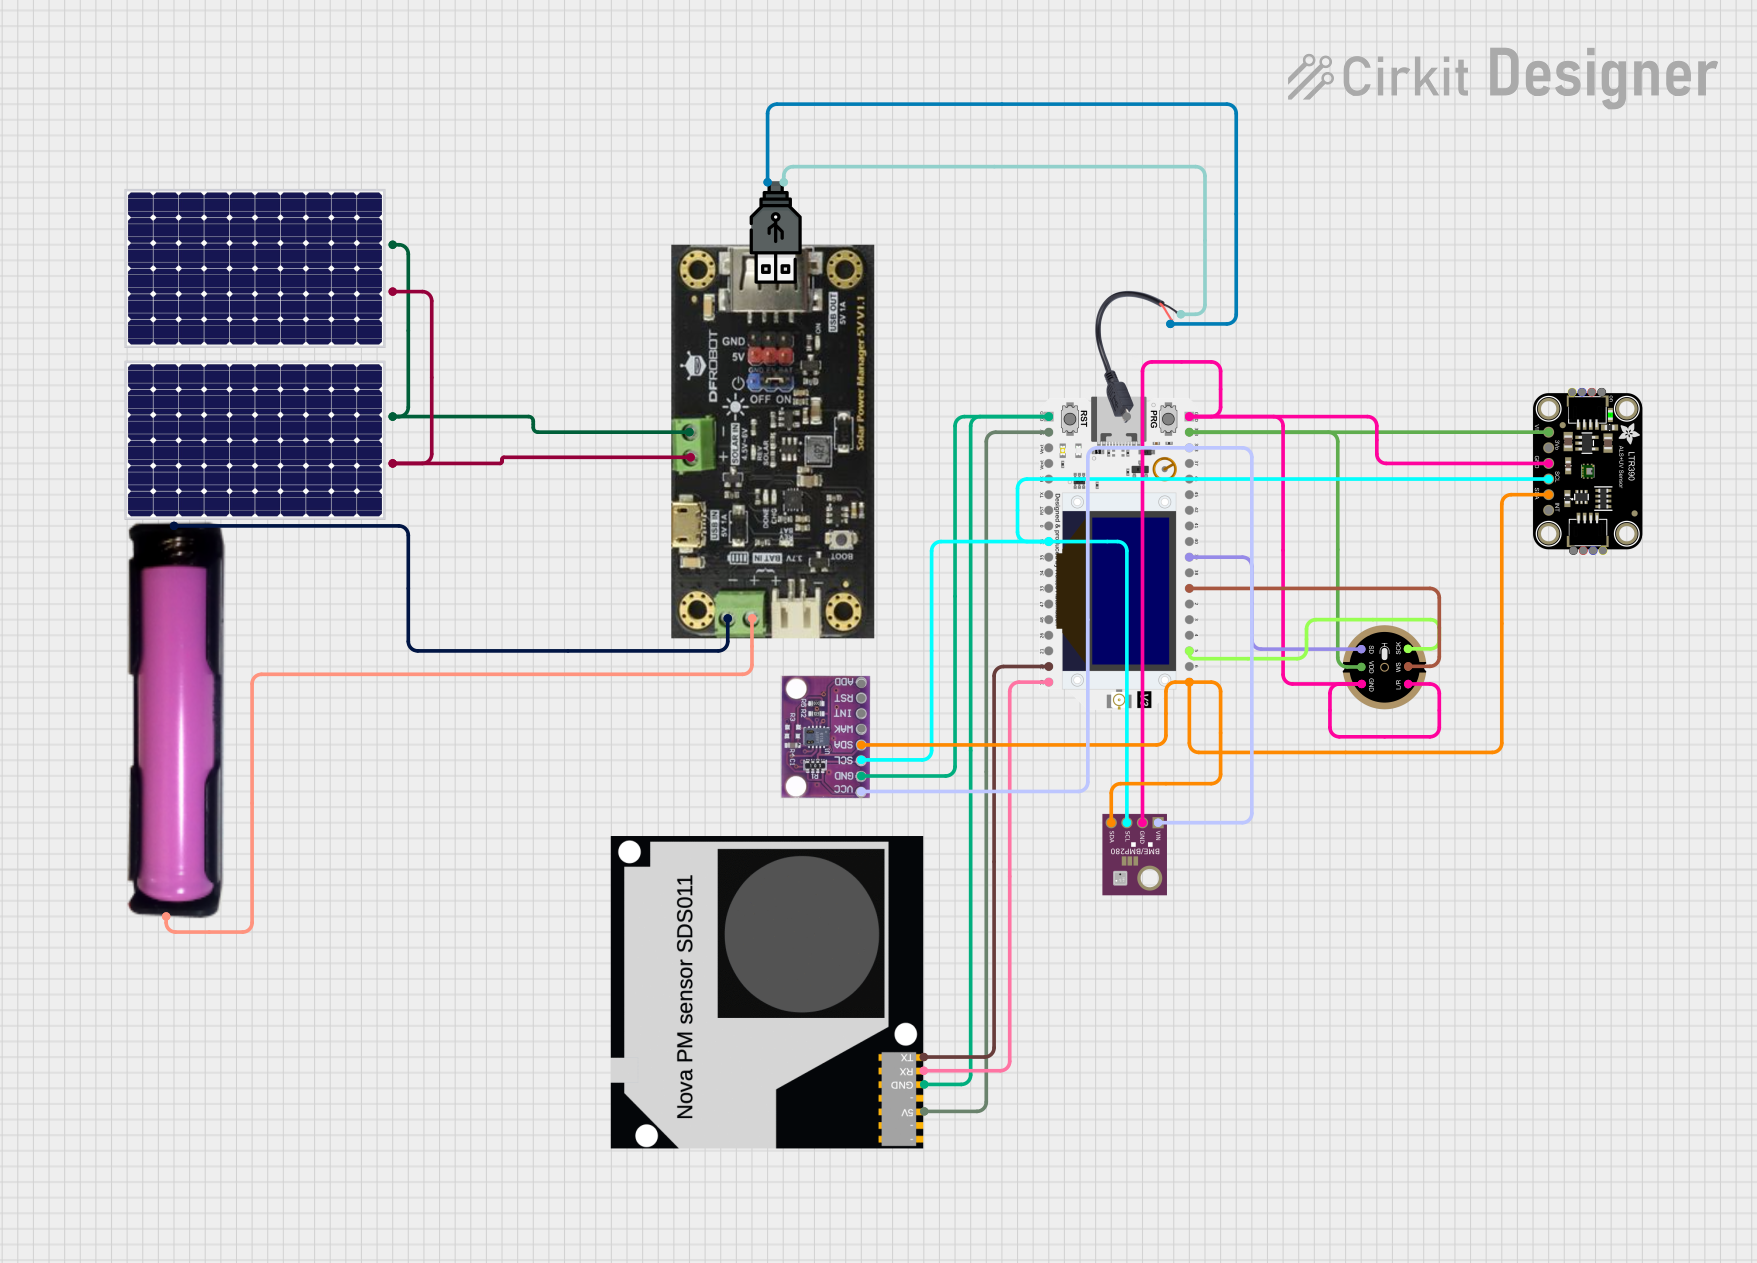
This circuit is a solar-powered environmental monitoring system that uses a WiFi LoRa 32V3 microcontroller to collect data from various sensors, including a microphone, UV light sensor, air quality sensor, and temperature/humidity/pressure sensor. The collected data is processed and transmitted via LoRa communication, making it suitable for remote environmental data logging and monitoring applications.
 Open Project in Cirkit Designer
ESP32 and LoRa Communication Module for IoT Applications
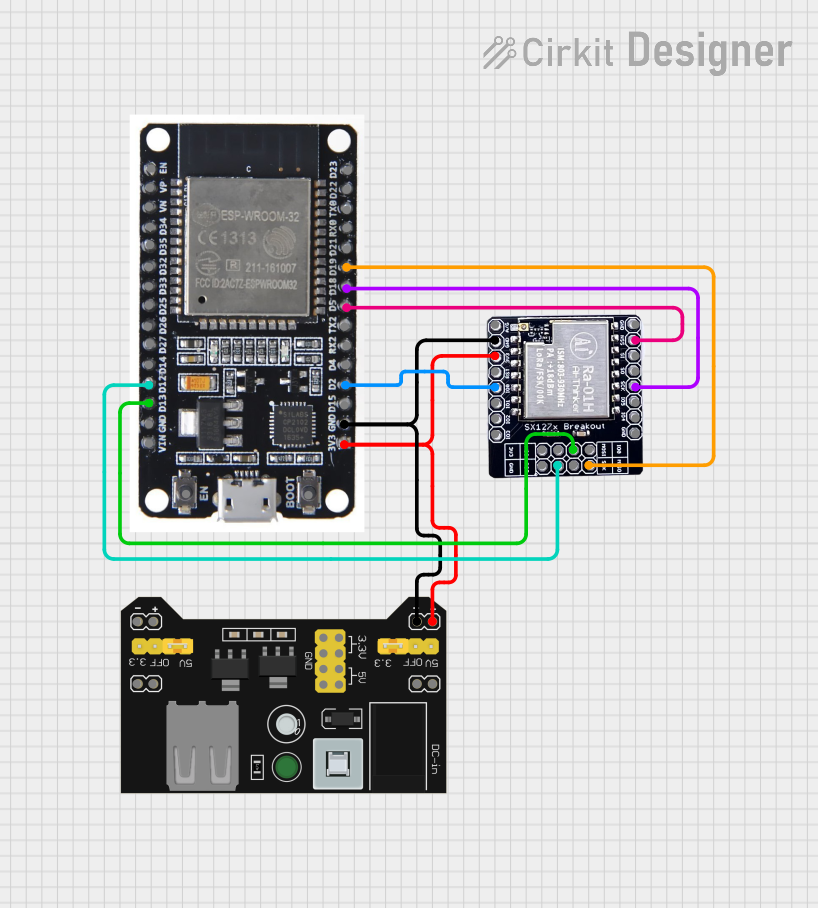
This circuit integrates an ESP32 microcontroller with a LoRa module for wireless communication, powered by an MB102 breadboard power supply. The ESP32 handles the control signals and data exchange with the LoRa module, enabling long-range, low-power data transmission.
 Open Project in Cirkit Designer
Heltec LoRa V2 and AD8232 Gravity Sensor-Based Health Monitoring System with GPS
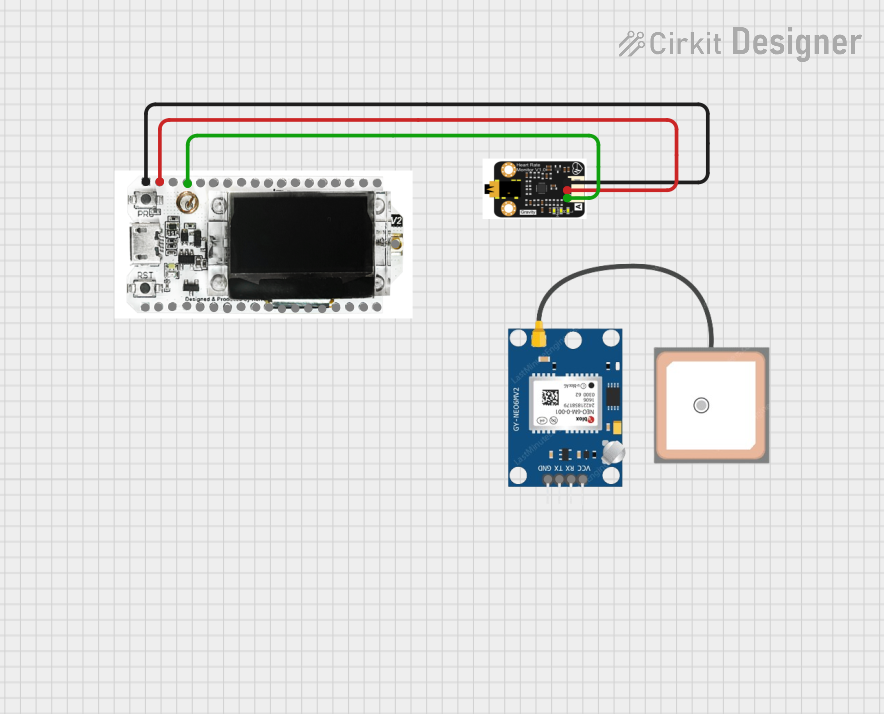
This circuit integrates a Heltec LoRa V2 microcontroller with an AD8232 Gravity Sensor to read and transmit analog heart rate data. The sensor's output is connected to the microcontroller, which reads the data and prints it to the Serial Monitor. The circuit is designed for remote health monitoring applications.
 Open Project in Cirkit Designer
ESP32 and LoRa SX1278 Based Wireless Communication Module
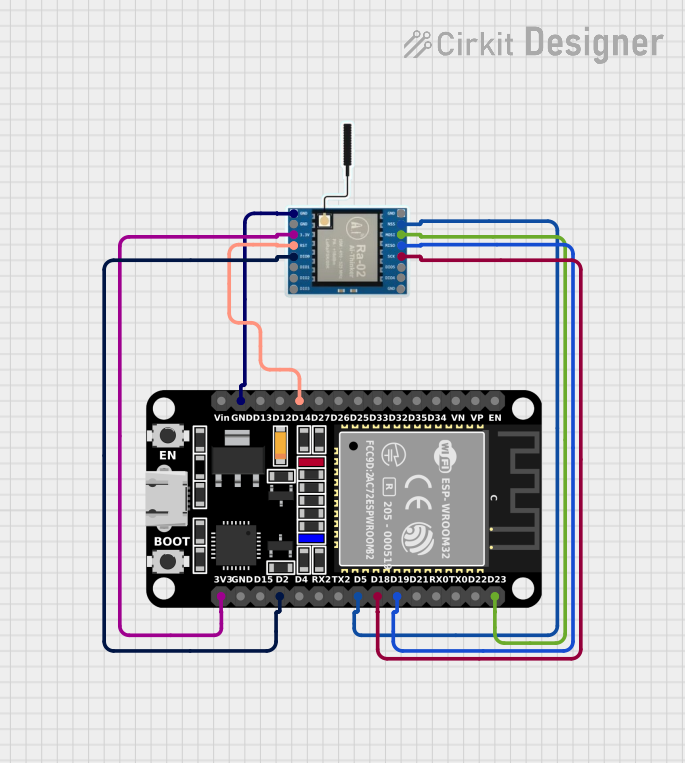
This circuit integrates an ESP32 microcontroller with a LoRa Ra-02 SX1278 module to enable long-range wireless communication. The ESP32 handles the control and data processing, while the LoRa module provides the communication link. The connections include SPI interface and control signals between the ESP32 and the LoRa module, as well as shared power and ground lines.
 Open Project in Cirkit Designer
Explore Projects Built with Heltec WiFi Lora 32V3

WiFi LoRa Environmental Monitoring System with INMP441 Mic and Multiple Sensors
This circuit is a solar-powered environmental monitoring system that uses a WiFi LoRa 32V3 microcontroller to collect data from various sensors, including a microphone, UV light sensor, air quality sensor, and temperature/humidity/pressure sensor. The collected data is processed and transmitted via LoRa communication, making it suitable for remote environmental data logging and monitoring applications.
 Open Project in Cirkit Designer
ESP32 and LoRa Communication Module for IoT Applications
This circuit integrates an ESP32 microcontroller with a LoRa module for wireless communication, powered by an MB102 breadboard power supply. The ESP32 handles the control signals and data exchange with the LoRa module, enabling long-range, low-power data transmission.
 Open Project in Cirkit Designer
Heltec LoRa V2 and AD8232 Gravity Sensor-Based Health Monitoring System with GPS
This circuit integrates a Heltec LoRa V2 microcontroller with an AD8232 Gravity Sensor to read and transmit analog heart rate data. The sensor's output is connected to the microcontroller, which reads the data and prints it to the Serial Monitor. The circuit is designed for remote health monitoring applications.
 Open Project in Cirkit Designer
ESP32 and LoRa SX1278 Based Wireless Communication Module
This circuit integrates an ESP32 microcontroller with a LoRa Ra-02 SX1278 module to enable long-range wireless communication. The ESP32 handles the control and data processing, while the LoRa module provides the communication link. The connections include SPI interface and control signals between the ESP32 and the LoRa module, as well as shared power and ground lines.
 Open Project in Cirkit Designer
Common Applications and Use Cases
- IoT Projects: Ideal for creating smart home devices, environmental monitoring systems, and other IoT applications.
- Wireless Communication: Suitable for projects requiring long-range communication using LoRa technology.
- Prototyping: Perfect for rapid prototyping and development of wireless communication systems.
- Educational Purposes: Great for learning about wireless communication, microcontrollers, and IoT technologies.
Technical Specifications
Key Technical Details
| Specification | Value |
|---|---|
| Microcontroller | ESP32 |
| WiFi | 802.11 b/g/n |
| Bluetooth | v4.2 BR/EDR and BLE |
| LoRa Frequency | 433/470/868/915 MHz (region-specific) |
| OLED Display | 0.96 inch, 128x64 pixels |
| Operating Voltage | 3.3V |
| Input Voltage | 5V (via USB) |
| GPIO Pins | 26 |
| Flash Memory | 8MB |
| SRAM | 520KB |
| Power Consumption | 10uA (deep sleep) |
Pin Configuration and Descriptions
| Pin Number | Pin Name | Description |
|---|---|---|
| 1 | 3V3 | 3.3V Power Output |
| 2 | EN | Enable Pin |
| 3 | GND | Ground |
| 4 | 23 | GPIO23 |
| 5 | 22 | GPIO22 |
| 6 | 21 | GPIO21 |
| 7 | 19 | GPIO19 |
| 8 | 18 | GPIO18 |
| 9 | 17 | GPIO17 |
| 10 | 16 | GPIO16 |
| 11 | 15 | GPIO15 |
| 12 | 14 | GPIO14 |
| 13 | 13 | GPIO13 |
| 14 | 12 | GPIO12 |
| 15 | 11 | GPIO11 |
| 16 | 10 | GPIO10 |
| 17 | 9 | GPIO9 |
| 18 | 8 | GPIO8 |
| 19 | 7 | GPIO7 |
| 20 | 6 | GPIO6 |
| 21 | 5 | GPIO5 |
| 22 | 4 | GPIO4 |
| 23 | 3 | GPIO3 |
| 24 | 2 | GPIO2 |
| 25 | 1 | GPIO1 |
| 26 | 0 | GPIO0 |
Usage Instructions
How to Use the Component in a Circuit
Powering the Board:
- Connect the board to your computer using a USB cable. This will provide the necessary 5V input voltage.
- Alternatively, you can power the board using an external 3.3V power source connected to the 3V3 pin.
Connecting to WiFi:
- Use the built-in WiFi capabilities of the ESP32 to connect to a WiFi network. This can be done using the Arduino IDE or other development environments.
Using the OLED Display:
- The OLED display can be controlled using the I2C protocol. Libraries such as
U8g2orAdafruit_SSD1306can be used to interface with the display.
- The OLED display can be controlled using the I2C protocol. Libraries such as
LoRa Communication:
- The LoRa module can be used for long-range communication. Libraries such as
LoRacan be used to send and receive data.
- The LoRa module can be used for long-range communication. Libraries such as
Important Considerations and Best Practices
- Voltage Levels: Ensure that all connected peripherals operate at 3.3V to avoid damaging the board.
- Antenna Placement: For optimal LoRa performance, ensure that the antenna is placed in a location with minimal obstructions.
- Deep Sleep Mode: Utilize the deep sleep mode to conserve power in battery-operated applications.
Sample Code for Arduino IDE
#include <WiFi.h>
#include <Wire.h>
#include <U8g2lib.h>
#include <LoRa.h>

// Replace with your network credentials
const char* ssid = "your_SSID";
const char* password = "your_PASSWORD";

// Initialize the OLED display
U8G2_SSD1306_128X64_NONAME_F_HW_I2C u8g2(U8G2_R0, /* reset=*/ U8X8_PIN_NONE);

// LoRa settings
#define LORA_SCK 5
#define LORA_MISO 19
#define LORA_MOSI 27
#define LORA_SS 18
#define LORA_RST 14
#define LORA_DI0 26

void setup() {
  // Initialize Serial Monitor
  Serial.begin(115200);

  // Initialize WiFi
  WiFi.begin(ssid, password);
  while (WiFi.status() != WL_CONNECTED) {
    delay(1000);
    Serial.println("Connecting to WiFi...");
  }
  Serial.println("Connected to WiFi");

  // Initialize OLED display
  u8g2.begin();
  u8g2.clearBuffer();
  u8g2.setFont(u8g2_font_ncenB08_tr);
  u8g2.drawStr(0, 10, "Hello, Heltec!");
  u8g2.sendBuffer();

  // Initialize LoRa
  LoRa.setPins(LORA_SS, LORA_RST, LORA_DI0);
  if (!LoRa.begin(915E6)) {
    Serial.println("Starting LoRa failed!");
    while (1);
  }
  Serial.println("LoRa Initializing OK!");
}

void loop() {
  // Send a message every 5 seconds
  LoRa.beginPacket();
  LoRa.print("Hello, LoRa!");
  LoRa.endPacket();
  delay(5000);
}
Troubleshooting and FAQs
Common Issues Users Might Face
WiFi Connection Issues:
- Ensure that the SSID and password are correct.
- Check if the WiFi network is within range.
OLED Display Not Working:
- Verify the I2C connections (SDA and SCL).
- Ensure that the correct I2C address is used in the code.
LoRa Communication Problems:
- Check the antenna connection.
- Ensure that the correct frequency is set in the code.
Solutions and Tips for Troubleshooting
- Serial Monitor: Use the Serial Monitor to print debug messages and check the status of the board.
- Library Documentation: Refer to the documentation of the libraries used (e.g.,
WiFi,U8g2,LoRa) for additional troubleshooting tips. - Community Forums: Engage with the community on forums and discussion boards for additional support and insights.
By following this documentation, users can effectively utilize the Heltec WiFi LoRa 32 V3 development board in their projects, leveraging its powerful features for a wide range of applications.