Introduction
The GPSNEO 6M GPS module, manufactured by Ardino (Part ID: UNO), is a high-performance GPS receiver designed to provide accurate positioning data for a wide range of applications. This module is compact, energy-efficient, and supports multiple satellite systems, making it a reliable choice for navigation, tracking, and geolocation projects. Its versatility and ease of integration make it a popular choice for hobbyists and professionals alike.
Common Applications and Use Cases
- Vehicle navigation systems
- Drone and UAV positioning
- Asset tracking and fleet management
- Geocaching and outdoor activities
- IoT devices requiring location data
- Time synchronization for embedded systems
Technical Specifications
The GPSNEO 6M GPS module is designed to deliver reliable performance in a compact form factor. Below are its key technical specifications:
Pin Configuration and Descriptions
The GPSNEO 6M module has a simple pinout for easy integration into your projects. Below is the pin configuration:
Usage Instructions
The GPSNEO 6M GPS module is straightforward to use and can be easily integrated into your projects. Below are the steps and best practices for using the module:
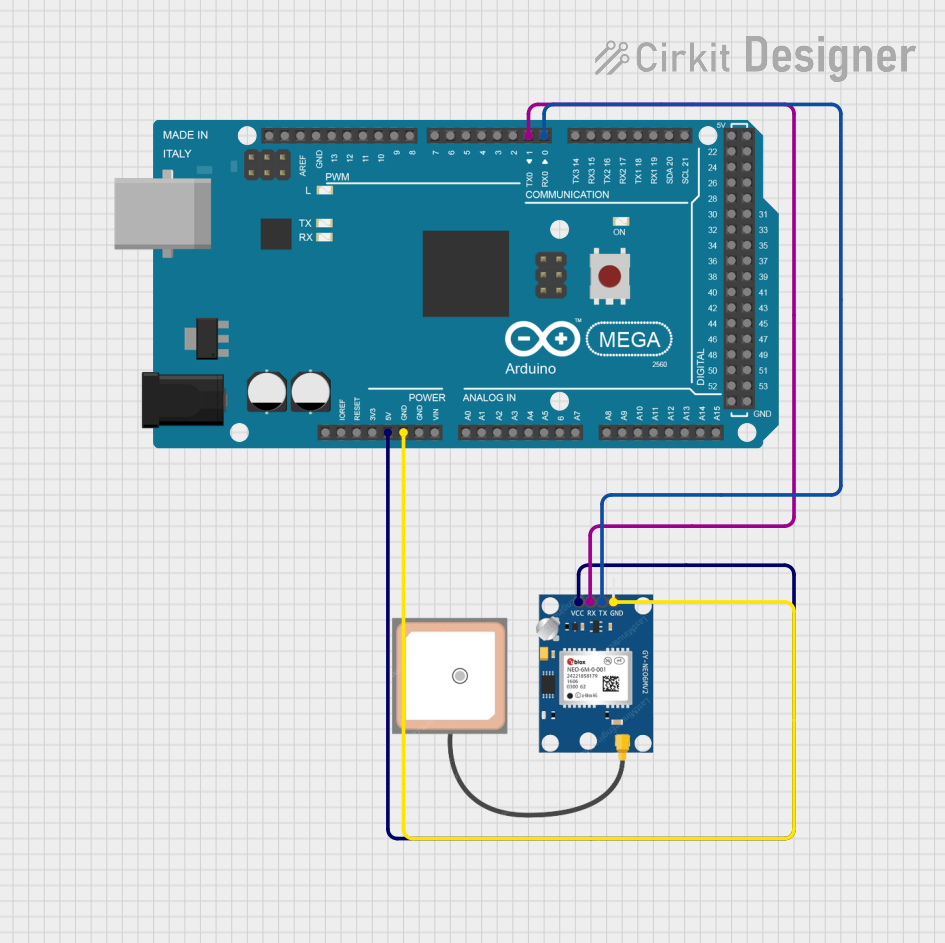
Connecting the GPSNEO 6M to an Arduino UNO
Wiring the Module:
- Connect the
VCC pin of the GPS module to the 5V pin on the Arduino UNO.
- Connect the
GND pin of the GPS module to the GND pin on the Arduino UNO.
- Connect the
TX pin of the GPS module to the Arduino UNO's RX pin (pin 0).
- Connect the
RX pin of the GPS module to the Arduino UNO's TX pin (pin 1).
Installing Required Libraries:
- Install the
TinyGPS++ library in the Arduino IDE. This library simplifies parsing GPS data.
- To install, go to Sketch > Include Library > Manage Libraries, search for
TinyGPS++, and click Install.
Uploading the Code:
Use the following example code to read and display GPS data on the Arduino Serial Monitor:
#include <TinyGPS++.h>
#include <SoftwareSerial.h>

// Create a TinyGPS++ object to parse GPS data
TinyGPSPlus gps;

// Define RX and TX pins for SoftwareSerial
SoftwareSerial gpsSerial(4, 3); // RX = pin 4, TX = pin 3

void setup() {
  Serial.begin(9600); // Initialize Serial Monitor
  gpsSerial.begin(9600); // Initialize GPS module communication

  Serial.println("GPSNEO 6M GPS Module Test");
  Serial.println("Waiting for GPS data...");
}

void loop() {
  // Read data from the GPS module
  while (gpsSerial.available() > 0) {
    char c = gpsSerial.read();
    gps.encode(c); // Parse the GPS data

    // If a valid location is available, print it
    if (gps.location.isUpdated()) {
      Serial.print("Latitude: ");
      Serial.print(gps.location.lat(), 6); // Print latitude
      Serial.print(", Longitude: ");
      Serial.println(gps.location.lng(), 6); // Print longitude
    }
  }
}
Important Considerations and Best Practices
- Antenna Placement: Ensure the external active antenna is placed in an open area with a clear view of the sky for optimal satellite reception.
- Power Supply: Use a stable power source to avoid interruptions in GPS data.
- UART Configuration: The default baud rate is 9600 bps. If needed, you can reconfigure it using specific commands.
- Cold Start vs. Warm Start: The module may take longer to acquire a fix during a cold start (first power-up). Subsequent starts (warm starts) are faster.
Troubleshooting and FAQs
Common Issues and Solutions
No GPS Fix or Data:
- Ensure the antenna is properly connected and placed in an open area.
- Verify the power supply voltage is within the specified range (3.3V to 5V).
- Check the wiring connections between the GPS module and the Arduino.
Garbage Data on Serial Monitor:
- Confirm that the baud rate in the Arduino code matches the GPS module's default baud rate (9600 bps).
- Ensure the Serial Monitor is set to the correct baud rate.
Intermittent GPS Signal:
- Avoid using the module indoors or near tall buildings, as these can block satellite signals.
- Check for electromagnetic interference from nearby devices.
FAQs
Q: Can the GPSNEO 6M module work with other microcontrollers?
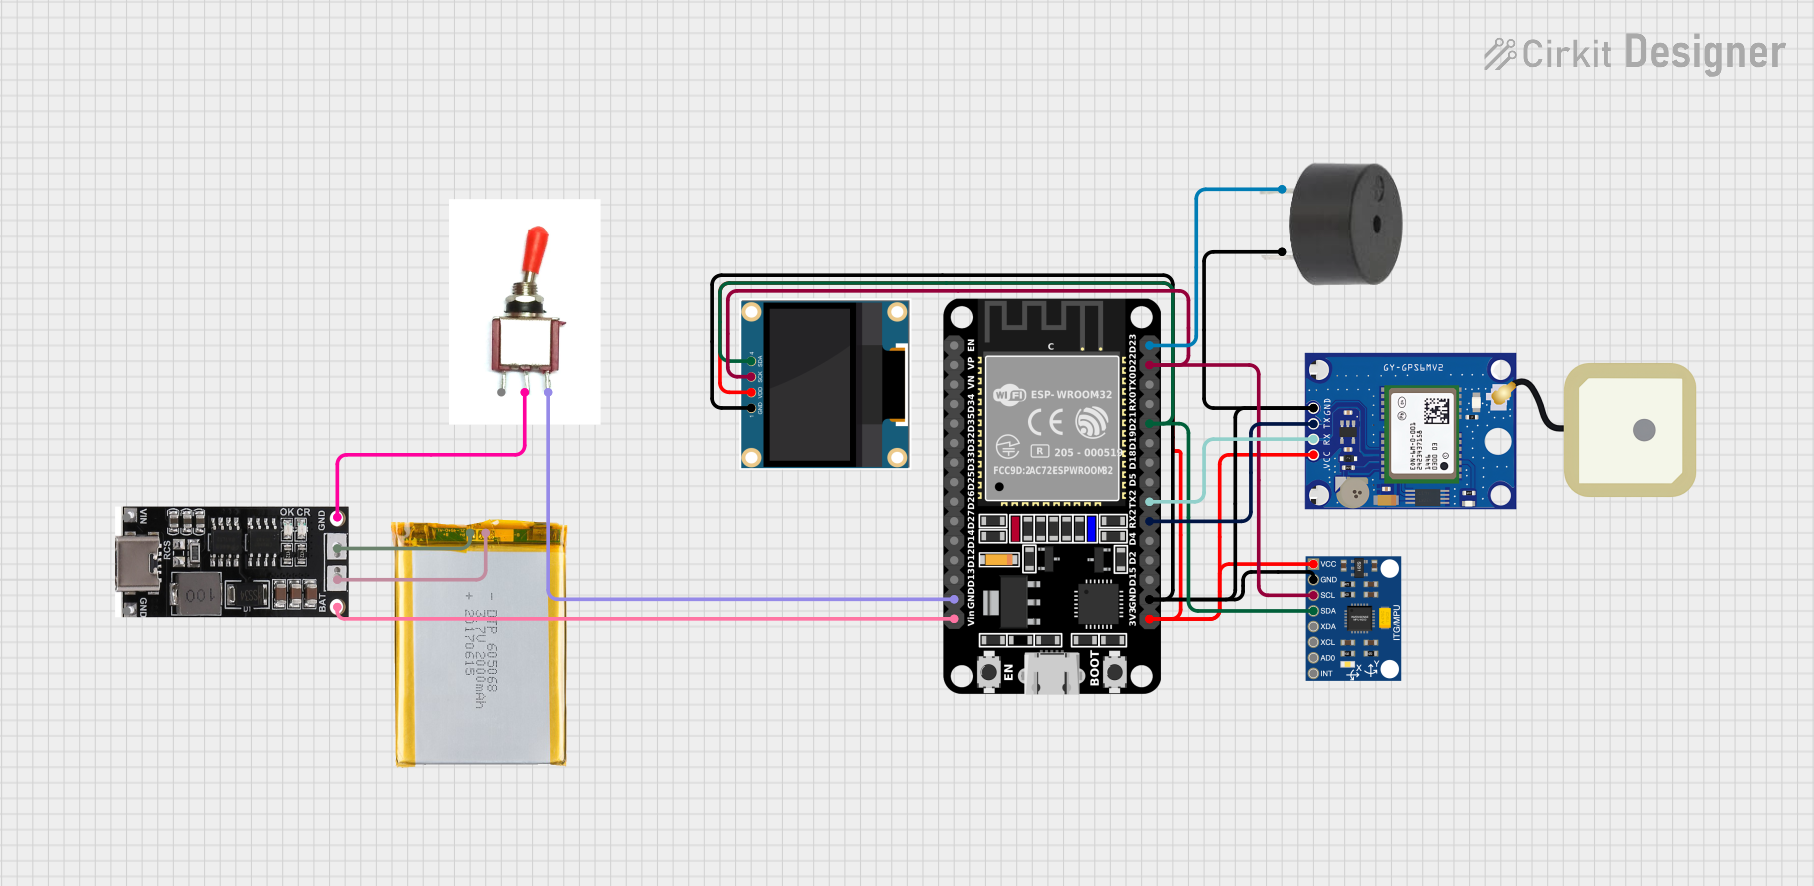
A: Yes, the module can work with any microcontroller that supports UART communication, such as ESP32, Raspberry Pi, or STM32.
Q: How long does it take to get a GPS fix?
A: A cold start typically takes 30-60 seconds, while a warm start takes 1-5 seconds, depending on satellite visibility.
Q: Can I increase the update rate of the module?
A: Yes, the update rate can be configured up to 5 Hz using specific NMEA commands. However, higher update rates may increase power consumption.
Q: Does the module support GLONASS or Galileo?
A: No, the GPSNEO 6M module supports GPS and SBAS systems (WAAS, EGNOS, MSAS, GAGAN) but not GLONASS or Galileo.
By following this documentation, you can effectively integrate and use the GPSNEO 6M GPS module in your projects.


 Open Project in Cirkit Designer