Cirkit Designer Logo
Cirkit Designer
Your all-in-one circuit design IDE
Home / 
Component Documentation

How to Use Keyestudio PIR motion: Examples, Pinouts, and Specs

Image of Keyestudio PIR motion
Cirkit Designer LogoDesign with Keyestudio PIR motion in Cirkit Designer

Introduction

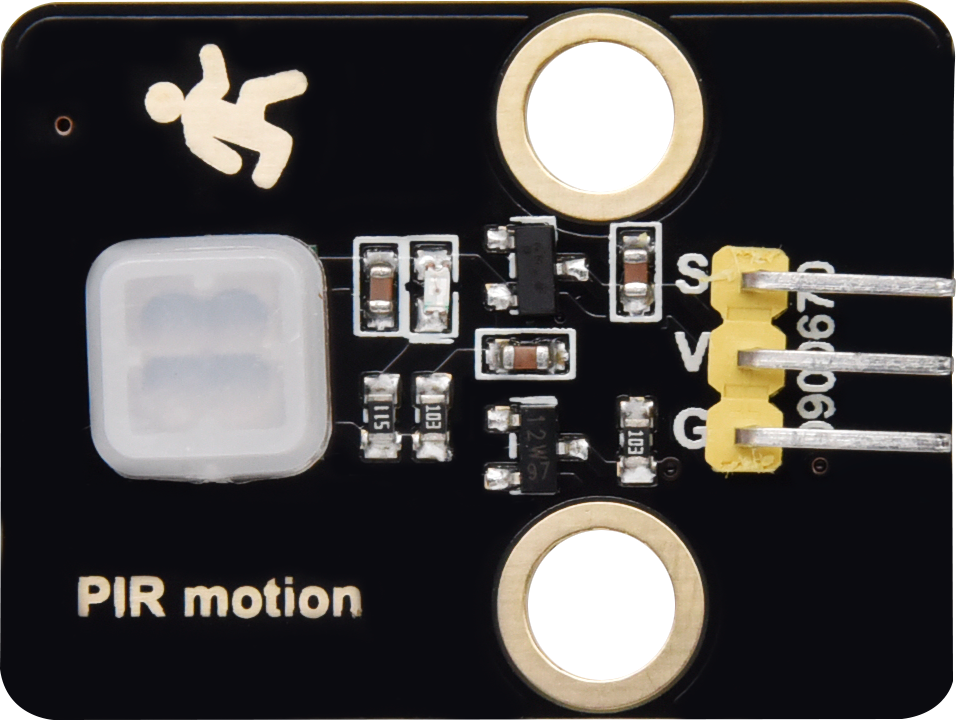
The Keyestudio PIR Motion Sensor is a Passive Infrared (PIR) sensor designed to detect motion by measuring changes in infrared radiation. It is highly sensitive to human movement and is commonly used in security systems, home automation, and energy-saving applications such as automatic lighting systems. This sensor is compact, easy to use, and compatible with microcontrollers like Arduino, making it an excellent choice for both beginners and advanced users.

Explore Projects Built with Keyestudio PIR motion

Use Cirkit Designer to design, explore, and prototype these projects online. Some projects support real-time simulation. Click "Open Project" to start designing instantly!
Arduino-Controlled PIR Motion Sensor with MP3 Playback and LED Lightning Effect
Image of Resident Evil Intro Board 1: A project utilizing Keyestudio PIR motion in a practical application
This circuit is designed to detect motion using a PIR sensor and trigger a sequence of events when motion is detected. An Arduino UNO controls a relay to power a 12V LED strip, simulating lightning, while simultaneously playing a sound effect through a Serial MP3 Player. The system includes a cooldown period to prevent immediate retriggering after an event.
Cirkit Designer LogoOpen Project in Cirkit Designer
Arduino-Controlled Security System with Wi-Fi Connectivity and Automated Lighting
Image of proto: A project utilizing Keyestudio PIR motion in a practical application
This circuit is designed to detect motion using a PIR sensor and activate a relay to turn on a red LED and a servo motor to simulate opening a door. The Arduino 101 microcontroller controls the relay and servo based on the PIR sensor input and can also receive commands from an ESP8266 module, which is set up for Wi-Fi connectivity to enable remote control. The ESP8266 can send serial commands to the Arduino to override the PIR sensor and manually control the relay state.
Cirkit Designer LogoOpen Project in Cirkit Designer
ESP32-CAM Wi-Fi Controlled Motion Detection Security Camera
Image of FRAS NEW: A project utilizing Keyestudio PIR motion in a practical application
This circuit integrates an ESP32 CAM module with a PIR sensor and an FTDI programmer to create a motion-activated camera system. The ESP32 CAM captures images when motion is detected by the PIR sensor and sends the images to a server via WiFi. The FTDI programmer is used for programming and debugging the ESP32 CAM.
Cirkit Designer LogoOpen Project in Cirkit Designer
Arduino Mega 2560 Security System with PIR Motion Sensor and Keypad
Image of Hallway: A project utilizing Keyestudio PIR motion in a practical application
This circuit uses an Arduino Mega 2560 to control a security system with a PIR motion sensor, a 4x4 keypad, and two LEDs. The PIR sensor triggers the green LED for motion detection, while the keypad allows for passcode entry to control the red LED, indicating access granted or denied.
Cirkit Designer LogoOpen Project in Cirkit Designer

Explore Projects Built with Keyestudio PIR motion

Use Cirkit Designer to design, explore, and prototype these projects online. Some projects support real-time simulation. Click "Open Project" to start designing instantly!
Image of Resident Evil Intro Board 1: A project utilizing Keyestudio PIR motion in a practical application
Arduino-Controlled PIR Motion Sensor with MP3 Playback and LED Lightning Effect
This circuit is designed to detect motion using a PIR sensor and trigger a sequence of events when motion is detected. An Arduino UNO controls a relay to power a 12V LED strip, simulating lightning, while simultaneously playing a sound effect through a Serial MP3 Player. The system includes a cooldown period to prevent immediate retriggering after an event.
Cirkit Designer LogoOpen Project in Cirkit Designer
Image of proto: A project utilizing Keyestudio PIR motion in a practical application
Arduino-Controlled Security System with Wi-Fi Connectivity and Automated Lighting
This circuit is designed to detect motion using a PIR sensor and activate a relay to turn on a red LED and a servo motor to simulate opening a door. The Arduino 101 microcontroller controls the relay and servo based on the PIR sensor input and can also receive commands from an ESP8266 module, which is set up for Wi-Fi connectivity to enable remote control. The ESP8266 can send serial commands to the Arduino to override the PIR sensor and manually control the relay state.
Cirkit Designer LogoOpen Project in Cirkit Designer
Image of FRAS NEW: A project utilizing Keyestudio PIR motion in a practical application
ESP32-CAM Wi-Fi Controlled Motion Detection Security Camera
This circuit integrates an ESP32 CAM module with a PIR sensor and an FTDI programmer to create a motion-activated camera system. The ESP32 CAM captures images when motion is detected by the PIR sensor and sends the images to a server via WiFi. The FTDI programmer is used for programming and debugging the ESP32 CAM.
Cirkit Designer LogoOpen Project in Cirkit Designer
Image of Hallway: A project utilizing Keyestudio PIR motion in a practical application
Arduino Mega 2560 Security System with PIR Motion Sensor and Keypad
This circuit uses an Arduino Mega 2560 to control a security system with a PIR motion sensor, a 4x4 keypad, and two LEDs. The PIR sensor triggers the green LED for motion detection, while the keypad allows for passcode entry to control the red LED, indicating access granted or denied.
Cirkit Designer LogoOpen Project in Cirkit Designer

Common Applications

  • Security systems (e.g., motion-activated alarms)
  • Automatic lighting control
  • Smart home automation
  • Energy-saving devices
  • Robotics and interactive projects

Technical Specifications

The Keyestudio PIR Motion Sensor has the following technical specifications:

Parameter Value
Operating Voltage 5V DC
Operating Current < 60 µA
Detection Range Up to 7 meters
Detection Angle 120°
Output Signal Digital (High: 3.3V, Low: 0V)
Trigger Modes Repeatable (default)
Warm-up Time ~30 seconds
Dimensions 32mm x 24mm x 25mm

Pin Configuration

The Keyestudio PIR Motion Sensor has a 3-pin interface:

Pin Name Description
1 VCC Power supply input (5V DC)
2 OUT Digital output signal (High when motion is detected)
3 GND Ground connection

Usage Instructions

Connecting the Sensor

  1. Power the Sensor: Connect the VCC pin to a 5V power source and the GND pin to ground.
  2. Read the Output: Connect the OUT pin to a digital input pin on your microcontroller (e.g., Arduino).
  3. Warm-up Period: Allow the sensor to stabilize for approximately 30 seconds after powering it on. During this time, the sensor may output random signals.
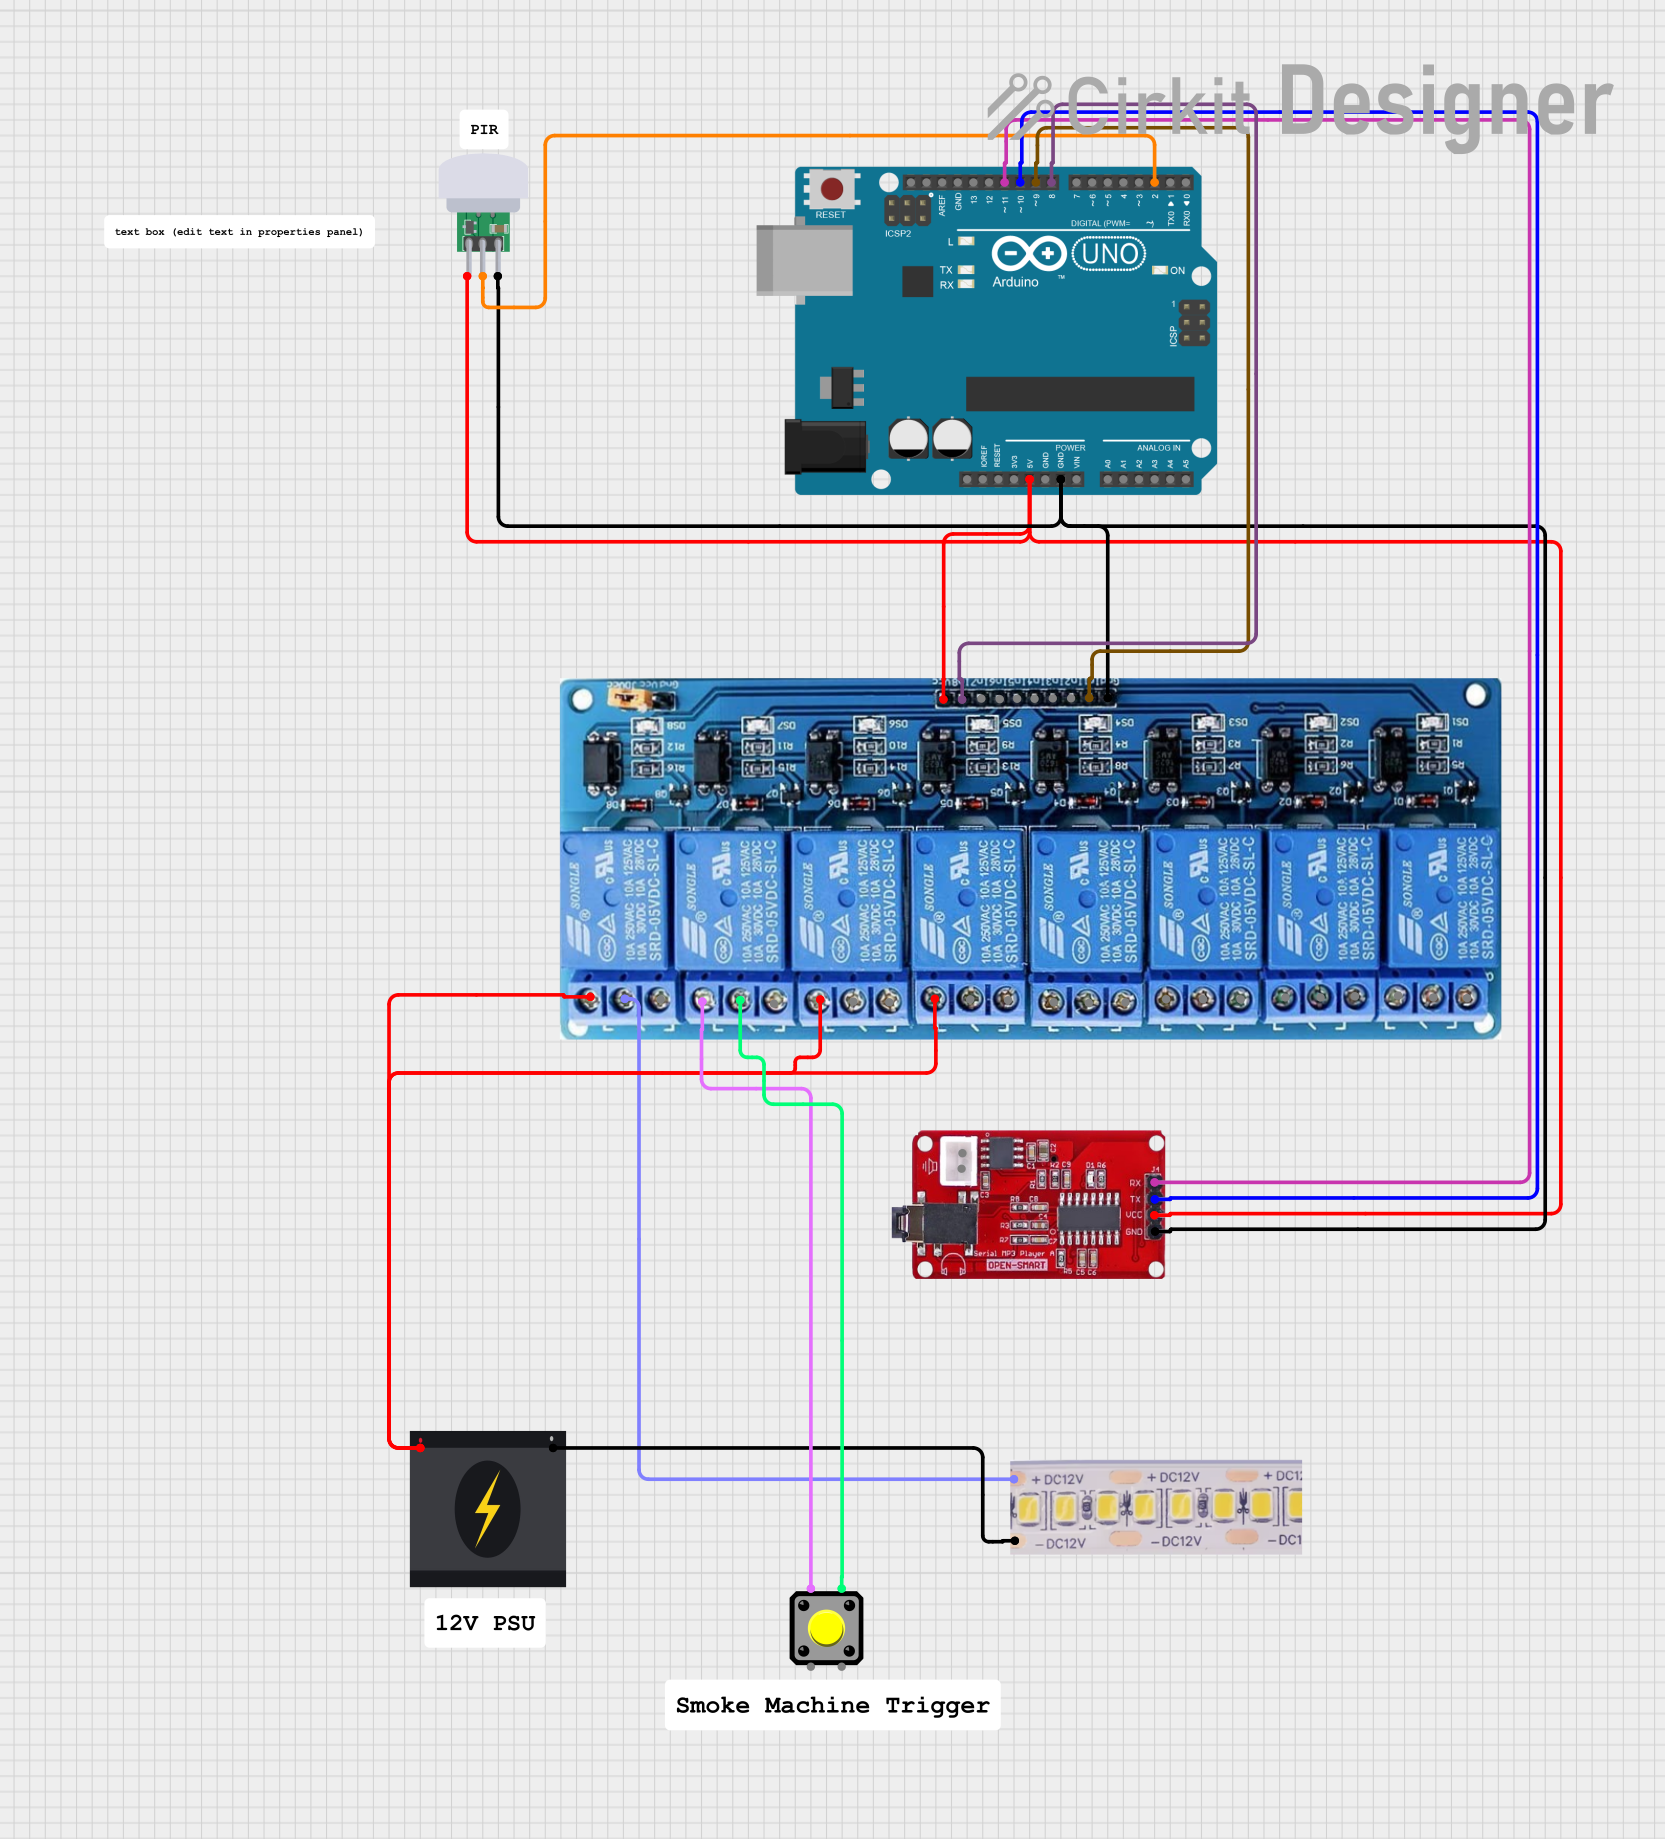
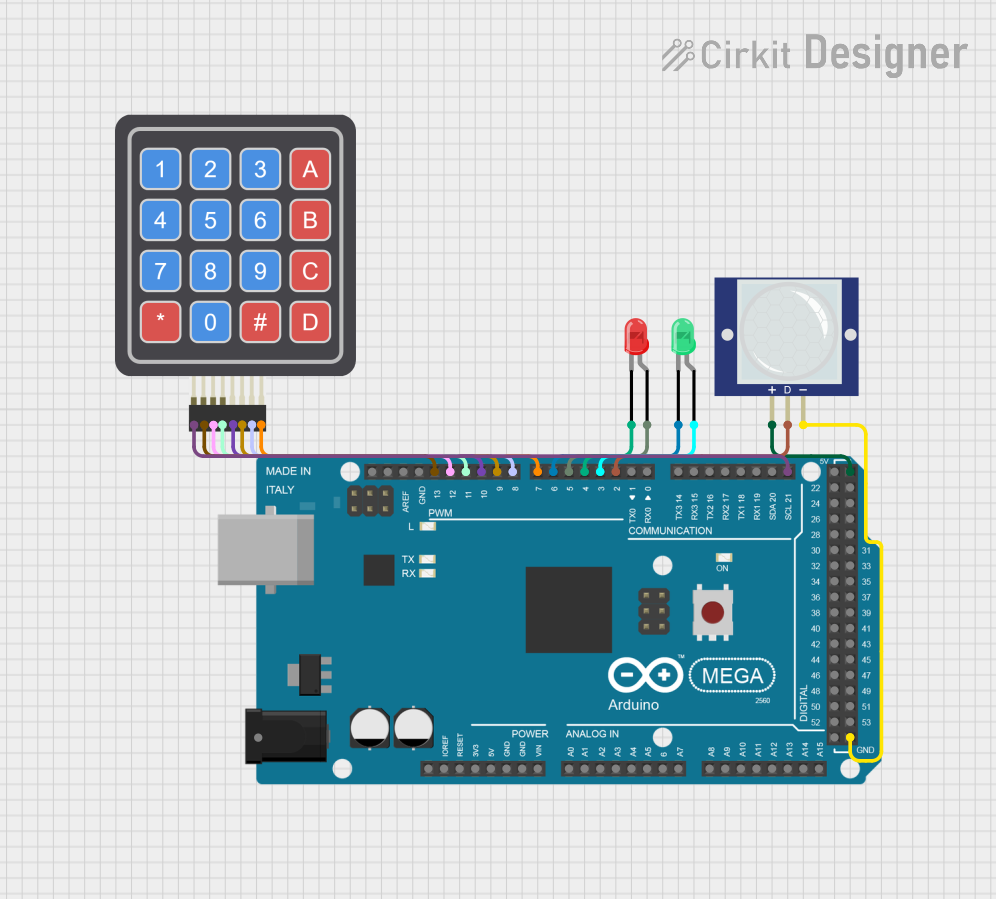
Example Circuit

Below is an example of how to connect the Keyestudio PIR Motion Sensor to an Arduino UNO:

  • Connect the VCC pin of the sensor to the 5V pin on the Arduino.
  • Connect the GND pin of the sensor to the GND pin on the Arduino.
  • Connect the OUT pin of the sensor to digital pin 2 on the Arduino.

Example Code

Here is a sample Arduino sketch to use the Keyestudio PIR Motion Sensor:

// Define the pin connected to the PIR sensor's output
const int pirPin = 2; // Digital pin 2
const int ledPin = 13; // Built-in LED pin for indication

void setup() {
  pinMode(pirPin, INPUT); // Set PIR sensor pin as input
  pinMode(ledPin, OUTPUT); // Set LED pin as output
  Serial.begin(9600); // Initialize serial communication for debugging
}

void loop() {
  int motionDetected = digitalRead(pirPin); // Read the PIR sensor output

  if (motionDetected == HIGH) { // If motion is detected
    digitalWrite(ledPin, HIGH); // Turn on the LED
    Serial.println("Motion detected!"); // Print message to serial monitor
  } else {
    digitalWrite(ledPin, LOW); // Turn off the LED
    Serial.println("No motion detected."); // Print message to serial monitor
  }

  delay(500); // Small delay to avoid rapid toggling
}

Important Considerations

  • Warm-up Time: Always allow the sensor to stabilize for ~30 seconds after powering it on.
  • Environmental Factors: Avoid placing the sensor near heat sources, direct sunlight, or areas with strong airflow, as these can cause false triggers.
  • Trigger Mode: The sensor is set to "repeatable trigger" mode by default, meaning it will continue to output a HIGH signal as long as motion is detected.

Troubleshooting and FAQs

Common Issues

  1. No Output Signal:

    • Ensure the sensor is properly powered (5V to VCC and GND connected).
    • Check the wiring to the microcontroller and ensure the OUT pin is connected to the correct digital input pin.
    • Verify that the sensor has completed its warm-up period (~30 seconds).
  2. False Triggers:

    • Ensure the sensor is not exposed to heat sources, direct sunlight, or strong airflow.
    • Check for electrical noise or interference in the circuit.
  3. Short Detection Range:

    • Verify that the sensor is unobstructed and positioned correctly.
    • Ensure the operating voltage is stable and within the specified range.

FAQs

Q: Can the detection range be adjusted?
A: No, the detection range of the Keyestudio PIR Motion Sensor is fixed at up to 7 meters. However, you can adjust the sensor's placement to optimize its coverage.

Q: Can this sensor detect stationary objects?
A: No, the PIR sensor detects motion by sensing changes in infrared radiation. It cannot detect stationary objects.

Q: Is the sensor compatible with 3.3V systems?
A: The sensor requires a 5V power supply for operation, but its output signal (3.3V HIGH) is compatible with 3.3V logic systems.

Q: How do I change the trigger mode?
A: The Keyestudio PIR Motion Sensor is set to "repeatable trigger" mode by default. Changing the trigger mode requires hardware modifications, which are not recommended for beginners.

By following this documentation, you can effectively integrate the Keyestudio PIR Motion Sensor into your projects and troubleshoot common issues with ease.