How to Use Vega V3: Examples, Pinouts, and Specs
Introduction
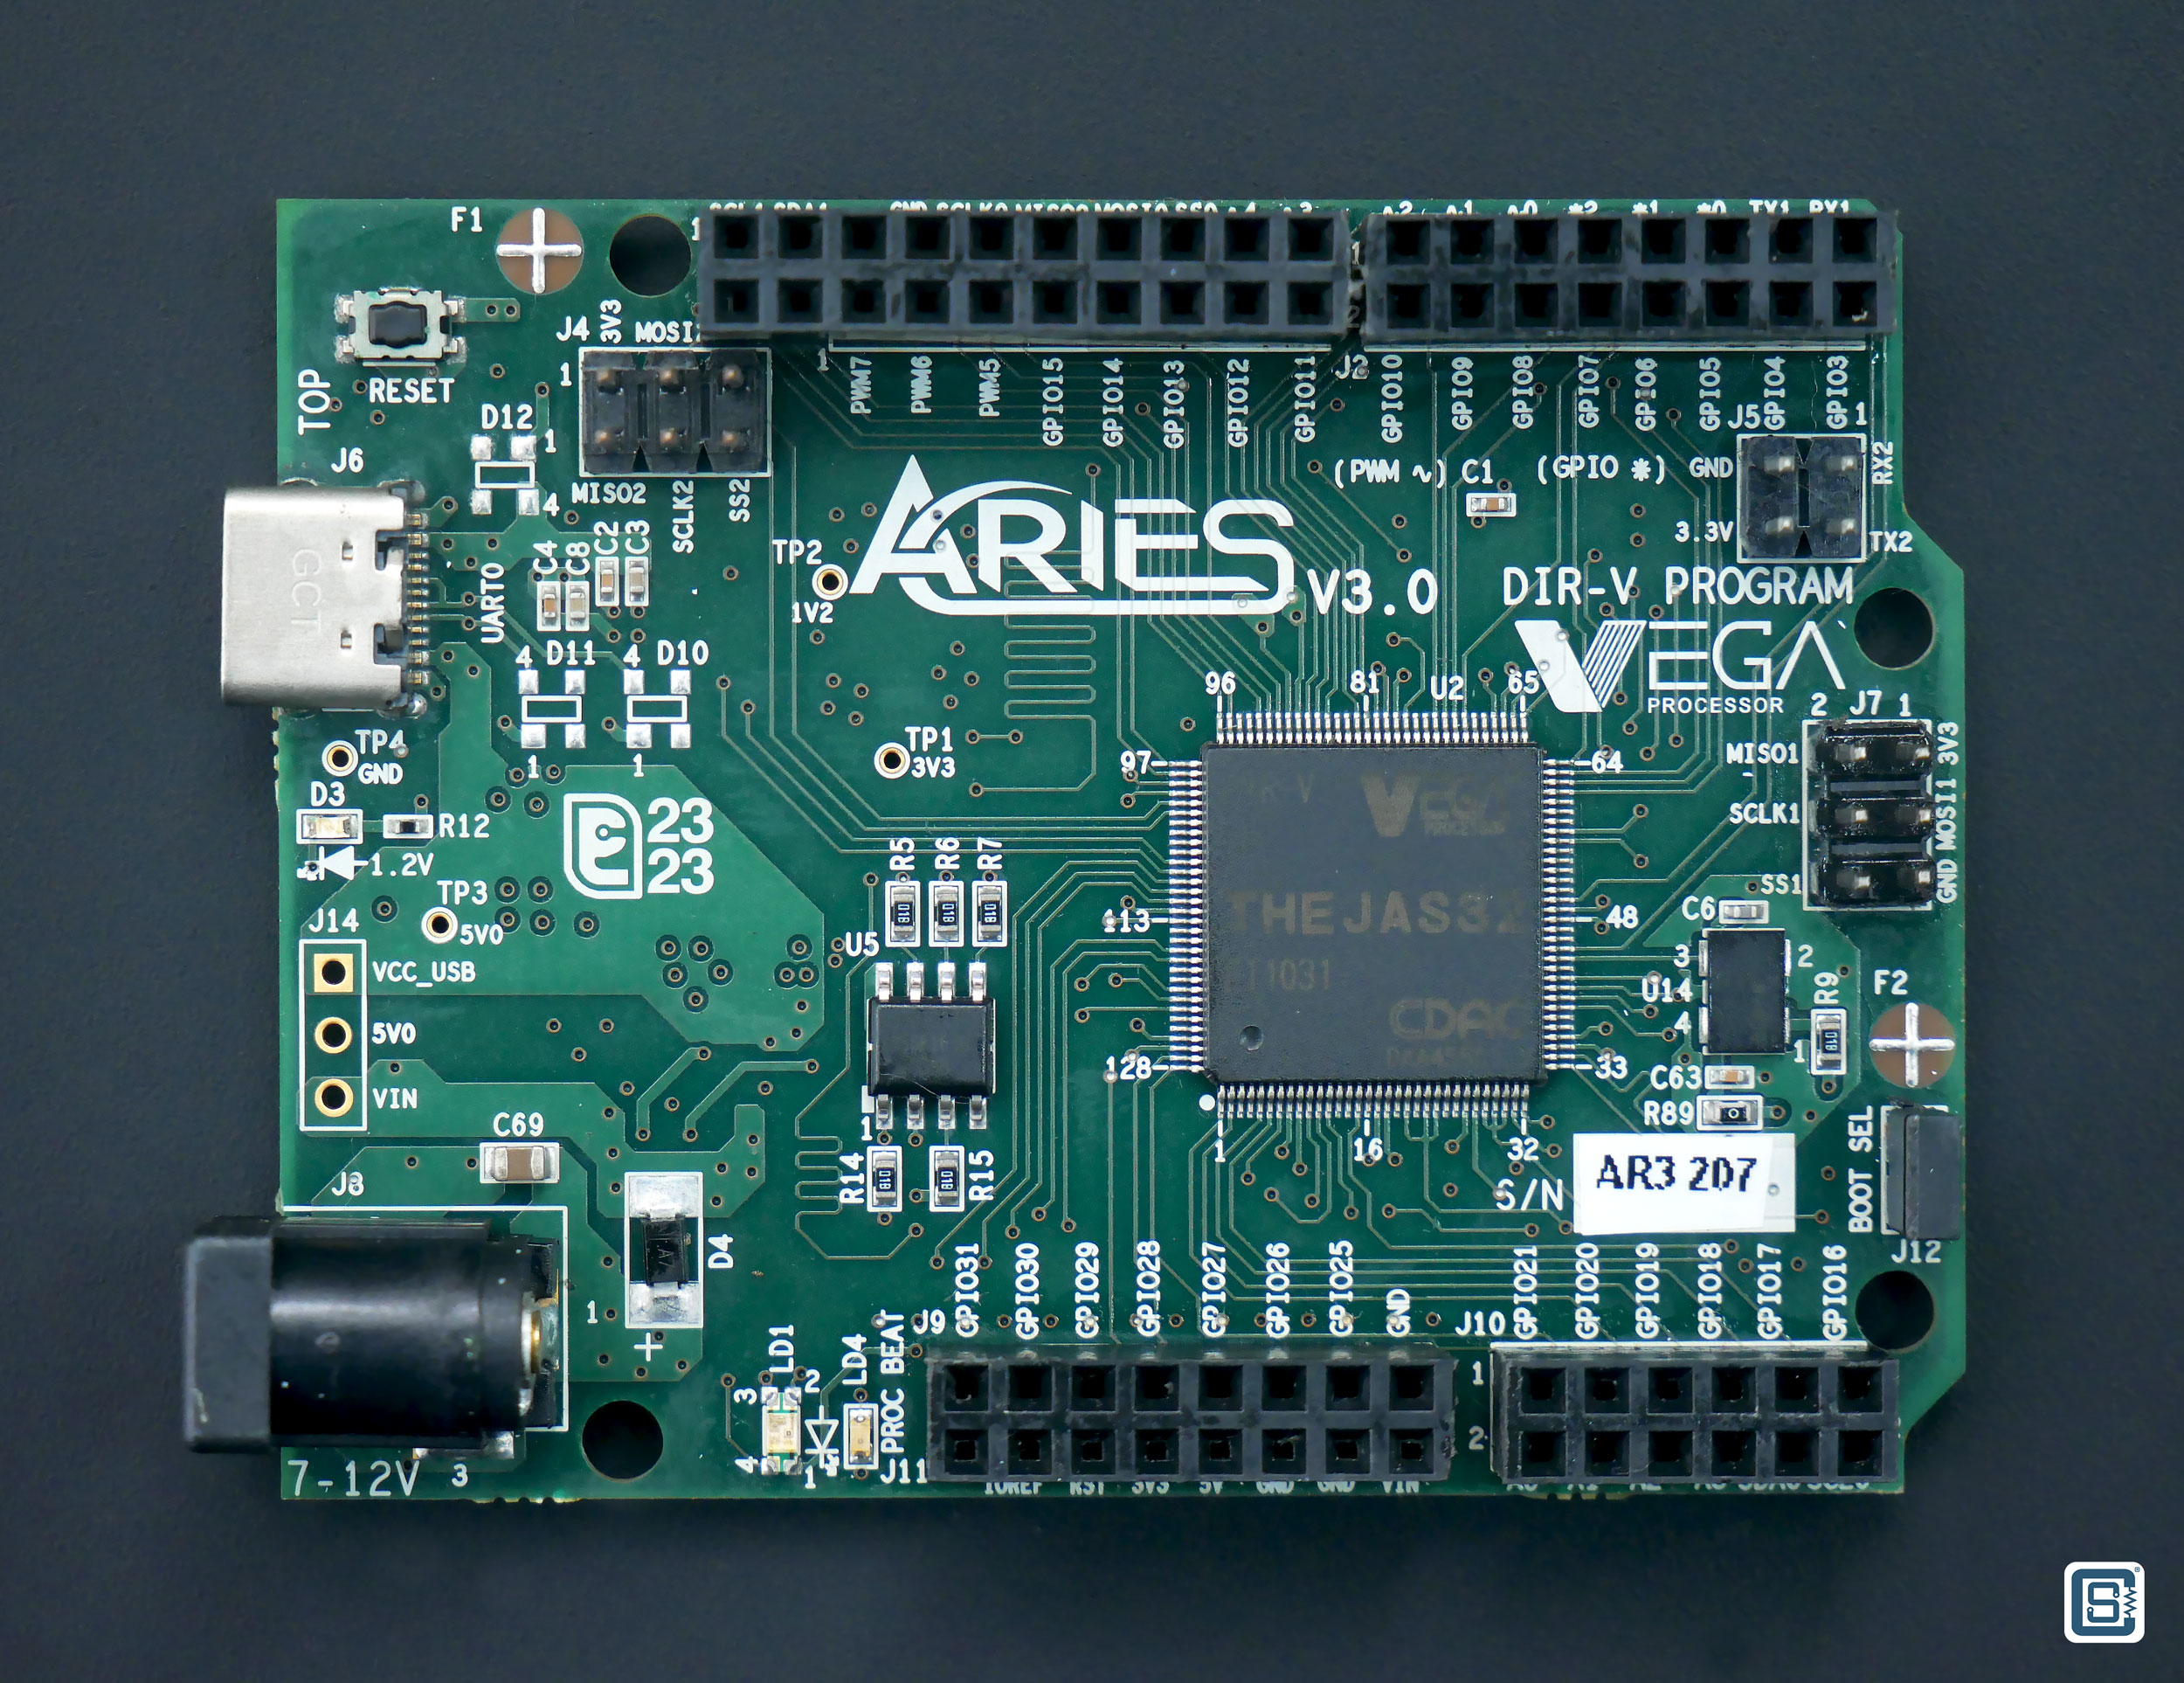
The Vega V3, manufactured by CDAC with the part ID ARIES, is a high-performance graphics processing unit (GPU) designed for both gaming and professional applications. It delivers cutting-edge performance with advanced features such as real-time ray tracing, support for high-resolution displays, and enhanced power efficiency. The Vega V3 is ideal for tasks requiring intensive graphical computations, including 3D rendering, video editing, and gaming.
Explore Projects Built with Vega V3

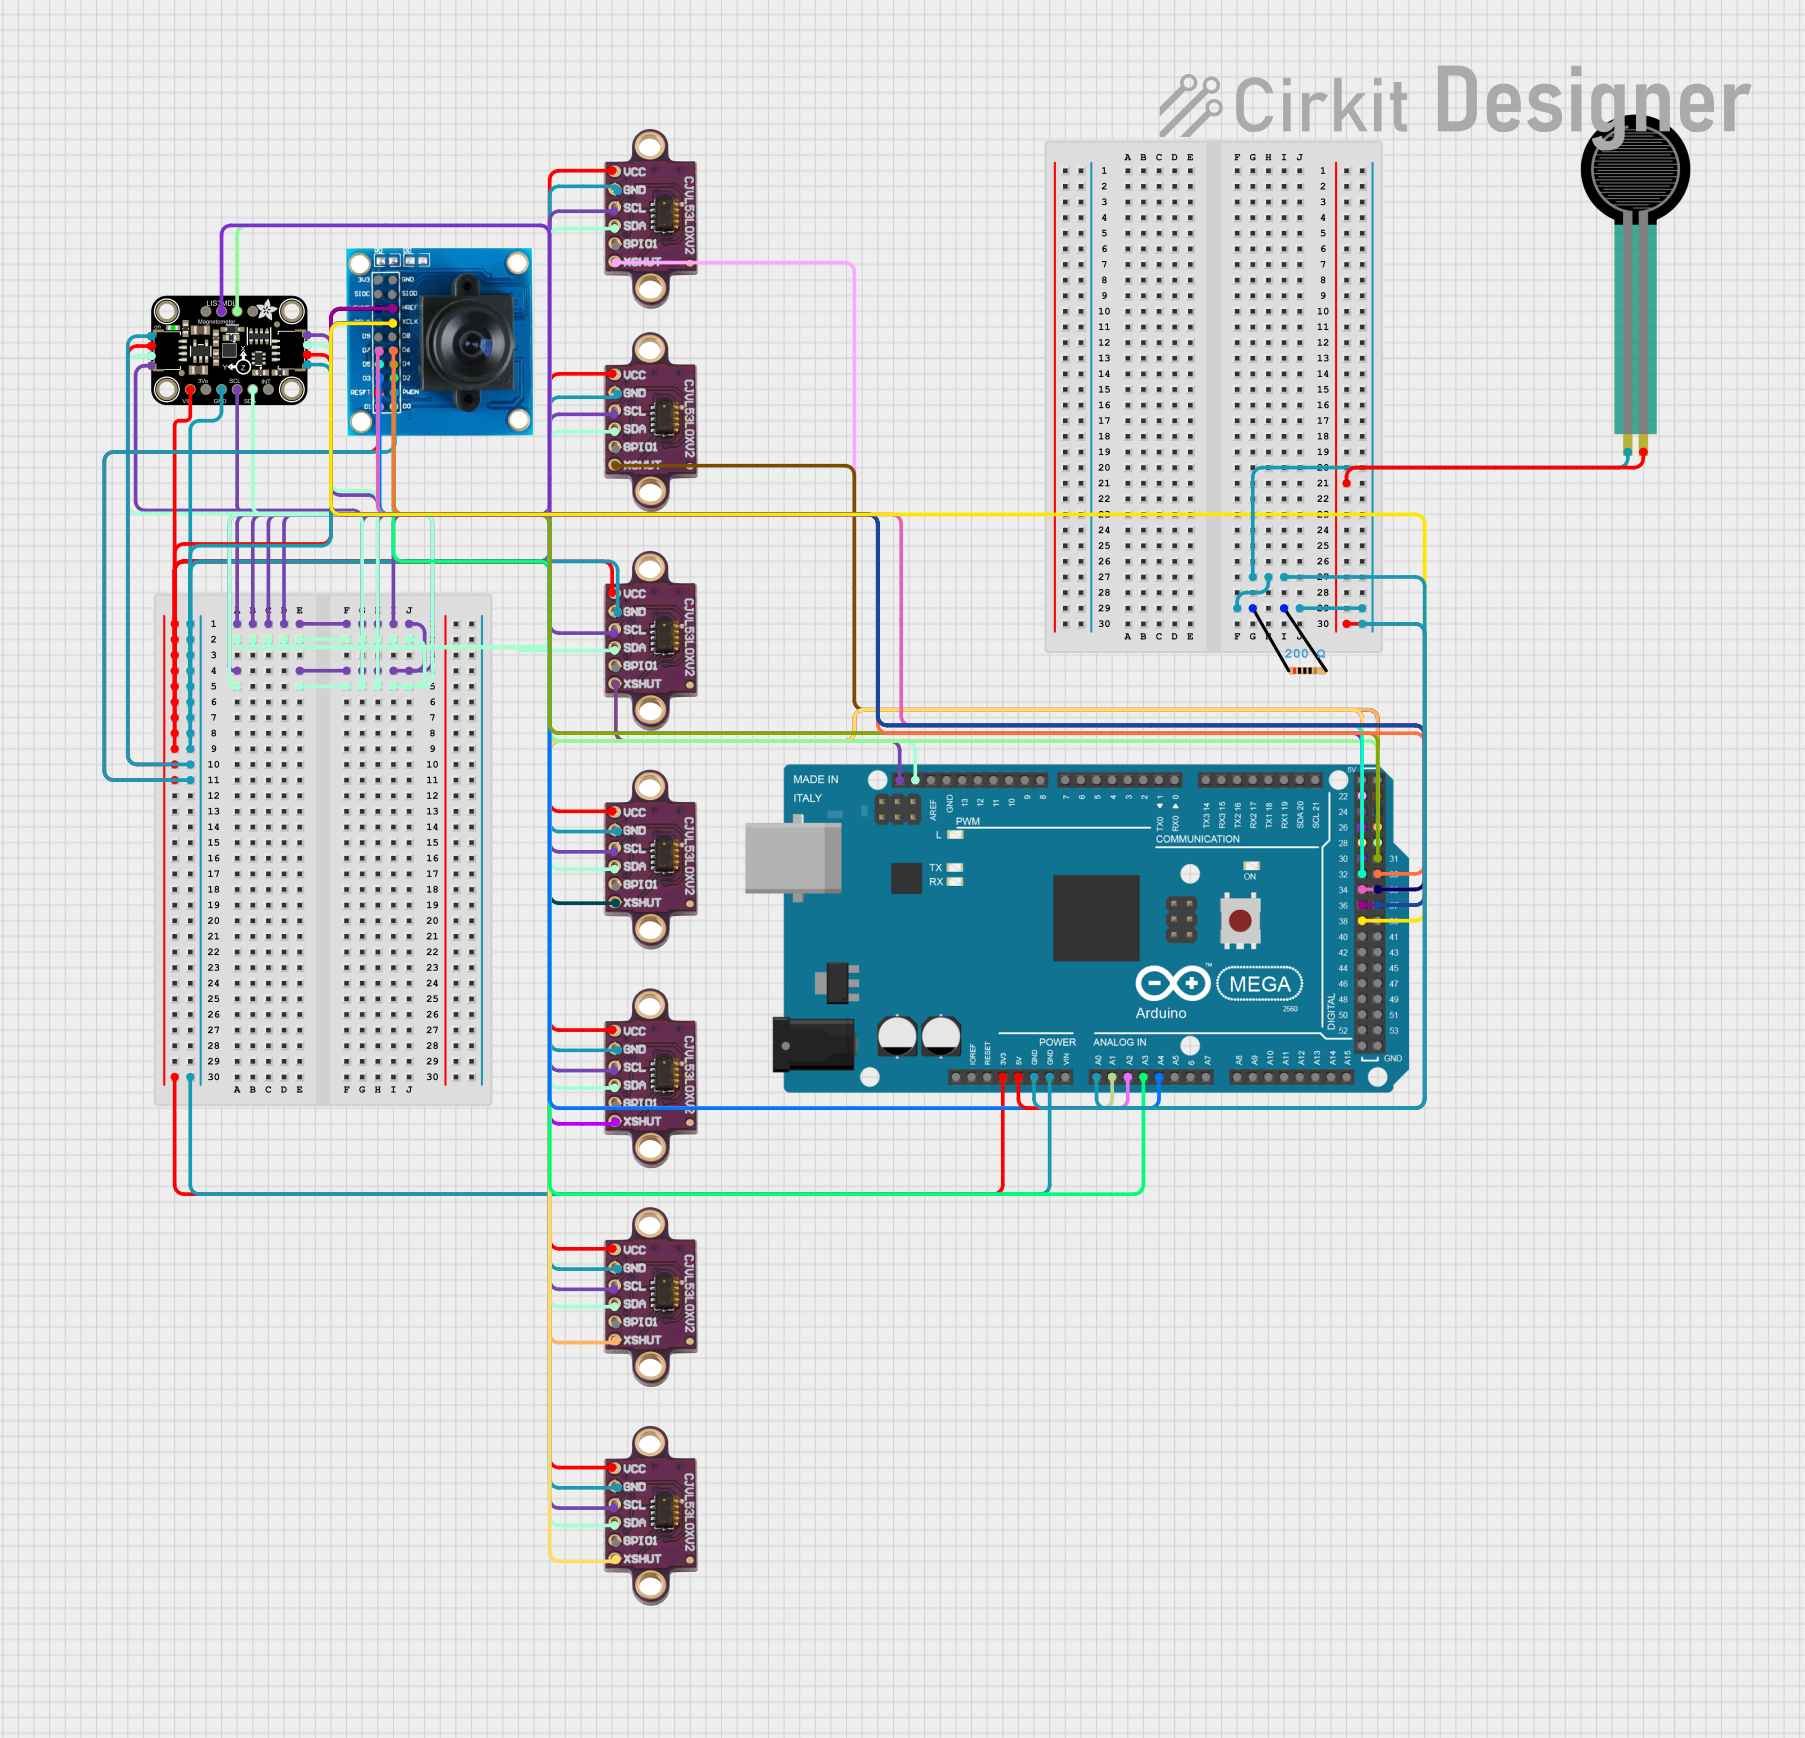
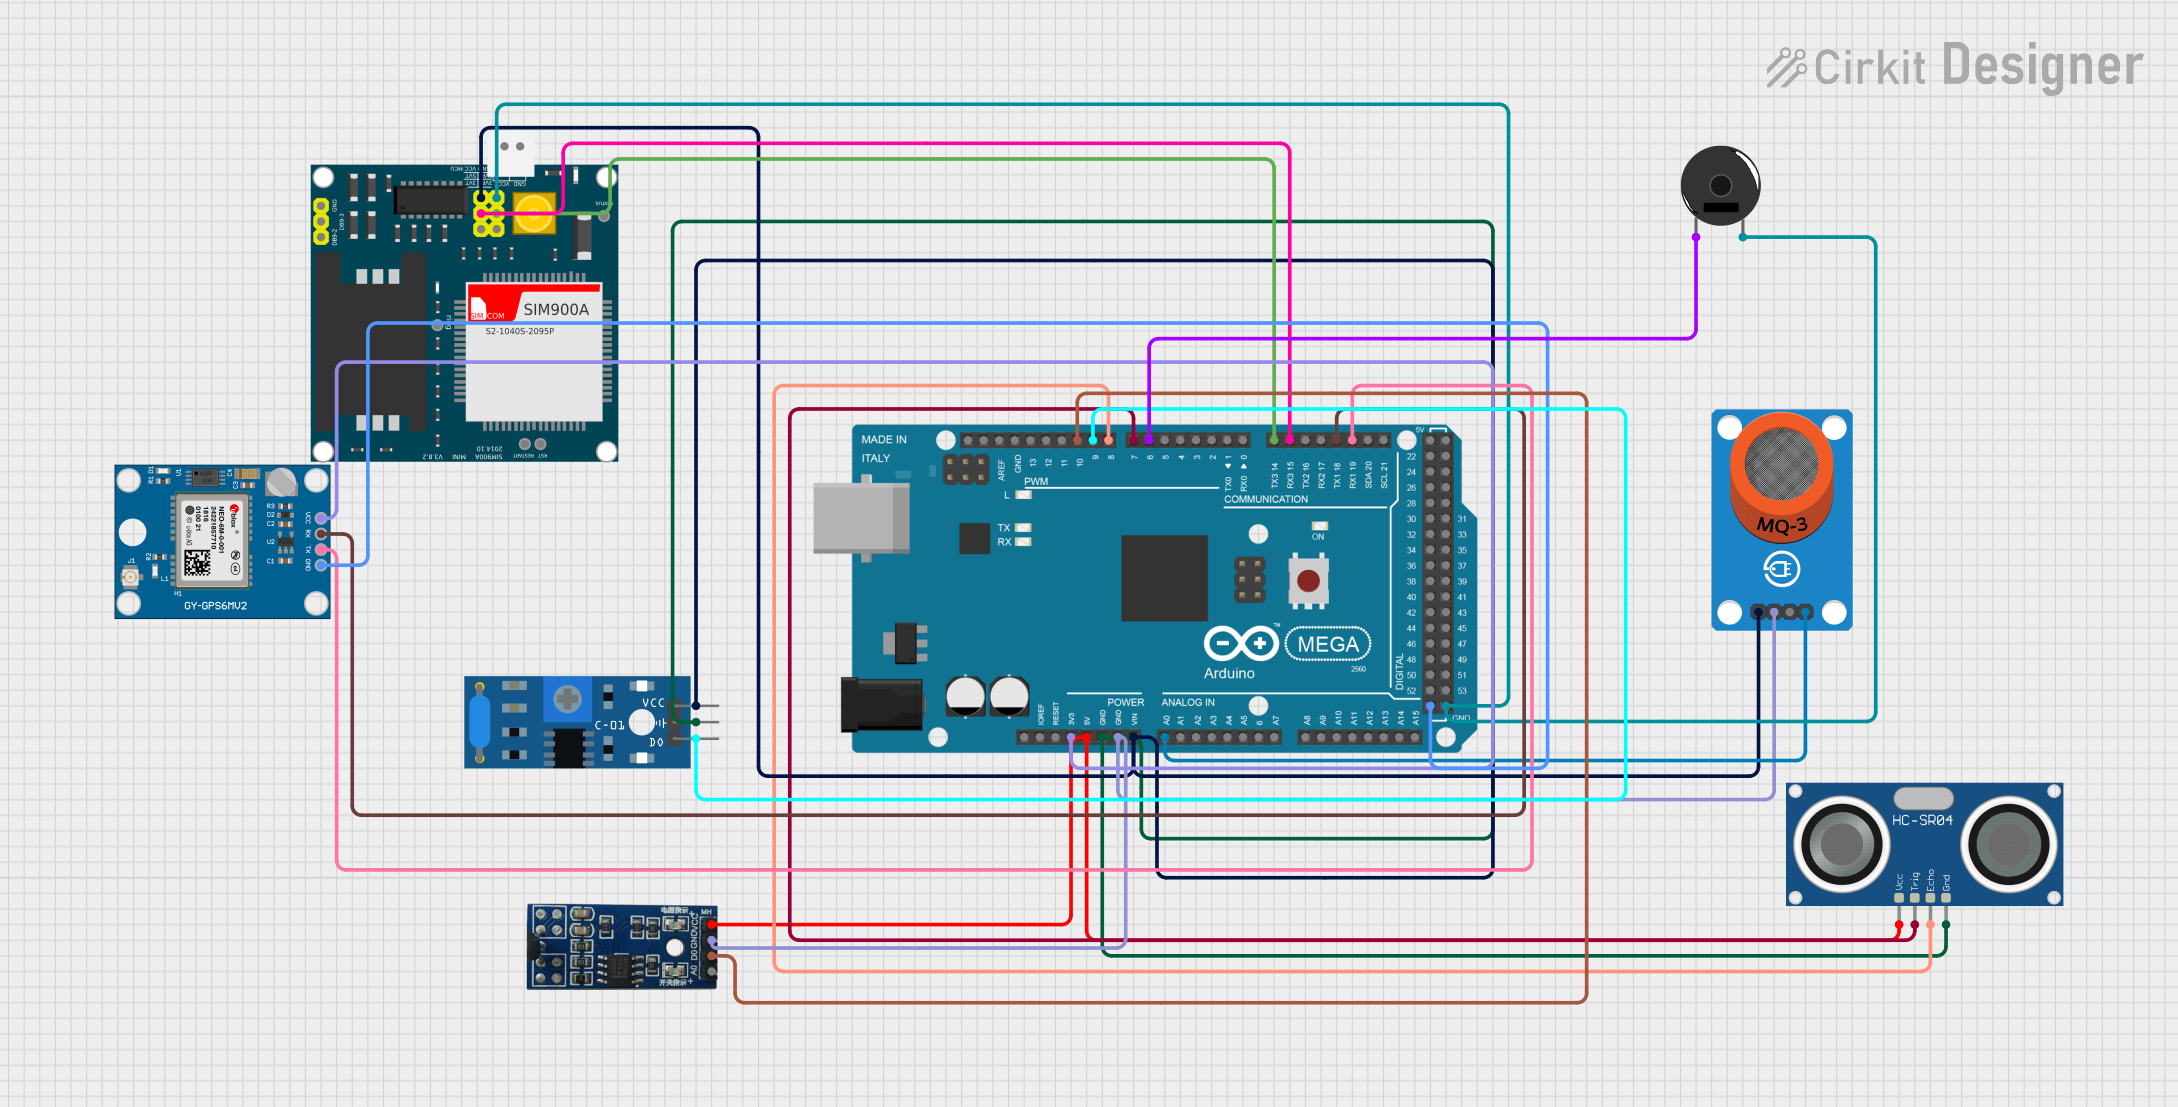

Explore Projects Built with Vega V3
Common Applications and Use Cases
- High-end gaming with support for 4K and 8K resolutions
- Professional 3D rendering and animation workflows
- Real-time ray tracing for realistic lighting and shadows
- Video editing and post-production
- AI and machine learning acceleration
- Multi-monitor setups for productivity and immersive experiences
Technical Specifications
Key Technical Details
| Parameter | Specification |
|---|---|
| Manufacturer | CDAC |
| Part ID | ARIES |
| Architecture | Vega |
| Core Clock Speed | 1.8 GHz (Base), 2.2 GHz (Boost) |
| Memory Type | GDDR6 |
| Memory Capacity | 16 GB |
| Memory Bandwidth | 512 GB/s |
| Power Consumption | 250 W (TDP) |
| PCIe Interface | PCIe 4.0 x16 |
| Display Outputs | 3x DisplayPort 1.4, 1x HDMI 2.1 |
| Maximum Resolution | 7680 x 4320 (8K) |
| Ray Tracing Support | Yes |
| DirectX Version | DirectX 12 Ultimate |
| OpenGL Version | OpenGL 4.6 |
| Vulkan API Support | Yes |
| Cooling Solution | Dual-fan heatsink with vapor chamber |
Pin Configuration and Descriptions
The Vega V3 connects to the motherboard via a PCIe 4.0 x16 interface and requires additional power through an 8-pin and a 6-pin PCIe power connector. Below is the pin configuration for the power connectors:
8-Pin PCIe Power Connector
| Pin Number | Signal Name | Description |
|---|---|---|
| 1 | +12V | 12V Power Supply |
| 2 | +12V | 12V Power Supply |
| 3 | +12V | 12V Power Supply |
| 4 | GND | Ground |
| 5 | GND | Ground |
| 6 | GND | Ground |
| 7 | Sense | Power Sense |
| 8 | Sense | Power Sense |
6-Pin PCIe Power Connector
| Pin Number | Signal Name | Description |
|---|---|---|
| 1 | +12V | 12V Power Supply |
| 2 | +12V | 12V Power Supply |
| 3 | +12V | 12V Power Supply |
| 4 | GND | Ground |
| 5 | GND | Ground |
| 6 | GND | Ground |
Usage Instructions
How to Use the Vega V3 in a System
- Install the GPU:
- Insert the Vega V3 into the PCIe 4.0 x16 slot on your motherboard.
- Secure the GPU to the case using screws to prevent movement.
- Connect Power:
- Attach the 8-pin and 6-pin PCIe power connectors from your power supply to the GPU.
- Ensure the connectors are firmly seated to avoid power issues.
- Connect Display Outputs:
- Use DisplayPort or HDMI cables to connect your monitor(s) to the GPU.
- For multi-monitor setups, connect additional monitors to the available ports.
- Install Drivers:
- Download and install the latest drivers from the CDAC website to ensure optimal performance.
- Restart your system after installation.
- Configure Settings:
- Use the GPU control panel software to adjust settings such as resolution, refresh rate, and ray tracing options.
Important Considerations and Best Practices
- Ensure your power supply unit (PSU) has a minimum capacity of 650W to handle the GPU's power requirements.
- Maintain proper airflow in your case to prevent overheating. Use additional case fans if necessary.
- Regularly update the GPU drivers to benefit from performance improvements and bug fixes.
- Avoid overclocking unless you have adequate cooling and experience with GPU tuning.
Example Code for GPU Acceleration with OpenCL
The Vega V3 supports OpenCL for GPU acceleration. Below is an example of initializing the GPU for computation:
#include <CL/cl.h>
#include <stdio.h>

int main() {
    // Get platform and device information
    cl_platform_id platform_id = NULL;
    cl_device_id device_id = NULL;
    cl_uint ret_num_devices;
    cl_uint ret_num_platforms;

    // Initialize OpenCL platform
    cl_int ret = clGetPlatformIDs(1, &platform_id, &ret_num_platforms);
    if (ret != CL_SUCCESS) {
        printf("Failed to get platform ID.\n");
        return -1;
    }

    // Get GPU device
    ret = clGetDeviceIDs(platform_id, CL_DEVICE_TYPE_GPU, 1, &device_id,
                         &ret_num_devices);
    if (ret != CL_SUCCESS) {
        printf("Failed to get device ID.\n");
        return -1;
    }

    printf("Vega V3 GPU initialized successfully.\n");
    return 0;
}
Troubleshooting and FAQs
Common Issues and Solutions
No Display Output:
- Ensure the GPU is properly seated in the PCIe slot.
- Verify that the power connectors are securely attached.
- Check if the monitor is powered on and the correct input source is selected.
Overheating:
- Clean the GPU's heatsink and fans to remove dust buildup.
- Improve case airflow by adding or repositioning case fans.
- Avoid overclocking if the cooling solution is insufficient.
Driver Installation Fails:
- Uninstall any existing GPU drivers before installing new ones.
- Download the latest drivers from the official CDAC website.
- Ensure your operating system is compatible with the driver version.
System Crashes or Freezes:
- Check if your PSU meets the GPU's power requirements.
- Test the GPU in another system to rule out hardware defects.
- Update your motherboard's BIOS to the latest version.
FAQs
Q: Can the Vega V3 handle 8K gaming?
A: Yes, the Vega V3 supports 8K resolution and is capable of running games at 8K, though performance may vary depending on the game's optimization and settings.
Q: Does the Vega V3 support VR headsets?
A: Yes, the Vega V3 is fully compatible with VR headsets and provides excellent performance for VR gaming and applications.
Q: What is the warranty period for the Vega V3?
A: The warranty period depends on the retailer or distributor, but CDAC typically offers a 3-year limited warranty for the Vega V3.
Q: Can I use the Vega V3 for cryptocurrency mining?
A: While the Vega V3 is capable of cryptocurrency mining, it is optimized for gaming and professional workloads. Mining may void the warranty.