How to Use SHT40 Breakout: Examples, Pinouts, and Specs
Introduction
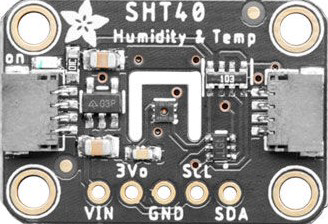
The SHT40 Breakout (Adafruit Part ID: 4885) is a high-accuracy temperature and humidity sensor module designed for precision environmental monitoring. Manufactured by Adafruit, this breakout board integrates the SHT40 sensor from Sensirion, which is part of their 4th-generation sensor family. The module is compact, reliable, and easy to use, making it ideal for applications such as:
- Environmental monitoring systems
- HVAC (Heating, Ventilation, and Air Conditioning) systems
- Weather stations
- IoT (Internet of Things) devices
- Industrial and home automation
The breakout board includes all necessary circuitry for seamless integration with microcontrollers via the I2C communication protocol.
Explore Projects Built with SHT40 Breakout
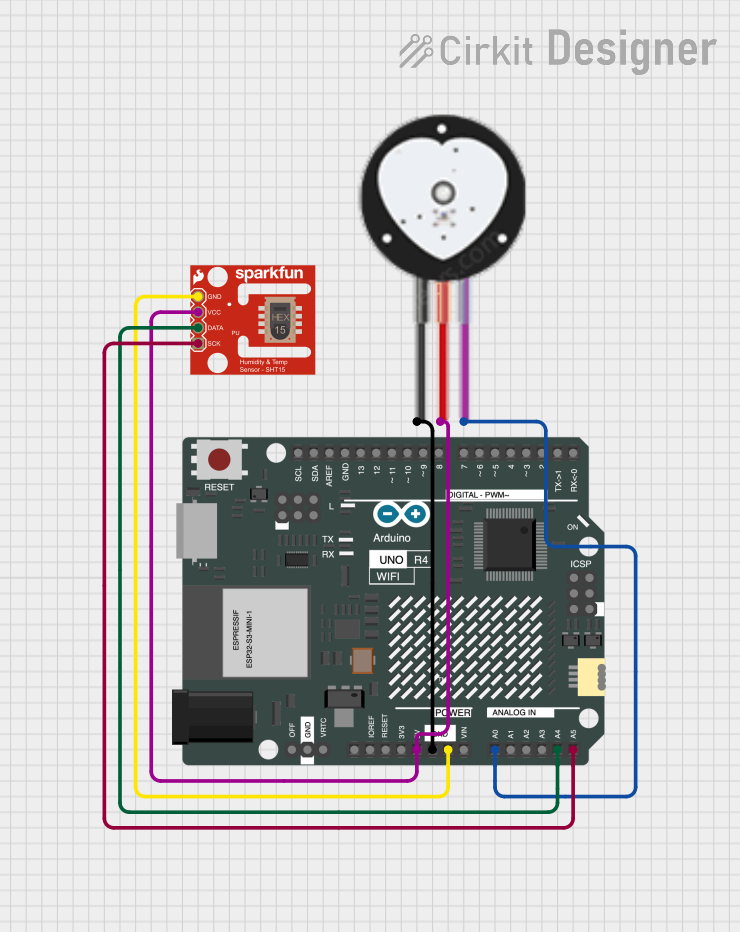
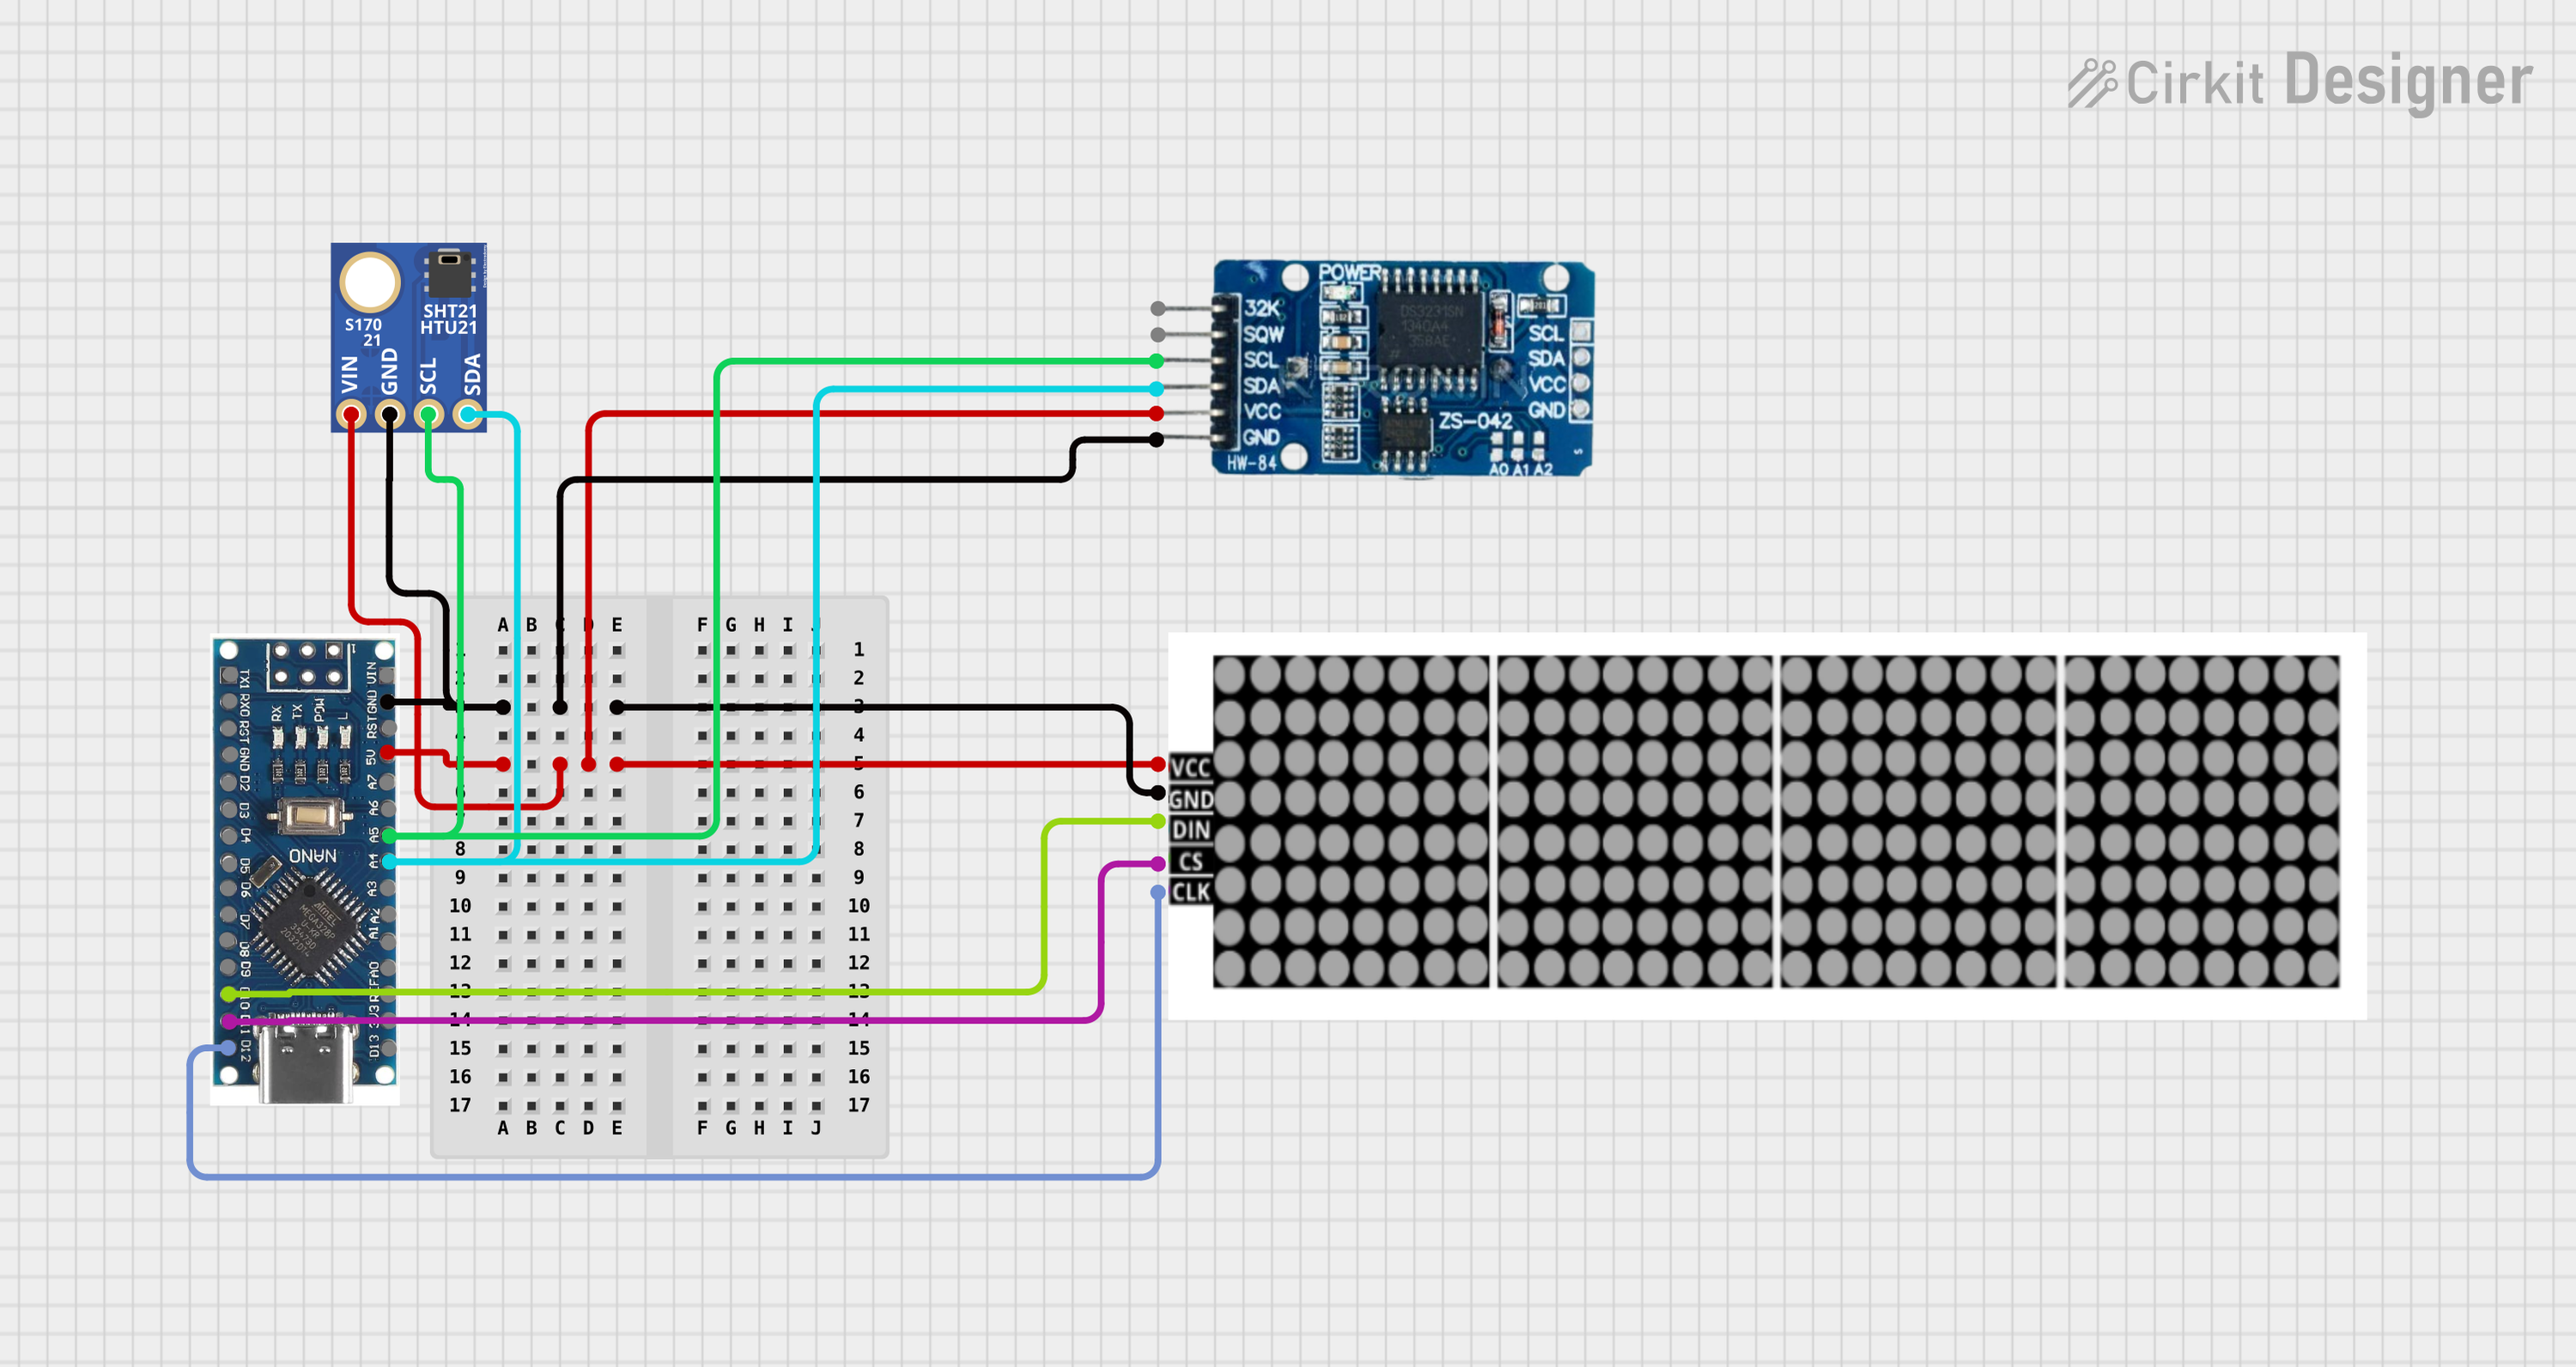
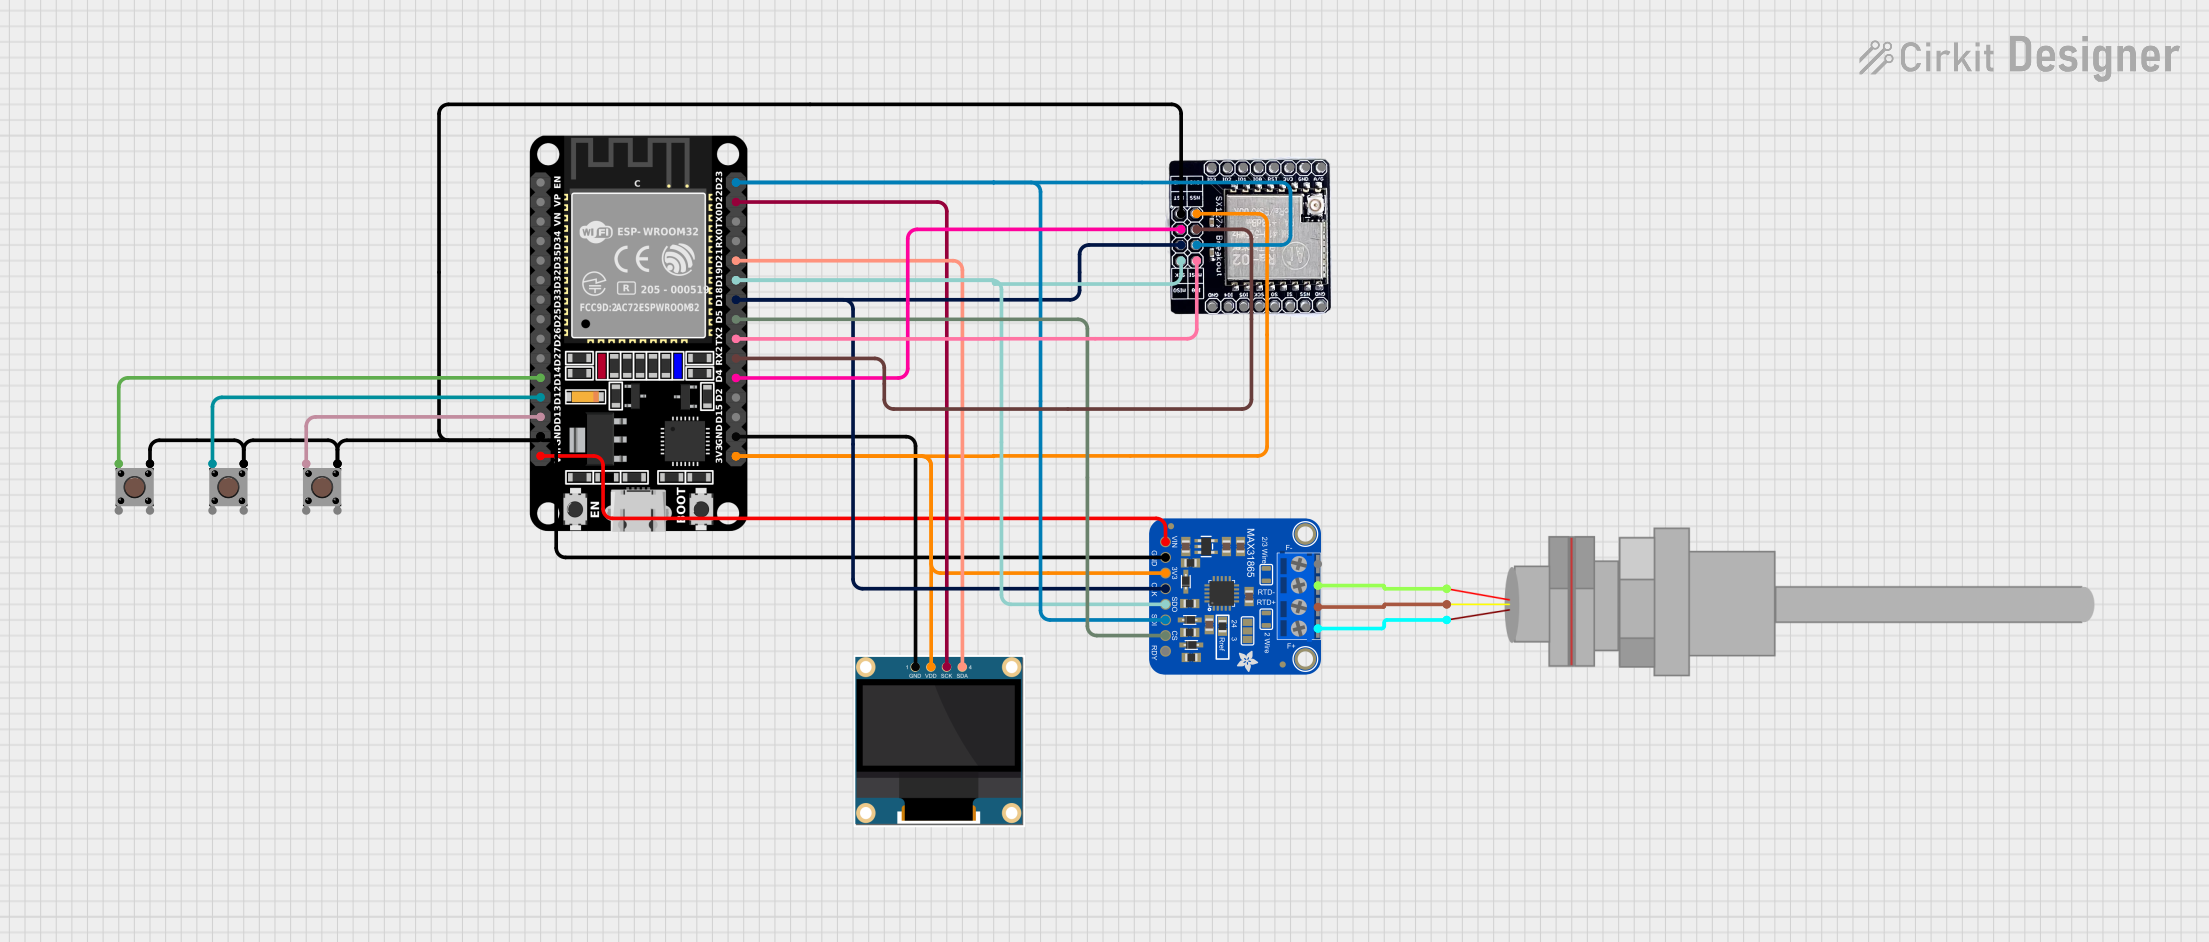
Explore Projects Built with SHT40 Breakout
Technical Specifications
Key Specifications
| Parameter | Value |
|---|---|
| Sensor Type | Temperature and Humidity |
| Temperature Range | -40°C to +125°C |
| Temperature Accuracy | ±0.1°C (typical) |
| Humidity Range | 0% to 100% RH |
| Humidity Accuracy | ±1.8% RH (typical) |
| Supply Voltage | 2.4V to 5.5V |
| Communication Protocol | I2C |
| I2C Address (Default) | 0x44 |
| Current Consumption | 0.4 µA (idle), 900 µA (measurement mode) |
| Dimensions | 16mm x 10mm x 2mm |
Pin Configuration
The SHT40 Breakout board has four pins, as described in the table below:
| Pin Name | Description | Notes |
|---|---|---|
| VIN | Power Supply Input | Accepts 2.4V to 5.5V |
| GND | Ground | Connect to system ground |
| SCL | I2C Clock Line | Pull-up resistor required |
| SDA | I2C Data Line | Pull-up resistor required |
Usage Instructions
Connecting the SHT40 Breakout
- Power Supply: Connect the
VINpin to a 3.3V or 5V power source and theGNDpin to ground. - I2C Communication: Connect the
SCLandSDApins to the corresponding I2C pins on your microcontroller. For example:- On an Arduino UNO, connect
SCLto A5 andSDAto A4.
- On an Arduino UNO, connect
- Pull-Up Resistors: Ensure that the I2C lines (
SCLandSDA) have pull-up resistors (typically 4.7kΩ). Many breakout boards include these resistors by default.
Example Arduino Code
Below is an example of how to use the SHT40 Breakout with an Arduino UNO. This code reads temperature and humidity data and prints it to the Serial Monitor.
#include <Wire.h>
#include "Adafruit_SHT4x.h"

// Create an instance of the SHT40 sensor
Adafruit_SHT4x sht40;

void setup() {
  Serial.begin(115200); // Initialize Serial Monitor
  while (!Serial) delay(10); // Wait for Serial Monitor to open

  Serial.println("SHT40 Breakout Example");

  // Initialize the sensor
  if (!sht40.begin()) {
    Serial.println("Failed to find SHT40 sensor!");
    while (1) delay(10); // Halt if sensor is not detected
  }
  Serial.println("SHT40 sensor initialized.");
}

void loop() {
  sensors_event_t humidity, temp;

  // Perform a measurement
  if (!sht40.getEvent(&humidity, &temp)) {
    Serial.println("Failed to read data from SHT40!");
    return;
  }

  // Print temperature and humidity readings
  Serial.print("Temperature: ");
  Serial.print(temp.temperature);
  Serial.println(" °C");

  Serial.print("Humidity: ");
  Serial.print(humidity.relative_humidity);
  Serial.println(" %");

  delay(2000); // Wait 2 seconds before the next reading
}
Best Practices
- Power Supply: Ensure the power supply voltage is within the specified range (2.4V to 5.5V).
- I2C Address: The default I2C address is
0x44. If you have multiple SHT40 sensors on the same bus, ensure they have unique addresses. - Environmental Factors: Avoid exposing the sensor to extreme conditions (e.g., condensation or dust) to maintain accuracy and longevity.
Troubleshooting and FAQs
Common Issues and Solutions
| Issue | Possible Cause | Solution |
|---|---|---|
| Sensor not detected on I2C bus | Incorrect wiring or I2C address | Verify connections and address |
| Incorrect temperature/humidity | Sensor exposed to contaminants | Clean sensor or use a protective cover |
| No data output | Missing pull-up resistors on I2C lines | Add 4.7kΩ pull-up resistors |
| Fluctuating readings | Electrical noise or unstable power | Use decoupling capacitors on VIN/GND |
FAQs
Can I use the SHT40 Breakout with a 3.3V microcontroller?
- Yes, the breakout board is compatible with both 3.3V and 5V systems.
What is the default I2C address of the SHT40?
- The default I2C address is
0x44.
- The default I2C address is
Do I need to calibrate the sensor?
- No, the SHT40 is factory-calibrated and does not require additional calibration.
Can I use the SHT40 in outdoor environments?
- While the sensor is accurate, it is not waterproof. Use a protective enclosure for outdoor applications.
By following this documentation, you can effectively integrate the SHT40 Breakout into your projects for reliable temperature and humidity measurements.