How to Use BULB: Examples, Pinouts, and Specs
Introduction
A bulb is an electrical component that emits light when an electric current passes through its filament. The filament heats up to a high temperature, becoming incandescent and producing visible light. Bulbs are widely used in residential, commercial, and industrial settings for illumination purposes. They come in various shapes, sizes, and technologies, including incandescent, fluorescent, and LED bulbs.
Explore Projects Built with BULB
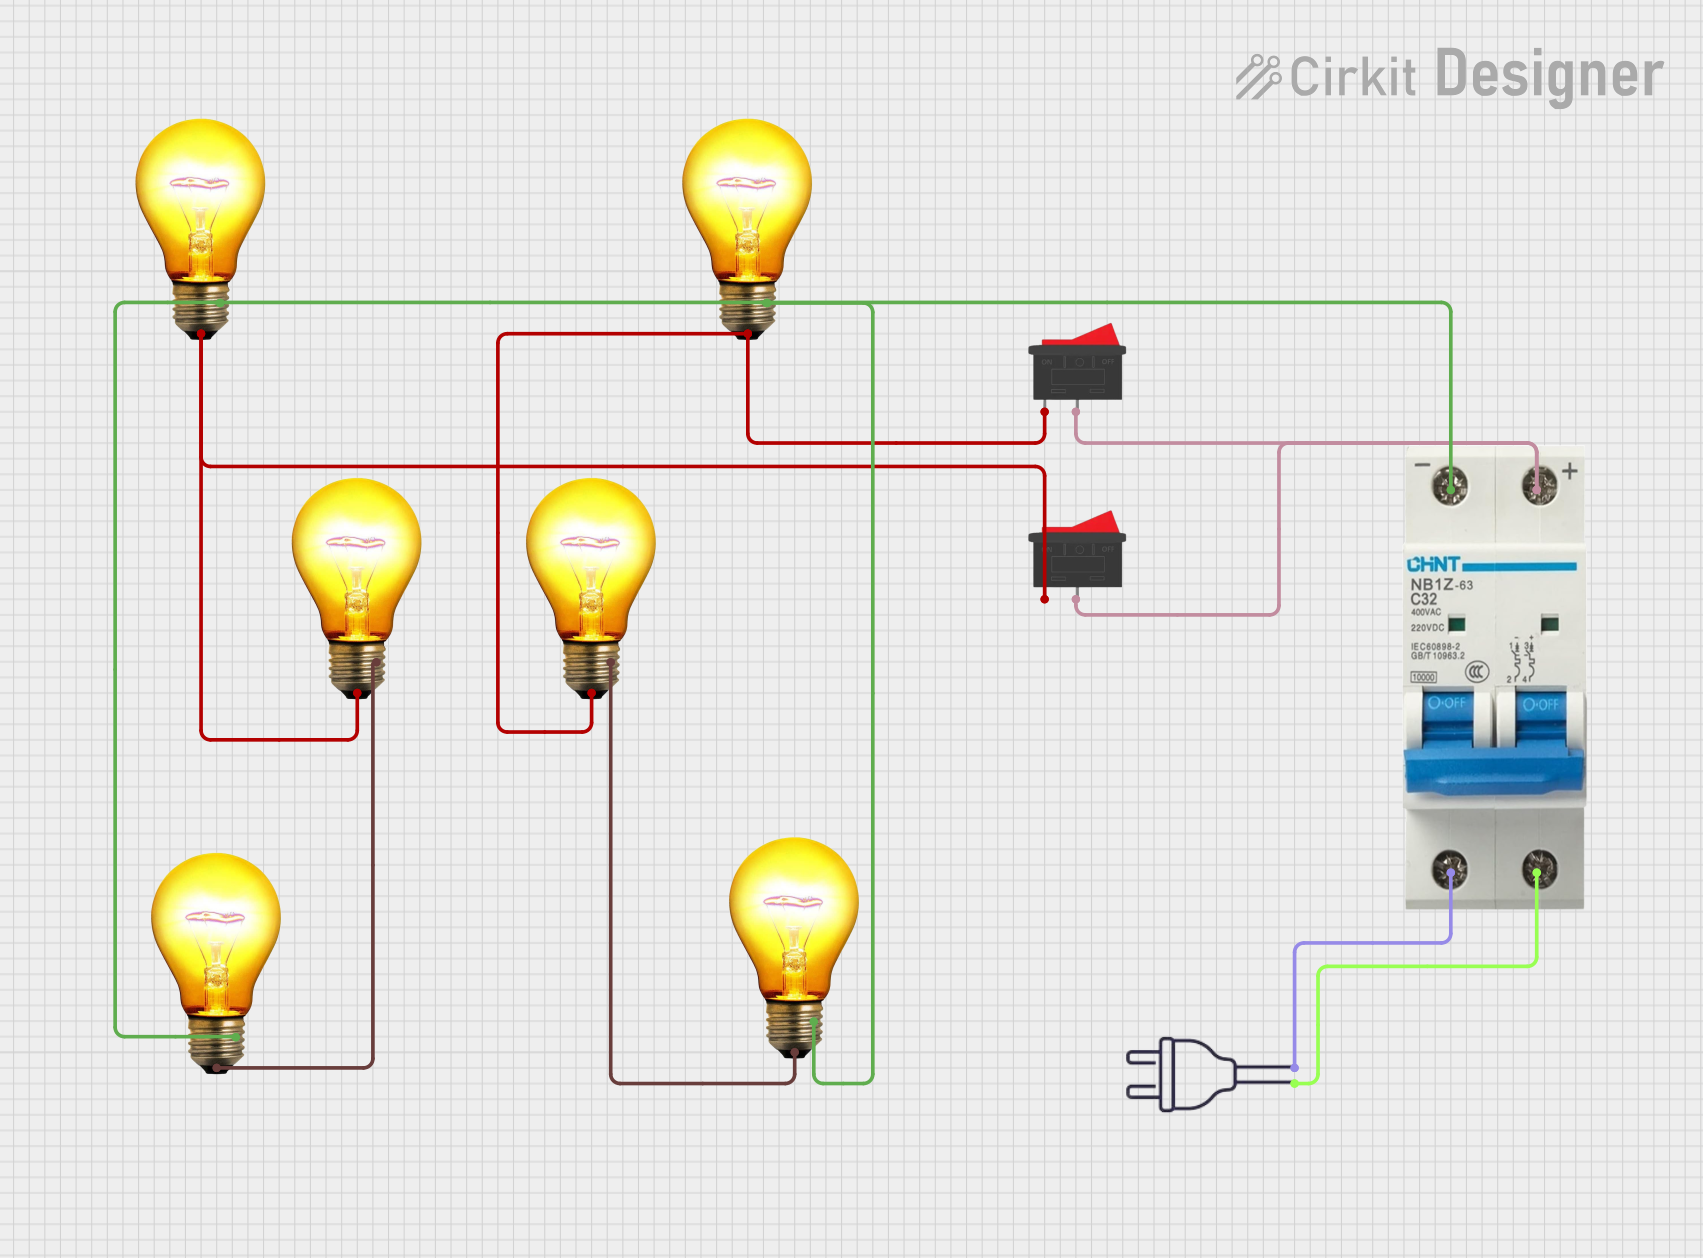
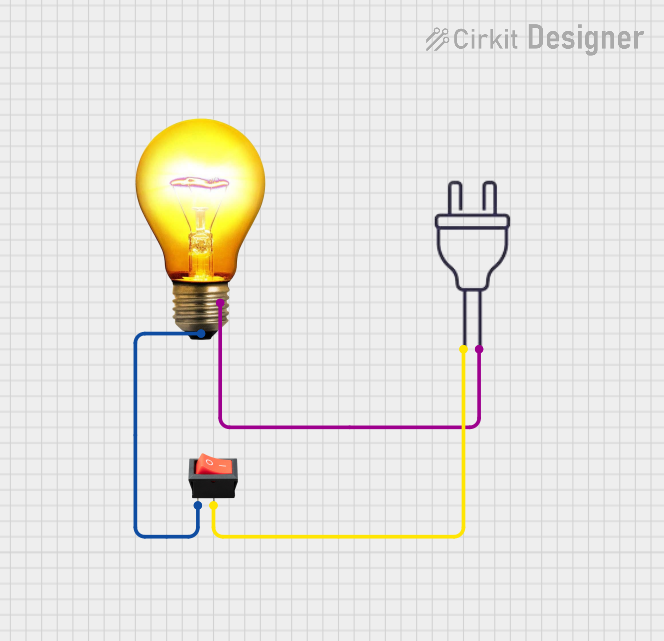
Explore Projects Built with BULB
Technical Specifications
General Specifications
| Specification | Description |
|---|---|
| Voltage | Typically 110-120V or 220-240V (depending on region) |
| Power | Ranges from 1W to 500W or more |
| Base Type | Common bases include E26/E27 (medium), B22 (bayonet), GU10, etc. |
| Lifespan | Varies by type: Incandescent (1,000 hrs), CFL (8,000 hrs), LED (25,000+ hrs) |
| Light Output | Measured in lumens; varies by wattage and bulb type |
| Color Temperature | Measured in Kelvin (K); ranges from warm (2700K) to cool (6500K) |
Pin Configuration and Descriptions
Since a bulb typically has only two contact points, the pin configuration is straightforward:
| Pin | Description |
|---|---|
| 1 | Live (Phase) Connection |
| 2 | Neutral Connection |
Usage Instructions
Installing a Bulb
- Ensure Power is Off: Before installing the bulb, make sure the power supply to the socket is turned off to prevent electric shock.
- Choose the Correct Bulb: Select a bulb with the appropriate voltage, wattage, and base type for your fixture.
- Handling the Bulb: Handle the bulb by its base to avoid getting oils from your skin on the glass, which can shorten its lifespan.
- Inserting the Bulb: Align the base of the bulb with the socket and gently screw in (for screw bases) or push and twist (for bayonet bases) until secure.
- Power On: Once the bulb is securely installed, turn the power back on to test the bulb.
Best Practices
- Use bulbs with the correct voltage rating for your region to avoid premature failure.
- Consider energy-efficient bulbs like LEDs to save on electricity costs and reduce heat output.
- Do not exceed the maximum wattage recommended for your lighting fixture.
- Dispose of bulbs properly, especially CFLs and fluorescents, which contain small amounts of mercury.
Troubleshooting and FAQs
Common Issues
- Bulb Does Not Light Up: Check if the power supply is on, the bulb is properly installed, and there are no issues with the circuit or fixture.
- Flickering Light: This could be due to a loose connection, voltage fluctuations, or a defective bulb.
- Short Lifespan: Overheating, voltage surges, or using a bulb with incorrect specifications can lead to a reduced lifespan.
FAQs
Q: Can I use a higher wattage bulb than recommended for my fixture? A: No, using a bulb with a higher wattage than recommended can cause excessive heat and pose a fire hazard.
Q: Are LED bulbs dimmable? A: Some LED bulbs are designed to be dimmable, but you need to check the bulb's specifications and use a compatible dimmer switch.
Q: How do I dispose of a broken CFL bulb? A: Due to the mercury content, follow local guidelines for hazardous waste disposal. Do not throw CFL bulbs in the regular trash.
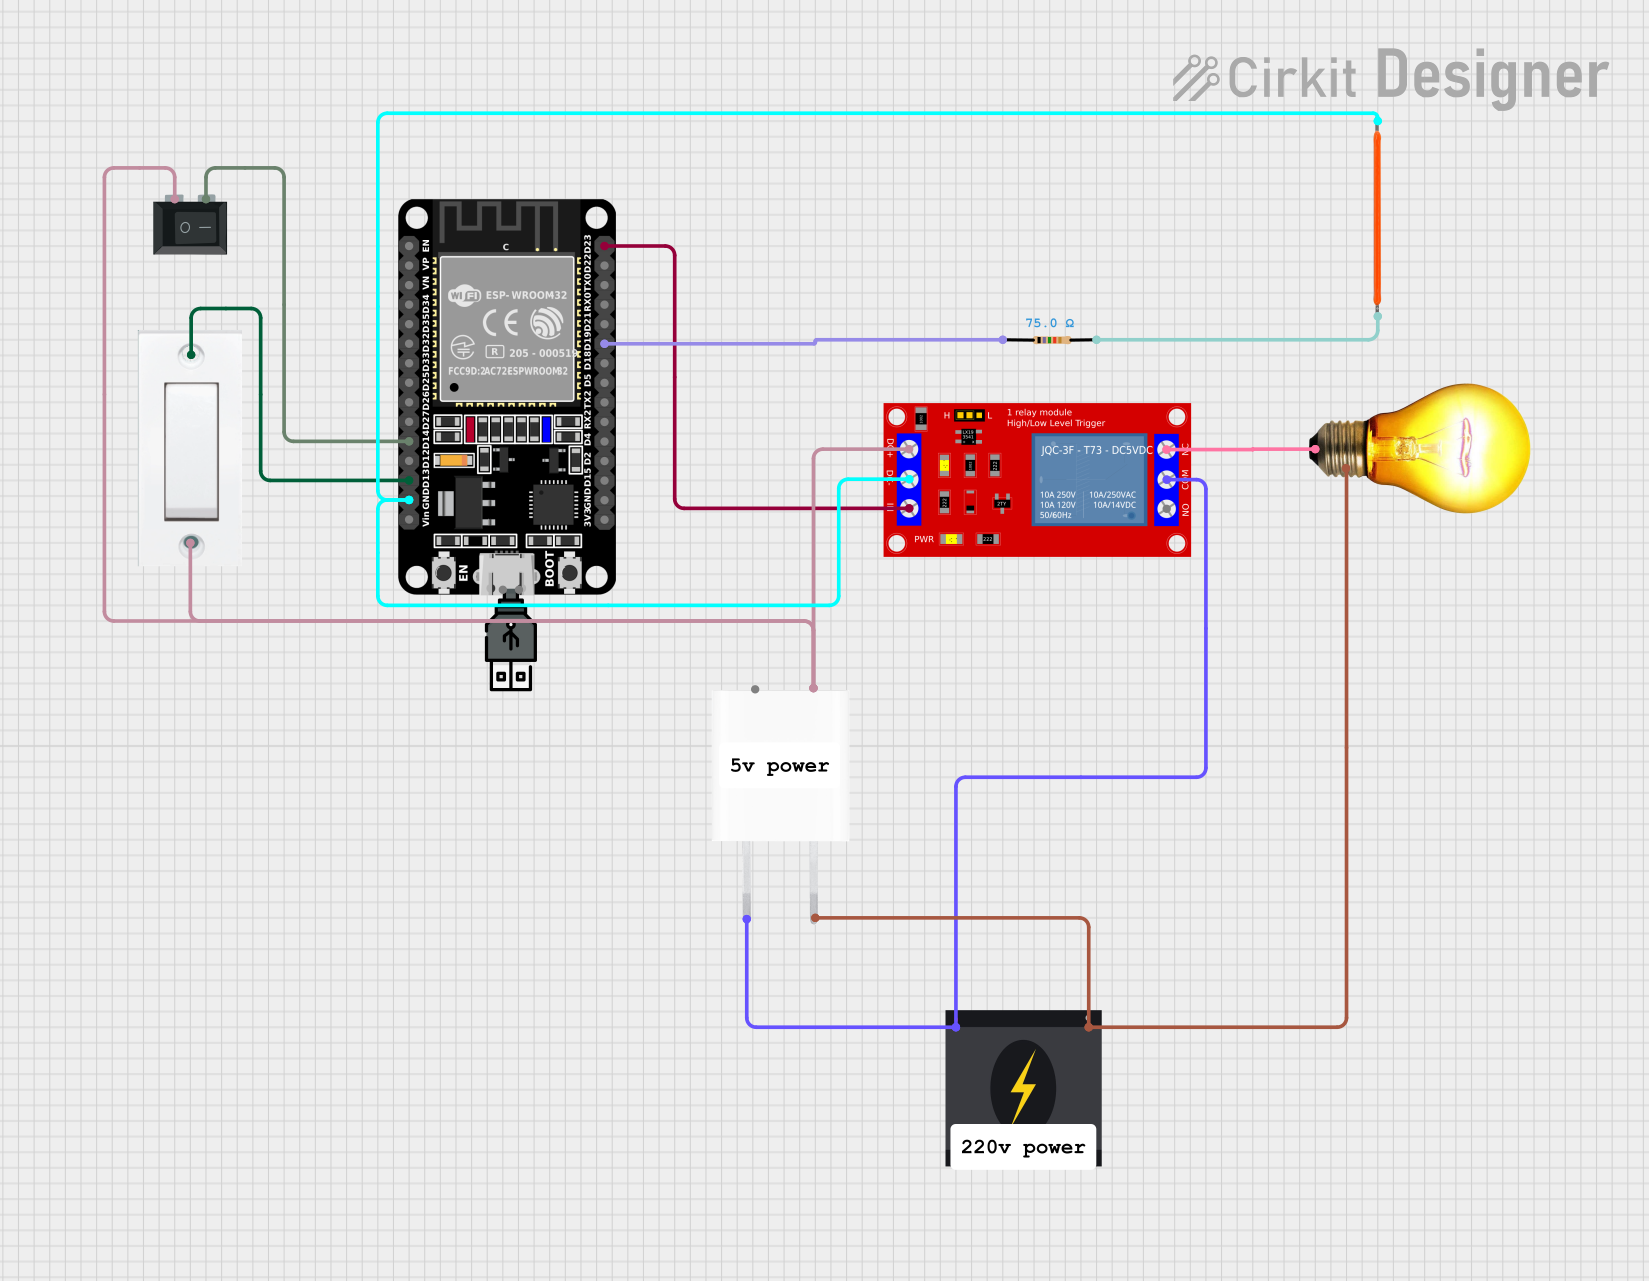
Example Code for Arduino UNO
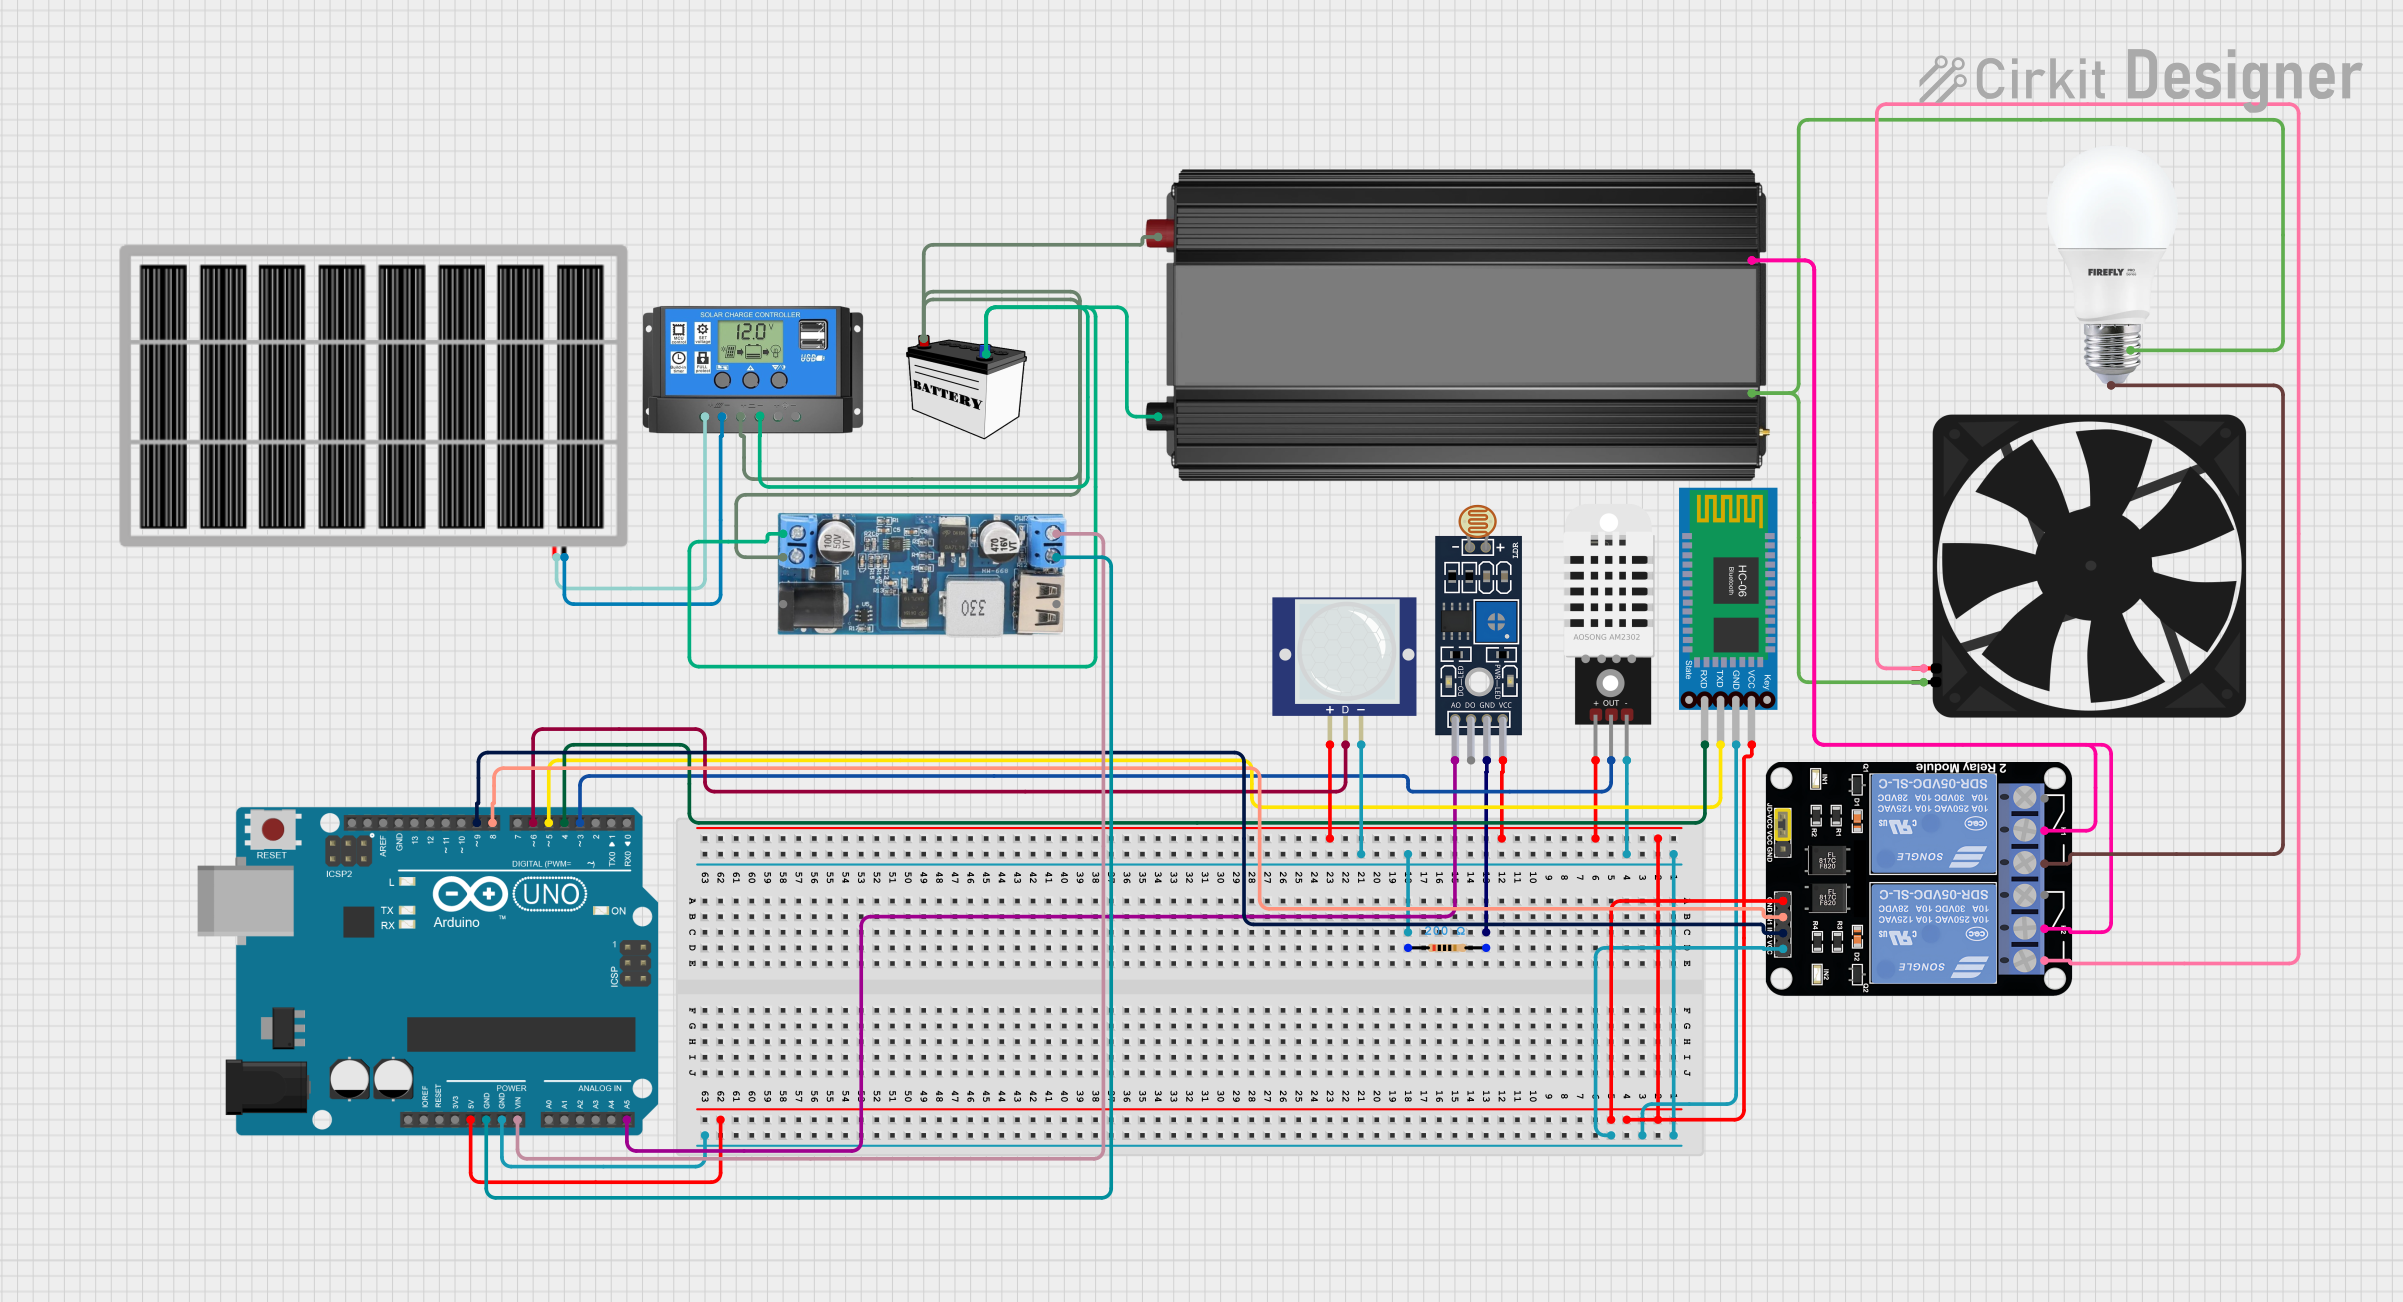
If you're using an LED bulb with an Arduino UNO, you can control it using a relay module. Below is a simple example code to turn the bulb on and off.
// Define the relay control pin
const int relayPin = 2;

void setup() {
  // Set the relay pin as an output
  pinMode(relayPin, OUTPUT);
  // Start with the relay off (bulb off)
  digitalWrite(relayPin, LOW);
}

void loop() {
  // Turn the bulb on for 1 second
  digitalWrite(relayPin, HIGH);
  delay(1000);
  // Turn the bulb off for 1 second
  digitalWrite(relayPin, LOW);
  delay(1000);
}
Note: Ensure that the relay module is rated for the bulb's voltage and current requirements. Always be cautious when working with mains electricity and consider consulting a professional if you are not experienced.