
Cirkit Designer
Your all-in-one circuit design IDE
Home /
Component Documentation
How to Use QR204 Thermal Printer: Examples, Pinouts, and Specs
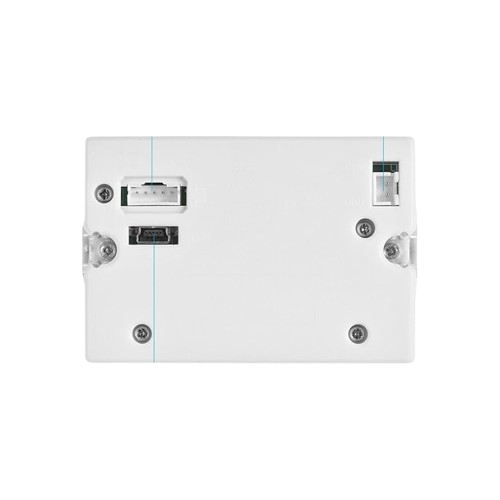
 Design with QR204 Thermal Printer in Cirkit Designer
Introduction
The QR204 Thermal Printer is a compact, high-speed printer designed for printing receipts and labels using thermal printing technology. This technology eliminates the need for ink or toner, making the QR204 a cost-effective and low-maintenance solution. Its small form factor and reliable performance make it ideal for applications in retail, hospitality, ticketing systems, and embedded systems.
Explore Projects Built with QR204 Thermal Printer
ESP32-Based Barcode Reader and Thermal Printer System
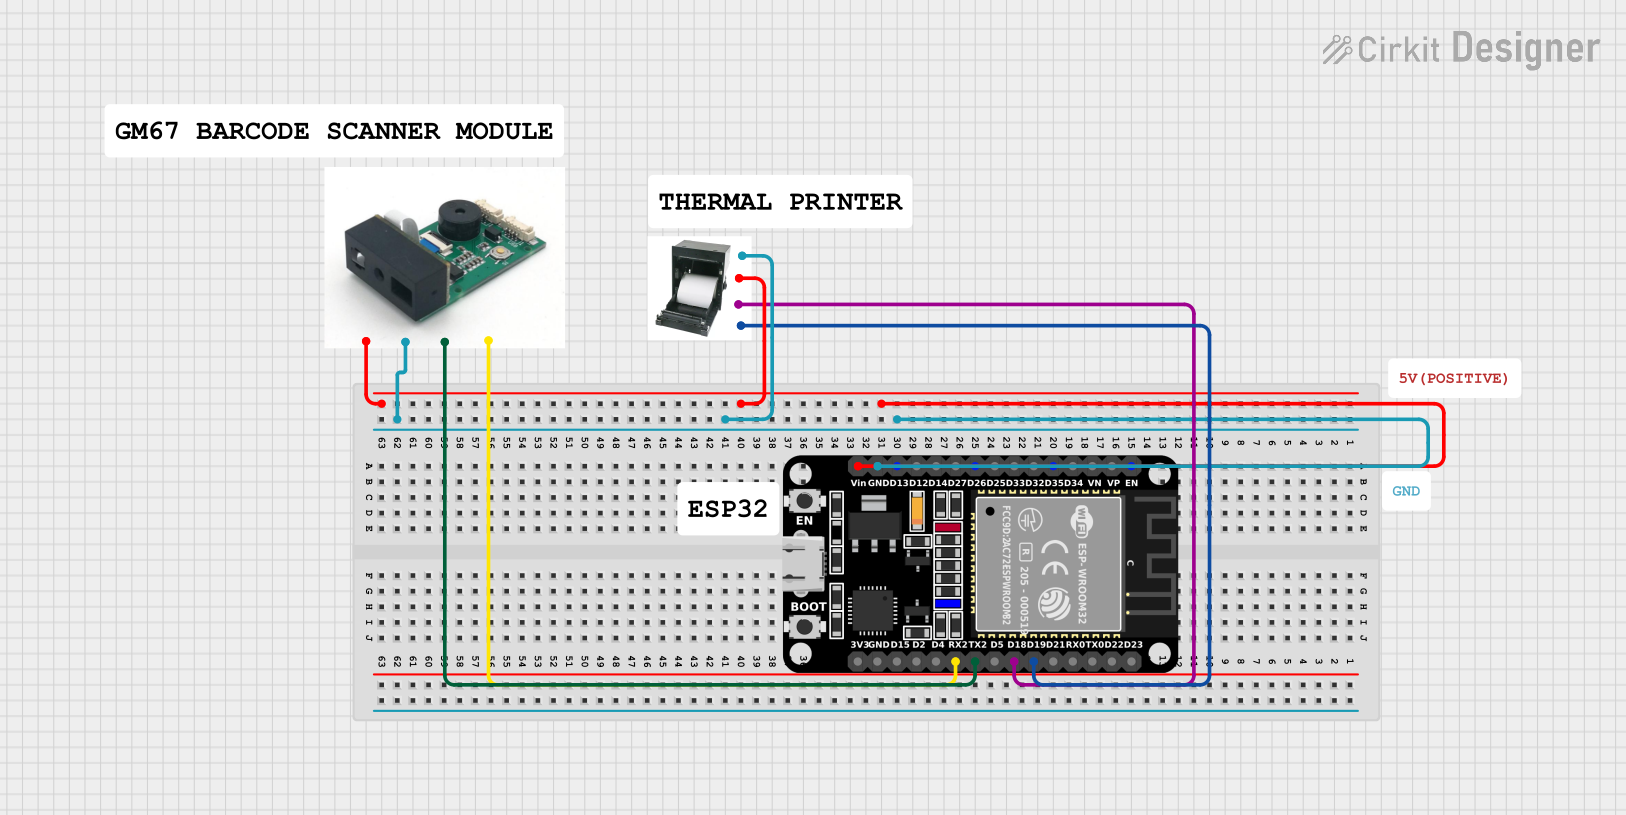
This circuit features an ESP32 microcontroller interfaced with a thermal printer and a GM67 barcode reader module. The ESP32 handles communication with the printer and barcode reader via its GPIO pins, enabling barcode data to be read and printed. Power is supplied to all components through the ESP32's Vin and GND pins.
Open Project in Cirkit DesignerArduino UNO R4 WiFi-Controlled Thermal Imaging Camera with TFT Display
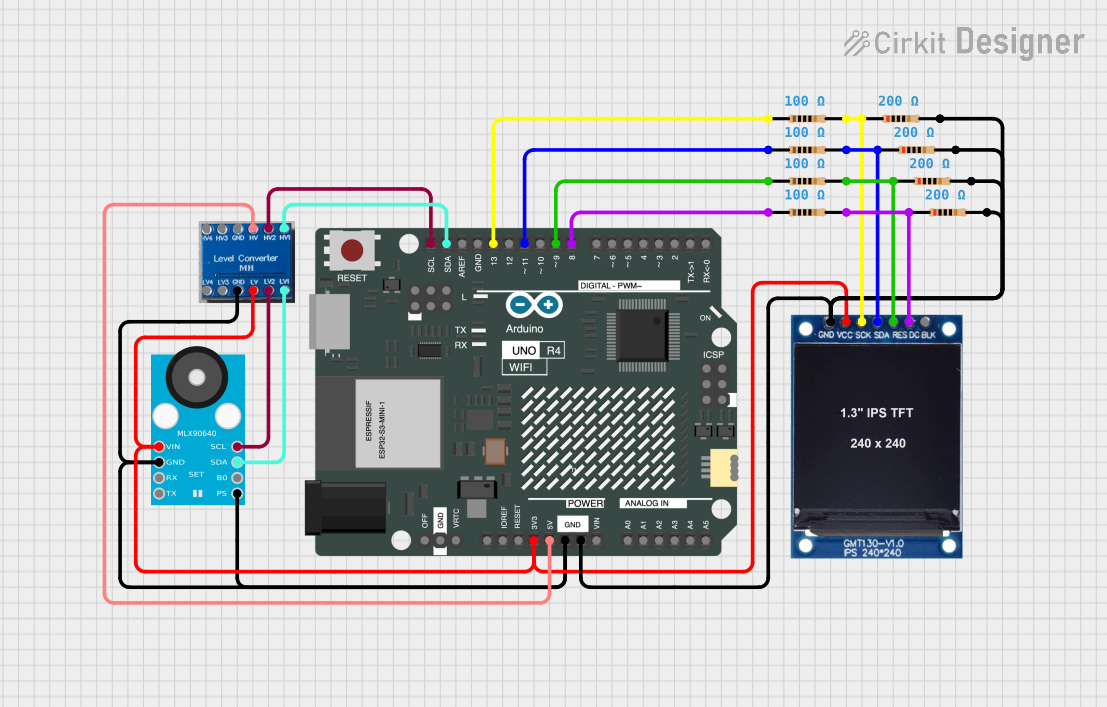
This circuit features an Arduino UNO R4 WiFi microcontroller interfaced with a GY-MCU90640 thermal camera and a 1.3 inch TFT display module. The Arduino processes thermal images from the camera and displays the results on the TFT screen. Level shifters are used to match voltage levels between the microcontroller and peripherals, and resistors are likely used for signal conditioning or pull-up/pull-down purposes.
Open Project in Cirkit DesignerArduino UNO-Based Smart Robotic System with Thermal Printer and Multiple Sensors
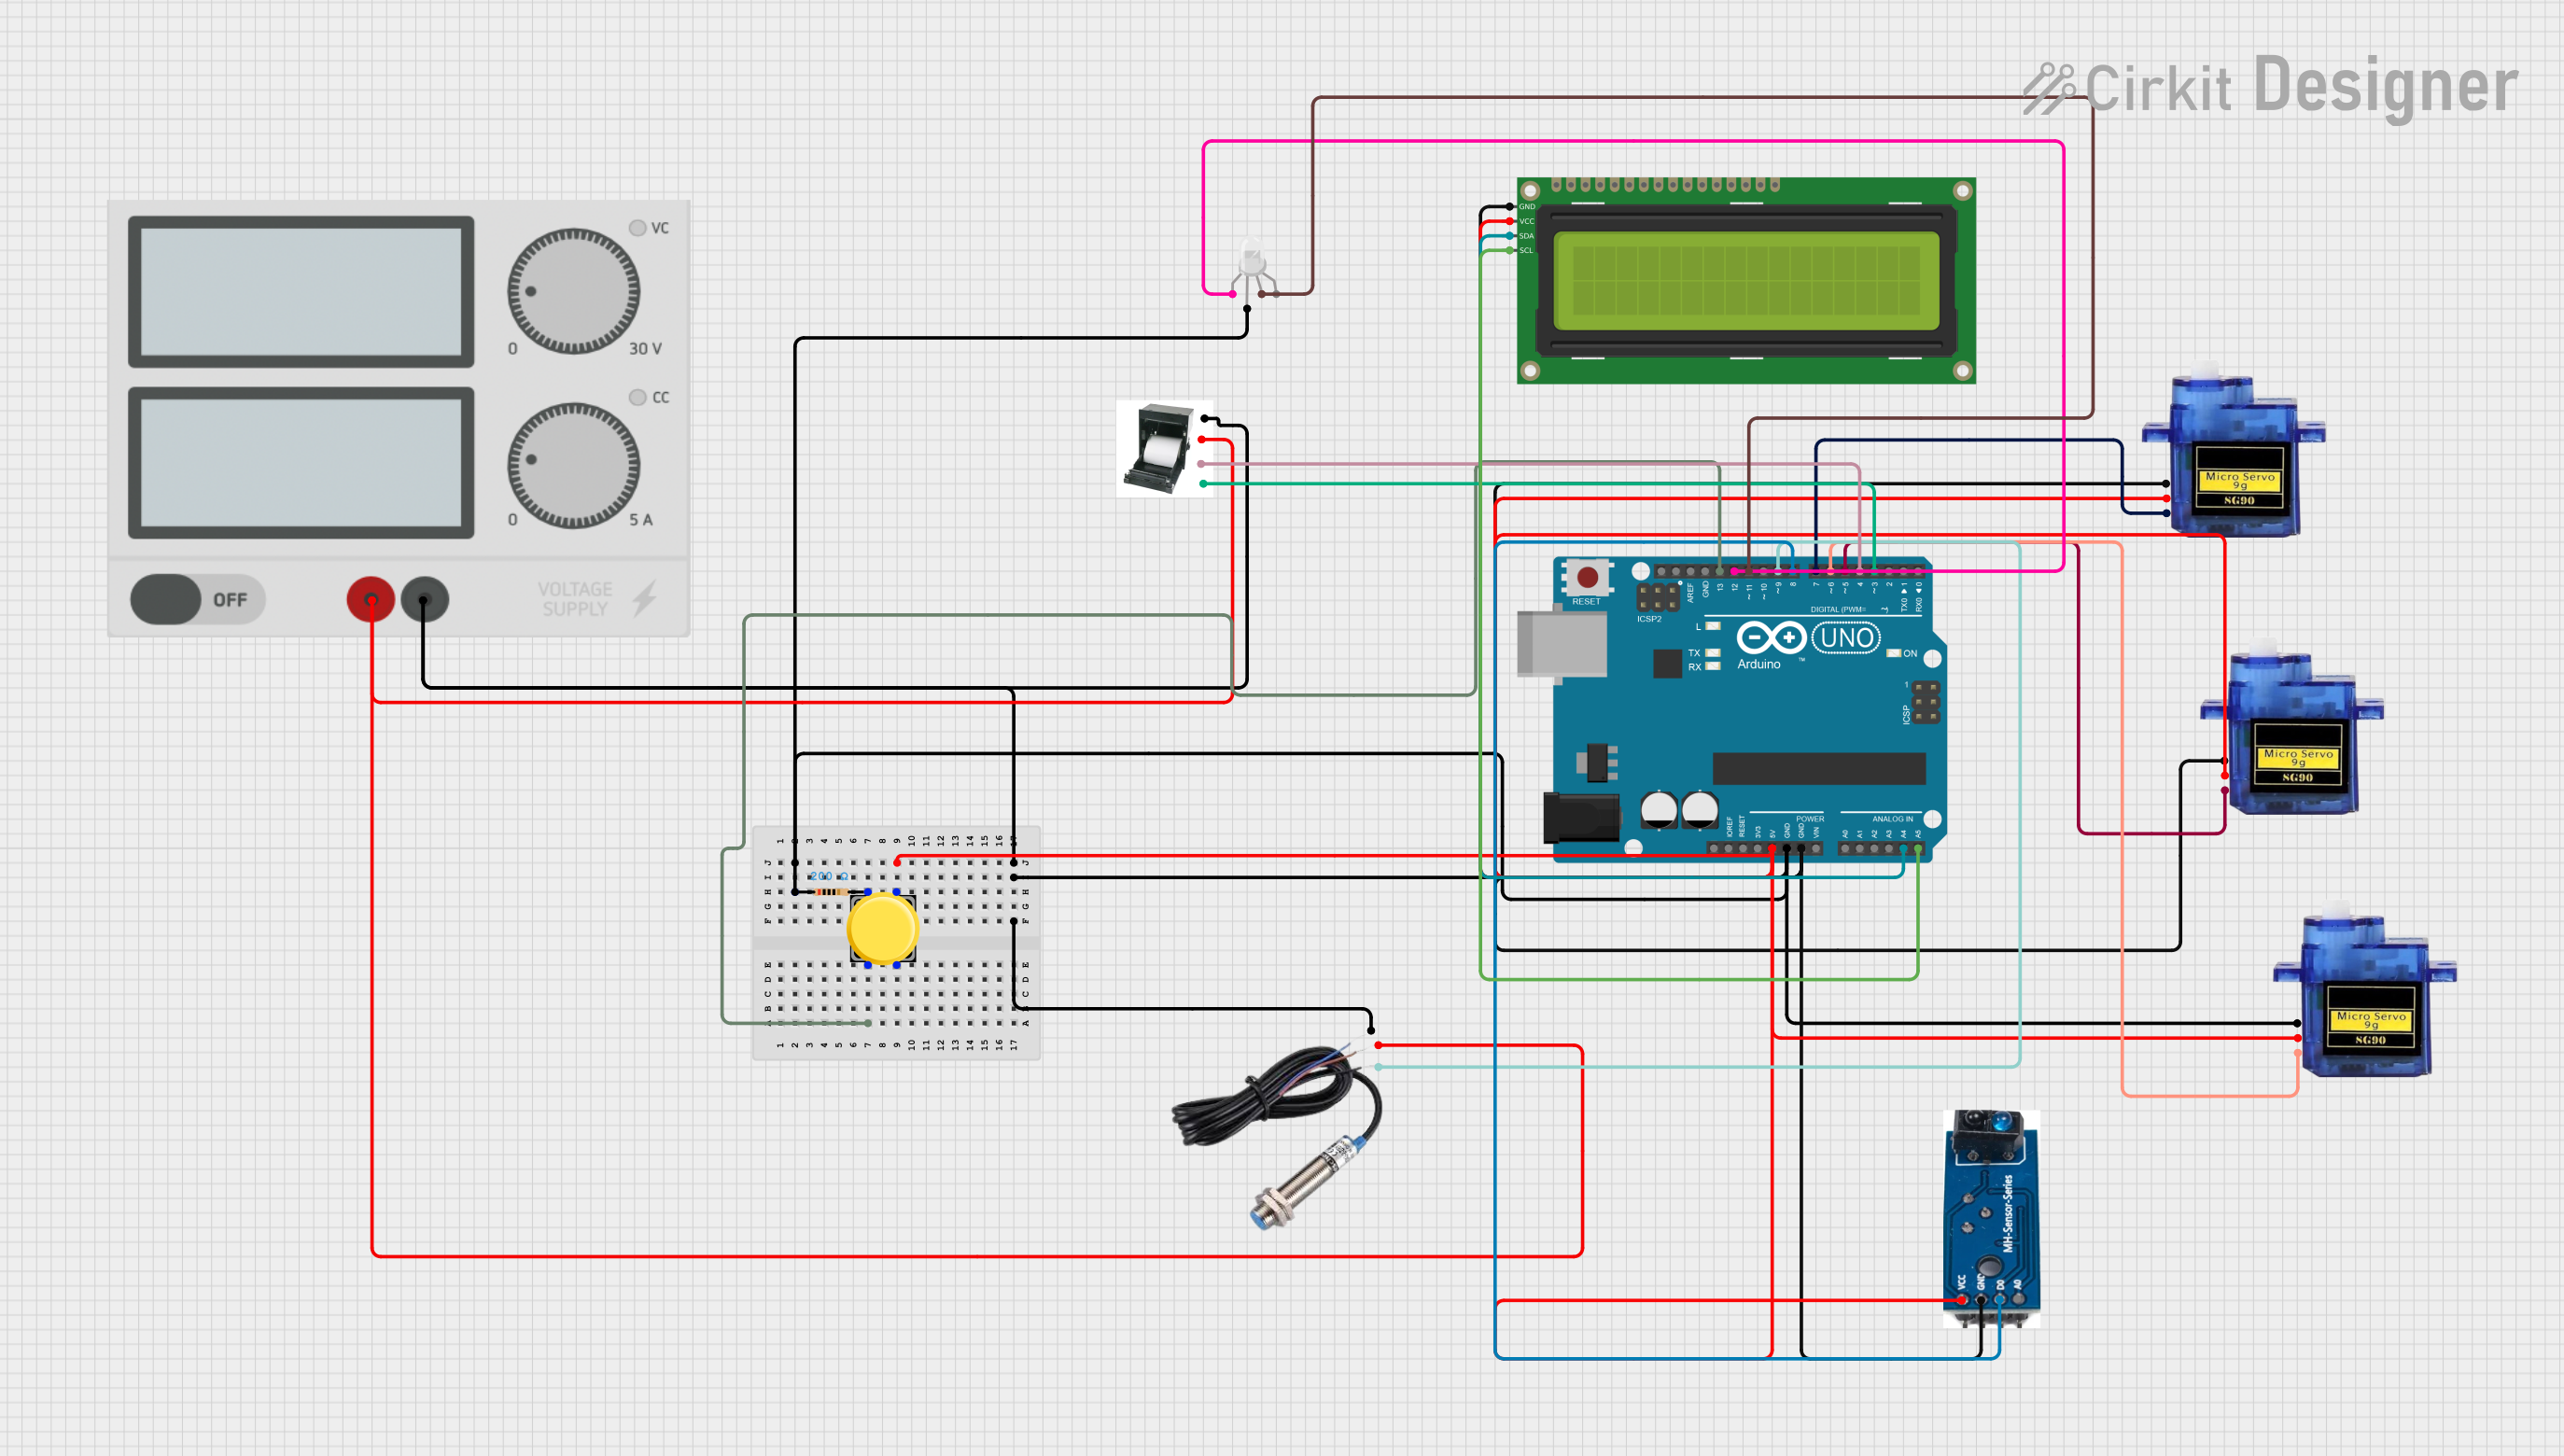
This circuit is an Arduino-based control system that interfaces with various sensors and actuators, including a thermal printer, multiple micro servos, an inductive sensor, an IR sensor, an RGB LED, and an I2C LCD display. The Arduino UNO reads inputs from the sensors and pushbutton, processes the data, and controls the servos, LED, and printer accordingly, with power supplied by an external power source.
Open Project in Cirkit DesignerRaspberry Pi 4B-based Payment Kiosk with Coin and Bill Acceptors
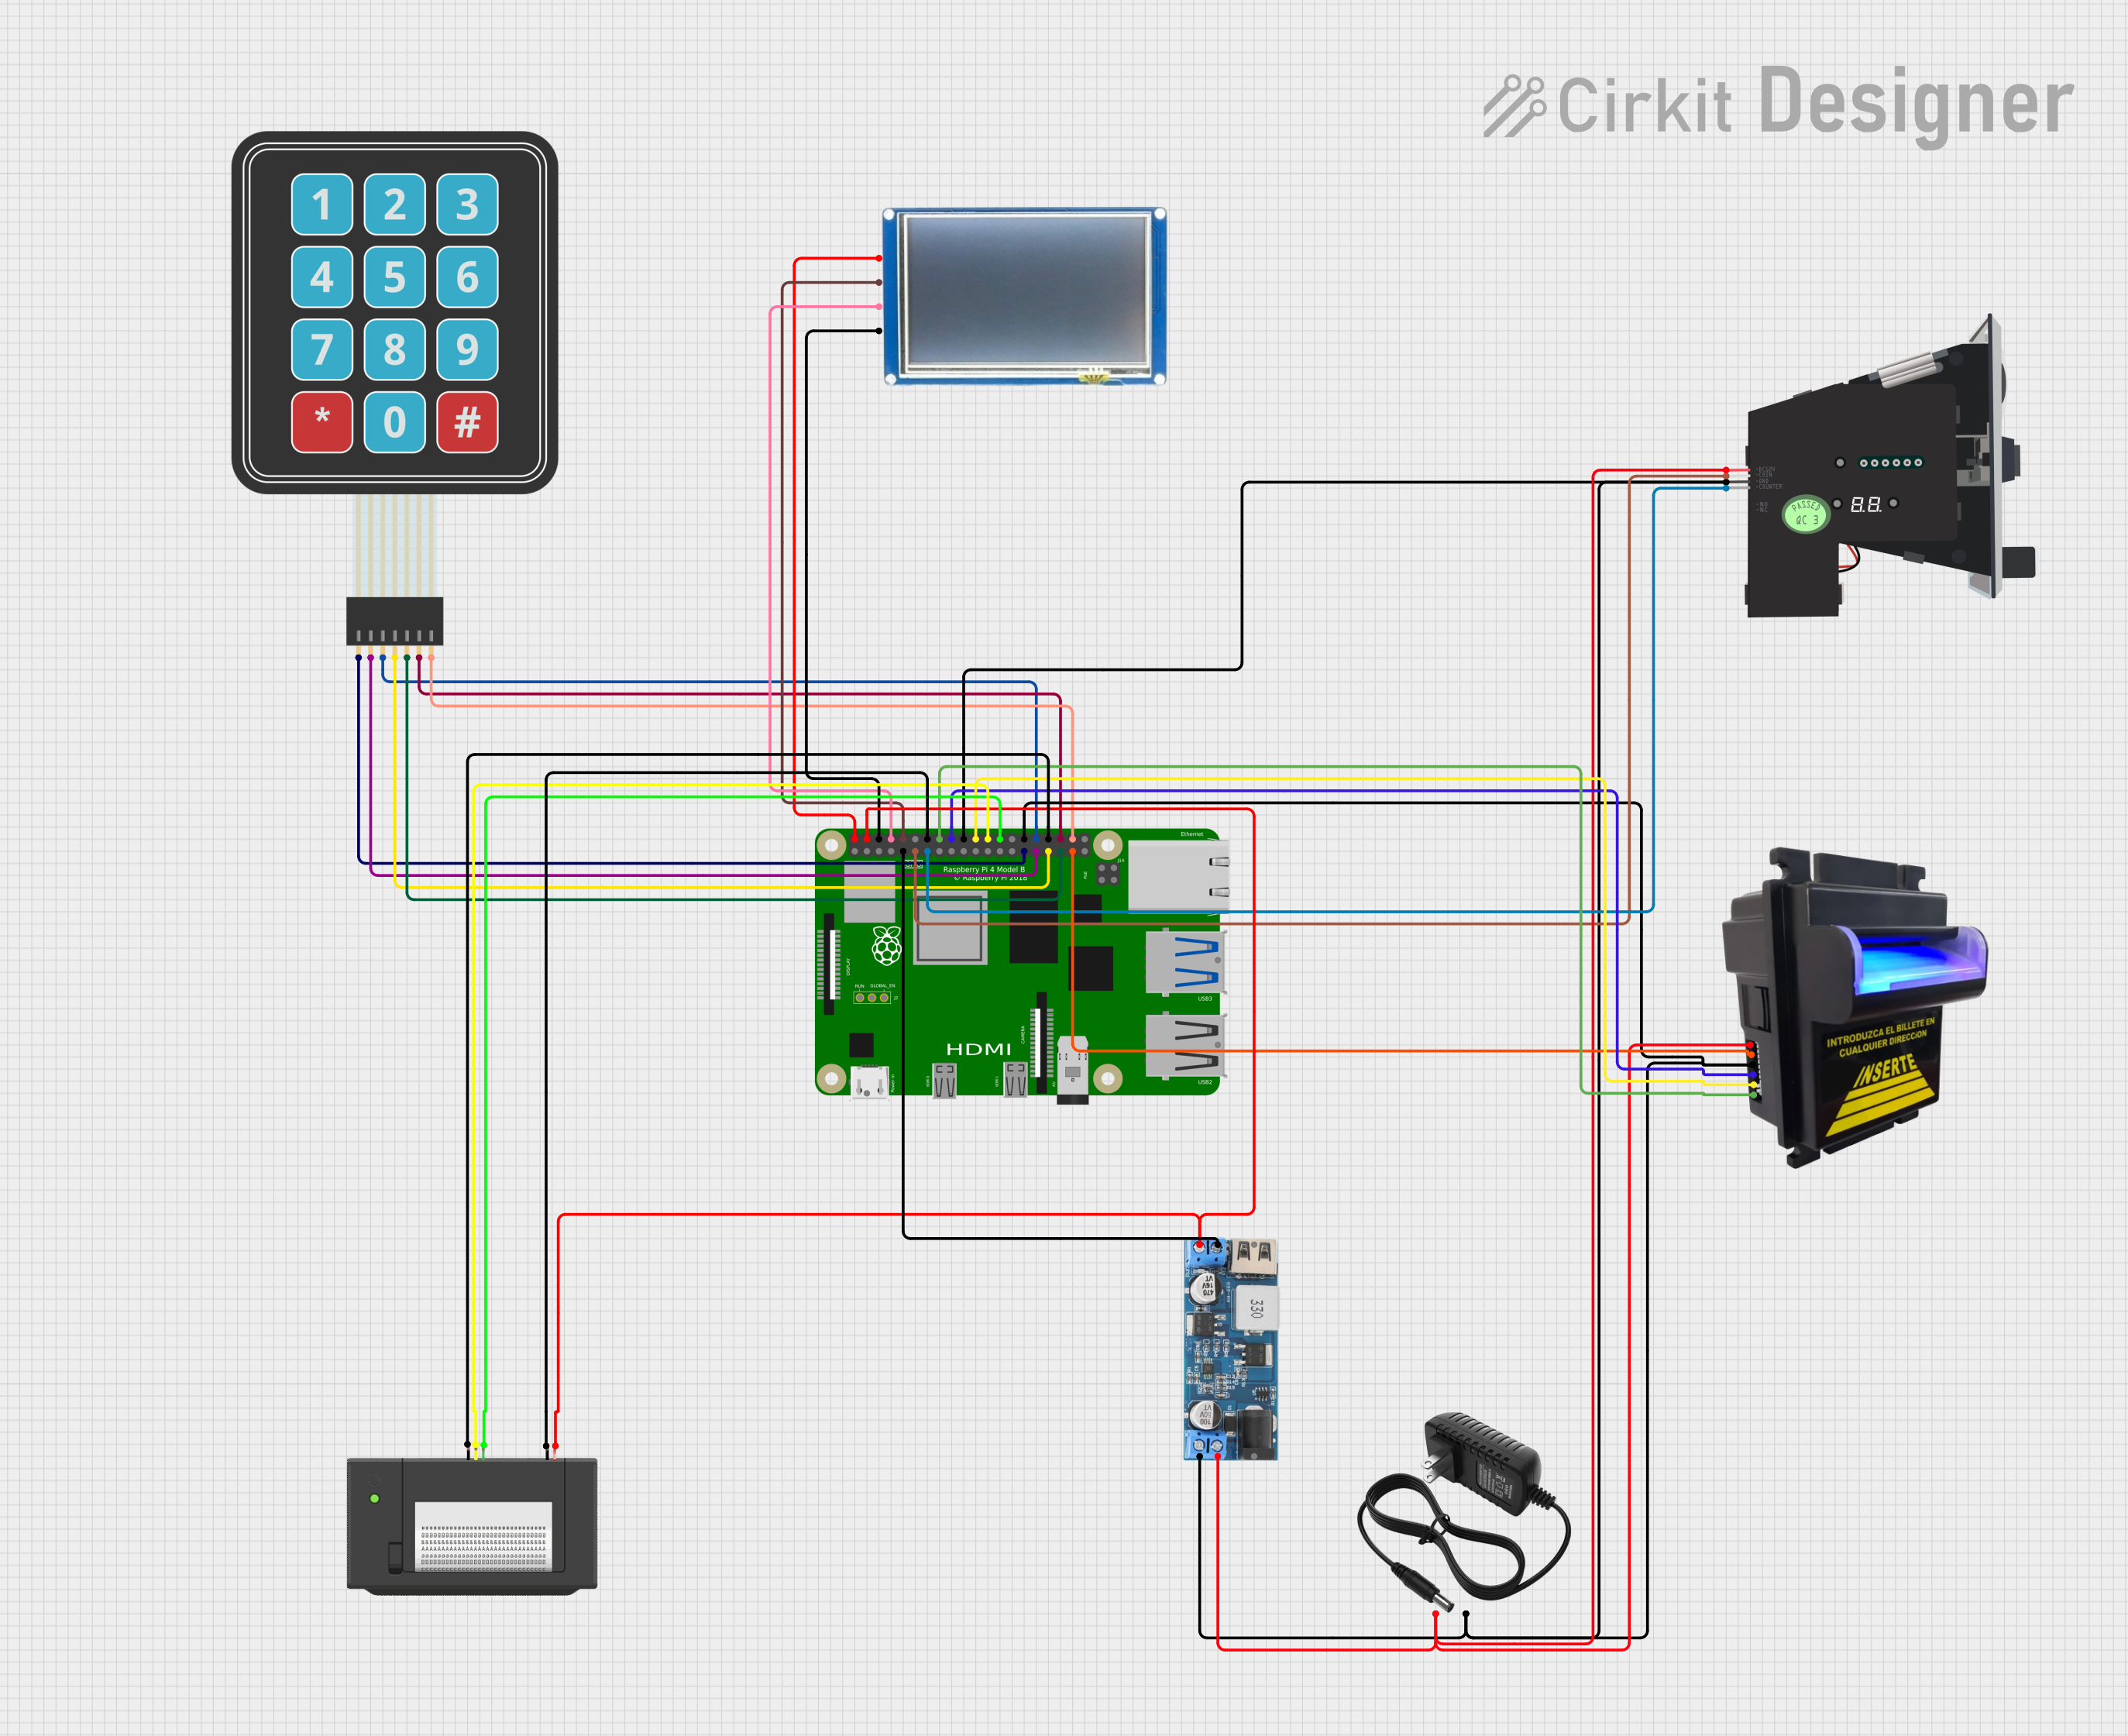
This circuit features a Raspberry Pi 4B as the central controller, interfaced with a variety of peripherals for a payment and display system. It includes a bill acceptor and multi coin acceptor for monetary input, a thermal printer for receipts, and a touch display for user interaction. The circuit also incorporates a 12V to 5V step-down converter to power the 5V components and a membrane matrix keypad for additional input options.
Open Project in Cirkit DesignerExplore Projects Built with QR204 Thermal Printer
ESP32-Based Barcode Reader and Thermal Printer System
This circuit features an ESP32 microcontroller interfaced with a thermal printer and a GM67 barcode reader module. The ESP32 handles communication with the printer and barcode reader via its GPIO pins, enabling barcode data to be read and printed. Power is supplied to all components through the ESP32's Vin and GND pins.
Open Project in Cirkit DesignerArduino UNO R4 WiFi-Controlled Thermal Imaging Camera with TFT Display
This circuit features an Arduino UNO R4 WiFi microcontroller interfaced with a GY-MCU90640 thermal camera and a 1.3 inch TFT display module. The Arduino processes thermal images from the camera and displays the results on the TFT screen. Level shifters are used to match voltage levels between the microcontroller and peripherals, and resistors are likely used for signal conditioning or pull-up/pull-down purposes.
Open Project in Cirkit DesignerArduino UNO-Based Smart Robotic System with Thermal Printer and Multiple Sensors
This circuit is an Arduino-based control system that interfaces with various sensors and actuators, including a thermal printer, multiple micro servos, an inductive sensor, an IR sensor, an RGB LED, and an I2C LCD display. The Arduino UNO reads inputs from the sensors and pushbutton, processes the data, and controls the servos, LED, and printer accordingly, with power supplied by an external power source.
Open Project in Cirkit DesignerRaspberry Pi 4B-based Payment Kiosk with Coin and Bill Acceptors
This circuit features a Raspberry Pi 4B as the central controller, interfaced with a variety of peripherals for a payment and display system. It includes a bill acceptor and multi coin acceptor for monetary input, a thermal printer for receipts, and a touch display for user interaction. The circuit also incorporates a 12V to 5V step-down converter to power the 5V components and a membrane matrix keypad for additional input options.
Open Project in Cirkit DesignerCommon Applications:
- Point-of-sale (POS) systems in retail stores
- Receipt printing in restaurants and cafes
- Ticket printing for events or transportation
- Label printing for inventory management
- Embedded systems requiring compact printing solutions
Technical Specifications
Key Technical Details:
| Parameter | Specification |
|---|---|
| Printing Method | Direct Thermal |
| Print Speed | Up to 100 mm/s |
| Resolution | 203 DPI (8 dots/mm) |
| Paper Width | 58 mm |
| Paper Thickness | 0.06 mm to 0.08 mm |
| Interface Options | UART (TTL), USB, or RS232 |
| Input Voltage | 5V DC ± 5% |
| Operating Temperature | 0°C to 50°C |
| Dimensions | 79 mm x 77 mm x 45 mm |
| Weight | Approximately 210 g |
Pin Configuration and Descriptions:
UART Interface Pinout:
| Pin Number | Pin Name | Description |
|---|---|---|
| 1 | VCC | Power supply input (5V DC) |
| 2 | GND | Ground |
| 3 | TXD | Transmit data (printer output) |
| 4 | RXD | Receive data (printer input) |
| 5 | RTS | Request to send (flow control) |
| 6 | CTS | Clear to send (flow control) |
USB Interface Pinout:
| Pin Number | Pin Name | Description |
|---|---|---|
| 1 | VBUS | USB power supply (5V DC) |
| 2 | D- | USB data negative |
| 3 | D+ | USB data positive |
| 4 | GND | Ground |
Usage Instructions
How to Use the QR204 Thermal Printer in a Circuit:
- Power Supply: Connect the VCC pin to a stable 5V DC power source and the GND pin to ground.
- Data Communication:
- For UART: Connect the TXD and RXD pins to the corresponding RX and TX pins of your microcontroller or device. Use RTS and CTS for hardware flow control if required.
- For USB: Connect the USB interface to a compatible host device.
- Paper Loading: Open the paper compartment, insert a roll of 58 mm thermal paper, and ensure the paper feeds correctly through the printer slot.
- Driver/Library Setup: Install the appropriate drivers or libraries for your host system (e.g., Windows, Linux, or Arduino).
- Send Data: Use the communication protocol to send text or graphics data to the printer.
Important Considerations and Best Practices:
- Ensure the power supply is stable and within the specified voltage range to avoid damage.
- Use high-quality thermal paper to ensure clear printing and prevent wear on the print head.
- Avoid exposing the printer to high humidity or temperatures outside the operating range.
- Regularly clean the print head with a soft, lint-free cloth to maintain print quality.
- For Arduino users, use a level shifter if your microcontroller operates at 3.3V logic levels.
Example Code for Arduino UNO:
#include <SoftwareSerial.h>

// Define RX and TX pins for communication with the QR204 printer
SoftwareSerial thermalPrinter(10, 11); // RX = 10, TX = 11

void setup() {
  // Initialize serial communication with the printer
  thermalPrinter.begin(9600); // Set baud rate to 9600
  Serial.begin(9600); // For debugging with the Serial Monitor

  // Print a test message
  thermalPrinter.println("QR204 Thermal Printer Test");
  thermalPrinter.println("--------------------------");
  thermalPrinter.println("Hello, World!");
  thermalPrinter.println("Thank you for using the QR204.");
  thermalPrinter.println("--------------------------");

  // Feed paper to ensure the message is fully printed
  thermalPrinter.write(0x0A); // Line feed
  thermalPrinter.write(0x0A); // Line feed
}

void loop() {
  // No actions in the loop
}
Notes on the Code:
- The
SoftwareSeriallibrary is used to communicate with the printer via UART. - Ensure the baud rate matches the printer's default setting (9600 bps in this case).
- Use the
thermalPrinter.println()function to send text data to the printer. - Add line feeds (
0x0A) to ensure proper spacing between printed lines.
Troubleshooting and FAQs
Common Issues and Solutions:
Printer Not Responding:
- Verify the power supply is connected and providing 5V DC.
- Check the UART or USB connections for proper wiring.
- Ensure the baud rate matches the printer's configuration.
Poor Print Quality:
- Use high-quality thermal paper compatible with the QR204.
- Clean the print head with a soft, lint-free cloth.
- Ensure the paper is loaded correctly and not jammed.
Paper Jam:
- Open the paper compartment and remove any jammed paper.
- Reload the paper roll and ensure it feeds smoothly.
Data Transmission Errors:
- Check the UART wiring and ensure TXD and RXD are correctly connected.
- If using hardware flow control, verify RTS and CTS connections.
FAQs:
Q: Can the QR204 print graphics?
- A: Yes, the QR204 supports basic bitmap graphics. Refer to the printer's command set for details.
Q: What is the maximum paper roll diameter?
- A: The QR204 supports paper rolls with a maximum diameter of 50 mm.
Q: Can I use the QR204 with a Raspberry Pi?
- A: Yes, the QR204 can be connected to a Raspberry Pi via UART or USB. Ensure proper voltage levels and install the necessary drivers.
Q: How do I reset the printer?
- A: Power off the printer, wait for 10 seconds, and power it back on.
By following this documentation, users can effectively integrate and operate the QR204 Thermal Printer in their projects.