How to Use SparkFun gator:environment: Examples, Pinouts, and Specs
Introduction
The SparkFun gator:environment is an all-in-one environmental sensor board designed for educational purposes and IoT projects. It integrates multiple sensors to measure temperature, humidity, atmospheric pressure, and light intensity. This board is part of the gator:bit ecosystem, which is compatible with the micro:bit platform, making it an excellent choice for beginners and classrooms.
Explore Projects Built with SparkFun gator:environment
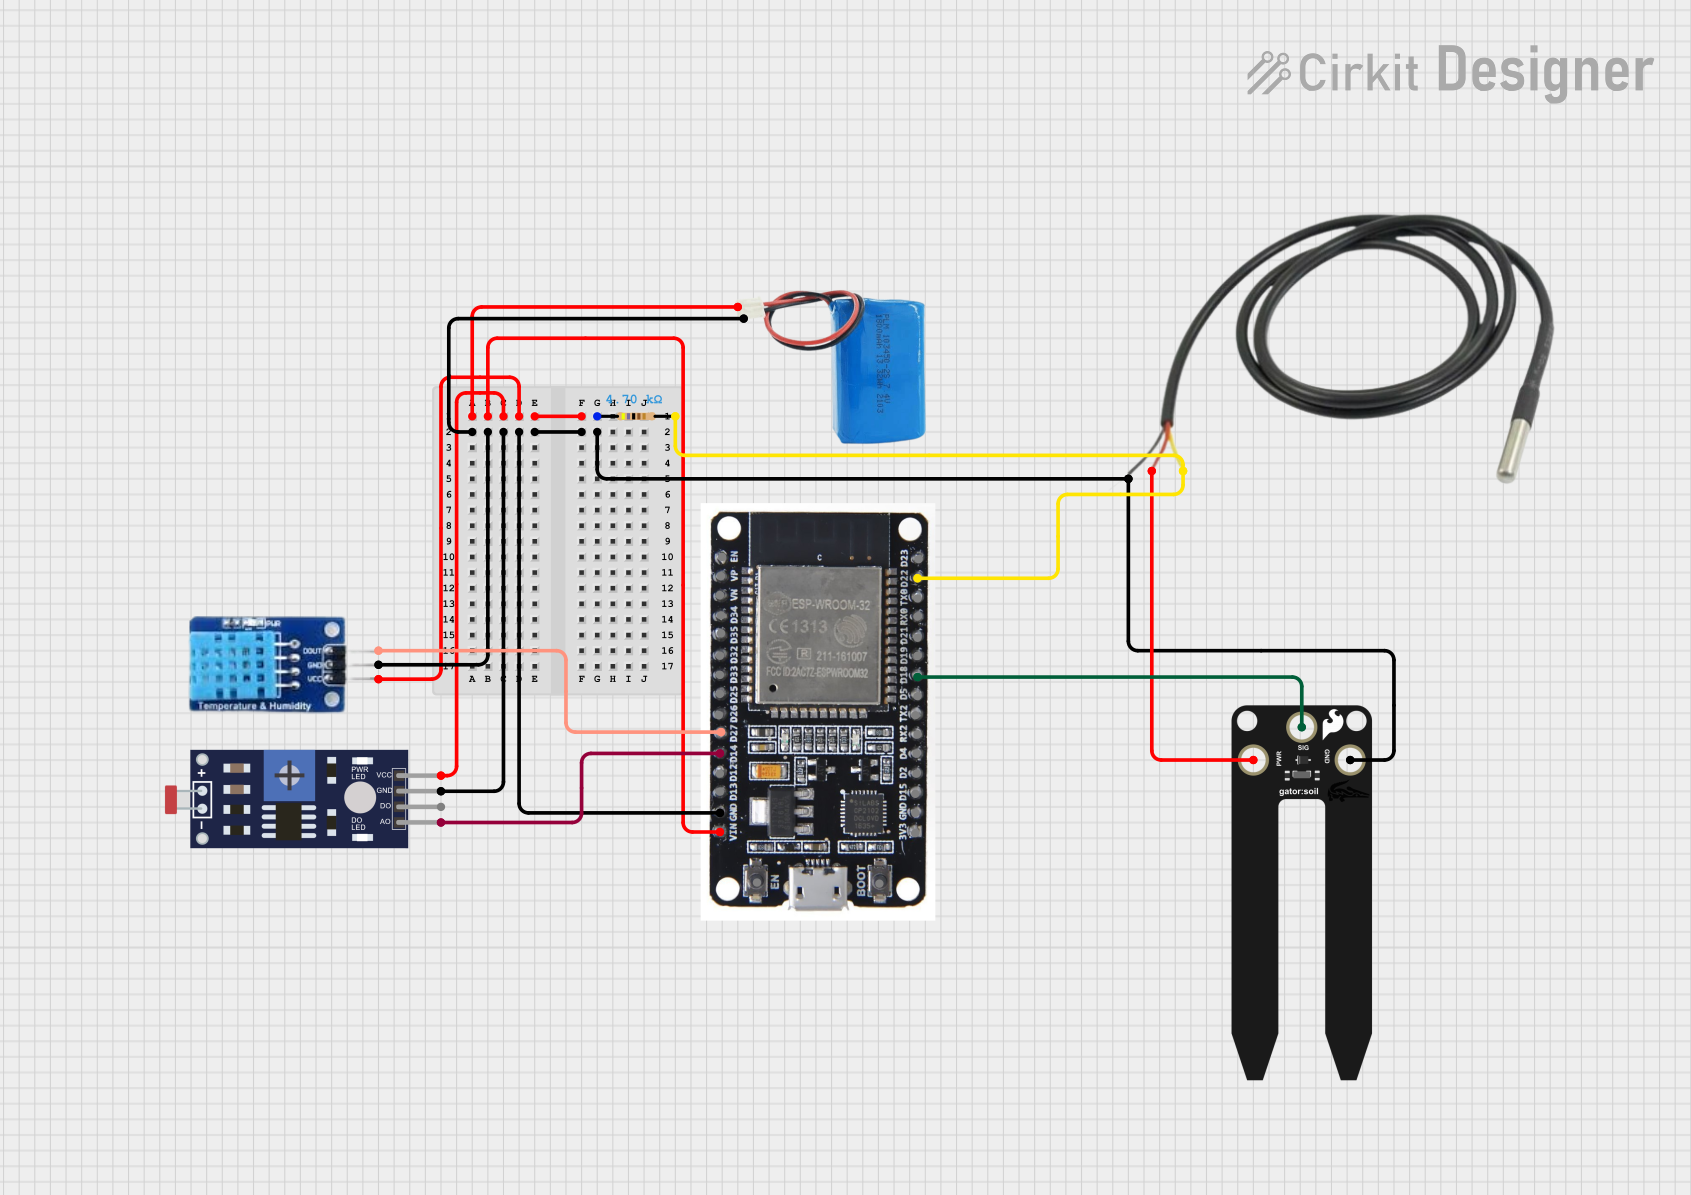

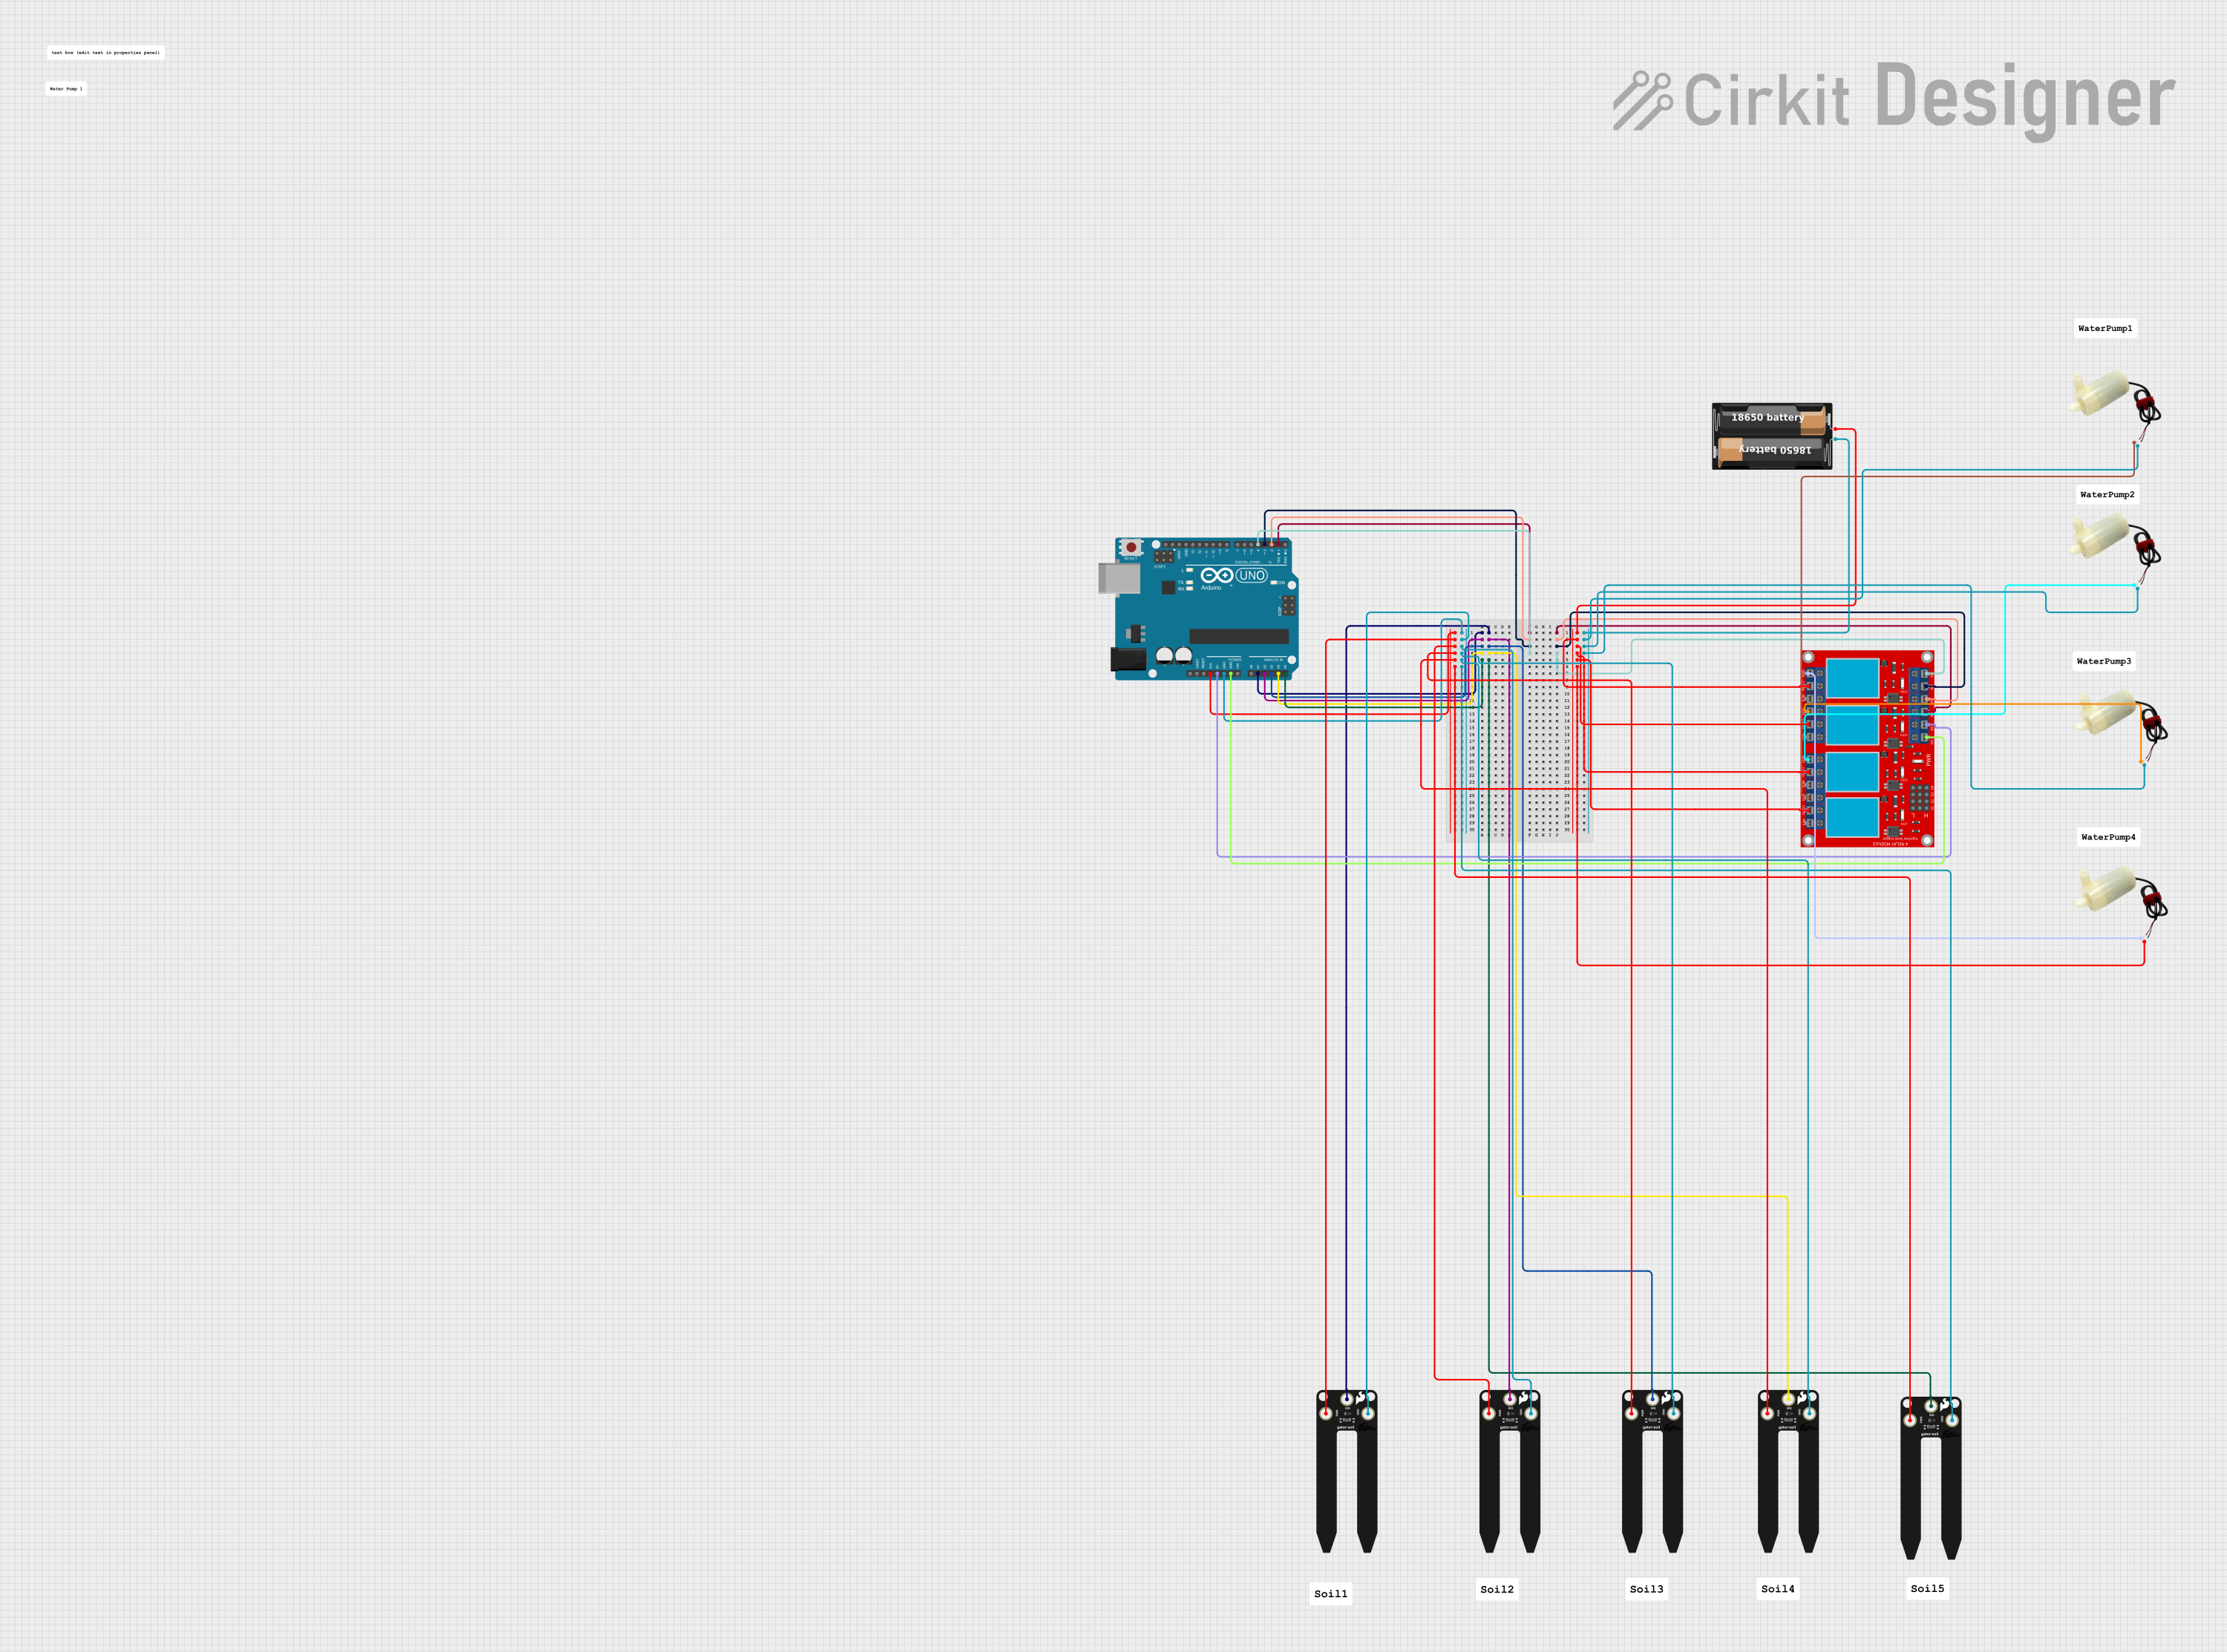
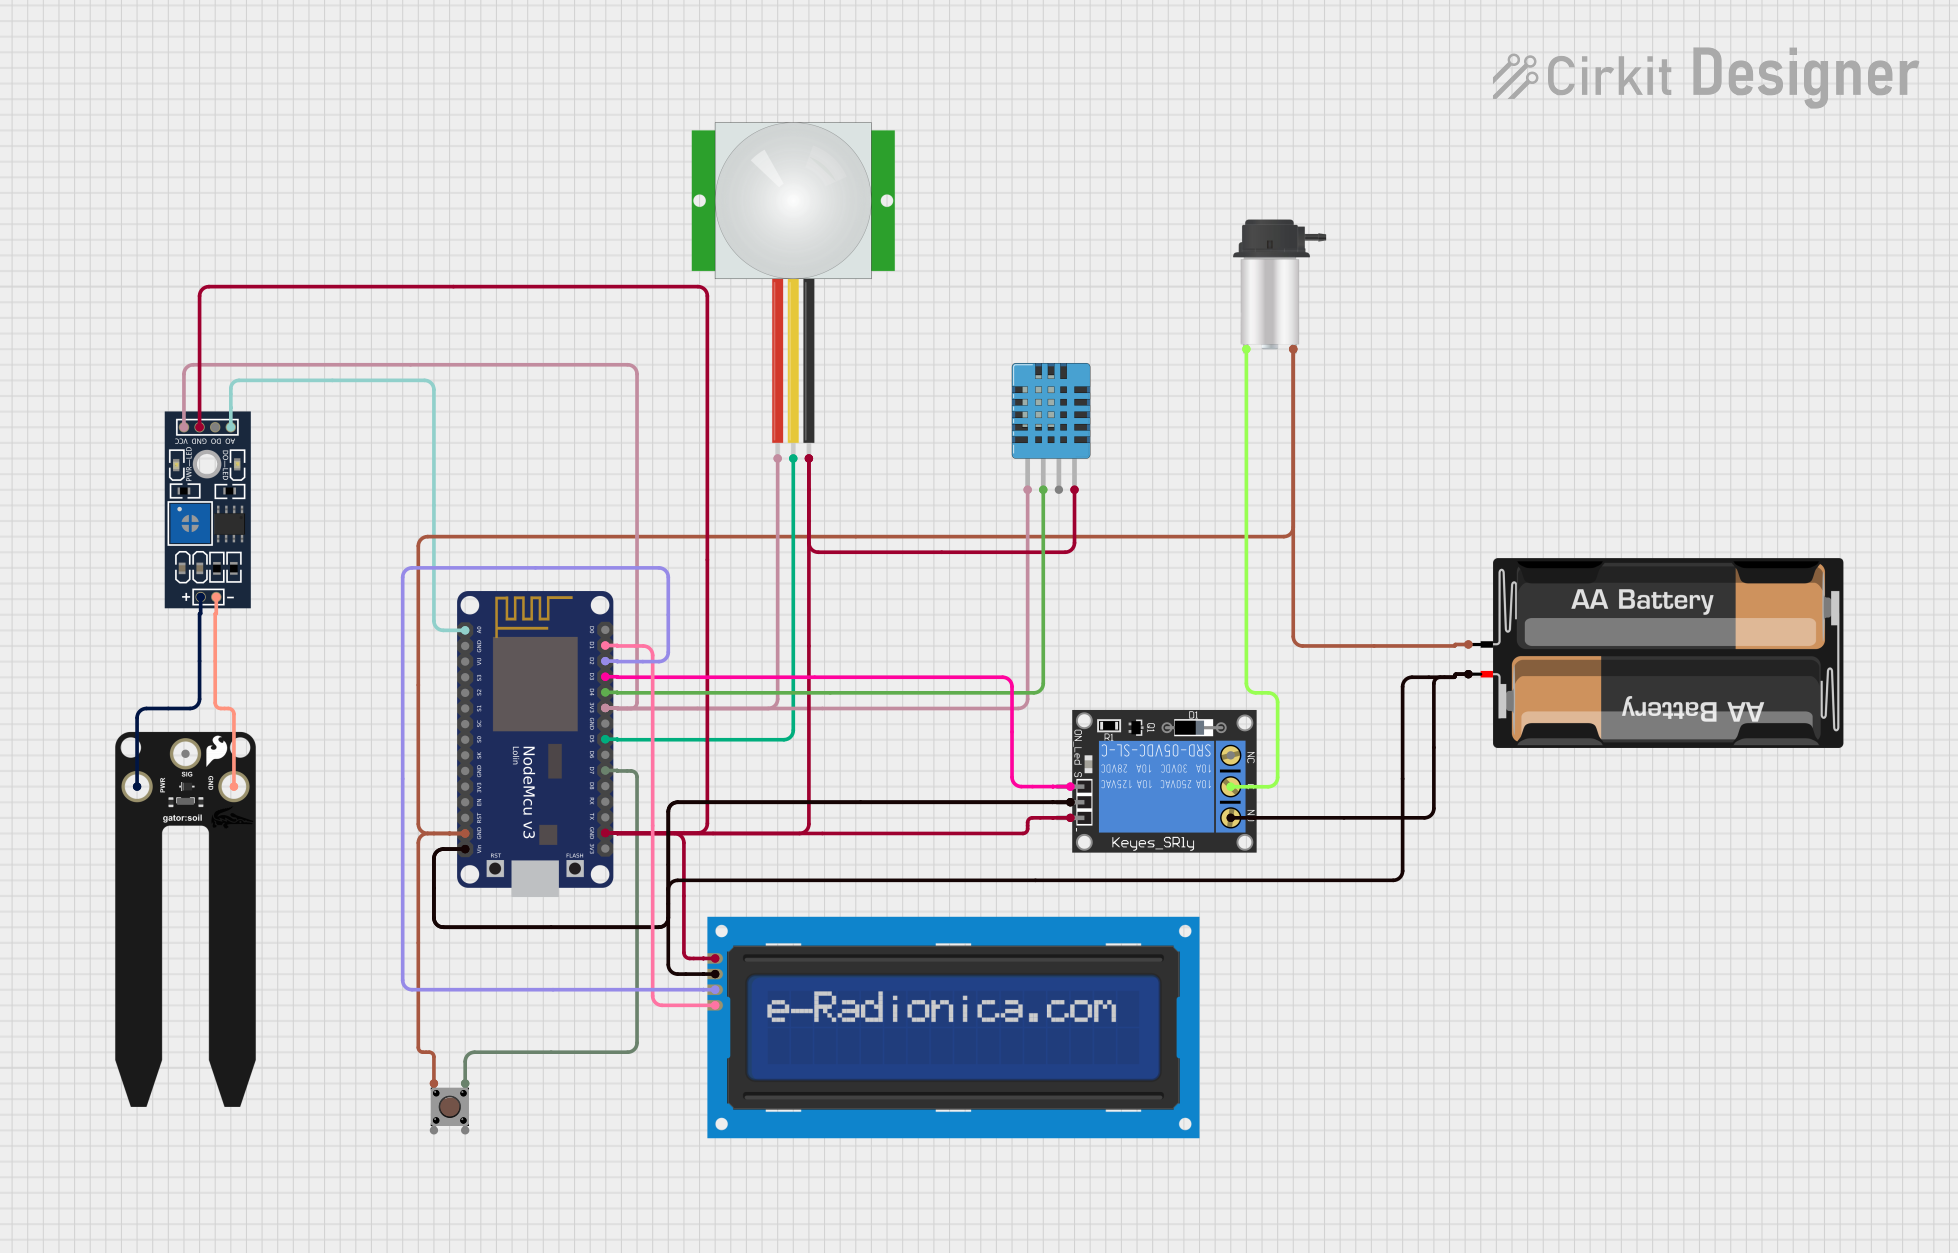
Explore Projects Built with SparkFun gator:environment
Common Applications and Use Cases
- Educational projects to teach students about environmental sensing
- Weather stations for atmospheric data collection
- Home automation systems for monitoring environmental conditions
- IoT devices that adjust settings based on environmental readings
Technical Specifications
Key Technical Details
- Temperature Sensor Range: -40°C to +85°C
- Humidity Sensor Range: 0 to 100% RH
- Pressure Sensor Range: 300 to 1100 hPa
- Light Sensor Range: 0.1 to 40k+ Lux
- Operating Voltage: 3.3V (compatible with micro:bit)
- Interface: I2C
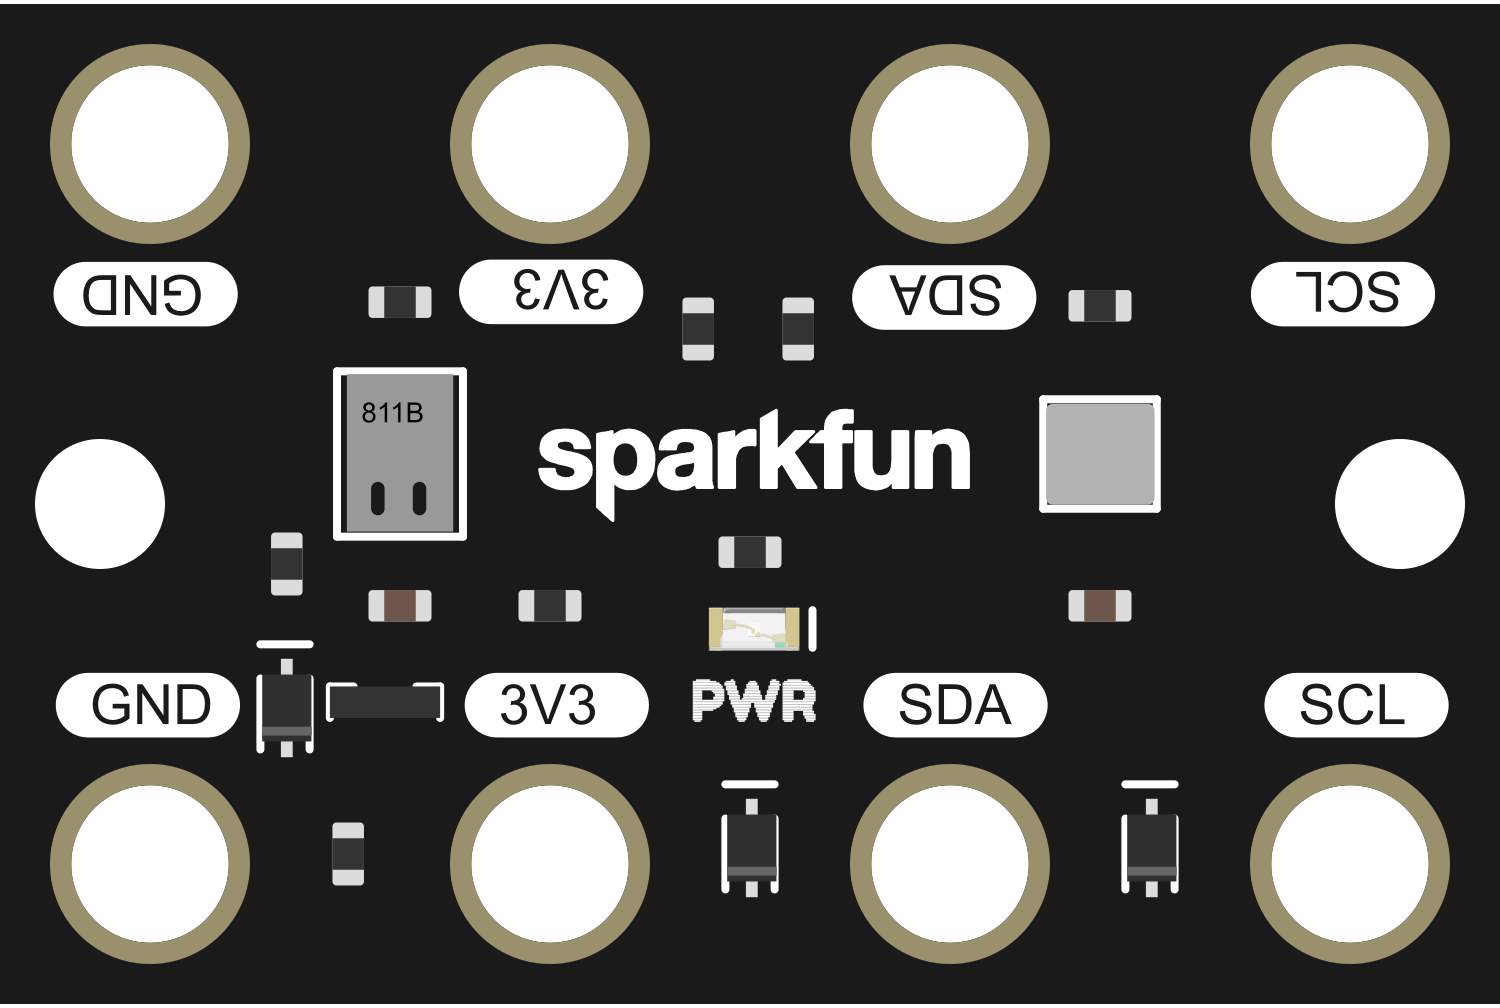
Pin Configuration and Descriptions
| Pin Name | Description |
|---|---|
| VCC | Power supply (3.3V) |
| GND | Ground |
| SCL | Serial Clock Line for I2C communication |
| SDA | Serial Data Line for I2C communication |
| INT | Interrupt pin (not used in basic setups) |
Usage Instructions
How to Use the Component in a Circuit
- Connect the VCC pin to a 3.3V power source.
- Connect the GND pin to the ground of your power source.
- Connect the SCL and SDA pins to the I2C clock and data lines, respectively.
- If using with a micro:bit, connect the board using the alligator clips to the corresponding I2C pins on the micro:bit edge connector.
Important Considerations and Best Practices
- Ensure that the power supply does not exceed 3.3V to avoid damaging the board.
- Use pull-up resistors on the I2C lines if they are not already present on your microcontroller board.
- Avoid placing the sensor in direct sunlight or near heat sources to get accurate readings.
- For outdoor applications, protect the sensor board from water and extreme weather conditions.
Example Code for Arduino UNO
#include <Wire.h>

// Define I2C Address for the sensor
const int gatorEnvironmentAddress = 0x76; // Replace with actual I2C address

void setup() {
  Wire.begin(); // Initialize I2C communication
  Serial.begin(9600); // Start serial communication at 9600 baud rate
}

void loop() {
  // Request data from the sensor
  Wire.beginTransmission(gatorEnvironmentAddress);
  // Add code to request specific sensor data here
  Wire.endTransmission();

  // Read the data from the sensor
  // Add code to read and process sensor data here

  // Print the sensor values to the serial monitor
  // Add code to print sensor data here

  delay(1000); // Wait for 1 second before reading the data again
}
Note: This is a skeleton code to initialize I2C communication. You will need to refer to the sensor's datasheet or library for specific commands to request and read data from the individual sensors on the gator:environment board.
Troubleshooting and FAQs
Common Issues Users Might Face
- Incorrect Readings: Ensure the sensor is not exposed to direct sunlight or heat sources.
- No Data on Serial Monitor: Check the wiring and ensure the correct I2C address is used.
- Sensor Not Detected: Verify connections and pull-up resistors on the I2C lines.
Solutions and Tips for Troubleshooting
- Double-check all connections and ensure they are secure.
- Use a multimeter to verify the voltage levels at the VCC and GND pins.
- Restart the microcontroller to reset the I2C bus in case of communication issues.
- Consult the micro:bit or Arduino forums for community support and additional troubleshooting tips.
FAQs
Q: Can the gator:environment sensor board be used with an Arduino UNO? A: Yes, it can be used with an Arduino UNO by connecting it to the I2C pins (A4 for SDA and A5 for SCL) and using the Wire library for communication.
Q: Is the gator:environment board waterproof? A: No, the board is not waterproof. It should be protected from water and extreme environmental conditions when used outdoors.
Q: How can I calibrate the sensors on the gator:environment board? A: Calibration procedures vary for each sensor. Refer to the individual sensor datasheets for calibration instructions.
Q: What libraries are required to interface with the gator:environment board? A: You will need libraries that support the individual sensors on the board. These can typically be found in the Arduino Library Manager or through the SparkFun GitHub repository.
For further assistance, please refer to the SparkFun gator:environment sensor board's official documentation or contact SparkFun's technical support.