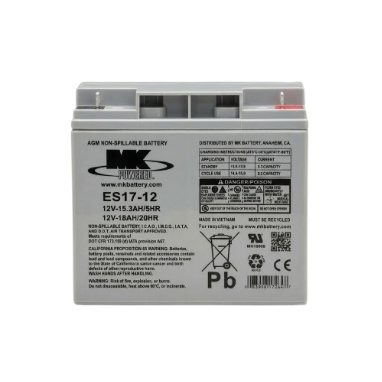
How to Use LeadAcid Battery: Examples, Pinouts, and Specs
Introduction
The lead-acid battery is a rechargeable energy storage device that uses lead dioxide (PbO₂) as the positive electrode, sponge lead (Pb) as the negative electrode, and sulfuric acid (H₂SO₄) as the electrolyte. It is one of the oldest and most widely used battery technologies due to its reliability, cost-effectiveness, and ability to deliver high surge currents.
Explore Projects Built with LeadAcid Battery


Explore Projects Built with LeadAcid Battery
Common Applications and Use Cases
- Automotive Applications: Used as starter batteries in cars, motorcycles, and trucks.
- Backup Power Systems: Commonly found in uninterruptible power supplies (UPS) and emergency lighting systems.
- Renewable Energy Storage: Used in solar and wind energy systems for energy storage.
- Industrial Applications: Employed in forklifts, golf carts, and other heavy-duty equipment.
Technical Specifications
Below are the key technical details of a typical lead-acid battery. Note that specific values may vary depending on the model and manufacturer.
General Specifications
| Parameter | Value |
|---|---|
| Nominal Voltage | 2V per cell (e.g., 12V for 6 cells) |
| Capacity Range | 1 Ah to 3000 Ah |
| Energy Density | 30-50 Wh/kg |
| Cycle Life | 200-1000 cycles (depending on usage) |
| Operating Temperature | -20°C to 50°C |
| Self-Discharge Rate | ~3-5% per month at 25°C |
Pin/Terminal Configuration
Lead-acid batteries typically have two terminals: positive and negative. The configuration is as follows:
| Terminal Name | Symbol | Description |
|---|---|---|
| Positive | (+) | Connects to the positive side of the circuit. |
| Negative | (-) | Connects to the negative side of the circuit. |
Usage Instructions
How to Use the Component in a Circuit
- Identify the Terminals: Ensure the positive terminal (+) is connected to the positive side of the circuit and the negative terminal (-) to the negative side.
- Charge the Battery: Use a compatible charger with the correct voltage and current ratings. For a 12V lead-acid battery, the charging voltage is typically 13.8V to 14.4V.
- Discharge the Battery: Connect the battery to the load, ensuring the current draw does not exceed the battery's rated capacity.
- Monitor Voltage Levels: Avoid over-discharging the battery. For a 12V battery, do not let the voltage drop below 10.5V.
Important Considerations and Best Practices
- Ventilation: Lead-acid batteries release hydrogen gas during charging. Ensure proper ventilation to prevent gas buildup.
- Avoid Overcharging: Overcharging can cause excessive heat and damage the battery.
- Temperature Management: Operate the battery within the recommended temperature range to maximize lifespan.
- Regular Maintenance: For flooded lead-acid batteries, check and refill the electrolyte levels with distilled water as needed.
- Polarity Check: Always verify the polarity before connecting the battery to a circuit to avoid damage.
Example: Connecting a Lead-Acid Battery to an Arduino UNO
To power an Arduino UNO using a lead-acid battery, follow these steps:
- Use a 12V lead-acid battery.
- Connect the positive terminal of the battery to the VIN pin of the Arduino.
- Connect the negative terminal of the battery to the GND pin of the Arduino.
Sample Code for Monitoring Battery Voltage
// This code reads the voltage of a lead-acid battery connected to an Arduino UNO.
// Ensure a voltage divider is used to step down the battery voltage to a safe level
// for the Arduino's analog input (max 5V).

const int batteryPin = A0; // Analog pin connected to the voltage divider
const float voltageDividerRatio = 5.7; // Adjust based on your resistor values
const float referenceVoltage = 5.0; // Arduino's reference voltage (5V)

void setup() {
  Serial.begin(9600); // Initialize serial communication
}

void loop() {
  int rawValue = analogRead(batteryPin); // Read the analog input
  float batteryVoltage = (rawValue / 1023.0) * referenceVoltage * voltageDividerRatio;

  // Print the battery voltage to the Serial Monitor
  Serial.print("Battery Voltage: ");
  Serial.print(batteryVoltage);
  Serial.println(" V");

  delay(1000); // Wait for 1 second before the next reading
}
Troubleshooting and FAQs
Common Issues and Solutions
Battery Not Charging
- Cause: Faulty charger or incorrect charging voltage.
- Solution: Verify the charger is functioning and set to the correct voltage.
Battery Drains Quickly
- Cause: Over-discharge, sulfation, or aging.
- Solution: Avoid deep discharges and replace the battery if it has reached the end of its life.
Excessive Heat During Charging
- Cause: Overcharging or high ambient temperature.
- Solution: Use a charger with overcharge protection and ensure proper ventilation.
Corroded Terminals
- Cause: Acid leakage or poor maintenance.
- Solution: Clean the terminals with a baking soda solution and apply terminal grease.
FAQs
Q: Can I use a lead-acid battery indoors?
- A: Yes, but ensure proper ventilation to prevent hydrogen gas buildup.
Q: How do I store a lead-acid battery?
- A: Store in a cool, dry place at a 50-70% state of charge. Recharge every 3-6 months to prevent sulfation.
Q: What is sulfation, and how can I prevent it?
- A: Sulfation occurs when lead sulfate crystals form on the electrodes, reducing capacity. Prevent it by avoiding prolonged discharge and regularly charging the battery.
Q: Can I connect multiple lead-acid batteries together?
- A: Yes, you can connect them in series to increase voltage or in parallel to increase capacity. Ensure all batteries are of the same type and capacity.
By following this documentation, you can safely and effectively use a lead-acid battery in your projects and applications.