How to Use LM 35: Examples, Pinouts, and Specs
Introduction
The LM35 is a precision temperature sensor that provides an output voltage proportional to the Celsius temperature. It is widely used in temperature measurement and control applications due to its linear output and low output impedance. Unlike thermistors, the LM35 does not require any external calibration or trimming, making it a reliable and easy-to-use component for temperature sensing.
Explore Projects Built with LM 35


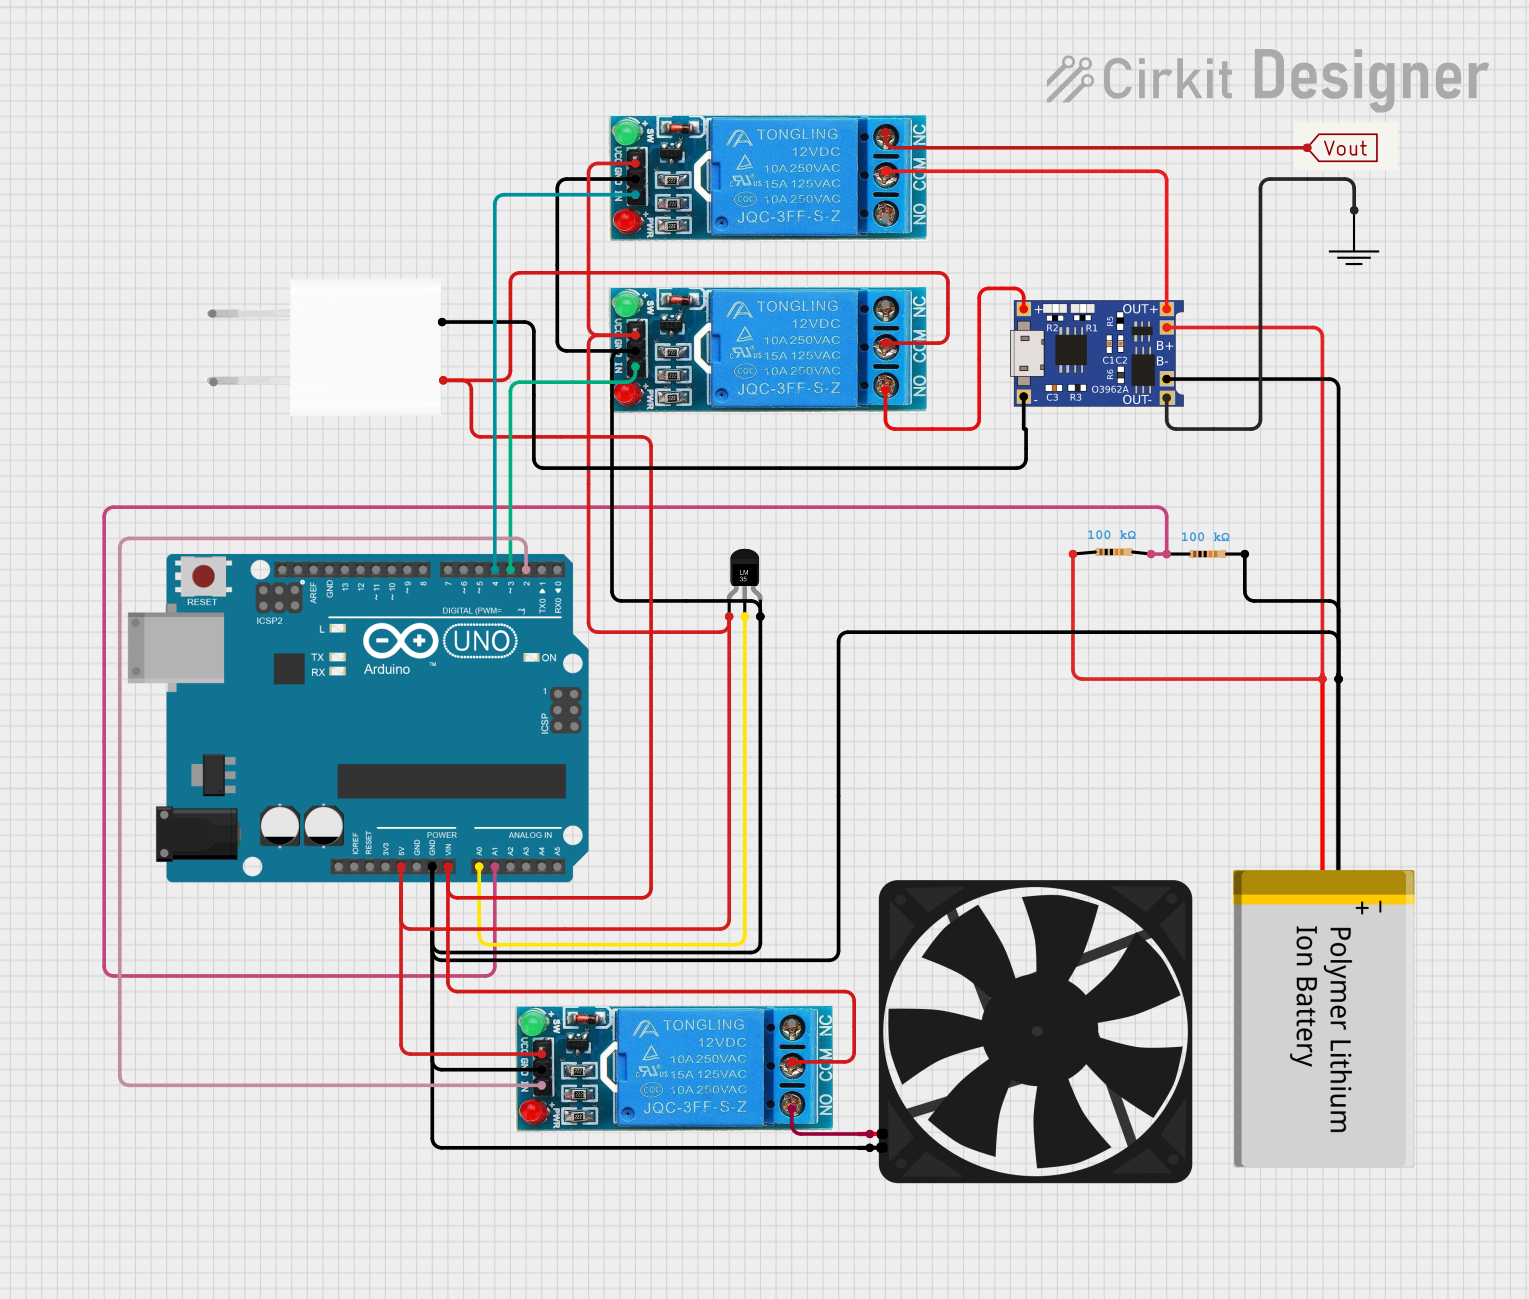

Explore Projects Built with LM 35
Common Applications and Use Cases
- HVAC systems for temperature monitoring and control
- Weather stations and environmental monitoring
- Industrial process control
- Consumer electronics, such as thermostats
- Data loggers and IoT devices
Technical Specifications
The LM35 is designed for accurate temperature measurement with minimal external components. Below are its key technical details:
| Parameter | Value |
|---|---|
| Supply Voltage Range | 4V to 30V |
| Output Voltage Range | 0V to 1.5V (for -55°C to 150°C) |
| Temperature Range | -55°C to +150°C |
| Accuracy | ±0.5°C (at 25°C) |
| Output Sensitivity | 10mV/°C |
| Current Consumption | 60 µA (typical) |
| Output Impedance | Low (0.1Ω for 1mA load) |
| Package Types | TO-92, SOIC-8, TO-220 |
Pin Configuration and Descriptions
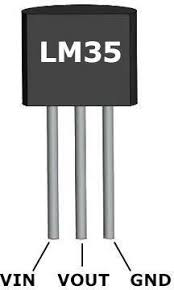
The LM35 typically comes in a 3-pin TO-92 package. Below is the pinout and description:
| Pin | Name | Description |
|---|---|---|
| 1 | VCC | Positive supply voltage (4V to 30V) |
| 2 | VOUT | Analog output voltage proportional to temperature |
| 3 | GND | Ground (0V reference) |
Usage Instructions
The LM35 is straightforward to use in a circuit. Follow the steps below to integrate it into your design:
Basic Circuit Connection
- Connect the VCC pin to a DC power supply (4V to 30V).
- Connect the GND pin to the ground of the circuit.
- Connect the VOUT pin to an analog input of a microcontroller or a voltmeter to measure the output voltage.
The output voltage of the LM35 is directly proportional to the temperature in Celsius. For example:
- At 25°C, the output voltage is 250mV (10mV/°C × 25°C).
- At 0°C, the output voltage is 0mV.
Important Considerations and Best Practices
- Use a decoupling capacitor (e.g., 0.1µF) between VCC and GND to reduce noise.
- Avoid long wires for the output pin to minimize signal degradation.
- If measuring negative temperatures, connect a pull-down resistor (e.g., 10kΩ) between VOUT and GND to ensure proper operation.
- Ensure the sensor is not exposed to excessive heat or humidity beyond its rated limits.
Example: Connecting LM35 to Arduino UNO
The LM35 can be easily interfaced with an Arduino UNO to read temperature values. Below is an example code:
// LM35 Temperature Sensor Example with Arduino UNO
// Reads temperature in Celsius and prints it to the Serial Monitor

const int sensorPin = A0; // LM35 output connected to analog pin A0
float temperatureC;       // Variable to store temperature in Celsius

void setup() {
  Serial.begin(9600); // Initialize serial communication at 9600 baud
}

void loop() {
  int sensorValue = analogRead(sensorPin); // Read analog value from LM35
  // Convert the analog value to voltage (5V reference, 10-bit ADC)
  float voltage = sensorValue * (5.0 / 1023.0);
  // Convert voltage to temperature in Celsius (10mV/°C)
  temperatureC = voltage * 100.0;

  // Print the temperature to the Serial Monitor
  Serial.print("Temperature: ");
  Serial.print(temperatureC);
  Serial.println(" °C");

  delay(1000); // Wait for 1 second before the next reading
}
Troubleshooting and FAQs
Common Issues and Solutions
No Output Voltage or Incorrect Readings
- Ensure the power supply voltage is within the specified range (4V to 30V).
- Verify all connections, especially the ground and output pins.
- Check for loose or damaged wires.
Fluctuating or Noisy Output
- Add a decoupling capacitor (e.g., 0.1µF) between VCC and GND.
- Ensure the sensor is not placed near high-frequency noise sources.
Output Voltage Does Not Match Expected Temperature
- Confirm the sensor is operating within its specified temperature range (-55°C to +150°C).
- Verify the calculation for converting voltage to temperature (10mV/°C).
FAQs
Q: Can the LM35 measure negative temperatures?
A: Yes, but the output voltage will be below 0V for negative temperatures. To measure negative temperatures, use a negative voltage supply or a pull-down resistor to shift the output voltage.
Q: Can I use the LM35 with a 3.3V microcontroller?
A: Yes, the LM35 can operate with a supply voltage as low as 4V. However, ensure the output voltage does not exceed the ADC input range of the microcontroller.
Q: How do I improve the accuracy of the LM35?
A: Use a stable power supply, minimize noise in the circuit, and avoid placing the sensor near heat sources or airflow that could affect readings.
Q: What is the maximum distance between the LM35 and the microcontroller?
A: The LM35 has low output impedance, allowing it to drive long cables. However, for best results, keep the distance under 10 meters and use shielded cables to reduce noise.