
How to Use LilyPad LiPower: Examples, Pinouts, and Specs
 Design with LilyPad LiPower in Cirkit Designer
Introduction
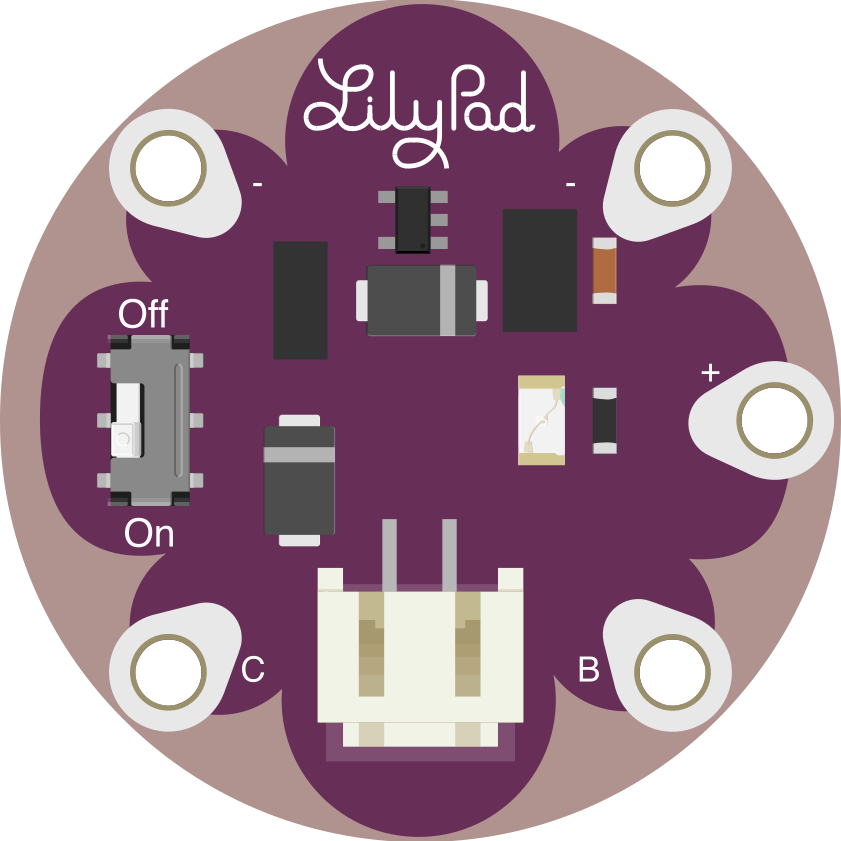
The LilyPad LiPower (Manufacturer Part ID: DEV-10085) is a compact power management module designed by SparkFun Electronics. It is specifically tailored for use with LilyPad Arduino projects, offering a convenient and efficient solution for powering wearable electronics. The module supports rechargeable lithium polymer (LiPo) batteries and includes built-in charging capabilities, making it an ideal choice for portable and wearable applications.
Explore Projects Built with LilyPad LiPower
 Open Project in Cirkit Designer
 Open Project in Cirkit Designer
 Open Project in Cirkit Designer
 Open Project in Cirkit Designer
Explore Projects Built with LilyPad LiPower
Open Project in Cirkit DesignerOpen Project in Cirkit DesignerOpen Project in Cirkit DesignerOpen Project in Cirkit DesignerCommon Applications and Use Cases
- Powering LilyPad Arduino boards and accessories in wearable projects
- Providing a rechargeable power source for e-textiles
- Simplifying battery management in portable electronics
- Enabling compact and lightweight designs for IoT and DIY projects
Technical Specifications
The LilyPad LiPower module is designed to provide stable power output while managing the charging of a connected LiPo battery. Below are the key technical details:
Electrical Specifications
| Parameter | Value |
|---|---|
| Input Voltage (USB) | 5V (via micro-USB connector) |
| Output Voltage | 3.3V or 5V (selectable via jumper) |
| Output Current (Max) | 200mA |
| Battery Compatibility | Single-cell LiPo (3.7V nominal) |
| Charging Current | 100mA |
Pin Configuration and Descriptions
| Pin Name | Description |
|---|---|
| VBATT | Battery input pin for connecting a 3.7V LiPo battery. |
| GND | Ground connection. |
| 3.3V | Regulated 3.3V output pin. |
| 5V | Regulated 5V output pin (enabled by soldering the jumper on the back). |
| CHG | Charging status indicator pin (low when charging, high when fully charged). |
Physical Dimensions
- Diameter: 20mm
- Thickness: 3.5mm
- Weight: 1.5g
Usage Instructions
The LilyPad LiPower module is straightforward to use and integrates seamlessly with LilyPad Arduino boards. Follow the steps below to use the module effectively:
Connecting the Module
- Power Input: Connect a single-cell 3.7V LiPo battery to the
VBATTpin. Ensure correct polarity to avoid damage. - Output Voltage Selection:
- By default, the module outputs 3.3V.
- To enable 5V output, solder the jumper on the back of the module.
- Power Output: Connect the
3.3Vor5Vpin to your LilyPad Arduino or other components requiring power. - Ground Connection: Connect the
GNDpin to the ground of your circuit.
Charging the Battery
- Plug a micro-USB cable into the module's USB port to charge the connected LiPo battery.
- The onboard charging circuit will automatically manage the charging process.
- The
CHGpin can be used to monitor the charging status:- Low: Battery is charging.
- High: Battery is fully charged.
Important Considerations
- Battery Safety: Only use compatible single-cell 3.7V LiPo batteries. Avoid overcharging or deep discharging the battery.
- Output Current: Do not exceed the maximum output current of 200mA to prevent overheating or damage.
- Jumper Configuration: Ensure the jumper is correctly configured for your desired output voltage before powering the module.
Example: Using with Arduino UNO
Although the LilyPad LiPower is designed for LilyPad Arduino boards, it can also be used with an Arduino UNO. Below is an example of powering an Arduino UNO with the module:
- Connect the
5Vpin of the LiPower module to the5Vpin of the Arduino UNO. - Connect the
GNDpin of the LiPower module to theGNDpin of the Arduino UNO. - Attach a 3.7V LiPo battery to the
VBATTpin of the module. - Optionally, monitor the charging status using the
CHGpin.
Here is a simple Arduino sketch to blink an LED while powered by the LilyPad LiPower:
// Simple LED Blink Example
// This sketch blinks an LED connected to pin 13 of the Arduino UNO.

void setup() {
  pinMode(13, OUTPUT); // Set pin 13 as an output
}

void loop() {
  digitalWrite(13, HIGH); // Turn the LED on
  delay(1000);            // Wait for 1 second
  digitalWrite(13, LOW);  // Turn the LED off
  delay(1000);            // Wait for 1 second
}
Troubleshooting and FAQs
Common Issues
Module Not Powering the Circuit
- Cause: Incorrect battery connection or depleted battery.
- Solution: Verify the battery polarity and ensure the battery is charged.
Battery Not Charging
- Cause: Faulty USB cable or insufficient USB power source.
- Solution: Use a known-good USB cable and ensure the power source provides 5V.
Output Voltage Incorrect
- Cause: Jumper not configured correctly.
- Solution: Check the jumper configuration and solder it for 5V output if needed.
Overheating
- Cause: Exceeding the maximum output current of 200mA.
- Solution: Reduce the load on the module to stay within the current limit.
FAQs
Q: Can I use the LilyPad LiPower without a battery?
A: Yes, the module can be powered directly via the USB port, but it is designed to work optimally with a connected LiPo battery.
Q: How do I know when the battery is fully charged?
A: The CHG pin will go high (logic level 1) when the battery is fully charged.
Q: Can I use this module with non-LilyPad Arduino boards?
A: Yes, the module can power any Arduino board or circuit that operates at 3.3V or 5V, as long as the current requirements are within the 200mA limit.
Q: Is the module safe for wearable projects?
A: Yes, the LilyPad LiPower is designed for wearable electronics. However, ensure proper insulation and avoid exposing the module to moisture.