Cirkit Designer Logo
Cirkit Designer
Your all-in-one circuit design IDE
Home / 
Component Documentation

How to Use DIY Humidifier: Examples, Pinouts, and Specs

Image of DIY Humidifier
Cirkit Designer LogoDesign with DIY Humidifier in Cirkit Designer

Introduction

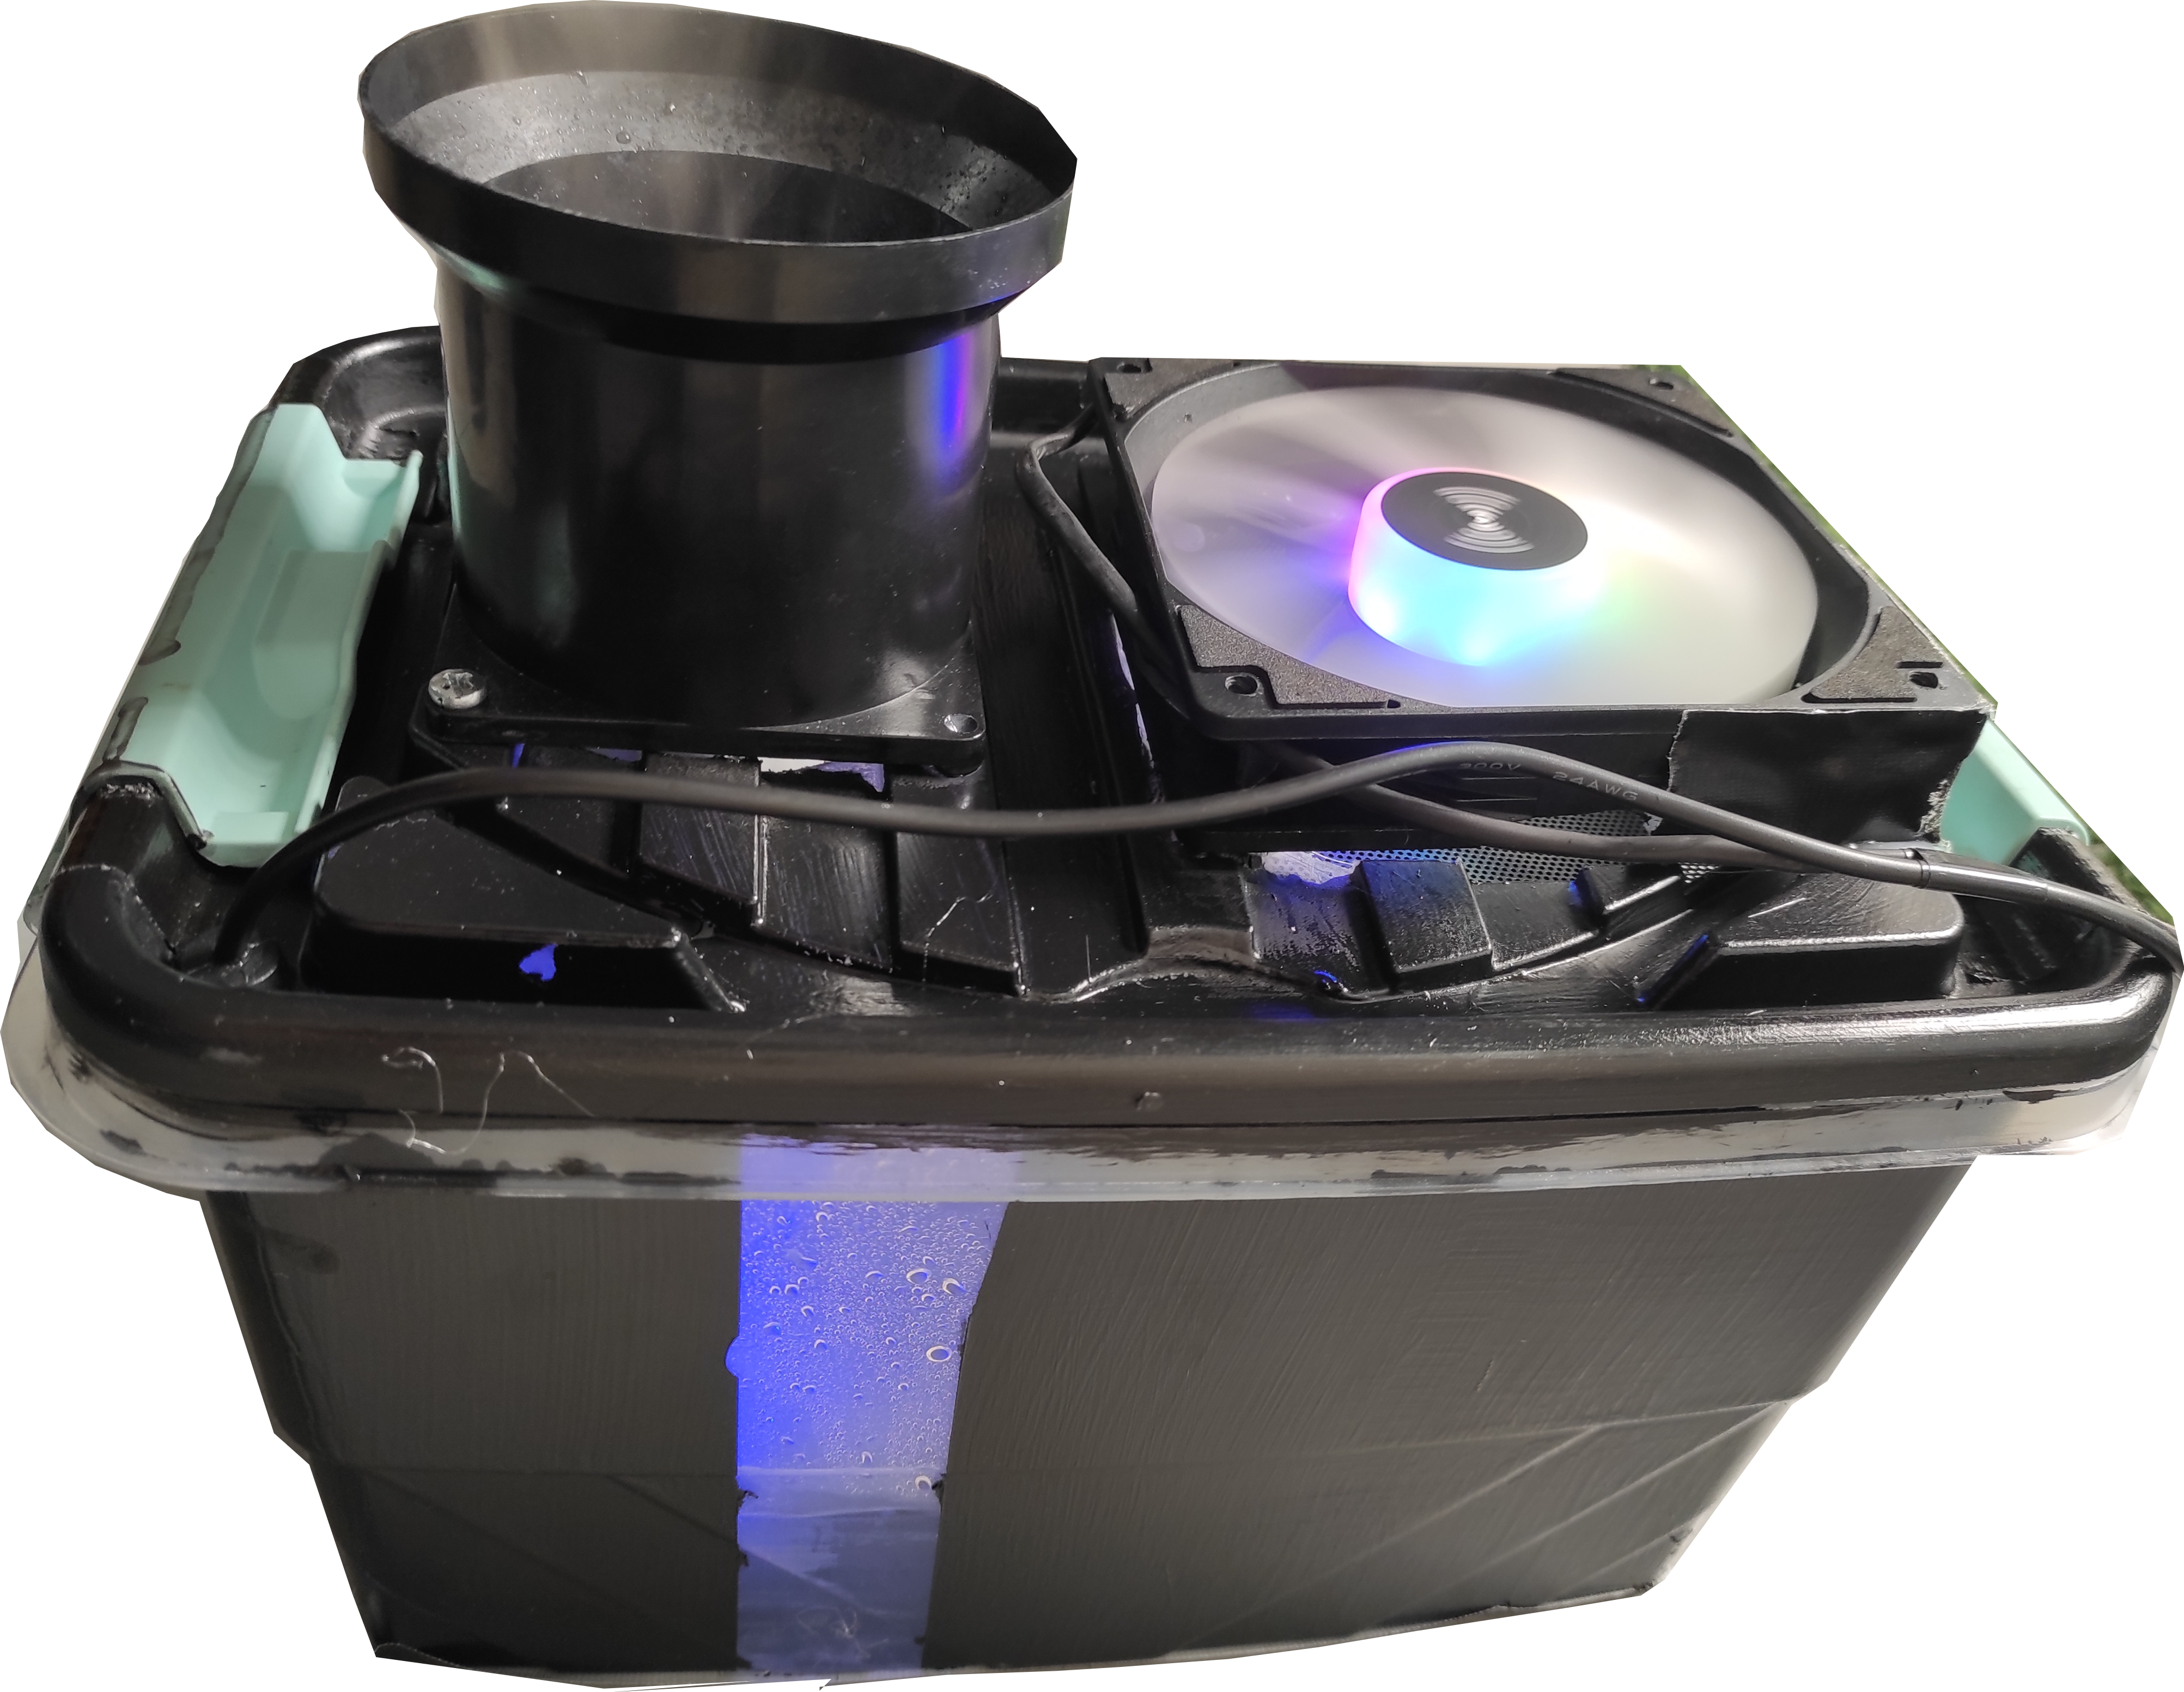
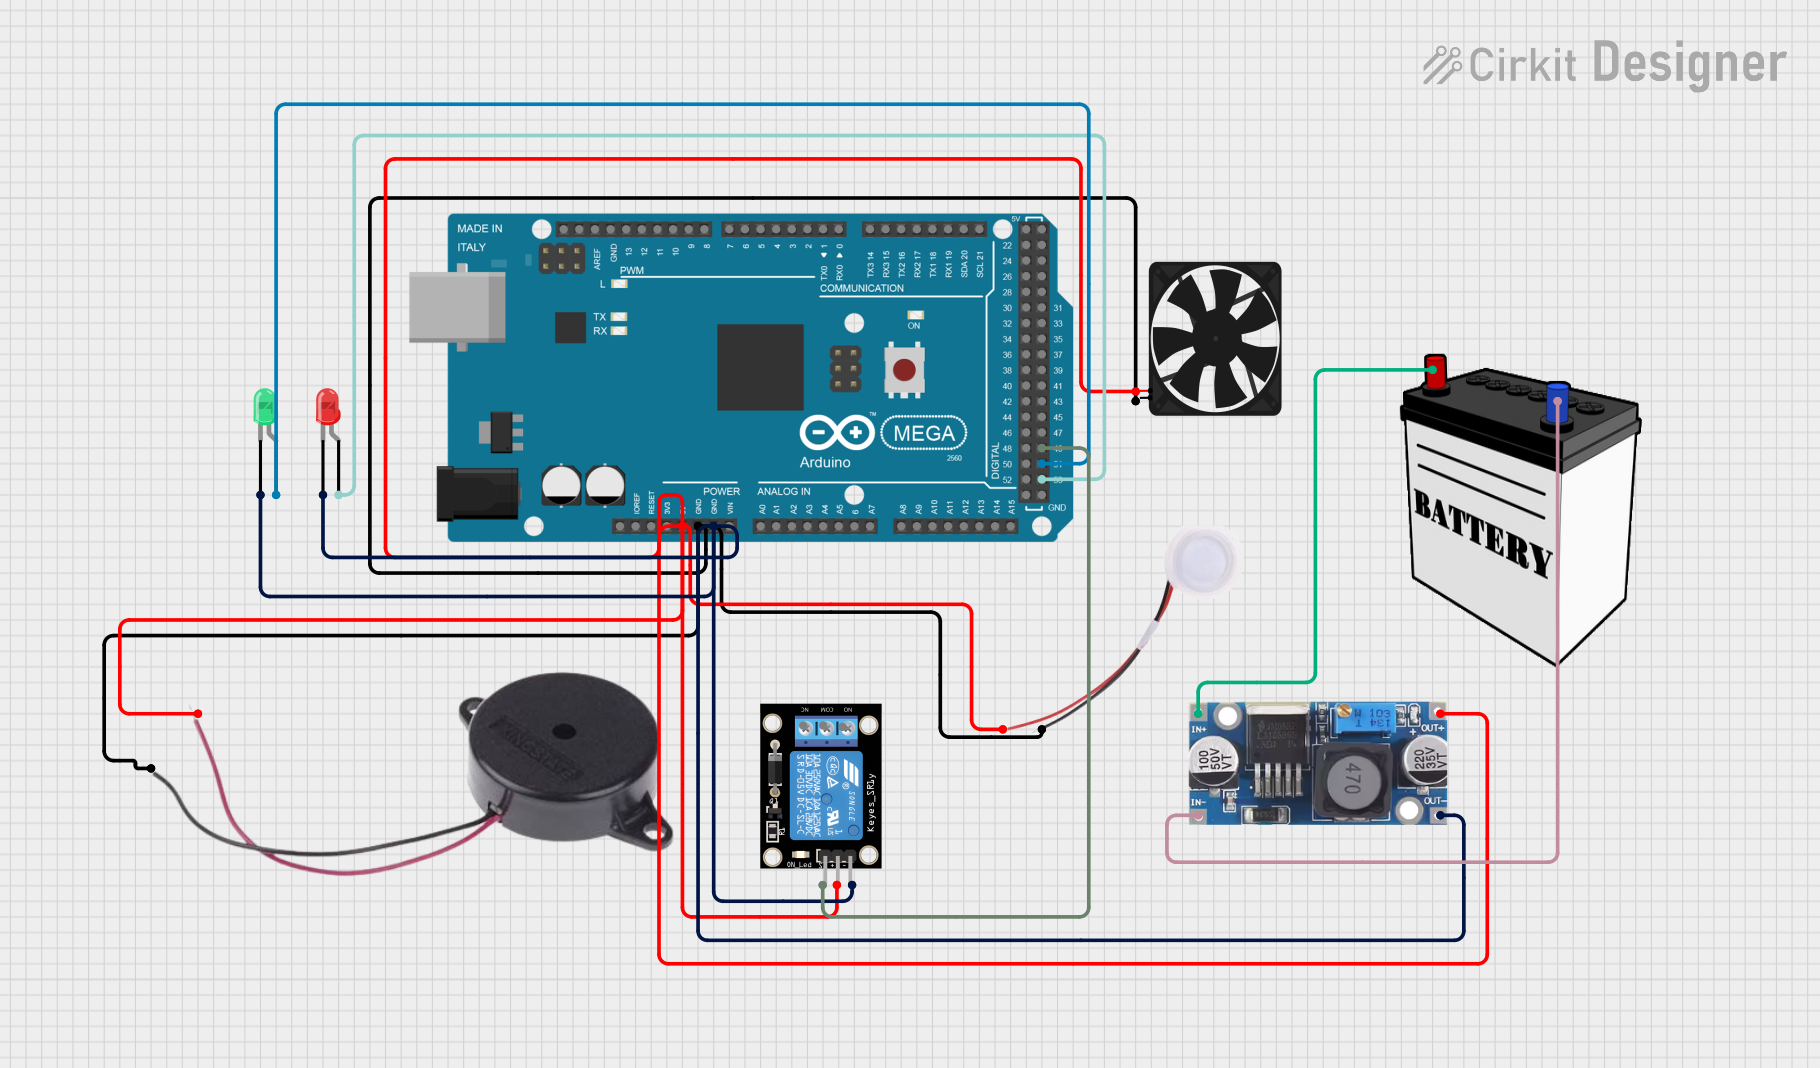
A DIY humidifier is a device designed to add moisture to the air, which can be particularly beneficial in dry climates or during winter months when indoor air tends to be dry. This device typically involves components such as a water reservoir, a fan, and a wick or ultrasonic mist maker to disperse water vapor into the air. DIY humidifiers are popular in home automation projects and can be easily integrated with microcontrollers like the Arduino UNO for enhanced control and automation.

Explore Projects Built with DIY Humidifier

Use Cirkit Designer to design, explore, and prototype these projects online. Some projects support real-time simulation. Click "Open Project" to start designing instantly!
Arduino UNO-Based Smart Humidifier with Ultrasonic Sensor and Solar Power
Image of ari humidifer with motion sensor powered by solar panel: A project utilizing DIY Humidifier in a practical application
This circuit uses an Arduino UNO to control a humidifier based on distance measurements from an ultrasonic sensor. The Arduino receives power from a 5V battery and controls a 5V relay to switch the humidifier on and off. A solar panel is also connected to the power supply, potentially for supplementary power.
Cirkit Designer LogoOpen Project in Cirkit Designer
ESP32-Based Smart Humidity and Temperature Controller with Wi-Fi Connectivity
Image of FINAL PROJECT: A project utilizing DIY Humidifier in a practical application
This circuit is designed to monitor and control temperature and humidity using an ESP32 microcontroller, which interfaces with a DHT11 sensor, an OLED display, and a two-channel relay. The ESP32 uses Blynk for IoT connectivity, allowing remote monitoring and control of a connected humidifier and a bulb (as a heater). Pushbuttons are included for manual control, and the system operates in either automatic or manual mode to maintain desired environmental conditions.
Cirkit Designer LogoOpen Project in Cirkit Designer
Arduino and ESP32 Controlled Smart Humidifier and UV-C LED System with Fan Automation
Image of thesis: A project utilizing DIY Humidifier in a practical application
This circuit uses an Arduino UNO to control a relay module that powers a humidifier, UV-C LED, and two fans in a specific sequence. The Arduino code turns on the humidifier and UV-C LED for 5 minutes, then switches them off and turns on the fans indefinitely. An ESP32 is also connected to a TFT LCD shield for display purposes.
Cirkit Designer LogoOpen Project in Cirkit Designer
Arduino Mega 2560 Controlled Environment System with Relay, Humidifier, Fan, and Indicator LEDs
Image of Hardware: A project utilizing DIY Humidifier in a practical application
This circuit is designed to control environmental conditions using an Arduino Mega 2560, which manages a humidifier, fan, and provides alerts through a buzzer and LEDs. A relay module is included for high-power device control, and a step-down buck converter is used to power the system from a 12V battery.
Cirkit Designer LogoOpen Project in Cirkit Designer

Explore Projects Built with DIY Humidifier

Use Cirkit Designer to design, explore, and prototype these projects online. Some projects support real-time simulation. Click "Open Project" to start designing instantly!
Image of ari humidifer with motion sensor powered by solar panel: A project utilizing DIY Humidifier in a practical application
Arduino UNO-Based Smart Humidifier with Ultrasonic Sensor and Solar Power
This circuit uses an Arduino UNO to control a humidifier based on distance measurements from an ultrasonic sensor. The Arduino receives power from a 5V battery and controls a 5V relay to switch the humidifier on and off. A solar panel is also connected to the power supply, potentially for supplementary power.
Cirkit Designer LogoOpen Project in Cirkit Designer
Image of FINAL PROJECT: A project utilizing DIY Humidifier in a practical application
ESP32-Based Smart Humidity and Temperature Controller with Wi-Fi Connectivity
This circuit is designed to monitor and control temperature and humidity using an ESP32 microcontroller, which interfaces with a DHT11 sensor, an OLED display, and a two-channel relay. The ESP32 uses Blynk for IoT connectivity, allowing remote monitoring and control of a connected humidifier and a bulb (as a heater). Pushbuttons are included for manual control, and the system operates in either automatic or manual mode to maintain desired environmental conditions.
Cirkit Designer LogoOpen Project in Cirkit Designer
Image of thesis: A project utilizing DIY Humidifier in a practical application
Arduino and ESP32 Controlled Smart Humidifier and UV-C LED System with Fan Automation
This circuit uses an Arduino UNO to control a relay module that powers a humidifier, UV-C LED, and two fans in a specific sequence. The Arduino code turns on the humidifier and UV-C LED for 5 minutes, then switches them off and turns on the fans indefinitely. An ESP32 is also connected to a TFT LCD shield for display purposes.
Cirkit Designer LogoOpen Project in Cirkit Designer
Image of Hardware: A project utilizing DIY Humidifier in a practical application
Arduino Mega 2560 Controlled Environment System with Relay, Humidifier, Fan, and Indicator LEDs
This circuit is designed to control environmental conditions using an Arduino Mega 2560, which manages a humidifier, fan, and provides alerts through a buzzer and LEDs. A relay module is included for high-power device control, and a step-down buck converter is used to power the system from a 12V battery.
Cirkit Designer LogoOpen Project in Cirkit Designer

Common Applications and Use Cases

  • Home Humidification: Maintaining optimal humidity levels in living spaces.
  • Plant Care: Providing necessary humidity for indoor plants.
  • Health Benefits: Alleviating symptoms of dry skin, throat, and respiratory issues.
  • Electronics Protection: Preventing static electricity buildup in electronics.

Technical Specifications

Key Technical Details

Parameter Value
Operating Voltage 5V DC
Current Consumption 200mA
Power Rating 1W
Water Reservoir 500ml
Humidification Rate 30ml/h
Fan Speed 3000 RPM
Ultrasonic Frequency 1.7MHz

Pin Configuration and Descriptions

Pin Number Pin Name Description
1 VCC Power supply (5V DC)
2 GND Ground
3 FAN_CTRL Fan control signal
4 MIST_CTRL Ultrasonic mist maker control signal

Usage Instructions

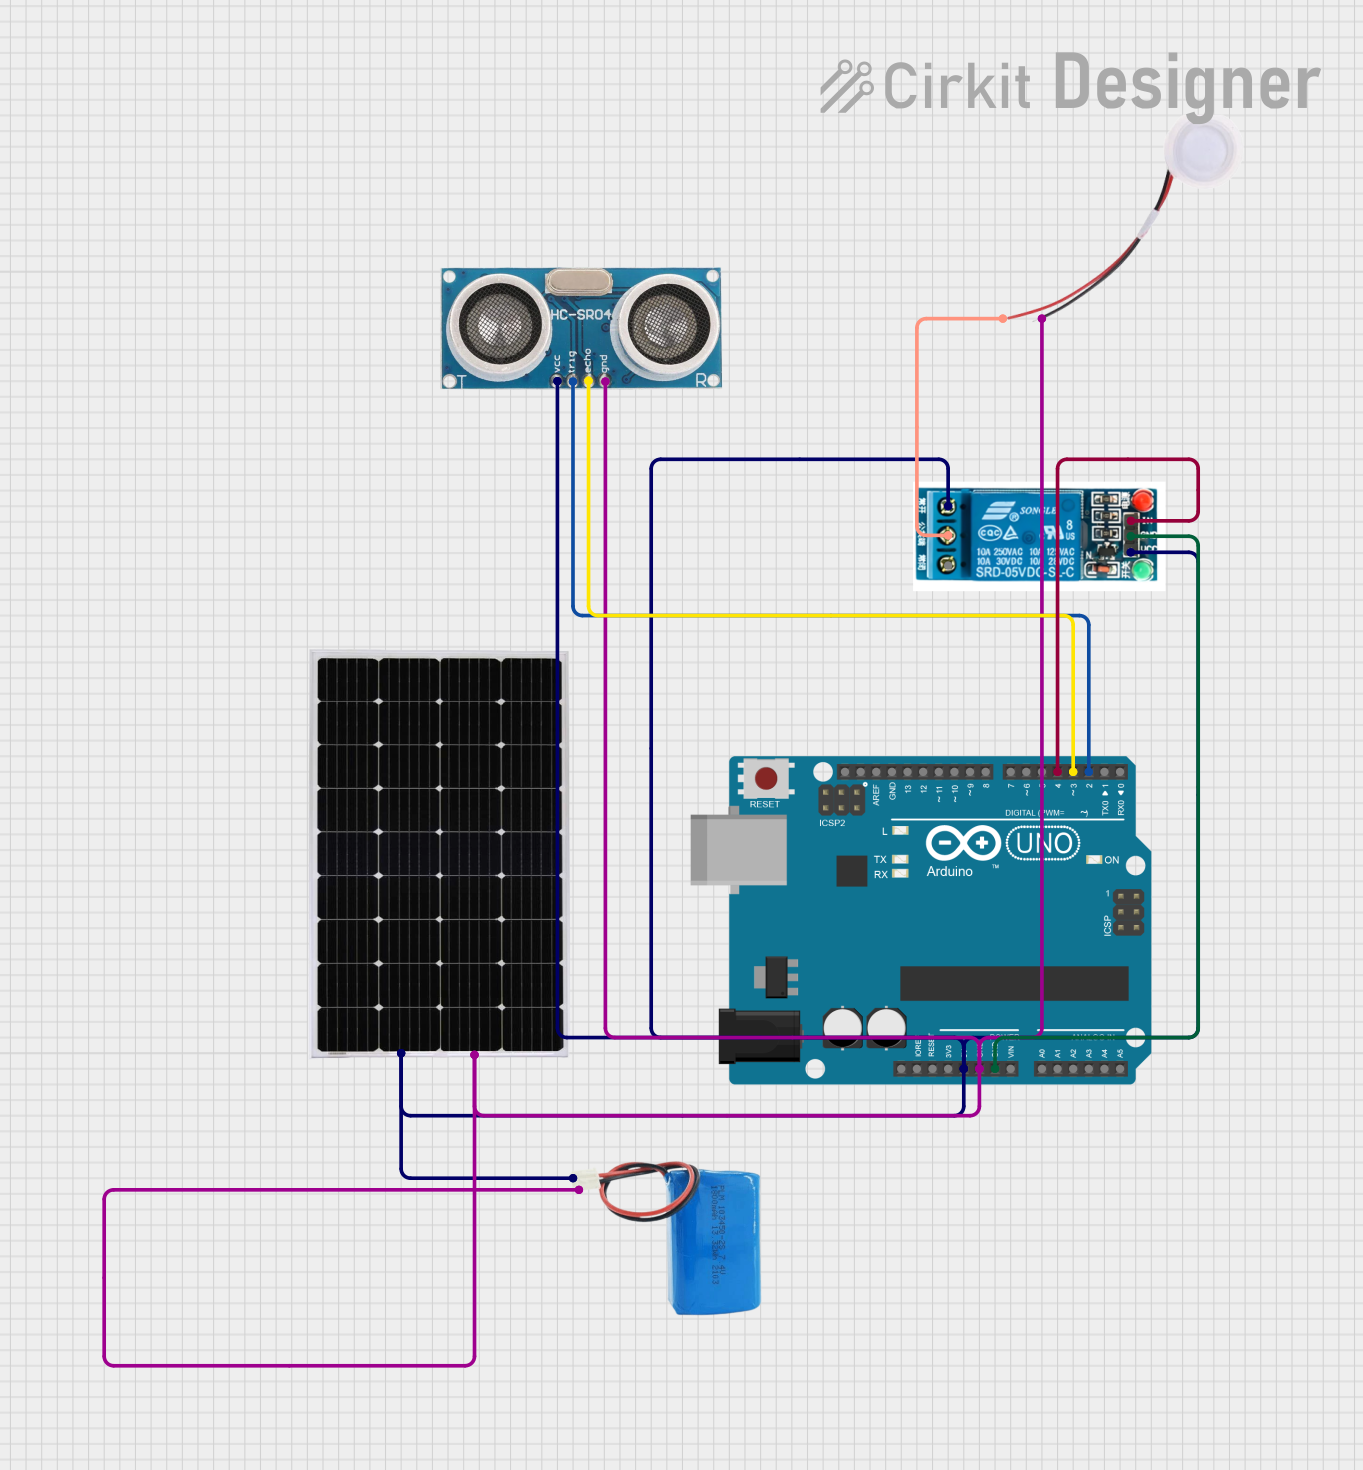
How to Use the Component in a Circuit

  1. Power Supply:

    • Connect the VCC pin to a 5V DC power source.
    • Connect the GND pin to the ground of the power source.
  2. Control Signals:

    • Connect the FAN_CTRL pin to a digital output pin on the Arduino UNO.
    • Connect the MIST_CTRL pin to another digital output pin on the Arduino UNO.
  3. Water Reservoir:

    • Ensure the water reservoir is filled with clean water.
    • Place the wick or ultrasonic mist maker in the water reservoir.

Important Considerations and Best Practices

  • Water Quality: Use distilled or purified water to prevent mineral buildup.
  • Safety: Ensure all electrical connections are secure and insulated to prevent short circuits.
  • Maintenance: Regularly clean the water reservoir and replace the wick or clean the ultrasonic mist maker to maintain efficiency.
  • Humidity Monitoring: Use a humidity sensor to monitor and control the humidity levels automatically.

Sample Arduino Code

// Define pin connections
const int fanPin = 9; // Pin connected to FAN_CTRL
const int mistPin = 10; // Pin connected to MIST_CTRL

void setup() {
  // Initialize the digital pins as outputs
  pinMode(fanPin, OUTPUT);
  pinMode(mistPin, OUTPUT);
}

void loop() {
  // Turn on the fan and mist maker
  digitalWrite(fanPin, HIGH);
  digitalWrite(mistPin, HIGH);
  
  // Keep them on for 10 seconds
  delay(10000);
  
  // Turn off the fan and mist maker
  digitalWrite(fanPin, LOW);
  digitalWrite(mistPin, LOW);
  
  // Keep them off for 10 seconds
  delay(10000);
}

Troubleshooting and FAQs

Common Issues Users Might Face

  1. No Mist Production:

    • Solution: Check the water level in the reservoir. Ensure the ultrasonic mist maker is fully submerged and connected properly.
  2. Fan Not Working:

    • Solution: Verify the fan control signal connection. Ensure the fan is receiving power and the control signal is being sent from the Arduino.
  3. Intermittent Operation:

    • Solution: Check for loose connections or power supply issues. Ensure the Arduino code is running correctly and the delay times are appropriate.

Solutions and Tips for Troubleshooting

  • Check Connections: Ensure all wires are securely connected and there are no loose connections.
  • Power Supply: Verify that the power supply is providing the correct voltage and current.
  • Component Testing: Test individual components (fan, mist maker) separately to ensure they are functioning correctly.
  • Code Verification: Double-check the Arduino code for any errors or incorrect pin assignments.

By following this documentation, users can effectively build and troubleshoot their DIY humidifier, ensuring optimal performance and longevity of the device.