Cirkit Designer Logo
Cirkit Designer
Your all-in-one circuit design IDE
Home / 
Component Documentation

How to Use VIBRATION SENSOR SW-420: Examples, Pinouts, and Specs

Image of VIBRATION SENSOR SW-420
Cirkit Designer LogoDesign with VIBRATION SENSOR SW-420 in Cirkit Designer

Introduction

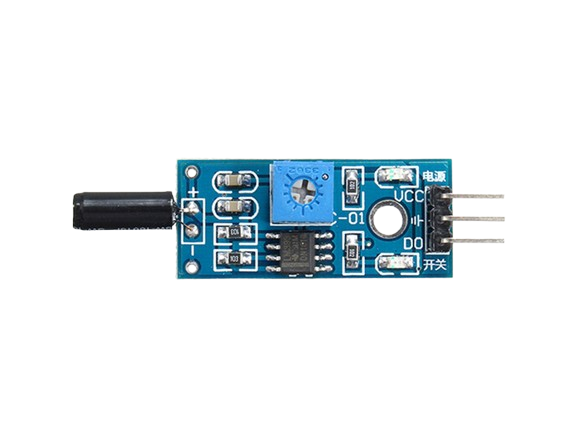
The SW-420 is a vibration sensor designed to detect vibrations and movements. It operates as a switch that changes its state when subjected to physical disturbances. This sensor is widely used in applications such as security systems, alarms, and robotics, where detecting vibrations or motion is critical. Its compact design and ease of use make it a popular choice for both hobbyists and professionals.

Explore Projects Built with VIBRATION SENSOR SW-420

Use Cirkit Designer to design, explore, and prototype these projects online. Some projects support real-time simulation. Click "Open Project" to start designing instantly!
Arduino Nano-Based Vibration Detection System with SIM800L GSM Module
Image of asd: A project utilizing VIBRATION SENSOR SW-420 in a practical application
This circuit is designed to detect vibrations using the SW-420 Vibration Sensor and communicate the detection events via the Sim800l GSM module. The Arduino Nano serves as the central controller, interfacing with the vibration sensor on its digital pin D4 and with the Sim800l module through serial communication using pins D0/RX and D1/TX. The circuit is likely intended for remote monitoring of vibrations, potentially for security or machinery fault detection applications.
Cirkit Designer LogoOpen Project in Cirkit Designer
Arduino Nano-Based Vibration Detection System
Image of Digital_Pin: A project utilizing VIBRATION SENSOR SW-420 in a practical application
This circuit connects an SW-420 Vibration Sensor to an Arduino Nano. The vibration sensor's digital output is linked to the Arduino's D2 pin, allowing the microcontroller to detect vibrations. The sensor is powered by the Arduino's 5V output, and both devices share a common ground.
Cirkit Designer LogoOpen Project in Cirkit Designer
ESP32-Based Environmental Monitoring System with Vibration and Sound Detection
Image of DRONE CIRCUIT: A project utilizing VIBRATION SENSOR SW-420 in a practical application
This circuit features an ESP32 microcontroller connected to various sensors and output devices. A sound sensor and a SW-420 vibration sensor provide analog and digital inputs, respectively, to the ESP32 for environmental monitoring. The circuit also includes a DHT11 sensor for temperature and humidity readings, a buzzer for audible alerts, and an OLED display for visual feedback, all interfaced with the ESP32. Power is supplied by a 3.7V source connected to all components requiring VCC.
Cirkit Designer LogoOpen Project in Cirkit Designer
Arduino-Based Vibration and Motion Detection System with LCD Display
Image of blueprint: A project utilizing VIBRATION SENSOR SW-420 in a practical application
This circuit uses an Arduino UNO to interface with an SW-420 vibration sensor, an MPU6050 accelerometer and gyroscope, a 16x2 LCD display, and a piezo buzzer. The Arduino reads data from the sensors and displays relevant information on the LCD, while the piezo buzzer provides audible alerts based on sensor inputs.
Cirkit Designer LogoOpen Project in Cirkit Designer

Explore Projects Built with VIBRATION SENSOR SW-420

Use Cirkit Designer to design, explore, and prototype these projects online. Some projects support real-time simulation. Click "Open Project" to start designing instantly!
Image of asd: A project utilizing VIBRATION SENSOR SW-420 in a practical application
Arduino Nano-Based Vibration Detection System with SIM800L GSM Module
This circuit is designed to detect vibrations using the SW-420 Vibration Sensor and communicate the detection events via the Sim800l GSM module. The Arduino Nano serves as the central controller, interfacing with the vibration sensor on its digital pin D4 and with the Sim800l module through serial communication using pins D0/RX and D1/TX. The circuit is likely intended for remote monitoring of vibrations, potentially for security or machinery fault detection applications.
Cirkit Designer LogoOpen Project in Cirkit Designer
Image of Digital_Pin: A project utilizing VIBRATION SENSOR SW-420 in a practical application
Arduino Nano-Based Vibration Detection System
This circuit connects an SW-420 Vibration Sensor to an Arduino Nano. The vibration sensor's digital output is linked to the Arduino's D2 pin, allowing the microcontroller to detect vibrations. The sensor is powered by the Arduino's 5V output, and both devices share a common ground.
Cirkit Designer LogoOpen Project in Cirkit Designer
Image of DRONE CIRCUIT: A project utilizing VIBRATION SENSOR SW-420 in a practical application
ESP32-Based Environmental Monitoring System with Vibration and Sound Detection
This circuit features an ESP32 microcontroller connected to various sensors and output devices. A sound sensor and a SW-420 vibration sensor provide analog and digital inputs, respectively, to the ESP32 for environmental monitoring. The circuit also includes a DHT11 sensor for temperature and humidity readings, a buzzer for audible alerts, and an OLED display for visual feedback, all interfaced with the ESP32. Power is supplied by a 3.7V source connected to all components requiring VCC.
Cirkit Designer LogoOpen Project in Cirkit Designer
Image of blueprint: A project utilizing VIBRATION SENSOR SW-420 in a practical application
Arduino-Based Vibration and Motion Detection System with LCD Display
This circuit uses an Arduino UNO to interface with an SW-420 vibration sensor, an MPU6050 accelerometer and gyroscope, a 16x2 LCD display, and a piezo buzzer. The Arduino reads data from the sensors and displays relevant information on the LCD, while the piezo buzzer provides audible alerts based on sensor inputs.
Cirkit Designer LogoOpen Project in Cirkit Designer

Technical Specifications

The SW-420 vibration sensor module typically includes the SW-420 sensor and a comparator circuit for signal processing. Below are the key technical details:

  • Operating Voltage: 3.3V to 5V DC
  • Output Type: Digital (High or Low)
  • Sensitivity Adjustment: Via onboard potentiometer
  • Output State:
    • High (logic 1) when no vibration is detected
    • Low (logic 0) when vibration is detected
  • Dimensions: Approximately 32mm x 14mm x 8mm
  • Operating Temperature: -40°C to 85°C

Pin Configuration and Descriptions

The SW-420 vibration sensor module typically has three pins. The table below describes each pin:

Pin Name Description
VCC Power supply input (3.3V to 5V DC)
GND Ground connection
DO Digital output signal

Usage Instructions

How to Use the SW-420 in a Circuit

  1. Power the Sensor: Connect the VCC pin to a 3.3V or 5V power source and the GND pin to the ground.
  2. Connect the Output: Connect the DO (Digital Output) pin to a microcontroller or other digital input device to read the sensor's state.
  3. Adjust Sensitivity: Use the onboard potentiometer to adjust the sensitivity of the sensor. Turning the potentiometer clockwise increases sensitivity, while turning it counterclockwise decreases sensitivity.
  4. Monitor Output: The DO pin will output a HIGH signal when no vibration is detected and a LOW signal when vibration is detected.

Important Considerations and Best Practices

  • Power Supply: Ensure a stable power supply to avoid false triggers.
  • Mounting: Secure the sensor module firmly to prevent unintended vibrations from affecting its performance.
  • Debouncing: If the sensor is connected to a microcontroller, consider implementing software debouncing to filter out noise or rapid state changes.
  • Environment: Avoid exposing the sensor to extreme temperatures or moisture, as this may affect its performance.

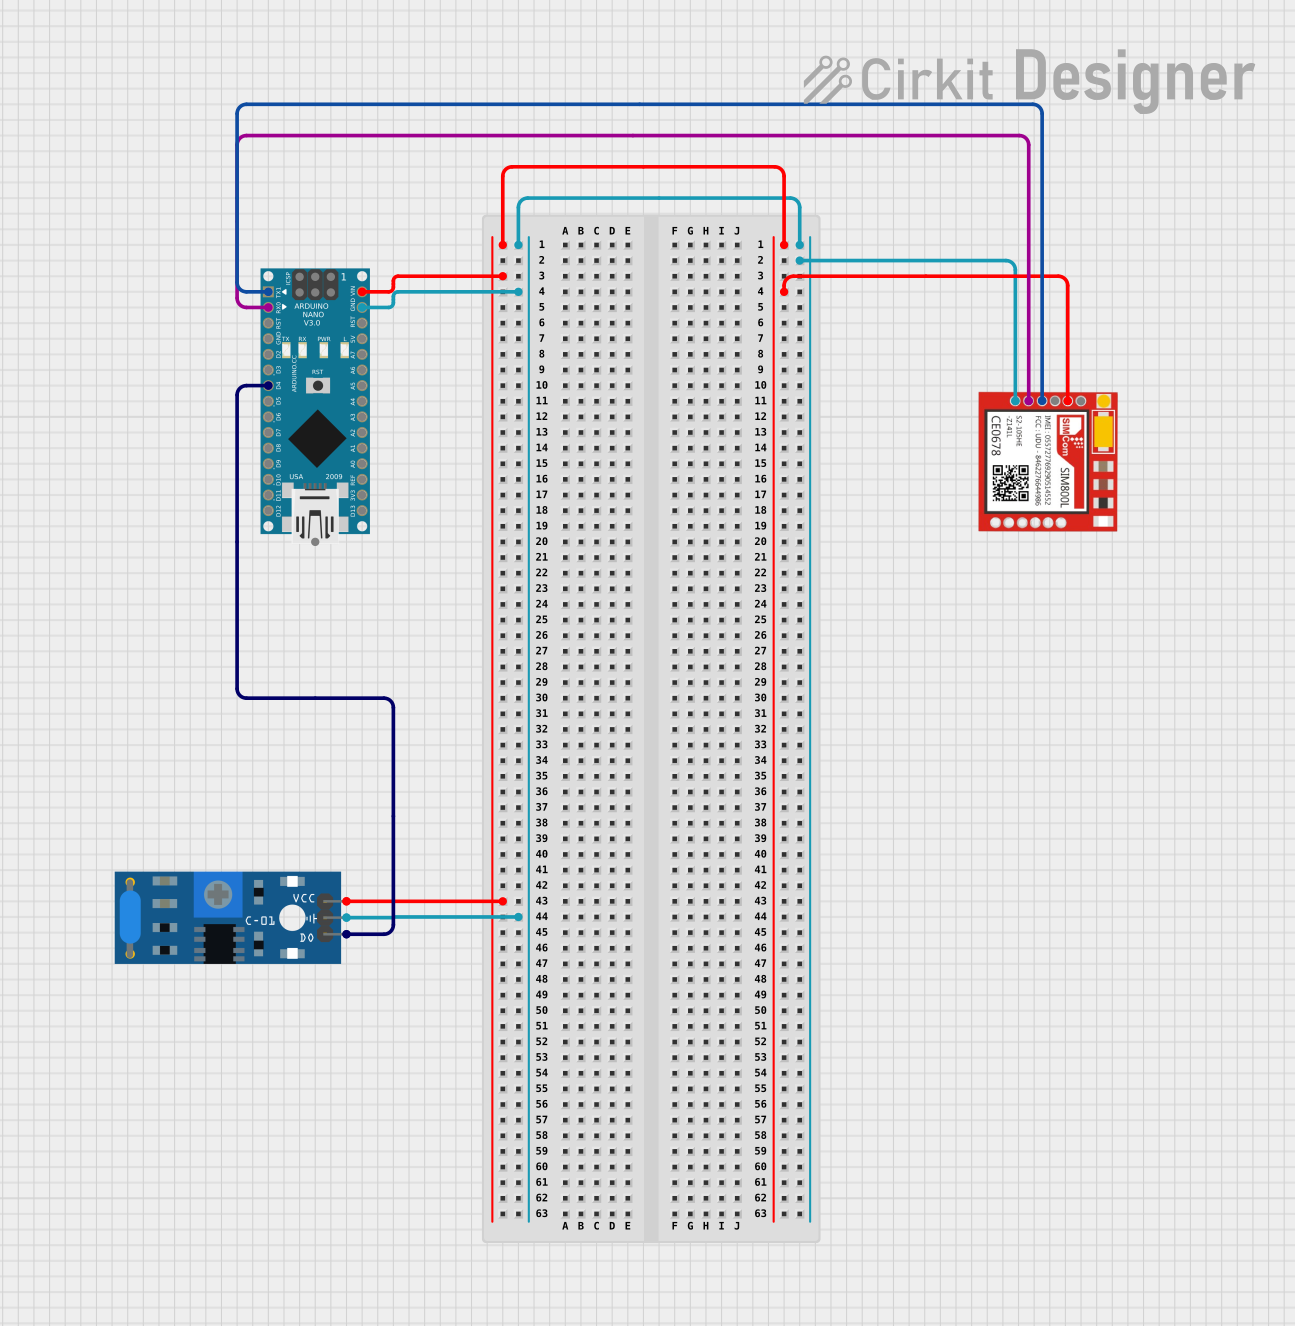
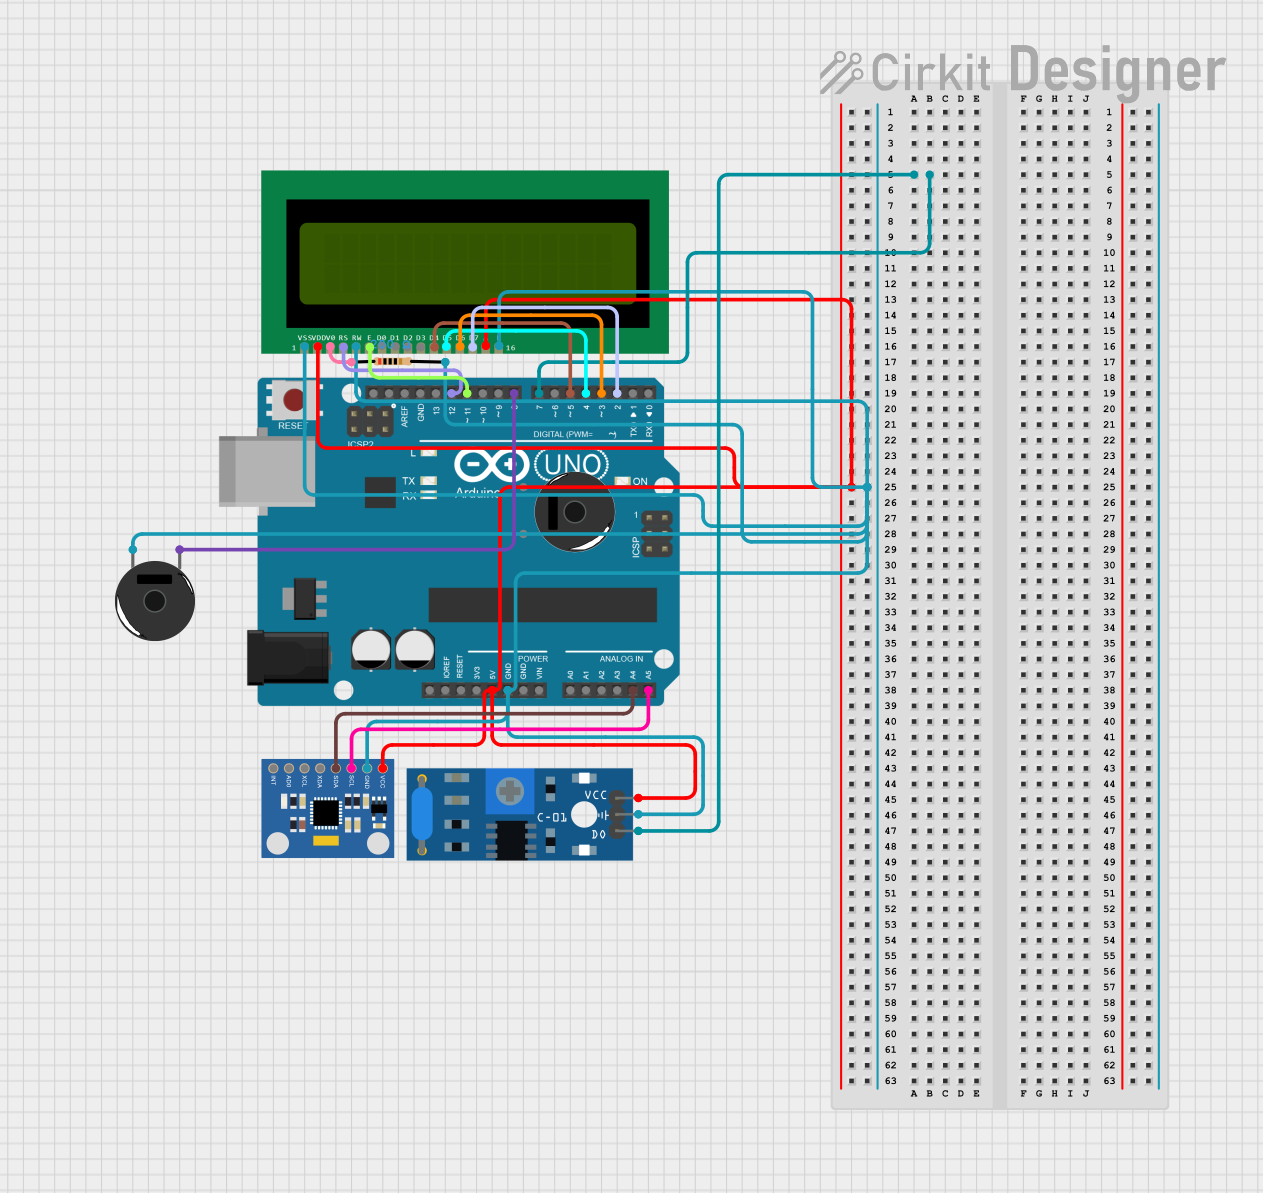
Example: Connecting SW-420 to Arduino UNO

Below is an example of how to connect and use the SW-420 vibration sensor with an Arduino UNO:

Circuit Connections

  • Connect the VCC pin of the SW-420 to the 5V pin on the Arduino.
  • Connect the GND pin of the SW-420 to the GND pin on the Arduino.
  • Connect the DO pin of the SW-420 to digital pin 2 on the Arduino.

Arduino Code

// SW-420 Vibration Sensor Example with Arduino UNO
// Connect the DO pin of the sensor to digital pin 2 on the Arduino

const int sensorPin = 2;  // Digital pin connected to the sensor's DO pin
const int ledPin = 13;    // Built-in LED pin on Arduino

void setup() {
  pinMode(sensorPin, INPUT);  // Set sensor pin as input
  pinMode(ledPin, OUTPUT);    // Set LED pin as output
  Serial.begin(9600);         // Initialize serial communication
}

void loop() {
  int sensorState = digitalRead(sensorPin);  // Read the sensor's output

  if (sensorState == LOW) {
    // If vibration is detected, turn on the LED
    digitalWrite(ledPin, HIGH);
    Serial.println("Vibration detected!");
  } else {
    // If no vibration is detected, turn off the LED
    digitalWrite(ledPin, LOW);
    Serial.println("No vibration.");
  }

  delay(100);  // Small delay to stabilize readings
}

Troubleshooting and FAQs

Common Issues and Solutions

  1. Sensor Not Responding

    • Cause: Incorrect wiring or insufficient power supply.
    • Solution: Double-check the connections and ensure the power supply is within the specified range (3.3V to 5V).
  2. False Triggers

    • Cause: High sensitivity or environmental noise.
    • Solution: Adjust the sensitivity using the onboard potentiometer and ensure the sensor is mounted securely.
  3. No Output Signal

    • Cause: Faulty sensor or damaged module.
    • Solution: Test the sensor with a multimeter or replace it if necessary.

FAQs

Q: Can the SW-420 detect continuous vibrations?
A: The SW-420 is designed to detect sudden vibrations or movements. For continuous vibration detection, additional signal processing may be required.

Q: Is the SW-420 suitable for outdoor use?
A: The SW-420 is not waterproof or weatherproof. It is recommended to use it in a controlled indoor environment or protect it with a suitable enclosure.

Q: How do I increase the detection range?
A: The detection range can be adjusted by turning the onboard potentiometer clockwise to increase sensitivity.

Q: Can I use the SW-420 with a 3.3V microcontroller?
A: Yes, the SW-420 operates within a voltage range of 3.3V to 5V, making it compatible with 3.3V microcontrollers like the ESP8266 or ESP32.