How to Use KY-008: Examples, Pinouts, and Specs
Introduction
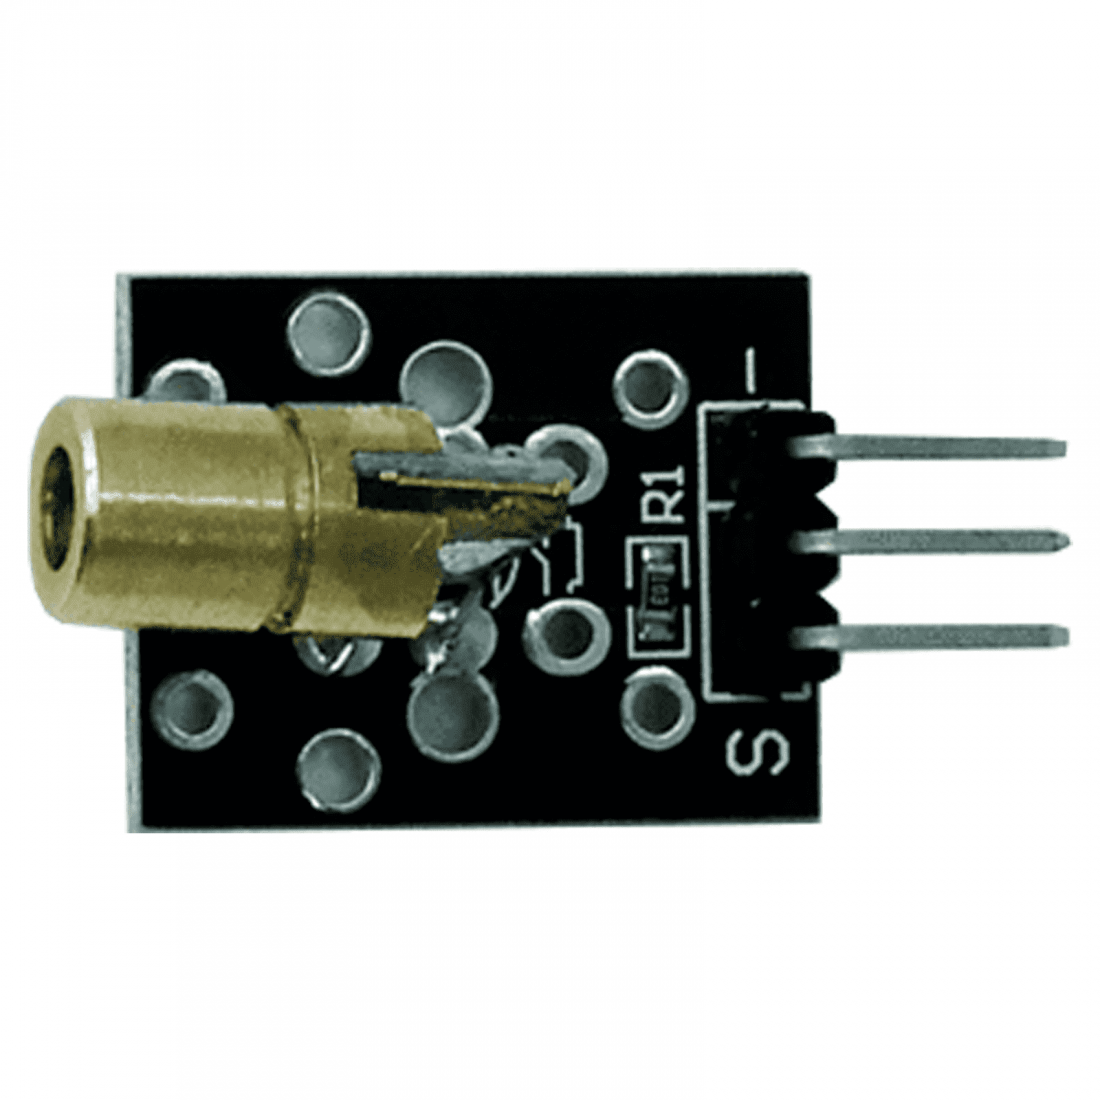
The KY-008 is a laser module that emits a coherent beam of red light, typically operating at a wavelength of 650nm. It is widely used in applications such as laser pointers, optical experiments, DIY electronics projects, and alignment tools. The module is compact, easy to use, and can be powered by a low voltage supply, making it an excellent choice for hobbyists and professionals alike.
Common applications of the KY-008 include:
- Laser pointers for presentations or alignment tasks.
- Optical experiments in educational or research settings.
- DIY electronics projects, such as distance measurement or light-based communication.
- Decorative or artistic laser displays.
Explore Projects Built with KY-008


Explore Projects Built with KY-008
Technical Specifications
The KY-008 laser module is designed for simplicity and versatility. Below are its key technical details:
| Parameter | Value |
|---|---|
| Operating Voltage | 3.0V - 5.0V DC |
| Wavelength | 650nm (red light) |
| Output Power | <5mW |
| Operating Current | <40mA |
| Beam Type | Coherent, focused light beam |
| Dimensions | 18mm x 6mm x 6mm |
Pin Configuration and Descriptions
The KY-008 module has three pins, as described in the table below:
| Pin | Name | Description |
|---|---|---|
| 1 | VCC | Connect to a 3.0V - 5.0V DC power supply. |
| 2 | GND | Ground connection. |
| 3 | S (Signal) | Optional control pin for turning the laser on/off. |
Note: Some KY-008 modules may only have two pins (VCC and GND). In such cases, the laser is always on when powered.
Usage Instructions
How to Use the KY-008 in a Circuit
Powering the Module:
- Connect the
VCCpin to a 3.0V - 5.0V DC power source. - Connect the
GNDpin to the ground of your circuit. - If your module has a
Signalpin, you can use it to control the laser with a microcontroller or switch.
- Connect the
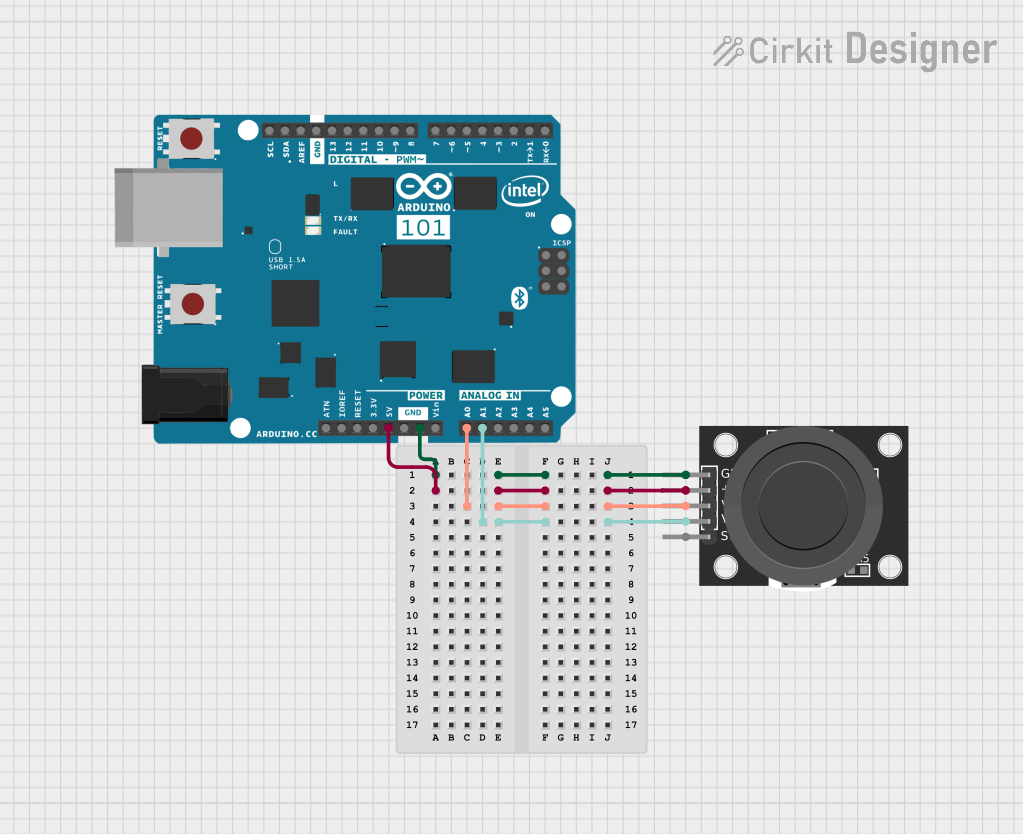
Connecting to an Arduino UNO:
- Connect the
VCCpin of the KY-008 to the 5V pin on the Arduino. - Connect the
GNDpin of the KY-008 to the GND pin on the Arduino. - If using the
Signalpin, connect it to a digital output pin on the Arduino (e.g., pin 7).
- Connect the
Example Arduino Code: Below is an example code snippet to control the KY-008 laser module using an Arduino UNO:
// Define the pin connected to the KY-008 Signal pin
const int laserPin = 7;

void setup() {
  pinMode(laserPin, OUTPUT); // Set the laser pin as an output
}

void loop() {
  digitalWrite(laserPin, HIGH); // Turn the laser on
  delay(1000);                  // Keep it on for 1 second
  digitalWrite(laserPin, LOW);  // Turn the laser off
  delay(1000);                  // Keep it off for 1 second
}
Note: If your KY-008 module does not have a
Signalpin, the laser will turn on as soon as power is applied.
Important Considerations and Best Practices
- Safety First: The KY-008 emits a laser beam that can be harmful to the eyes. Avoid direct eye exposure and do not point the laser at reflective surfaces.
- Power Supply: Ensure the power supply voltage does not exceed 5V to prevent damage to the module.
- Heat Management: Although the KY-008 operates at low power, prolonged use may cause slight heating. Allow the module to cool if used continuously for extended periods.
- Mounting: Use a stable mounting mechanism to ensure the laser beam remains steady and aligned.
Troubleshooting and FAQs
Common Issues and Solutions
The laser does not turn on:
- Verify that the power supply voltage is within the 3.0V - 5.0V range.
- Check all connections to ensure they are secure and correctly wired.
- If using the
Signalpin, ensure the control signal is set to HIGH.
The laser beam is weak or flickering:
- Ensure the power supply can provide sufficient current (at least 40mA).
- Check for loose or corroded connections.
- Test the module with a different power source to rule out power supply issues.
The laser turns on but cannot be controlled via the
Signalpin:- Verify that the
Signalpin is connected to a digital output pin on the microcontroller. - Ensure the microcontroller pin is configured as an output in the code.
- Check the code logic to confirm the
Signalpin is being toggled correctly.
- Verify that the
FAQs
Q: Can I use the KY-008 with a 3.3V microcontroller?
A: Yes, the KY-008 can operate at 3.3V. Ensure the power supply and control signals are within the module's operating range.
Q: Is the KY-008 suitable for long-distance applications?
A: The KY-008 is designed for short to medium distances. Its beam may not remain focused or visible over very long distances.
Q: Can I adjust the focus of the laser beam?
A: No, the KY-008 has a fixed-focus lens and does not support manual adjustment.
Q: Is the KY-008 safe for use in educational projects?
A: Yes, as long as proper safety precautions are followed, such as avoiding direct eye exposure and supervising younger users.