How to Use Billa: Examples, Pinouts, and Specs

Introduction
The Billa 4 Pin Connector is a versatile electronic component designed for reliable and efficient electrical connections in various circuits. Manufactured by Billa, this connector is widely used in applications requiring secure and compact connections between multiple wires or devices. Its robust design ensures durability and consistent performance, making it suitable for both prototyping and production environments.
Explore Projects Built with Billa
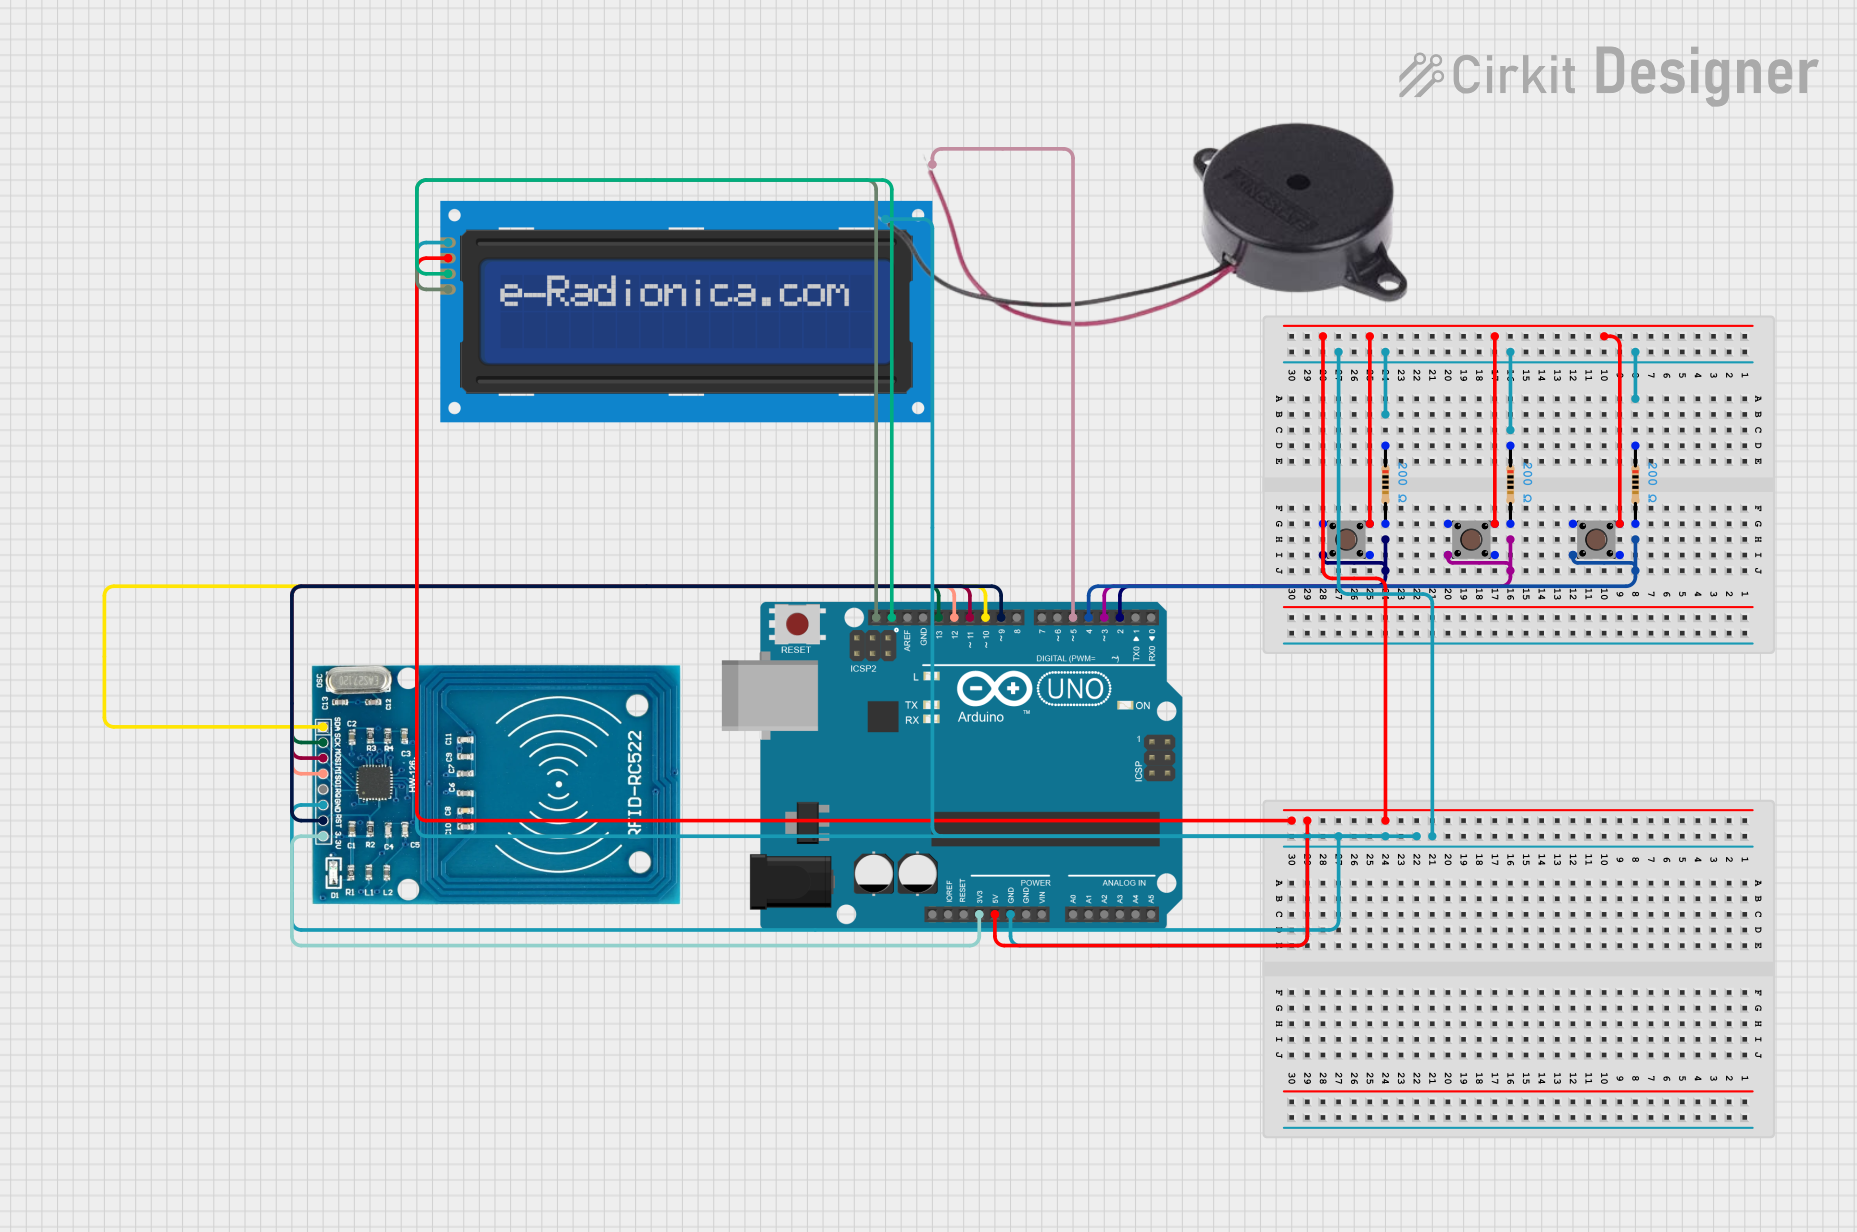
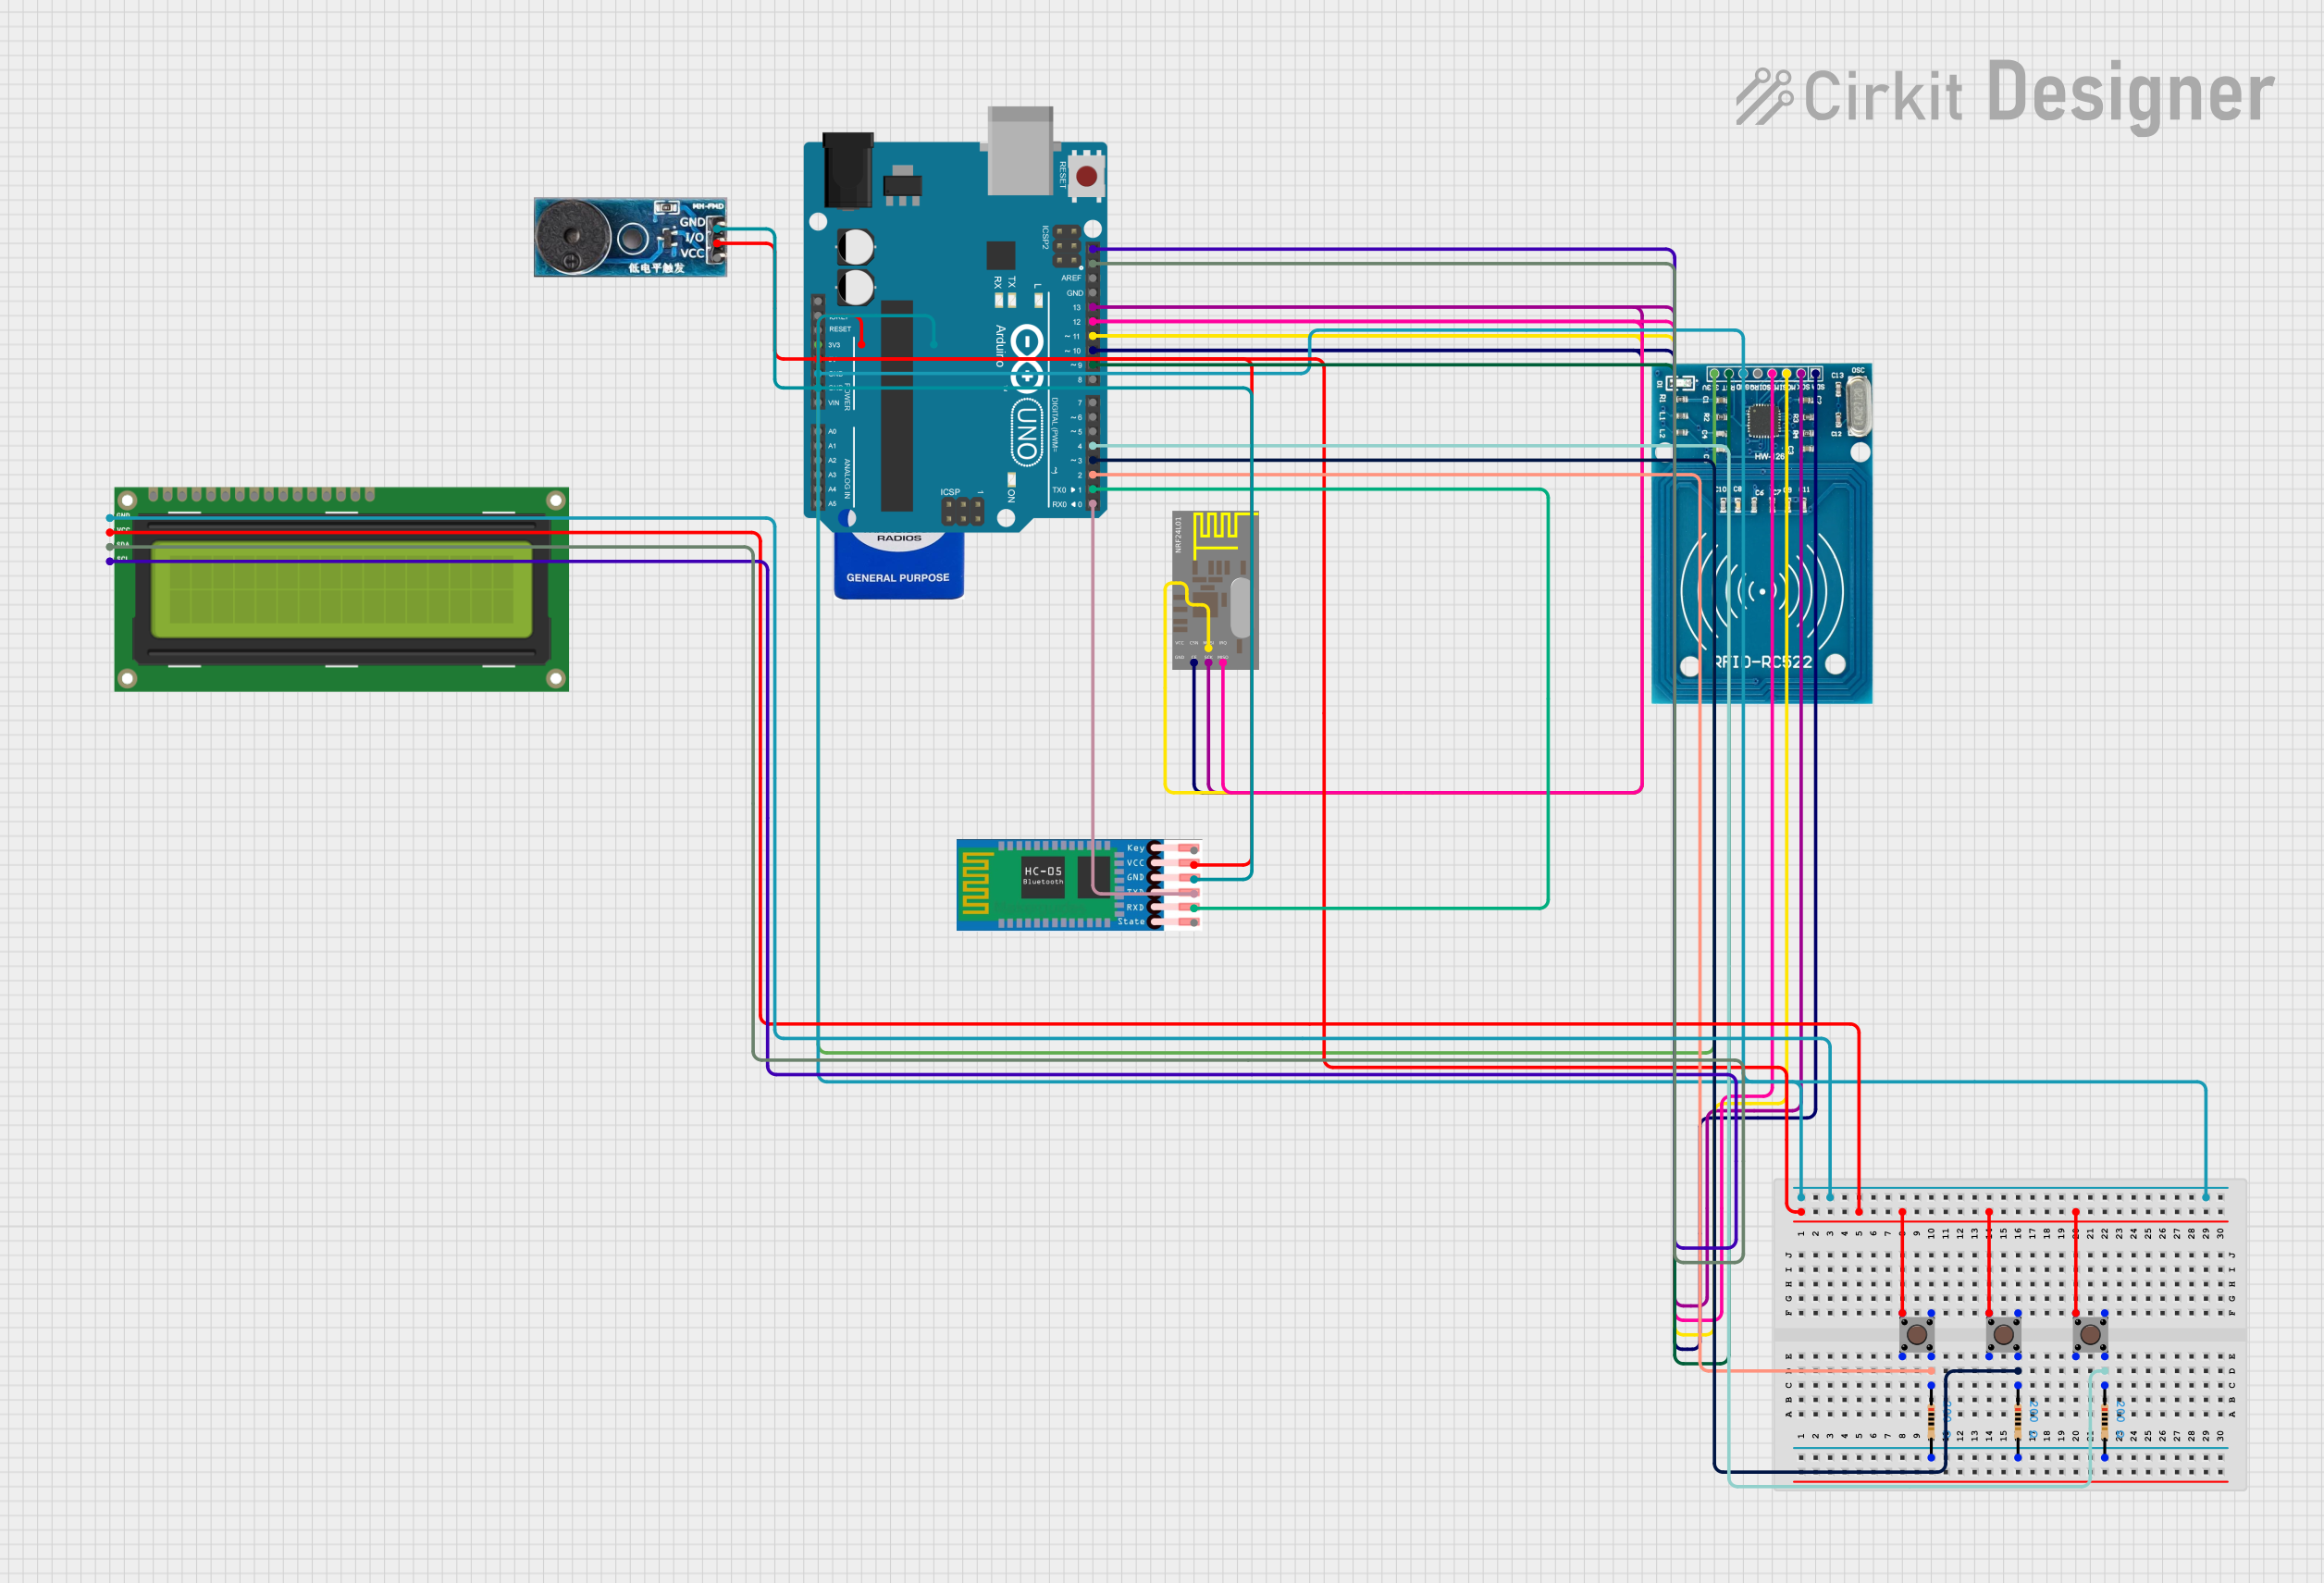
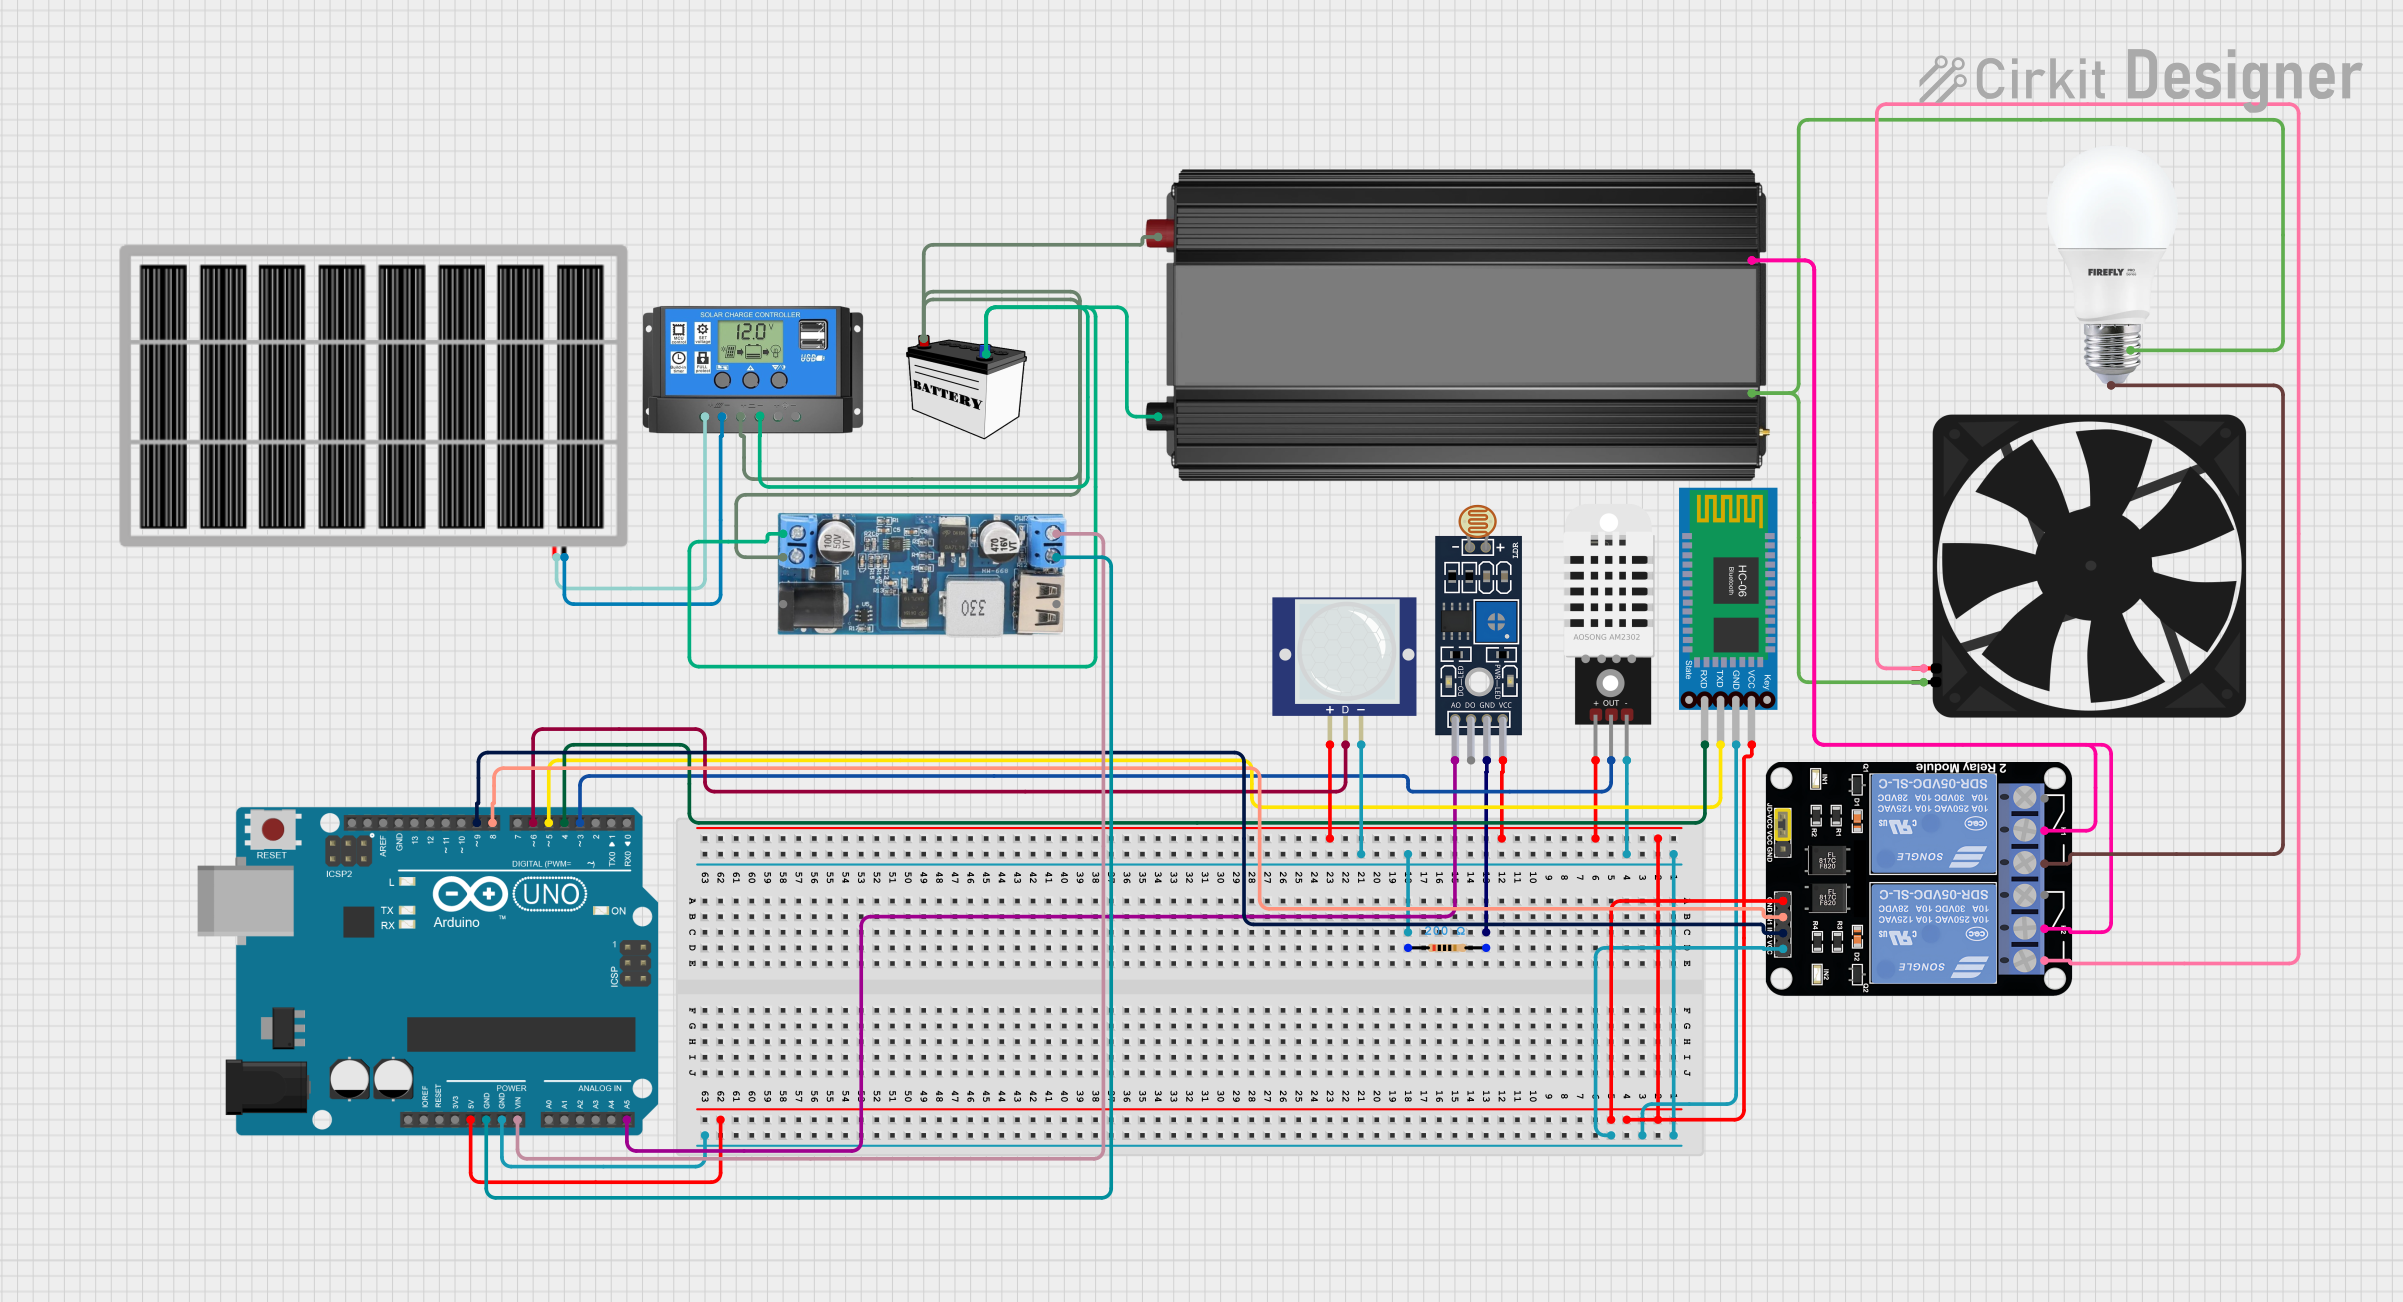

Explore Projects Built with Billa
Common Applications and Use Cases
- Microcontroller Projects: Connecting sensors, modules, or peripherals to development boards like Arduino or Raspberry Pi.
- Power Distribution: Transmitting power between different parts of a circuit.
- Signal Transmission: Carrying data signals in communication systems.
- Consumer Electronics: Used in devices such as home appliances, audio systems, and more.
- Industrial Automation: Connecting control systems and machinery.
Technical Specifications
The following table outlines the key technical details of the Billa 4 Pin Connector:
| Parameter | Specification |
|---|---|
| Manufacturer | Billa |
| Part ID | 4 Pin Connector |
| Number of Pins | 4 |
| Rated Voltage | 250V AC/DC |
| Rated Current | 3A per pin |
| Contact Resistance | ≤ 20 mΩ |
| Insulation Resistance | ≥ 1000 MΩ |
| Operating Temperature | -40°C to +85°C |
| Connector Type | Male/Female Pair |
| Mounting Style | Through-hole or PCB-mounted |
| Material | High-quality thermoplastic and metal |
Pin Configuration and Descriptions
The Billa 4 Pin Connector features four pins, each with a specific purpose. The pinout is as follows:
| Pin Number | Function | Description |
|---|---|---|
| 1 | VCC (Power) | Supplies power to the connected device or circuit. |
| 2 | GND (Ground) | Provides the ground connection. |
| 3 | Signal/Data Line 1 | Transmits data or signals. |
| 4 | Signal/Data Line 2 | Transmits data or signals. |
Usage Instructions
How to Use the Billa 4 Pin Connector in a Circuit
- Identify the Pins: Refer to the pin configuration table to understand the purpose of each pin.
- Soldering: If using the through-hole version, solder the connector onto the PCB. Ensure proper alignment and secure solder joints.
- Wiring: Connect wires to the corresponding pins using crimp terminals or soldering, depending on the connector type.
- Connection: Plug the male and female connectors together to establish a secure connection.
- Testing: Verify the connections using a multimeter to ensure proper continuity and functionality.
Important Considerations and Best Practices
- Current and Voltage Ratings: Do not exceed the rated voltage (250V) or current (3A per pin) to avoid damage or overheating.
- Secure Connections: Ensure that the connectors are firmly mated to prevent accidental disconnections.
- Wire Gauge: Use wires of appropriate gauge to handle the current without excessive resistance or heating.
- Environmental Conditions: Avoid exposing the connector to extreme temperatures or moisture beyond its specified operating range.
Example: Connecting to an Arduino UNO
The Billa 4 Pin Connector can be used to connect sensors or modules to an Arduino UNO. Below is an example of connecting a sensor with a 4-pin interface:
Circuit Diagram
- Pin 1 (VCC): Connect to the Arduino's 5V pin.
- Pin 2 (GND): Connect to the Arduino's GND pin.
- Pin 3 (Signal/Data Line 1): Connect to a digital input pin (e.g., D2).
- Pin 4 (Signal/Data Line 2): Connect to another digital input pin (e.g., D3).
Arduino Code Example
// Example code for using a sensor with the Billa 4 Pin Connector
const int signalPin1 = 2; // Pin connected to Signal/Data Line 1
const int signalPin2 = 3; // Pin connected to Signal/Data Line 2

void setup() {
  pinMode(signalPin1, INPUT); // Set Signal/Data Line 1 as input
  pinMode(signalPin2, INPUT); // Set Signal/Data Line 2 as input
  Serial.begin(9600); // Initialize serial communication
}

void loop() {
  int value1 = digitalRead(signalPin1); // Read data from Signal/Data Line 1
  int value2 = digitalRead(signalPin2); // Read data from Signal/Data Line 2

  // Print the values to the Serial Monitor
  Serial.print("Signal 1: ");
  Serial.println(value1);
  Serial.print("Signal 2: ");
  Serial.println(value2);

  delay(500); // Wait for 500ms before the next reading
}
Troubleshooting and FAQs
Common Issues and Solutions
Loose Connections:
- Issue: The connector is not securely mated, causing intermittent signals.
- Solution: Ensure the male and female connectors are fully inserted and locked.
Overheating:
- Issue: The connector becomes hot during operation.
- Solution: Check if the current exceeds the 3A per pin rating. Use thicker wires if necessary.
Signal Interference:
- Issue: Data signals are noisy or unreliable.
- Solution: Use shielded cables for signal lines and ensure proper grounding.
Corrosion:
- Issue: Pins show signs of corrosion, leading to poor conductivity.
- Solution: Clean the pins with isopropyl alcohol and ensure the connector is used in a dry environment.
FAQs
Q1: Can the Billa 4 Pin Connector handle AC signals?
A1: Yes, it can handle both AC and DC signals, provided the voltage and current ratings are not exceeded.
Q2: Is the connector waterproof?
A2: No, the standard version is not waterproof. For outdoor or moisture-prone environments, use a waterproof housing or connector variant.
Q3: Can I use this connector for high-frequency signals?
A3: While it can handle moderate-frequency signals, it is not specifically designed for high-frequency RF applications.
Q4: What tools are recommended for crimping the wires?
A4: Use a high-quality crimping tool compatible with the connector's terminals for secure and reliable connections.