Cirkit Designer Logo
Cirkit Designer
Your all-in-one circuit design IDE
Home / 
Component Documentation

How to Use Gravity: 数字红色LED: Examples, Pinouts, and Specs

Image of Gravity: 数字红色LED
Cirkit Designer LogoDesign with Gravity: 数字红色LED in Cirkit Designer

Introduction

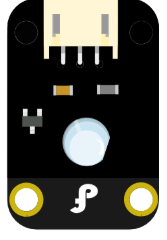
The Gravity: 数字红色LED is a digital red LED display designed to show numerical values. It is widely used in electronic projects for providing a clear and bright visual output of data, such as sensor readings, time, or other numerical information. This component is part of the Gravity series, known for its ease of use and compatibility with microcontrollers like Arduino.

Explore Projects Built with Gravity: 数字红色LED

Use Cirkit Designer to design, explore, and prototype these projects online. Some projects support real-time simulation. Click "Open Project" to start designing instantly!
ESP32-Based Smart Weighing and Distance Measurement System with LED Indicators
Image of Load Cell Ultrasonic Sensor: A project utilizing Gravity: 数字红色LED in a practical application
This circuit is designed to measure weight using a load cell and an HX711 bridge sensor interface, and to detect distance using an HC-SR04 ultrasonic sensor. The ESP32 microcontroller processes the data from these sensors and controls three LEDs (green, orange, and red) to indicate different statuses.
Cirkit Designer LogoOpen Project in Cirkit Designer
Battery-Powered Wi-Fi Controlled Sensor and Display System with ESP8266 and MPU-6050
Image of Spider Hand Controller: A project utilizing Gravity: 数字红色LED in a practical application
This circuit is a sensor and display system powered by a 3.7V LiPo battery with a boost converter. It uses an ESP8266 NodeMCU to read data from an MPU-6050 accelerometer/gyroscope and display information on a 0.96" OLED screen, while also controlling an RGB LED.
Cirkit Designer LogoOpen Project in Cirkit Designer
Arduino Mega 2560-Based Smart Weighing System with Bluetooth Connectivity
Image of SMART BRIDGE CIRCUIT DIAGRAM: A project utilizing Gravity: 数字红色LED in a practical application
This circuit is a weighing system that uses two load cells connected to HX711 modules for weight measurement, interfaced with an Arduino Mega 2560. The system includes an LCD for displaying weight, a Bluetooth module for wireless communication, and LEDs for status indication, with a micro servo for additional mechanical control.
Cirkit Designer LogoOpen Project in Cirkit Designer
Arduino Mega ADK and HX711 Weighing Sensor Rain Detection System with LED Indicator
Image of raindrop: A project utilizing Gravity: 数字红色LED in a practical application
This circuit uses an Arduino Mega ADK to interface with an HX711 weighing sensor module to measure weight. When the weight exceeds a predefined threshold, the Arduino lights up a red LED for 60 seconds. The system is designed to detect and indicate the presence of a raindrop or similar event.
Cirkit Designer LogoOpen Project in Cirkit Designer

Explore Projects Built with Gravity: 数字红色LED

Use Cirkit Designer to design, explore, and prototype these projects online. Some projects support real-time simulation. Click "Open Project" to start designing instantly!
Image of Load Cell Ultrasonic Sensor: A project utilizing Gravity: 数字红色LED in a practical application
ESP32-Based Smart Weighing and Distance Measurement System with LED Indicators
This circuit is designed to measure weight using a load cell and an HX711 bridge sensor interface, and to detect distance using an HC-SR04 ultrasonic sensor. The ESP32 microcontroller processes the data from these sensors and controls three LEDs (green, orange, and red) to indicate different statuses.
Cirkit Designer LogoOpen Project in Cirkit Designer
Image of Spider Hand Controller: A project utilizing Gravity: 数字红色LED in a practical application
Battery-Powered Wi-Fi Controlled Sensor and Display System with ESP8266 and MPU-6050
This circuit is a sensor and display system powered by a 3.7V LiPo battery with a boost converter. It uses an ESP8266 NodeMCU to read data from an MPU-6050 accelerometer/gyroscope and display information on a 0.96" OLED screen, while also controlling an RGB LED.
Cirkit Designer LogoOpen Project in Cirkit Designer
Image of SMART BRIDGE CIRCUIT DIAGRAM: A project utilizing Gravity: 数字红色LED in a practical application
Arduino Mega 2560-Based Smart Weighing System with Bluetooth Connectivity
This circuit is a weighing system that uses two load cells connected to HX711 modules for weight measurement, interfaced with an Arduino Mega 2560. The system includes an LCD for displaying weight, a Bluetooth module for wireless communication, and LEDs for status indication, with a micro servo for additional mechanical control.
Cirkit Designer LogoOpen Project in Cirkit Designer
Image of raindrop: A project utilizing Gravity: 数字红色LED in a practical application
Arduino Mega ADK and HX711 Weighing Sensor Rain Detection System with LED Indicator
This circuit uses an Arduino Mega ADK to interface with an HX711 weighing sensor module to measure weight. When the weight exceeds a predefined threshold, the Arduino lights up a red LED for 60 seconds. The system is designed to detect and indicate the presence of a raindrop or similar event.
Cirkit Designer LogoOpen Project in Cirkit Designer

Common Applications

  • Displaying sensor data (e.g., temperature, humidity, distance)
  • Digital clocks and timers
  • Counters and scoreboards
  • Visual feedback in DIY electronics projects

Technical Specifications

The Gravity: 数字红色LED is a 4-digit, 7-segment display module with integrated driver circuitry, making it easy to interface with microcontrollers.

Key Specifications

Parameter Value
Operating Voltage 3.3V - 5V
Operating Current ≤ 20mA per segment
Display Type 4-digit, 7-segment LED
Color Red
Communication Protocol TM1637 (2-wire interface)
Dimensions 42mm x 24mm x 12mm
Operating Temperature -40°C to 85°C

Pin Configuration

The module has a 4-pin interface for easy connection. Below is the pinout description:

Pin Name Description Notes
VCC Power Supply (3.3V - 5V) Connect to the microcontroller's power pin
GND Ground Connect to the microcontroller's ground pin
DIO Data Input/Output Used for data communication
CLK Clock Signal Used for timing synchronization

Usage Instructions

Connecting the Gravity: 数字红色LED to an Arduino UNO

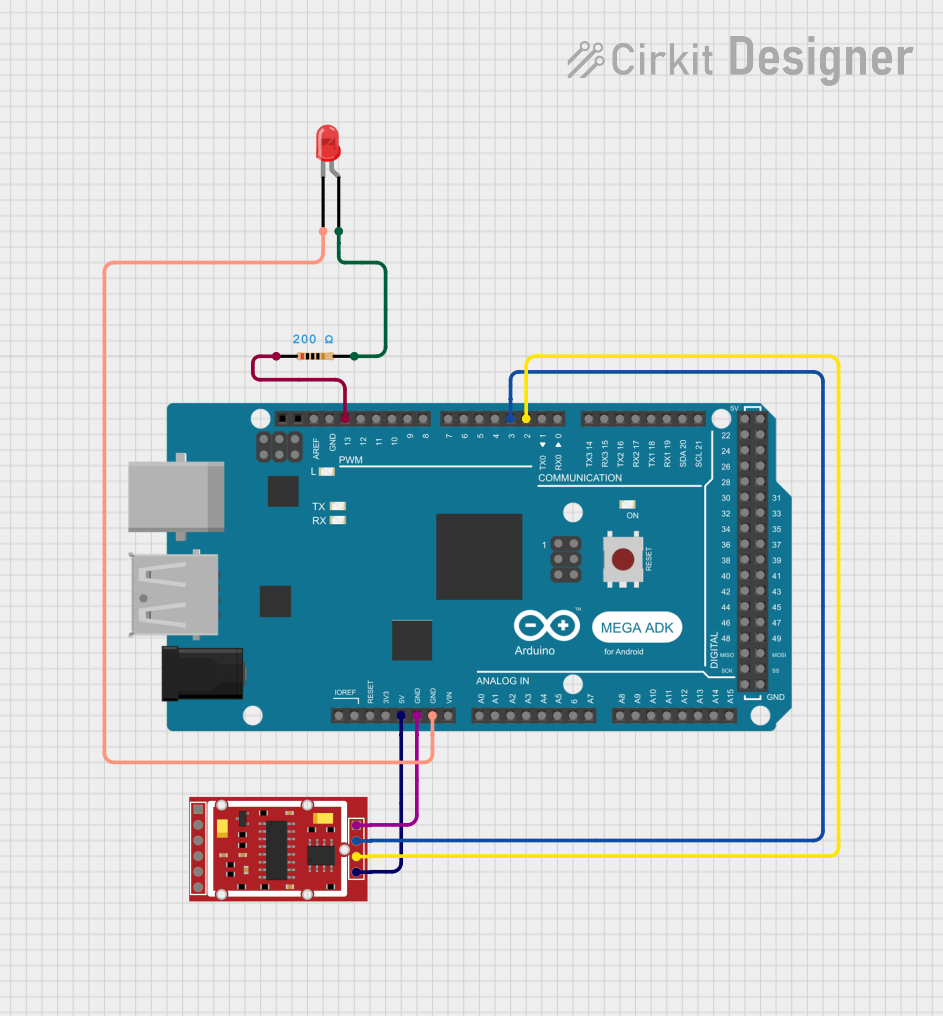
To use the Gravity: 数字红色LED with an Arduino UNO, follow these steps:

  1. Connect the VCC pin of the module to the 5V pin on the Arduino.
  2. Connect the GND pin of the module to the GND pin on the Arduino.
  3. Connect the DIO pin of the module to a digital pin on the Arduino (e.g., D2).
  4. Connect the CLK pin of the module to another digital pin on the Arduino (e.g., D3).

Example Code

Below is an example Arduino sketch to display numbers on the Gravity: 数字红色LED using the TM1637 library.

#include <TM1637Display.h>

// Define the connections to the module
#define CLK 3  // Clock pin connected to D3
#define DIO 2  // Data pin connected to D2

// Create an instance of the TM1637Display class
TM1637Display display(CLK, DIO);

void setup() {
  // Initialize the display
  display.setBrightness(7); // Set brightness (0-7)
}

void loop() {
  // Display a number (e.g., 1234)
  display.showNumberDec(1234);

  // Wait for 1 second
  delay(1000);

  // Display another number (e.g., 5678)
  display.showNumberDec(5678);

  // Wait for 1 second
  delay(1000);
}

Important Considerations

  • Power Supply: Ensure the module is powered within the specified voltage range (3.3V - 5V).
  • Current Limitation: Avoid exceeding the current rating to prevent damage to the LEDs.
  • Library Dependency: The TM1637 library is required for Arduino. Install it via the Arduino Library Manager.

Troubleshooting and FAQs

Common Issues

  1. No Display Output

    • Cause: Incorrect wiring or loose connections.
    • Solution: Double-check the connections between the module and the microcontroller.
  2. Flickering or Dim Display

    • Cause: Insufficient power supply or poor connections.
    • Solution: Ensure a stable power source and secure connections.
  3. Incorrect Numbers Displayed

    • Cause: Incorrect data sent to the module.
    • Solution: Verify the code logic and ensure the TM1637 library is used correctly.
  4. Module Not Responding

    • Cause: Missing or outdated library.
    • Solution: Install or update the TM1637 library in the Arduino IDE.

FAQs

Q: Can I use this module with a 3.3V microcontroller?
A: Yes, the module supports both 3.3V and 5V logic levels.

Q: How do I adjust the brightness of the display?
A: Use the setBrightness() function in the TM1637 library to set the brightness level (0-7).

Q: Can I display letters or symbols?
A: The module primarily supports numbers, but some letters and symbols can be displayed by customizing the segment data.

Q: Is it possible to daisy-chain multiple displays?
A: No, the TM1637 protocol does not support daisy-chaining multiple modules. Each display requires its own set of pins.

By following this documentation, you can effectively integrate the Gravity: 数字红色LED into your projects for clear and reliable numerical displays.