How to Use MQ135: Examples, Pinouts, and Specs
Introduction
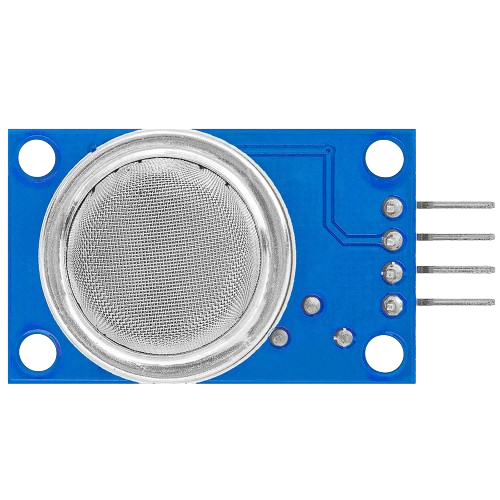
The MQ135 is a versatile gas sensor designed for detecting a wide range of gases including ammonia (NH3), nitrogen oxides (NOx), alcohols, aromatic compounds, sulfide, smoke, and carbon dioxide (CO2). It is commonly used in air quality monitoring equipment for both indoor and outdoor environments, as well as in systems for detecting hazardous gases for safety and health applications.
Explore Projects Built with MQ135
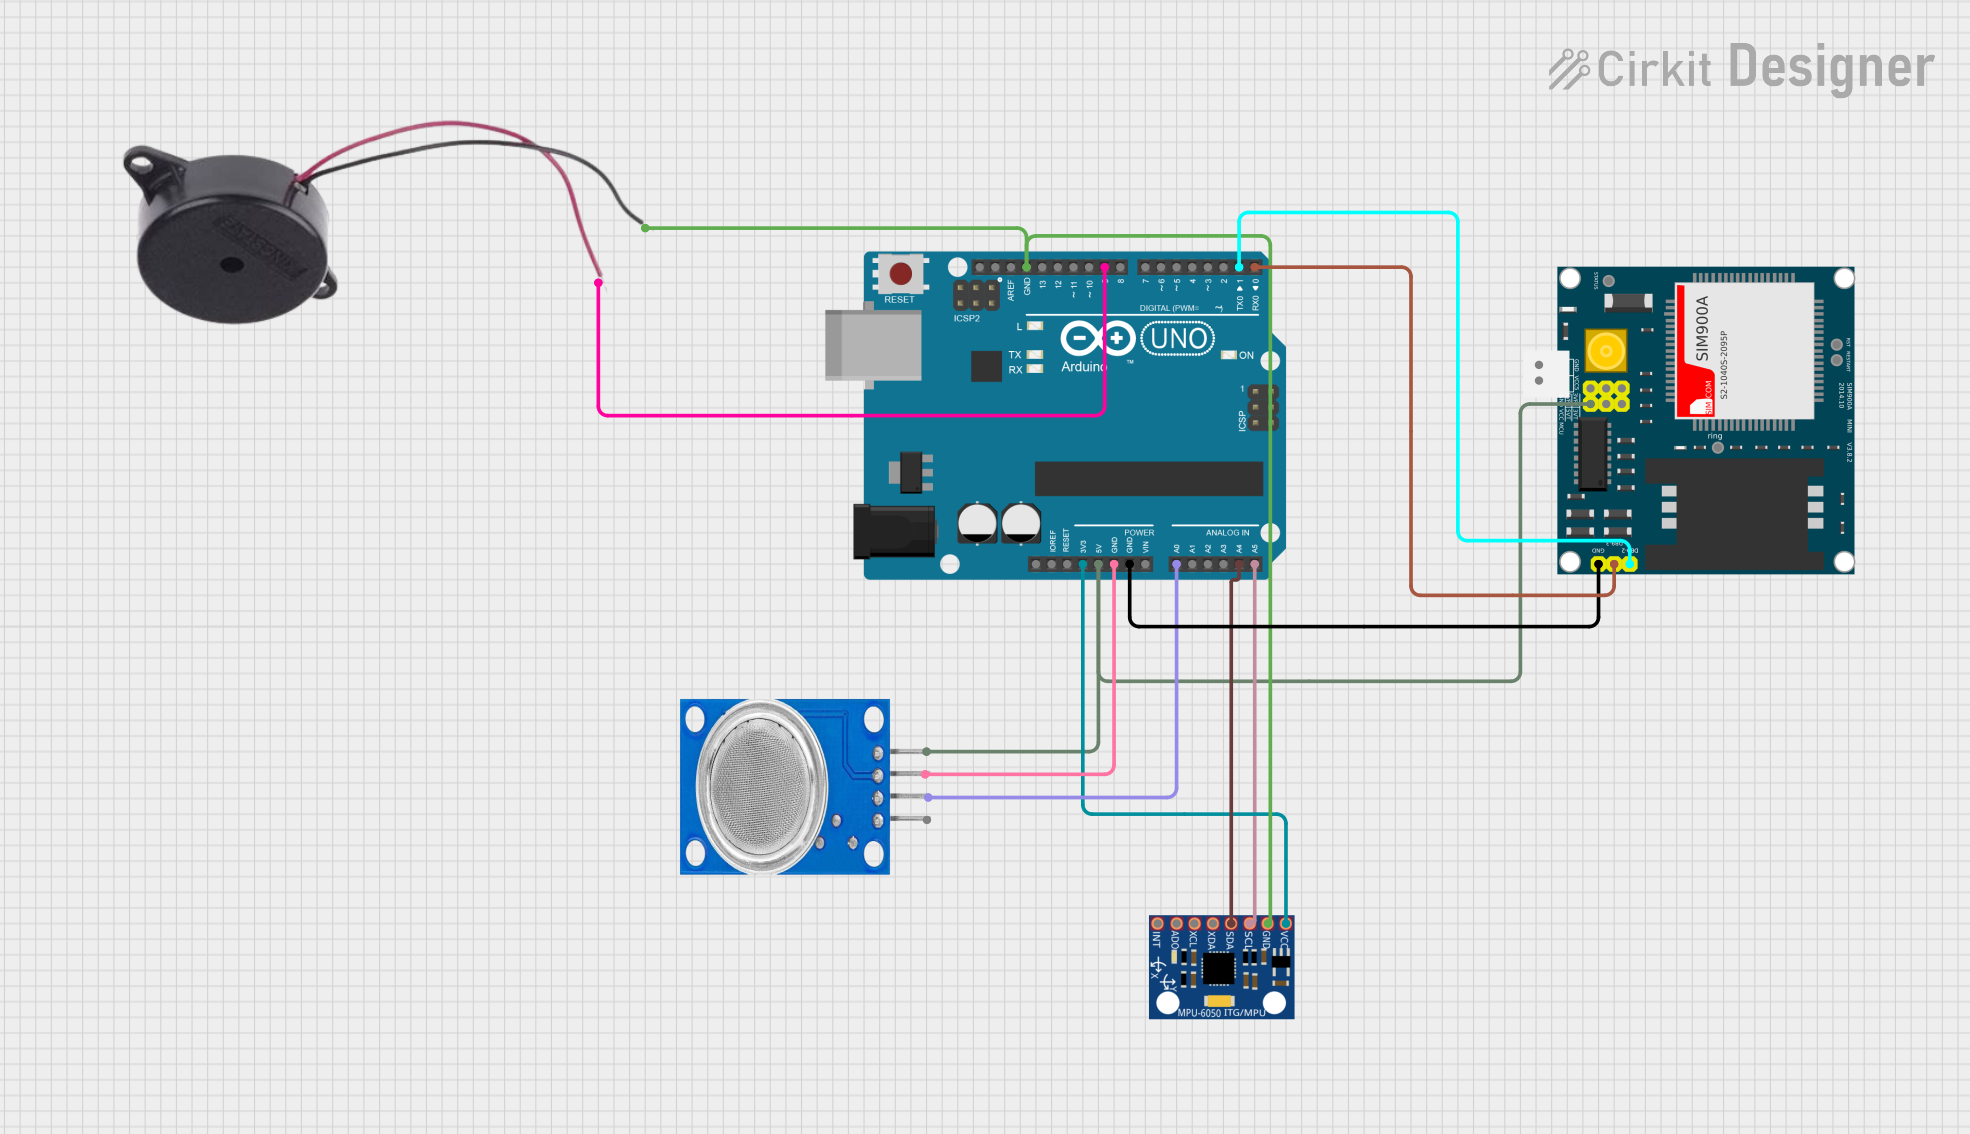
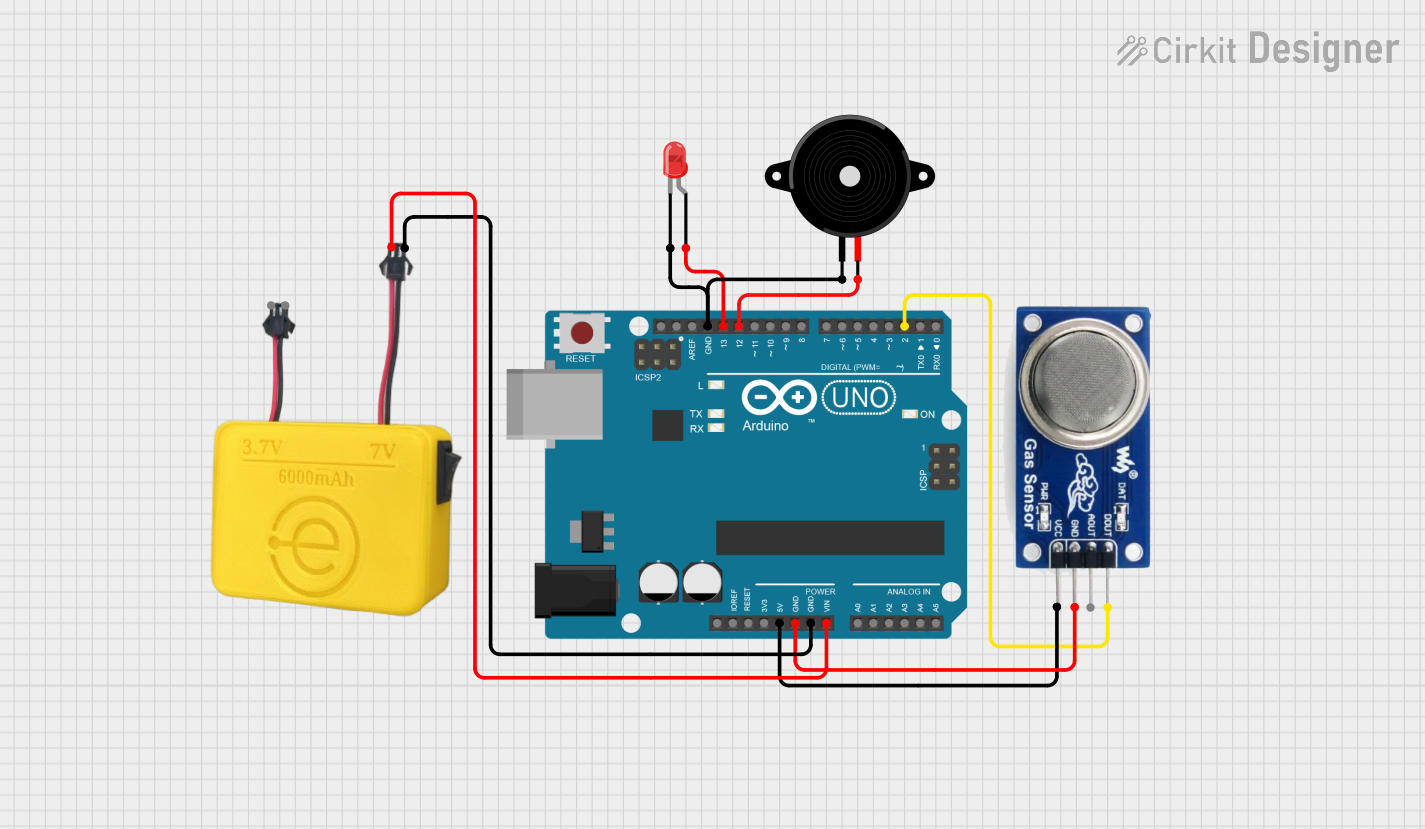
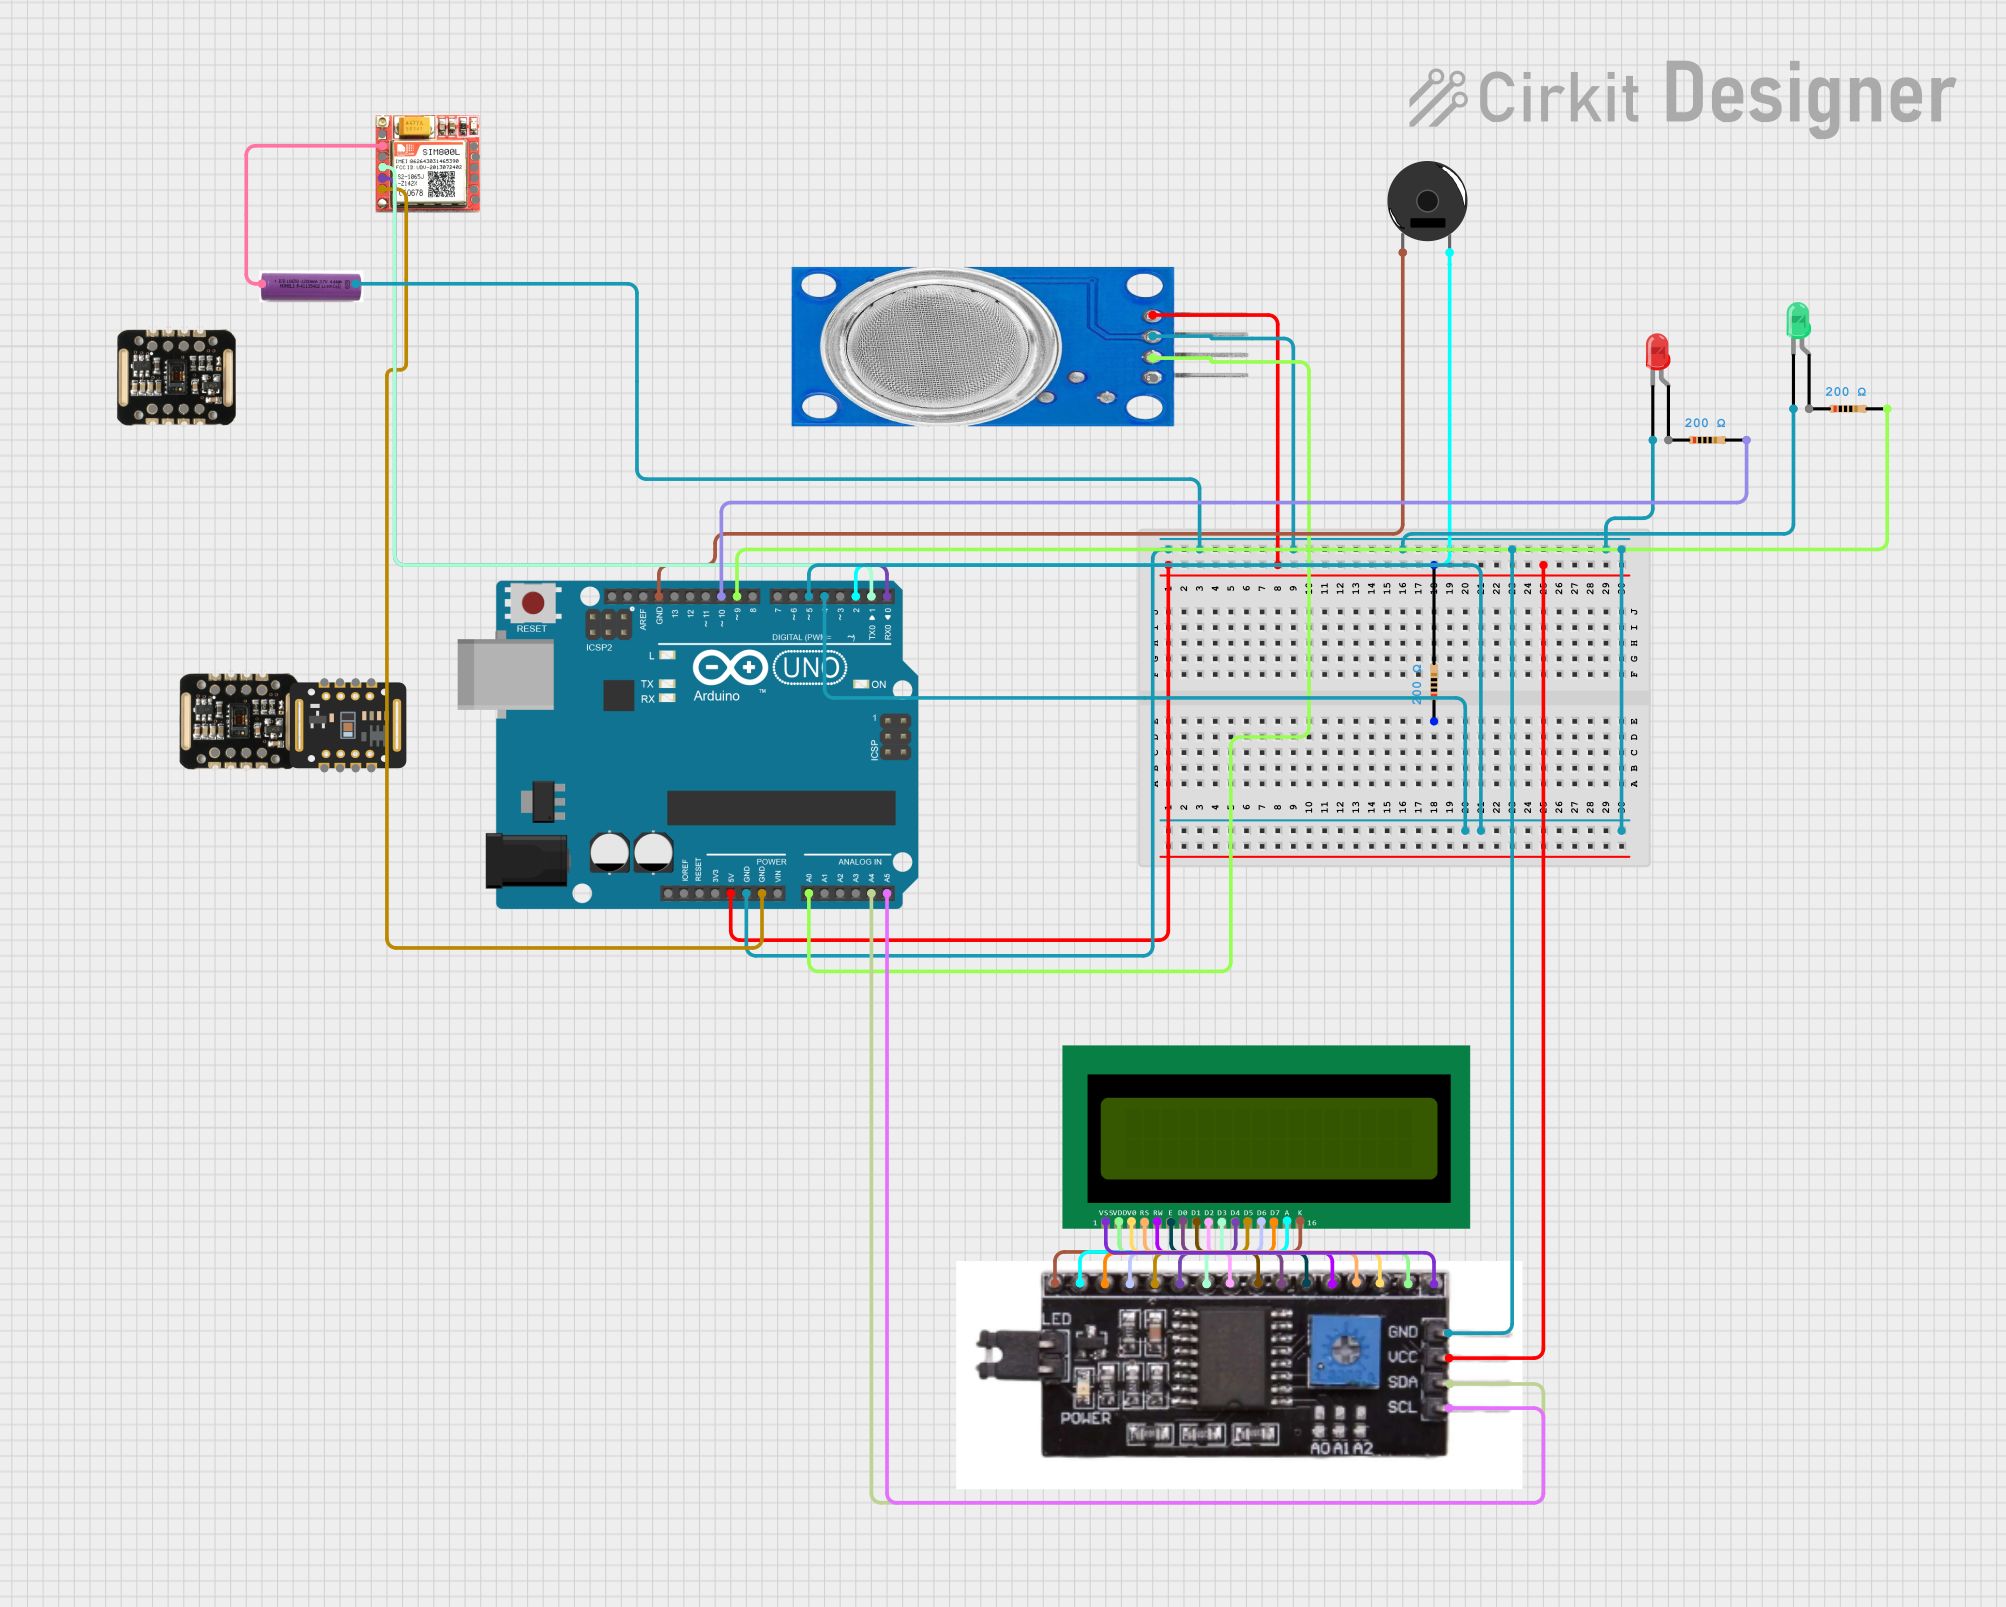
Explore Projects Built with MQ135
Technical Specifications
Key Technical Details
- Detection Gas: Ammonia, Nitrogen oxides, Alcohols, Aromatic compounds, Sulfide, Smoke, CO2
- Concentration Range: 10 to 1000 ppm (parts per million) for various gases
- Preheat Duration: 20 seconds
- Supply Voltage: 5V ± 0.1
- Heater Voltage: 5V (AC or DC)
- Load Resistance: Adjustable
- Heater Resistance: 33Ω ± 5%
- Heater Power Consumption: Approx. 800mW
- Operating Temperature: -20°C to 50°C
Pin Configuration and Descriptions
| Pin Number | Pin Name | Description |
|---|---|---|
| 1 | VCC | Power supply (5V) |
| 2 | GND | Ground |
| 3 | DO | Digital output (TTL) |
| 4 | AO | Analog output (Varies with gas concentration) |
Usage Instructions
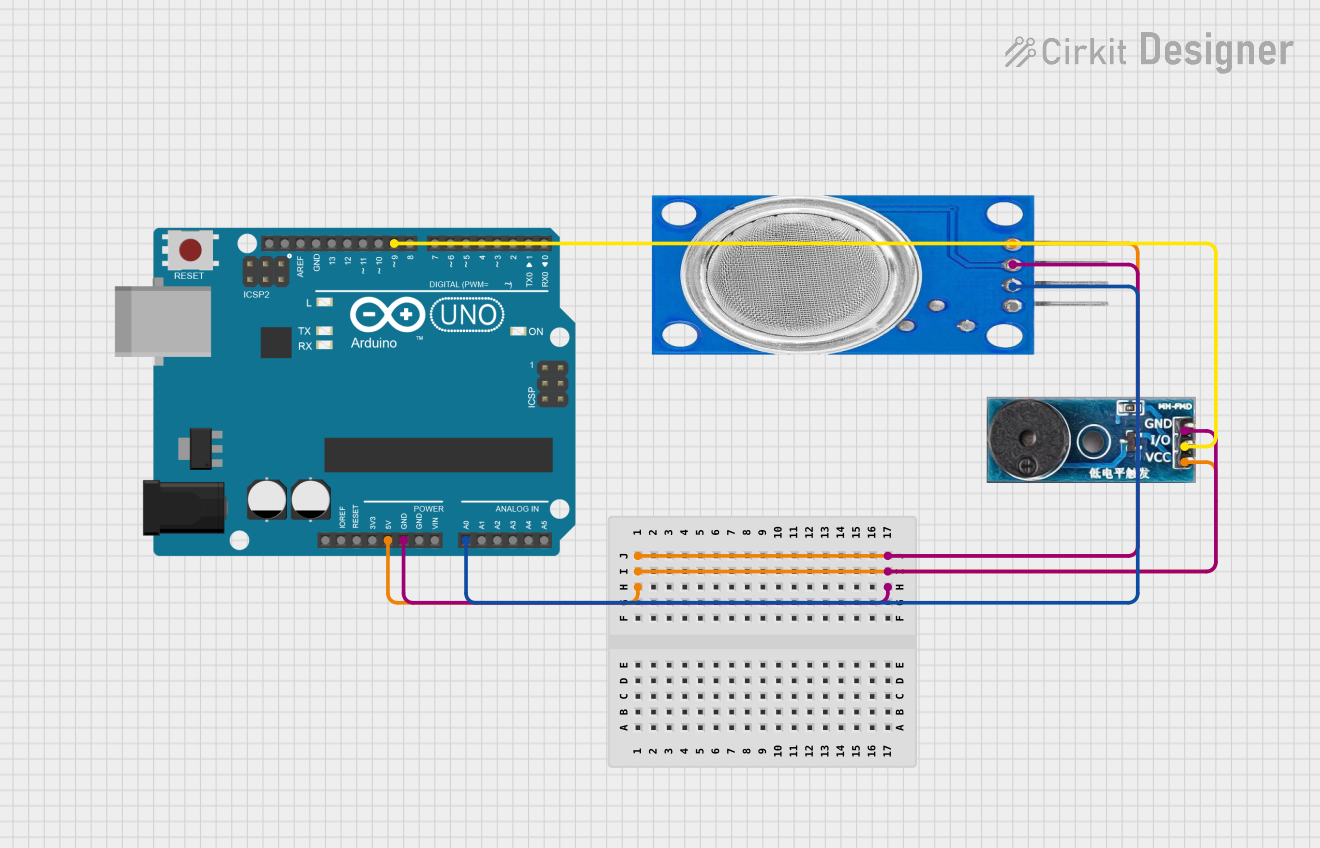
Integration with a Circuit
- Connect the VCC pin to a 5V power supply.
- Connect the GND pin to the ground of the power supply.
- The AO pin provides an analog voltage output that is proportional to the concentration of gases. Connect this to an analog input on your microcontroller.
- The DO pin provides a digital output which goes high or low based on a threshold value. This can be connected to a digital input on your microcontroller.
Important Considerations and Best Practices
- Ensure that the sensor is preheated for at least 20 seconds before taking measurements.
- Calibrate the sensor for accurate readings. This typically involves adjusting the load resistance to obtain a particular output voltage at a known gas concentration.
- Avoid using the sensor in environments with high humidity as it may affect the readings.
- The sensor's sensitivity changes with temperature, so it should be used within its specified operating temperature range.
Example Code for Arduino UNO
// MQ135 Gas Sensor Example Code
#include <MQ135.h>

MQ135 gasSensor = MQ135(A0); // Assign the analog pin A0 to MQ135

void setup() {
  Serial.begin(9600); // Start serial communication at 9600 baud rate
}

void loop() {
  float ppm = gasSensor.getPPM(); // Get the concentration of gas in ppm
  Serial.print("Gas concentration: ");
  Serial.print(ppm);
  Serial.println(" ppm");
  delay(1000); // Wait for a second before taking the next reading
}
Troubleshooting and FAQs
Common Issues
- Inaccurate Readings: If the sensor is giving inaccurate readings, ensure that it has been properly calibrated and that it has been preheated for the recommended time.
- No Output: Check the power supply connections and ensure that the sensor is receiving 5V.
- Sensor Not Responding: Ensure that the sensor is operating within the recommended temperature range and that it has not been exposed to contaminants that could damage the sensor.
Solutions and Tips for Troubleshooting
- Calibration: Perform calibration in clean air or a known concentration of gas to set a baseline for accurate readings.
- Preheating: Always allow the sensor to preheat before taking measurements to ensure the readings stabilize.
- Environmental Conditions: Use the sensor in an environment that is free from extreme humidity and temperature variations.
FAQs
Q: How long does the MQ135 sensor last? A: The lifespan of the MQ135 sensor can vary depending on usage and environmental conditions, but it typically lasts for about 2 years with proper calibration and maintenance.
Q: Can the MQ135 sensor detect carbon monoxide (CO)? A: The MQ135 is not specifically designed for CO detection. For accurate carbon monoxide measurements, a dedicated CO sensor is recommended.
Q: Is the MQ135 sensor suitable for outdoor use? A: Yes, the MQ135 can be used outdoors, but it should be protected from water and extreme environmental conditions to ensure accurate readings.