How to Use uno_shield_L298N: Examples, Pinouts, and Specs
Introduction
The L298N motor driver shield, manufactured by Arduino, is a versatile and robust motor driver designed to interface seamlessly with Arduino boards, such as the Arduino UNO. This shield enables users to control DC motors and stepper motors with ease, making it an essential component for robotics, automation, and motorized projects. It supports dual-channel motor control, allowing simultaneous operation of two motors with independent speed and direction control.
Explore Projects Built with uno_shield_L298N
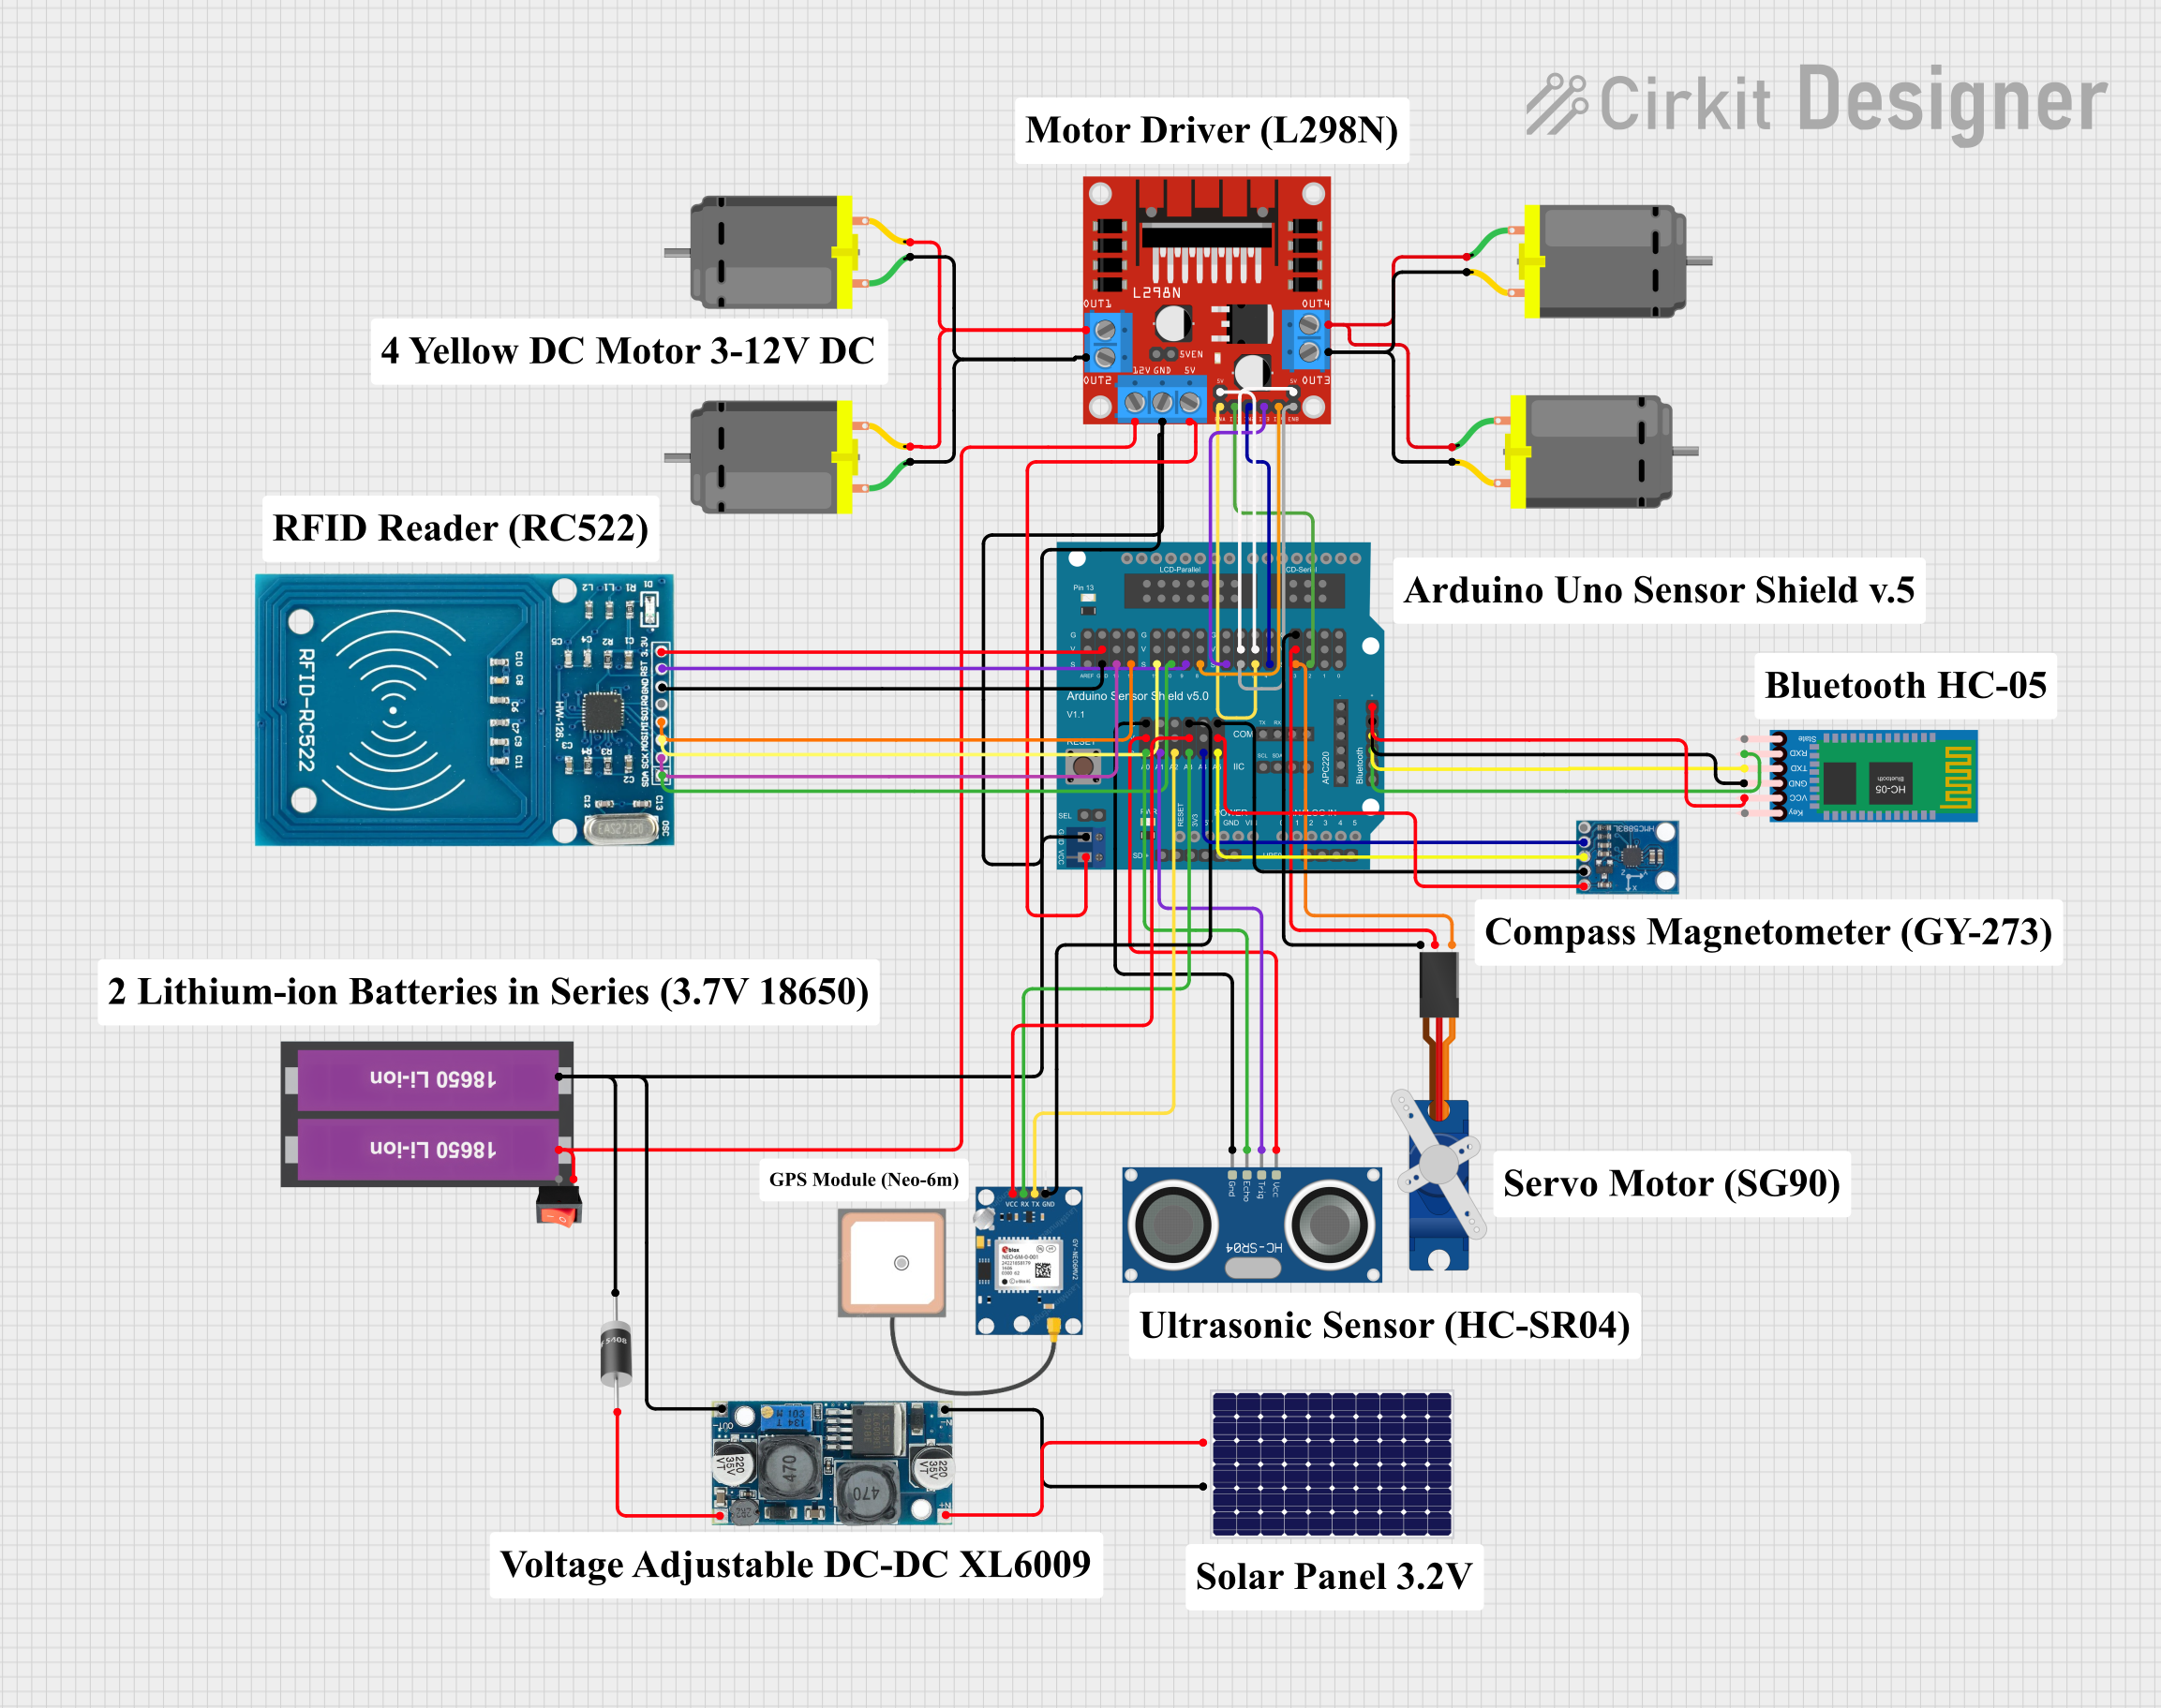
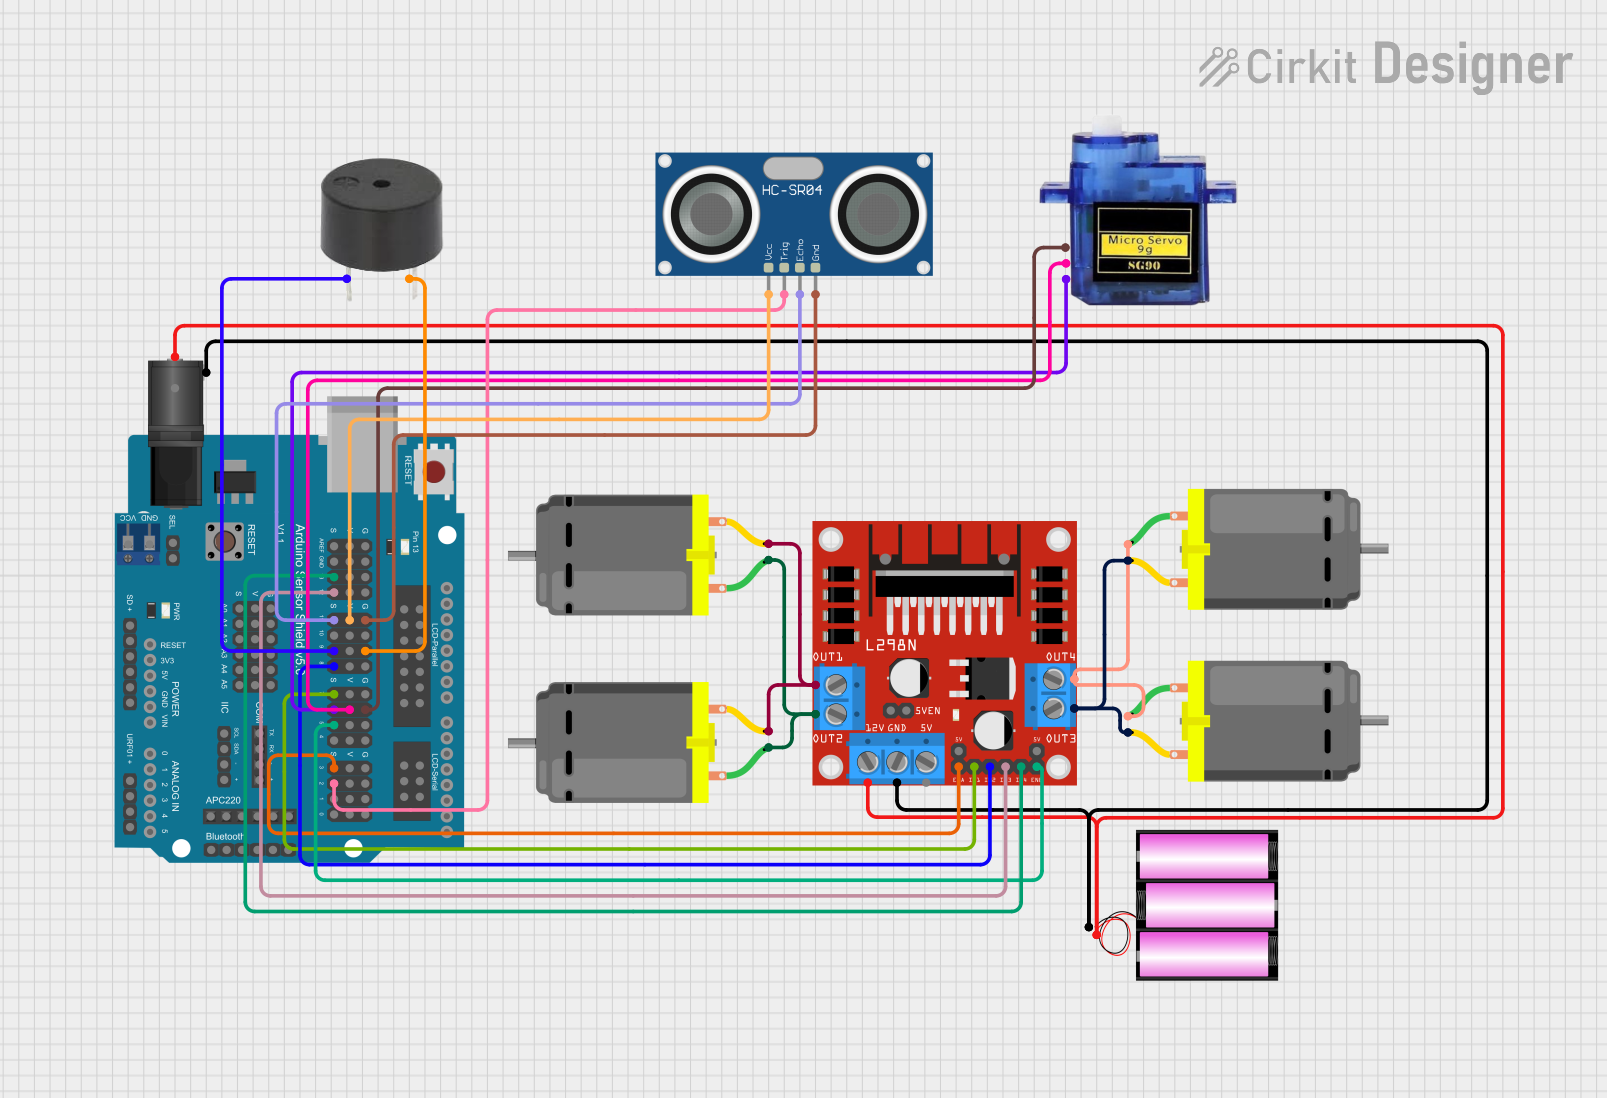

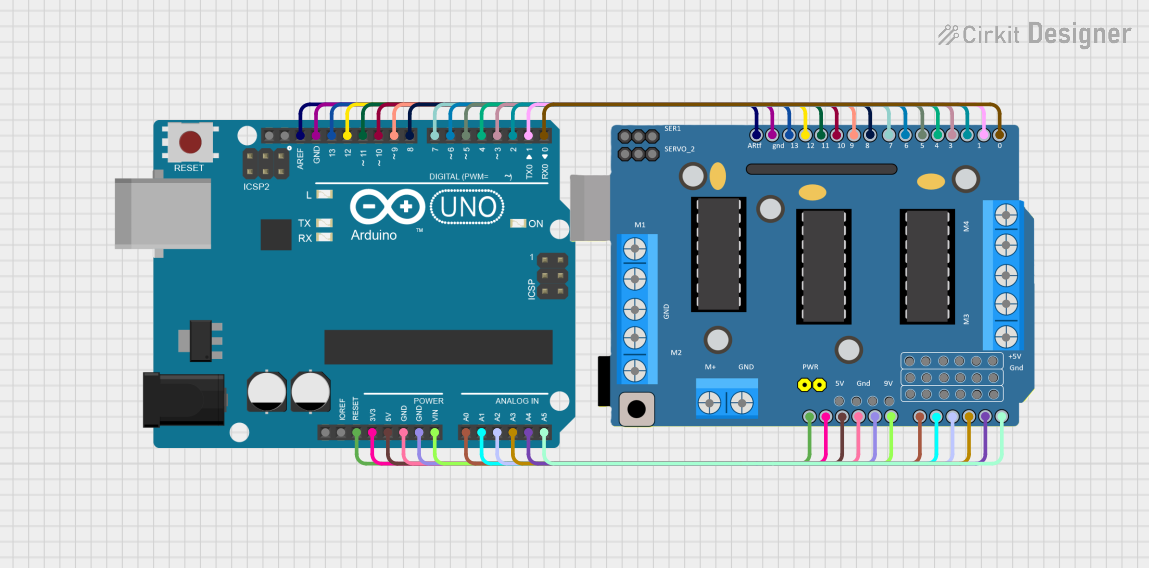
Explore Projects Built with uno_shield_L298N
Common Applications and Use Cases
- Robotics: Driving wheels or robotic arms
- Automation: Conveyor belts, automated gates, or other motorized systems
- DIY Projects: Remote-controlled cars, drones, or hobbyist motorized devices
- Educational Purposes: Learning motor control and Arduino programming
Technical Specifications
The L298N motor driver shield is based on the L298N dual H-bridge motor driver IC. Below are its key technical details:
| Specification | Details |
|---|---|
| Operating Voltage | 5V to 12V |
| Motor Drive Voltage (VM) | 6V to 35V |
| Maximum Motor Current | 2A per channel |
| Logic Voltage | 5V |
| Control Logic | TTL compatible |
| Number of Channels | 2 (dual H-bridge) |
| PWM Support | Yes |
| Dimensions | 68mm x 53mm x 15mm |
Pin Configuration and Descriptions
The L298N motor driver shield connects directly to the Arduino UNO, utilizing its pins for control and power. Below is the pin configuration:
| Pin | Description |
|---|---|
| IN1, IN2 | Control inputs for Motor A (set direction) |
| IN3, IN4 | Control inputs for Motor B (set direction) |
| ENA | PWM input for speed control of Motor A |
| ENB | PWM input for speed control of Motor B |
| 5V | Logic voltage input (connected to Arduino 5V pin) |
| GND | Ground connection |
| VM | Motor power supply (6V to 35V) |
| OUT1, OUT2 | Motor A output terminals |
| OUT3, OUT4 | Motor B output terminals |
Usage Instructions
How to Use the Component in a Circuit
- Connect the Shield to the Arduino UNO:
- Align the shield's pins with the Arduino UNO headers and press it firmly into place.
- Connect Motors:
- Attach the wires of Motor A to OUT1 and OUT2.
- Attach the wires of Motor B to OUT3 and OUT4.
- Power the Shield:
- Connect an external power supply (6V to 35V) to the VM terminal for motor power.
- Ensure the GND of the power supply is connected to the GND of the Arduino.
- Control Logic:
- Use the Arduino's digital pins to control IN1, IN2, IN3, and IN4 for motor direction.
- Use PWM signals on ENA and ENB for speed control.
Important Considerations and Best Practices
- Power Supply: Ensure the external power supply voltage matches the motor's requirements.
- Current Limitations: Do not exceed 2A per channel to avoid overheating or damaging the shield.
- Heat Dissipation: The L298N IC may heat up during operation. Use a heatsink if necessary.
- Motor Type: This shield is designed for brushed DC motors and stepper motors only.
- Code Compatibility: Use the Arduino IDE to upload motor control code to the Arduino UNO.
Example Code for Arduino UNO
Below is an example code snippet to control two DC motors using the L298N motor driver shield:
// Define motor control pins
const int IN1 = 8;  // Motor A direction pin 1
const int IN2 = 9;  // Motor A direction pin 2
const int ENA = 10; // Motor A speed control (PWM)
const int IN3 = 11; // Motor B direction pin 1
const int IN4 = 12; // Motor B direction pin 2
const int ENB = 13; // Motor B speed control (PWM)

void setup() {
  // Set motor control pins as outputs
  pinMode(IN1, OUTPUT);
  pinMode(IN2, OUTPUT);
  pinMode(ENA, OUTPUT);
  pinMode(IN3, OUTPUT);
  pinMode(IN4, OUTPUT);
  pinMode(ENB, OUTPUT);
}

void loop() {
  // Motor A: Forward at 50% speed
  digitalWrite(IN1, HIGH);
  digitalWrite(IN2, LOW);
  analogWrite(ENA, 128); // 50% duty cycle (0-255)

  // Motor B: Backward at 75% speed
  digitalWrite(IN3, LOW);
  digitalWrite(IN4, HIGH);
  analogWrite(ENB, 192); // 75% duty cycle (0-255)

  delay(2000); // Run motors for 2 seconds

  // Stop both motors
  digitalWrite(IN1, LOW);
  digitalWrite(IN2, LOW);
  digitalWrite(IN3, LOW);
  digitalWrite(IN4, LOW);
  analogWrite(ENA, 0);
  analogWrite(ENB, 0);

  delay(2000); // Wait for 2 seconds before repeating
}
Troubleshooting and FAQs
Common Issues and Solutions
Motors Not Running:
- Ensure the external power supply is connected to the VM terminal.
- Verify that the motor wires are securely connected to the output terminals.
- Check the Arduino code for correct pin assignments.
Motors Running in the Wrong Direction:
- Swap the connections of IN1 and IN2 (or IN3 and IN4) in the code or hardware.
Shield Overheating:
- Ensure the motor current does not exceed 2A per channel.
- Attach a heatsink to the L298N IC for better heat dissipation.
PWM Not Controlling Speed:
- Verify that the ENA and ENB pins are connected to PWM-capable Arduino pins.
- Check the PWM values in the code (range: 0-255).
FAQs
Q: Can I use this shield with stepper motors?
A: Yes, the L298N shield supports stepper motors. You will need to configure the control pins accordingly.
Q: What happens if I exceed the current limit?
A: Exceeding the 2A per channel limit may cause the IC to overheat or fail. Use motors within the specified current range.
Q: Can I power the Arduino through the shield?
A: Yes, if the external power supply is connected to the VM terminal, the shield can provide 5V to the Arduino through its onboard voltage regulator.
Q: Is this shield compatible with other Arduino boards?
A: Yes, it is compatible with most Arduino boards that have the same pinout as the Arduino UNO.