How to Use ESP32 (30 pin): Examples, Pinouts, and Specs
Introduction
The ESP32 (30 pin) module is a versatile and powerful microcontroller equipped with the ESP32 chip, designed for a wide range of Internet of Things (IoT) applications. It features a dual-core processor, integrated Wi-Fi and Bluetooth connectivity, and a multitude of I/O options. This module is commonly used in applications such as smart home devices, wearable electronics, and wireless sensor networks.
Explore Projects Built with ESP32 (30 pin)
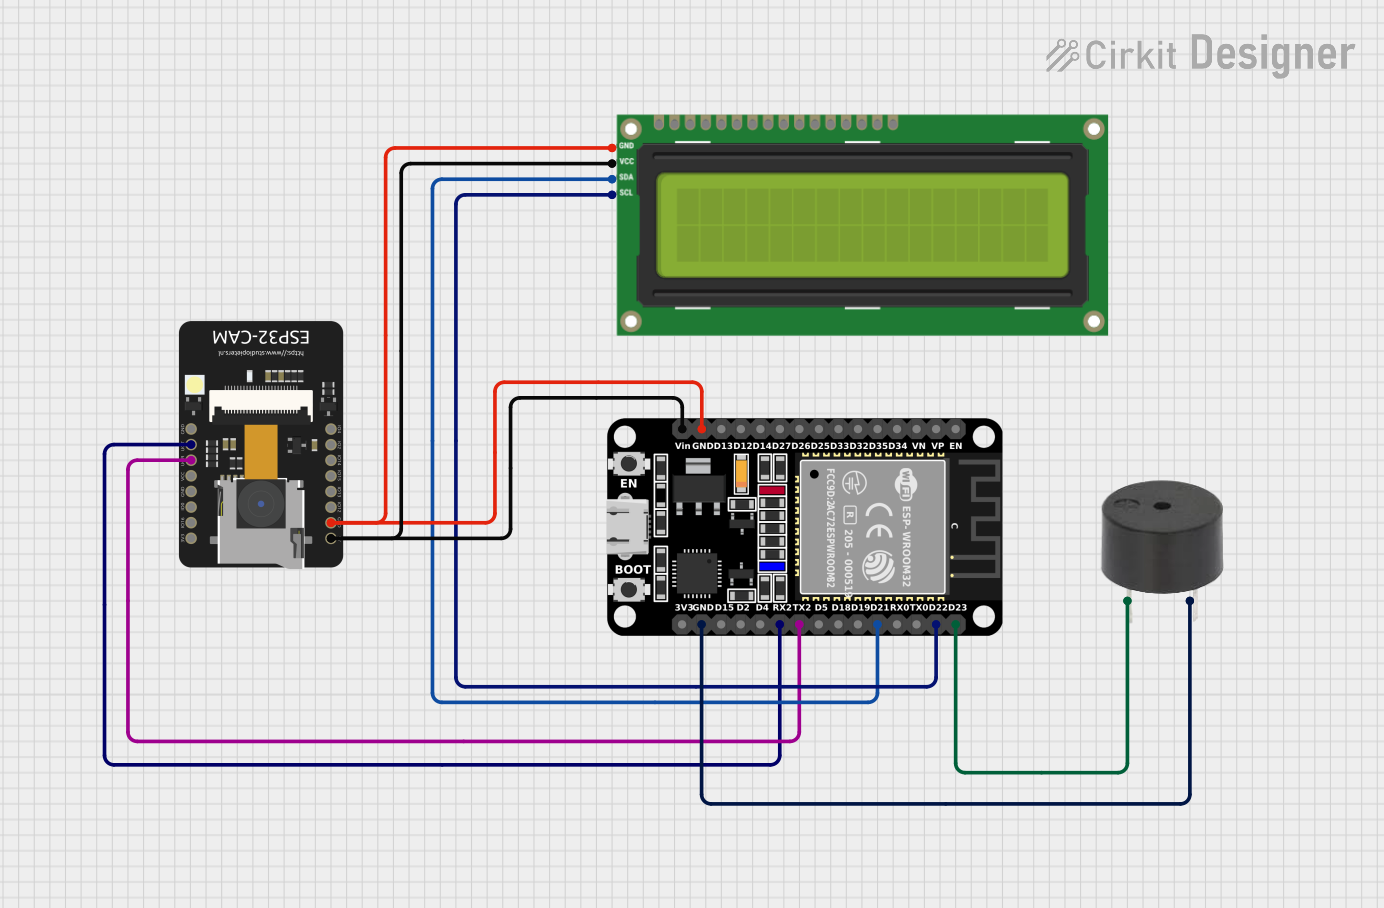


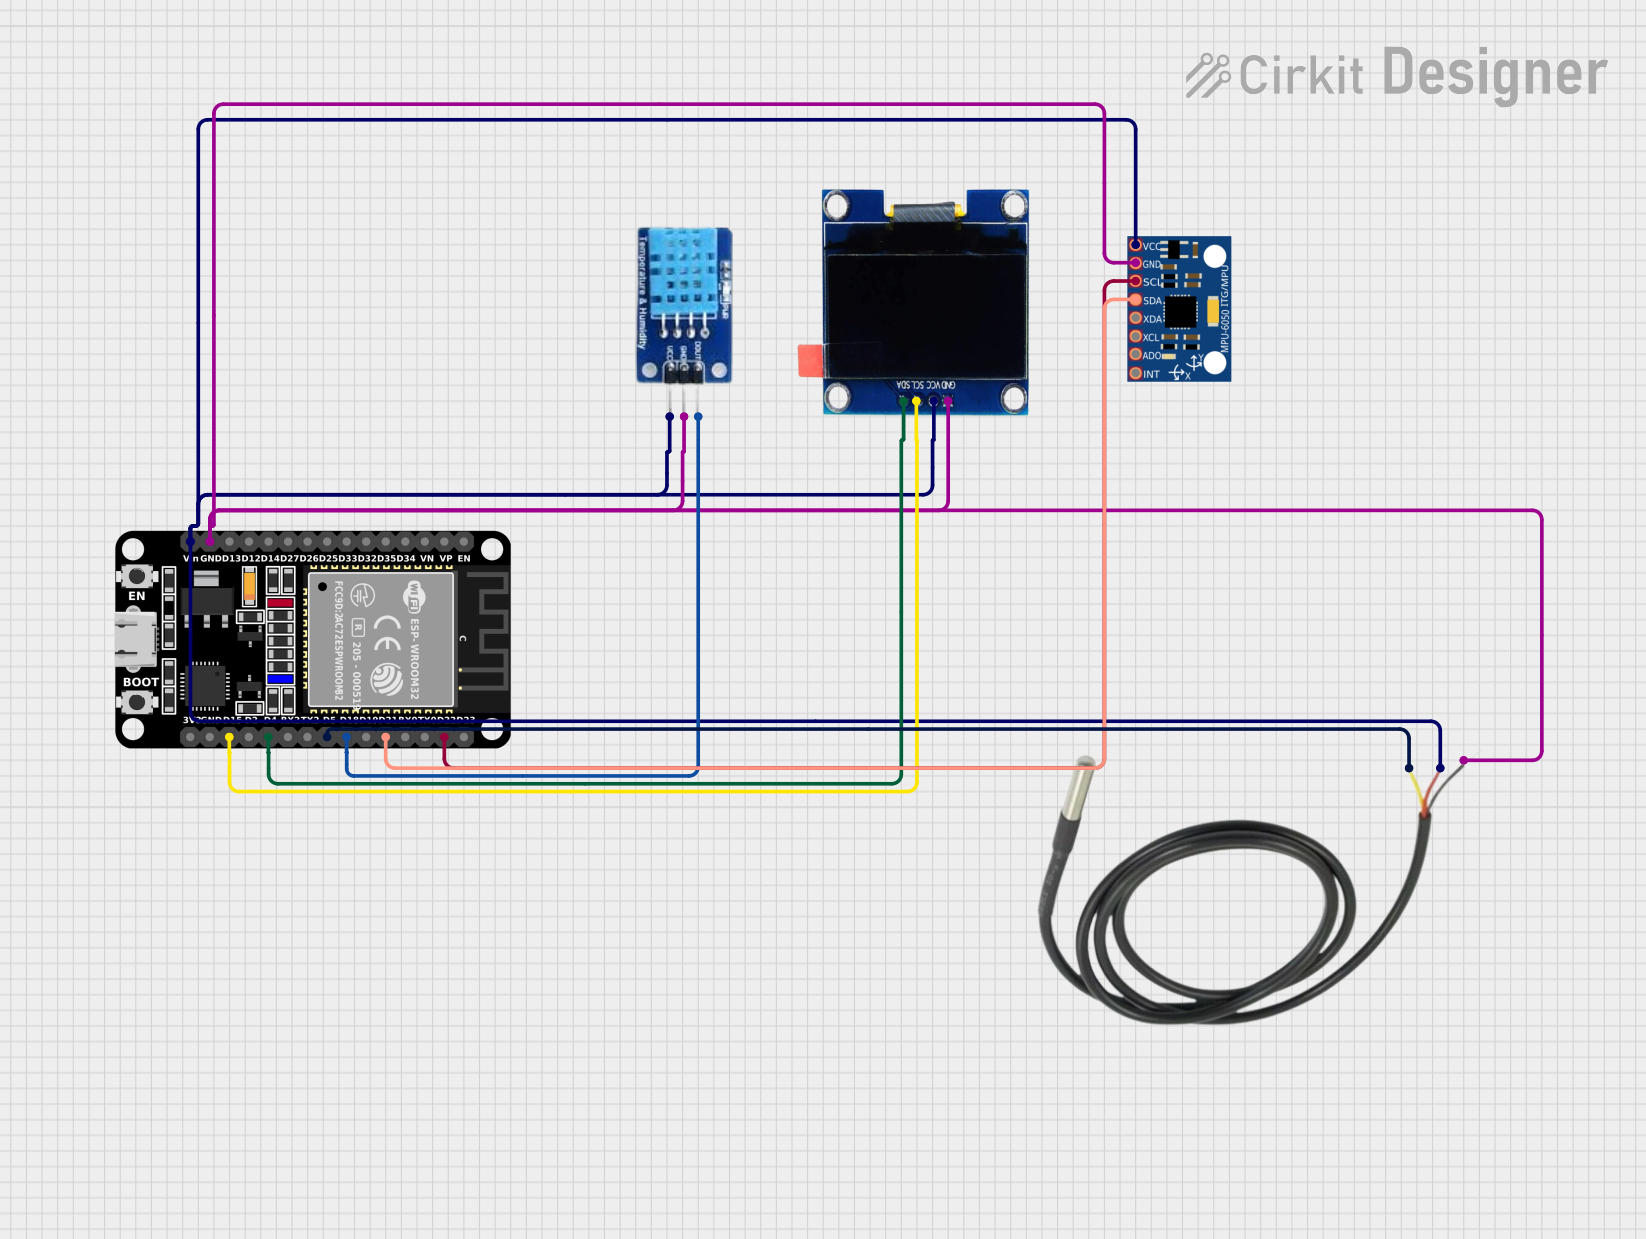
Explore Projects Built with ESP32 (30 pin)
Technical Specifications
Key Features
- Dual-core Tensilica LX6 microprocessor
- Clock frequency up to 240 MHz
- 520 KB SRAM
- Integrated 802.11 b/g/n Wi-Fi transceiver
- Integrated dual-mode Bluetooth (classic and BLE)
- Up to 30 GPIO pins
- Multiple peripherals including UART, SPI, I2C, DAC, ADC (12-bit), CAN 2.0, PWM, and more
- Operating voltage: 2.2V to 3.6V
- Operating temperature range: -40°C to +125°C
Pin Configuration
| Pin Number | Function | Description |
|---|---|---|
| 1 | GND | Ground |
| 2 | 3V3 | 3.3V power supply |
| 3 | EN | Chip enable. Active high. |
| 4 | VP | GPIO36, ADC1_CH0, Sensor VP |
| 5 | VN | GPIO39, ADC1_CH3, Sensor VN |
| ... | ... | ... |
| 30 | GND | Ground |
Note: This is a simplified representation. Please refer to the ESP32 datasheet for the complete pinout and functions.
Usage Instructions
Basic Setup
To use the ESP32 in a circuit:
- Connect the
3V3pin to a 3.3V power supply. - Connect the
GNDpins to the ground of the power supply. - Ensure that the
ENpin is pulled high to enable the chip.
Programming
The ESP32 can be programmed using the Arduino IDE. To get started:
- Install the Arduino IDE.
- Go to
File > Preferencesand enter the ESP32 board manager URL into the "Additional Board Manager URLs" field. - Open the
Tools > Board > Boards Manager, search for ESP32, and install the package. - Select the appropriate ESP32 board from the
Tools > Boardmenu.
Example Blink Code
// This code blinks an LED connected to GPIO 2 on the ESP32.

#define LED_PIN 2 // Define the LED pin

void setup() {
  pinMode(LED_PIN, OUTPUT); // Initialize the LED pin as an output
}

void loop() {
  digitalWrite(LED_PIN, HIGH); // Turn the LED on
  delay(1000);                // Wait for a second
  digitalWrite(LED_PIN, LOW);  // Turn the LED off
  delay(1000);                // Wait for a second
}
Best Practices
- Use a regulated 3.3V power supply to avoid damaging the ESP32.
- When using Wi-Fi or Bluetooth, consider the power consumption and heat dissipation.
- Ensure proper decoupling capacitors are placed close to the power supply pins.
- Avoid exposing the module to temperatures outside the specified operating range.
Troubleshooting and FAQs
Common Issues
- ESP32 not booting: Ensure the
ENpin is high and the power supply is stable and within the specified range. - Wi-Fi/Bluetooth not functioning: Check the antenna connections and ensure the software is correctly configured.
- I/O pin not responding: Verify that the pin is not being used by another peripheral and is correctly configured in the code.
FAQs
Q: Can I use the ESP32 with a 5V power supply? A: No, the ESP32 should only be powered with a 3.3V supply. Using 5V can damage the module.
Q: How do I connect the ESP32 to Wi-Fi?
A: Use the WiFi.h library in the Arduino IDE and configure the network credentials in your code.
Q: What is the maximum current draw for the ESP32? A: The ESP32's maximum current draw is approximately 500 mA during transmission. However, it's recommended to have a power supply that can provide at least 1A to ensure stable operation during peak current demands.
Q: How can I extend the number of GPIOs? A: You can use I/O expanders or multiplexers to increase the number of available GPIOs.
For more detailed troubleshooting, refer to the ESP32 forums and the extensive community resources available online.