How to Use AC Bulb: Examples, Pinouts, and Specs

Introduction
An AC bulb is a type of light bulb that operates on alternating current (AC) electricity, which is the standard form of electrical power supplied to homes and businesses. These bulbs are widely used for general lighting purposes due to their simplicity, efficiency, and compatibility with standard electrical systems. AC bulbs come in various types, including incandescent, compact fluorescent (CFL), and LED, each offering different levels of energy efficiency and brightness.
Explore Projects Built with AC Bulb
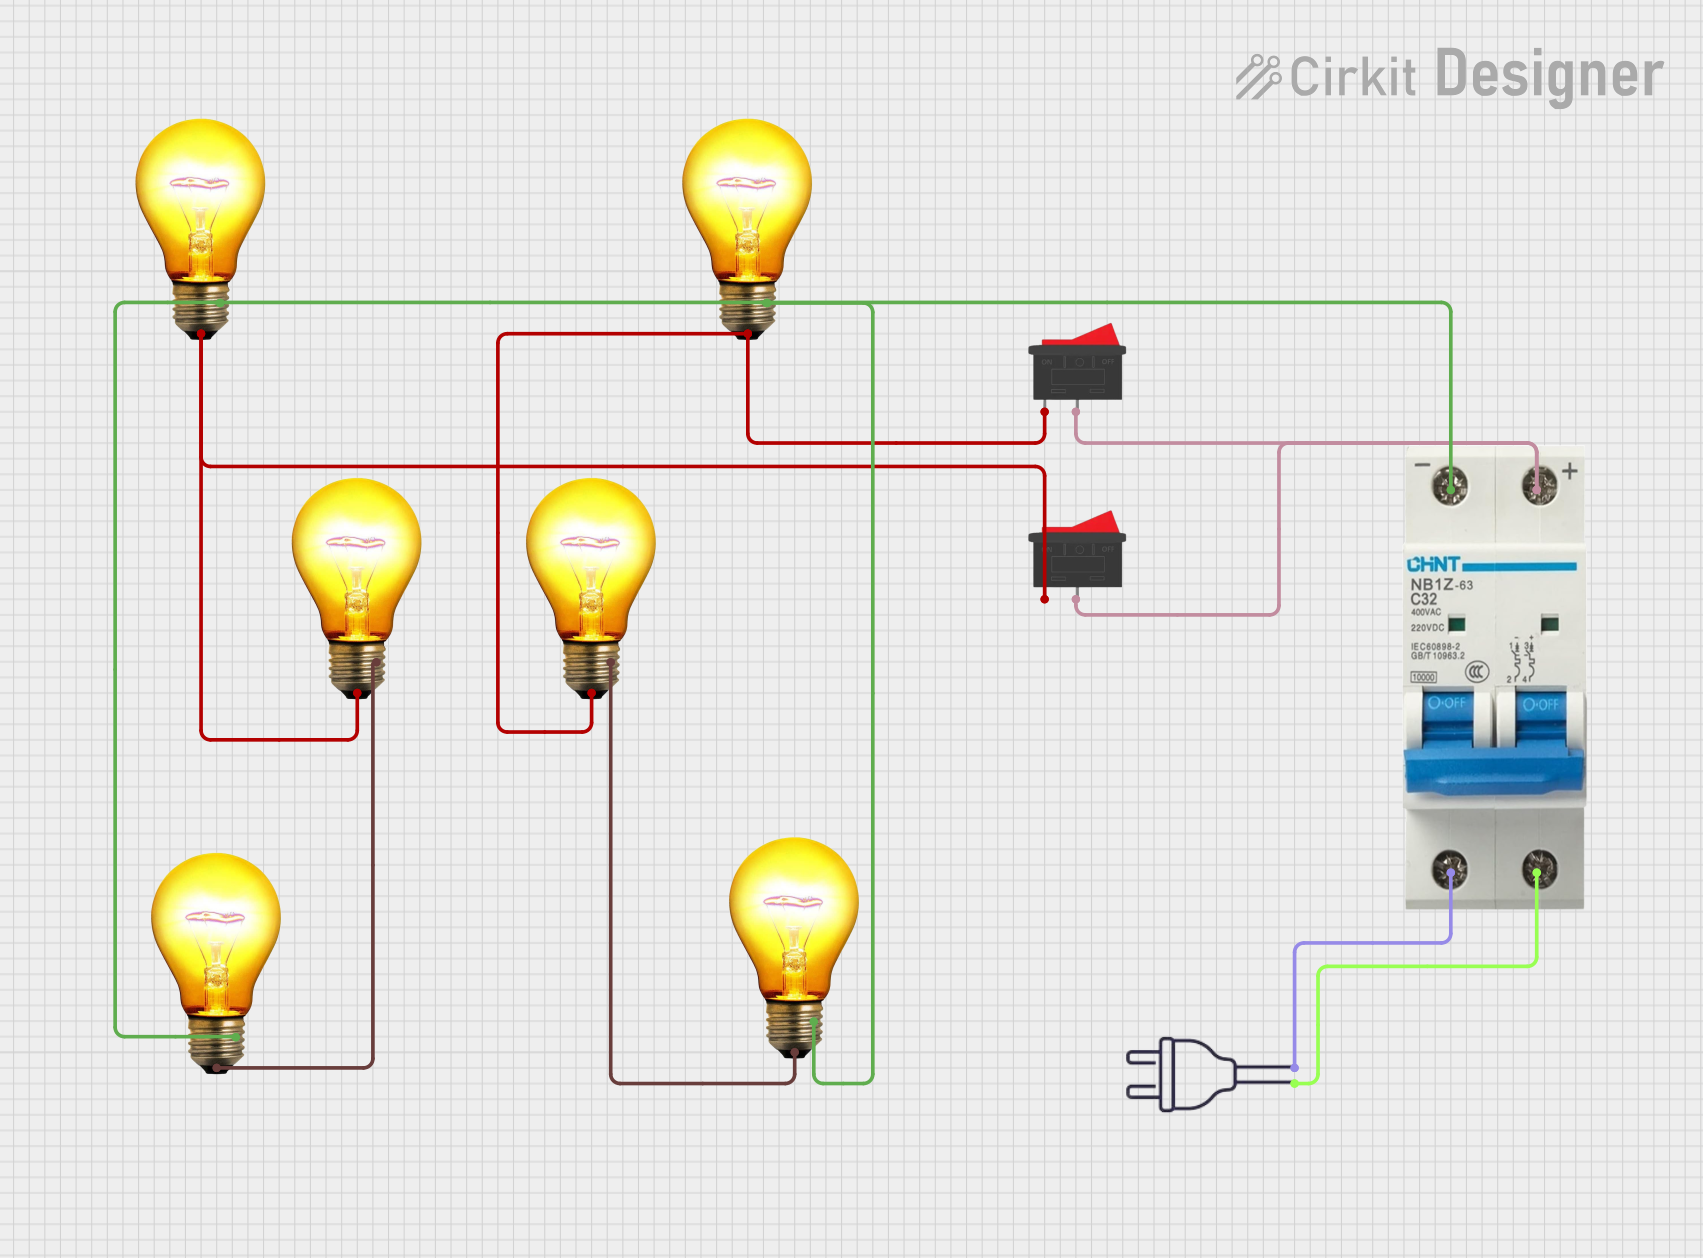
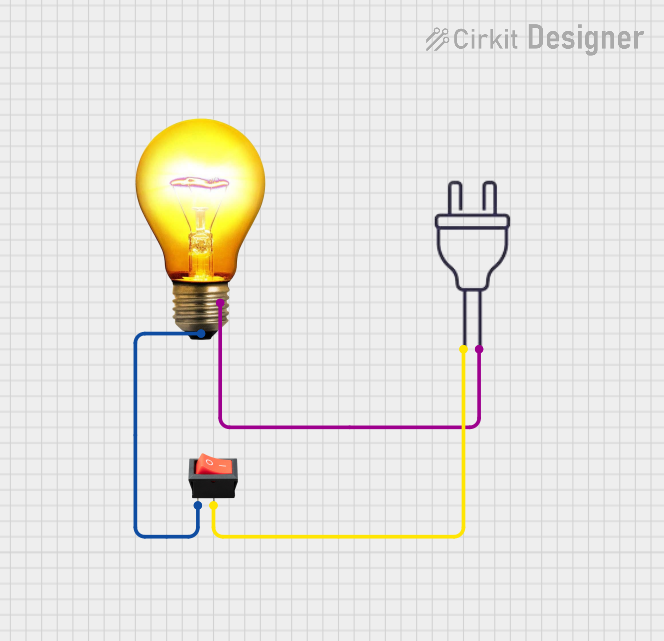
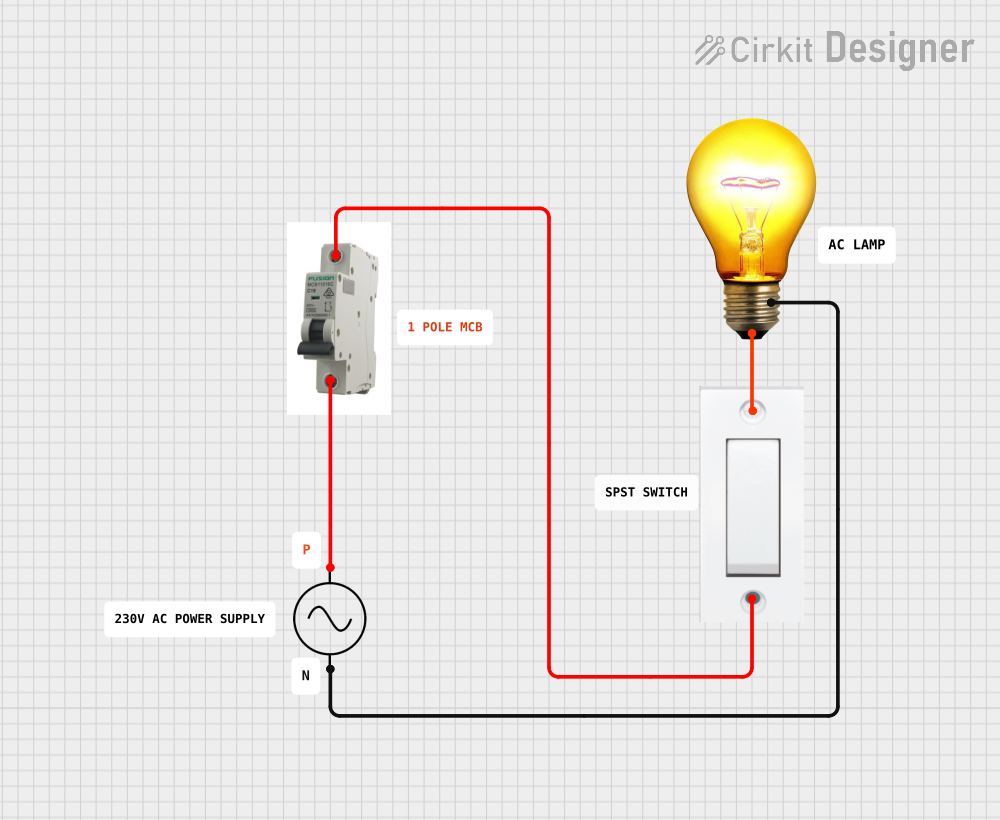
Explore Projects Built with AC Bulb
Common Applications and Use Cases
- Residential lighting (e.g., living rooms, bedrooms, kitchens)
- Commercial lighting in offices, shops, and warehouses
- Outdoor lighting (e.g., streetlights, garden lights)
- Decorative lighting for events and celebrations
Technical Specifications
The technical specifications of an AC bulb can vary depending on the type and model. Below are general specifications for a standard AC bulb:
| Parameter | Value |
|---|---|
| Operating Voltage | 110V - 240V AC |
| Power Rating | 5W - 100W (varies by bulb type) |
| Frequency | 50Hz - 60Hz |
| Base Type | E27, E14, B22, or GU10 |
| Light Output (Lumens) | 300 - 1600 lumens (varies by wattage) |
| Color Temperature | 2700K (warm white) to 6500K (cool white) |
| Lifespan | 1,000 - 25,000 hours (varies by type) |
| Dimmable | Yes/No (depends on the bulb type) |
Pin Configuration and Descriptions
AC bulbs typically have a base with two electrical contacts. The configuration depends on the base type:
| Base Type | Description |
|---|---|
| E27 | Standard screw base, 27mm diameter, commonly used in household lighting fixtures. |
| E14 | Smaller screw base, 14mm diameter, used for decorative or smaller fixtures. |
| B22 | Bayonet base with two pins, commonly used in older fixtures. |
| GU10 | Twist-lock base, often used in spotlights and recessed lighting. |
Usage Instructions
How to Use the Component in a Circuit
- Ensure Compatibility: Verify that the AC bulb's voltage and base type match the fixture and power supply.
- Turn Off Power: Before installation, switch off the power supply to avoid electrical hazards.
- Install the Bulb: Insert the bulb into the fixture by screwing it in (E27/E14) or locking it in place (B22/GU10).
- Turn On Power: Restore power and test the bulb by switching it on.
Important Considerations and Best Practices
- Voltage Compatibility: Always use an AC bulb rated for the voltage of your power supply (e.g., 110V or 240V).
- Fixture Type: Ensure the bulb's base type matches the fixture to avoid damage or poor contact.
- Dimming: Use dimmable bulbs only with compatible dimmer switches to prevent flickering or damage.
- Heat Management: Avoid enclosing high-wattage bulbs in tight spaces to prevent overheating.
- Energy Efficiency: Consider using LED AC bulbs for lower energy consumption and longer lifespan.
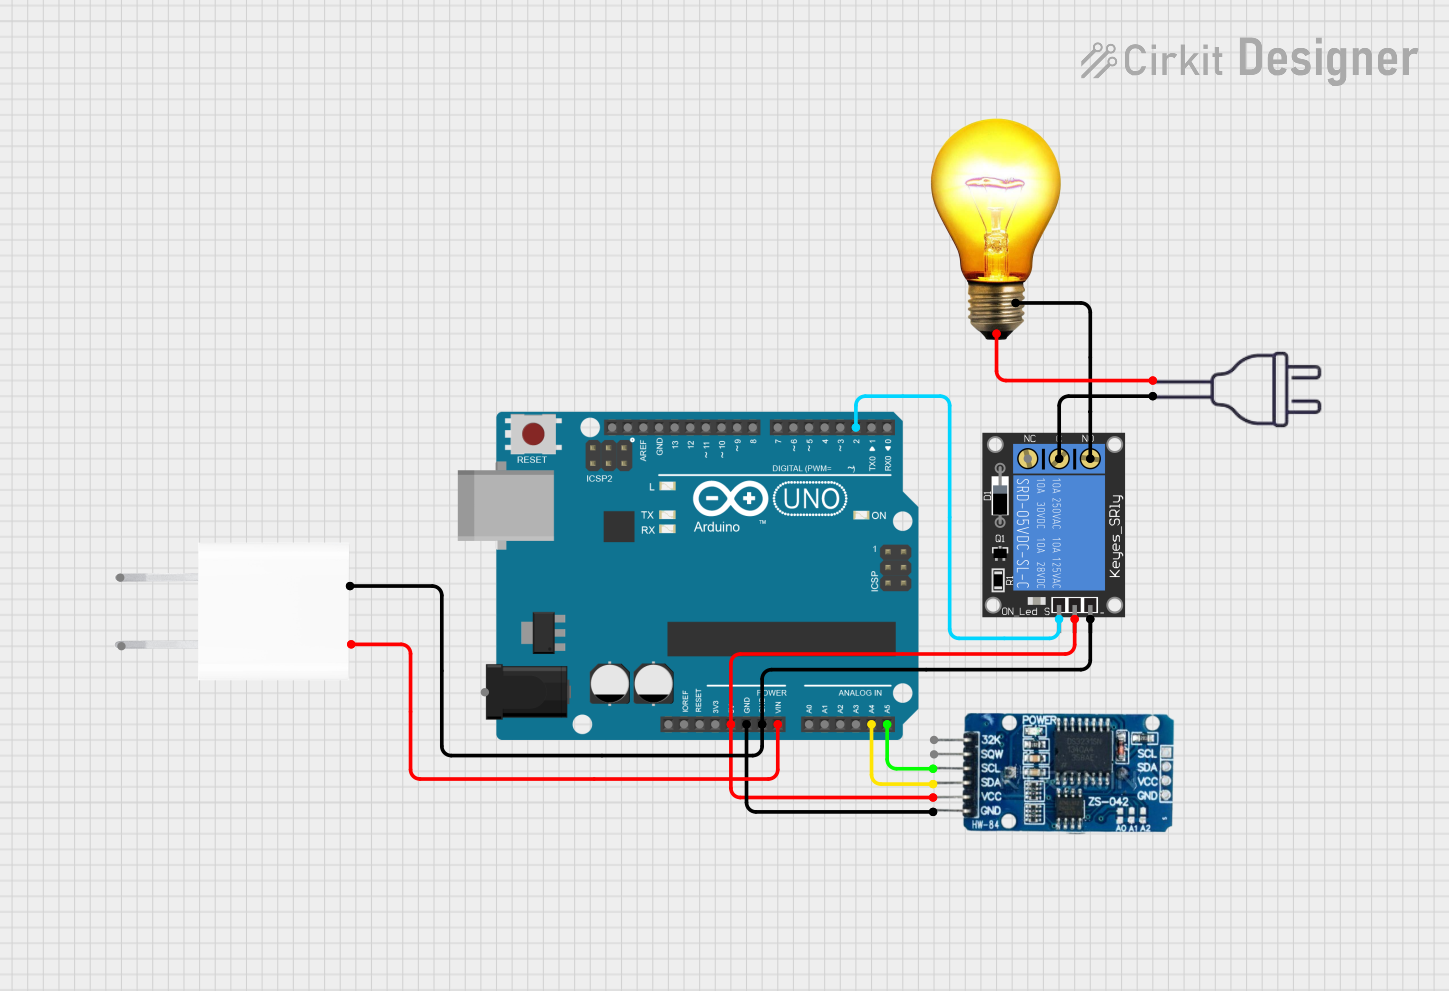
Example: Controlling an AC Bulb with an Arduino UNO
To control an AC bulb using an Arduino UNO, you can use a relay module to safely switch the bulb on and off. Below is an example code snippet:
/*
  Example: Controlling an AC Bulb with Arduino UNO
  This code demonstrates how to use a relay module to control an AC bulb.
  Ensure proper isolation and safety when working with AC electricity.
*/

const int relayPin = 7; // Pin connected to the relay module

void setup() {
  pinMode(relayPin, OUTPUT); // Set relay pin as output
  digitalWrite(relayPin, LOW); // Ensure relay is off at startup
}

void loop() {
  digitalWrite(relayPin, HIGH); // Turn on the AC bulb
  delay(5000); // Keep the bulb on for 5 seconds
  digitalWrite(relayPin, LOW); // Turn off the AC bulb
  delay(5000); // Keep the bulb off for 5 seconds
}
Note: Always use a relay module with proper isolation when working with AC electricity. Ensure all connections are secure and insulated to prevent electrical hazards.
Troubleshooting and FAQs
Common Issues Users Might Face
Bulb Does Not Light Up:
- Check if the bulb is properly screwed into the fixture.
- Verify that the power supply is turned on and functioning.
- Ensure the bulb is not damaged or burned out.
Flickering Light:
- Ensure the bulb is compatible with the dimmer switch (if used).
- Check for loose connections in the fixture or wiring.
- Verify that the voltage supply is stable and within the bulb's rated range.
Overheating:
- Avoid using high-wattage bulbs in enclosed fixtures.
- Ensure proper ventilation around the bulb.
Relay Control Issues (Arduino):
- Verify that the relay module is connected correctly to the Arduino.
- Check the relay's power supply and ensure it matches the module's requirements.
- Test the relay module with a multimeter to confirm functionality.
Solutions and Tips for Troubleshooting
- Replace the bulb with a known working one to isolate the issue.
- Use a multimeter to check the voltage at the fixture.
- For Arduino projects, double-check the wiring and code to ensure proper operation.
- Consult the bulb's datasheet or user manual for specific troubleshooting steps.
By following these guidelines, you can ensure safe and effective use of AC bulbs in various applications.