Cirkit Designer
Your all-in-one circuit design IDE
Home /
Component Documentation
How to Use bela: Examples, Pinouts, and Specs
Introduction
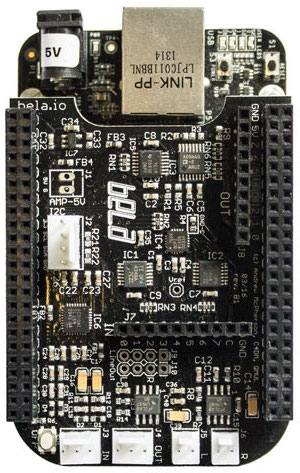
- Bela is a platform designed for creating interactive audio and music applications. It features a powerful embedded system that enables real-time audio processing with ultra-low latency, making it ideal for professional audio projects and experimental sound design.
- Common applications include:
- Interactive musical instruments
- Audio effects processors
- Sound installations
- Real-time audio synthesis
- Educational tools for audio programming
Explore Projects Built with bela
Interactive Touch and Motion Sensor System with Bela Board and OLED Display

This circuit integrates a Bela Board with various sensors and actuators, including a TRILL CRAFT touch sensor, an ADXXL335 accelerometer, a vibration motor, and a loudspeaker. The Bela Board processes input from the touch sensor and accelerometer, and controls the vibration motor and loudspeaker, while an OLED display provides visual feedback.
BELA Board Controlled DC Motor System with Dual Motor Drivers
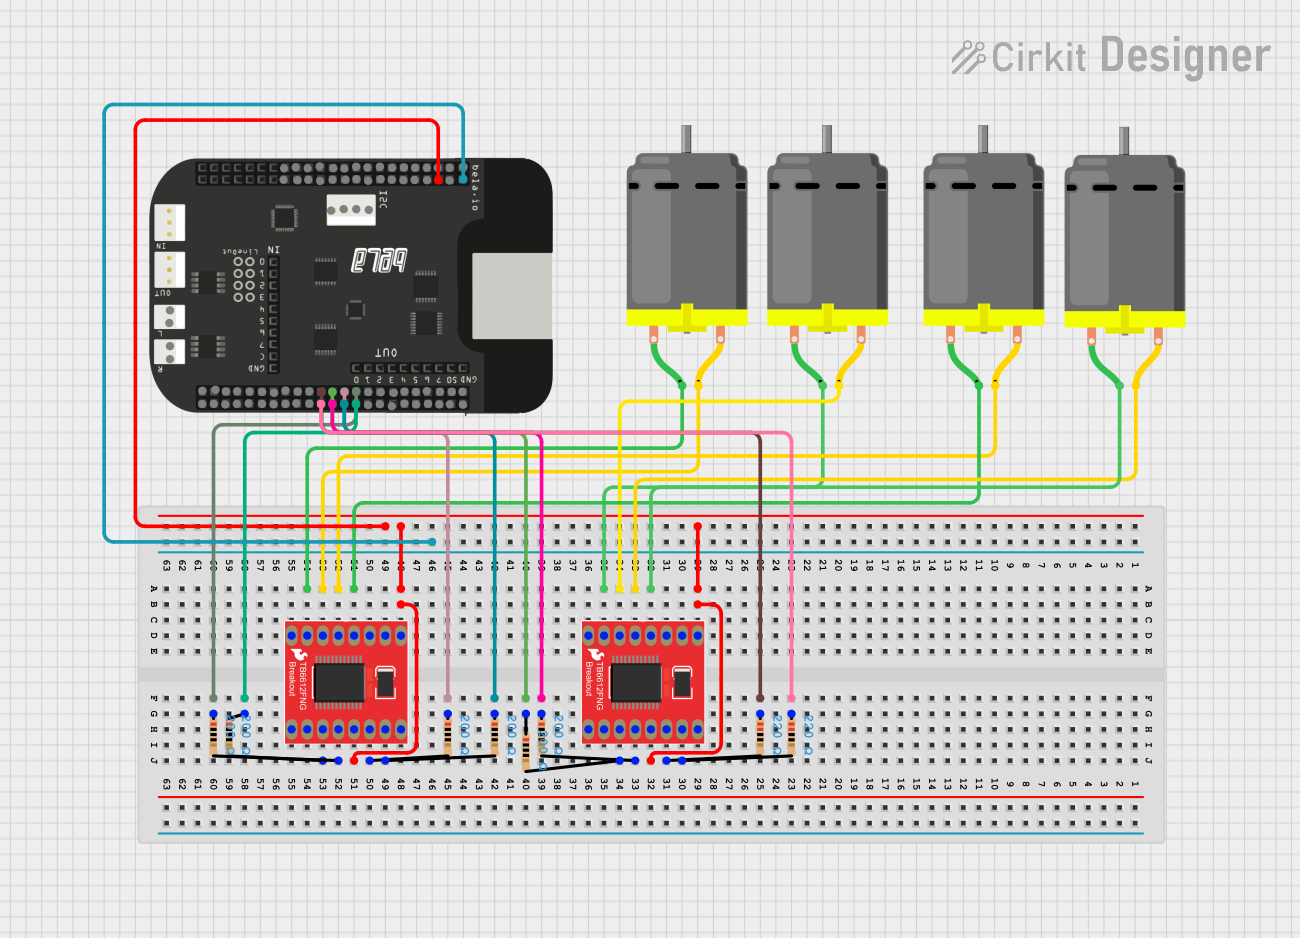
This circuit is designed to control four DC motors using two dual-channel TB6612FNG motor drivers, which are interfaced with a BELA board. The BELA board provides the control signals, while resistors are used for current limiting and signal conditioning.
Arduino Mega 2560 Smart Home Automation System with Sensor Integration
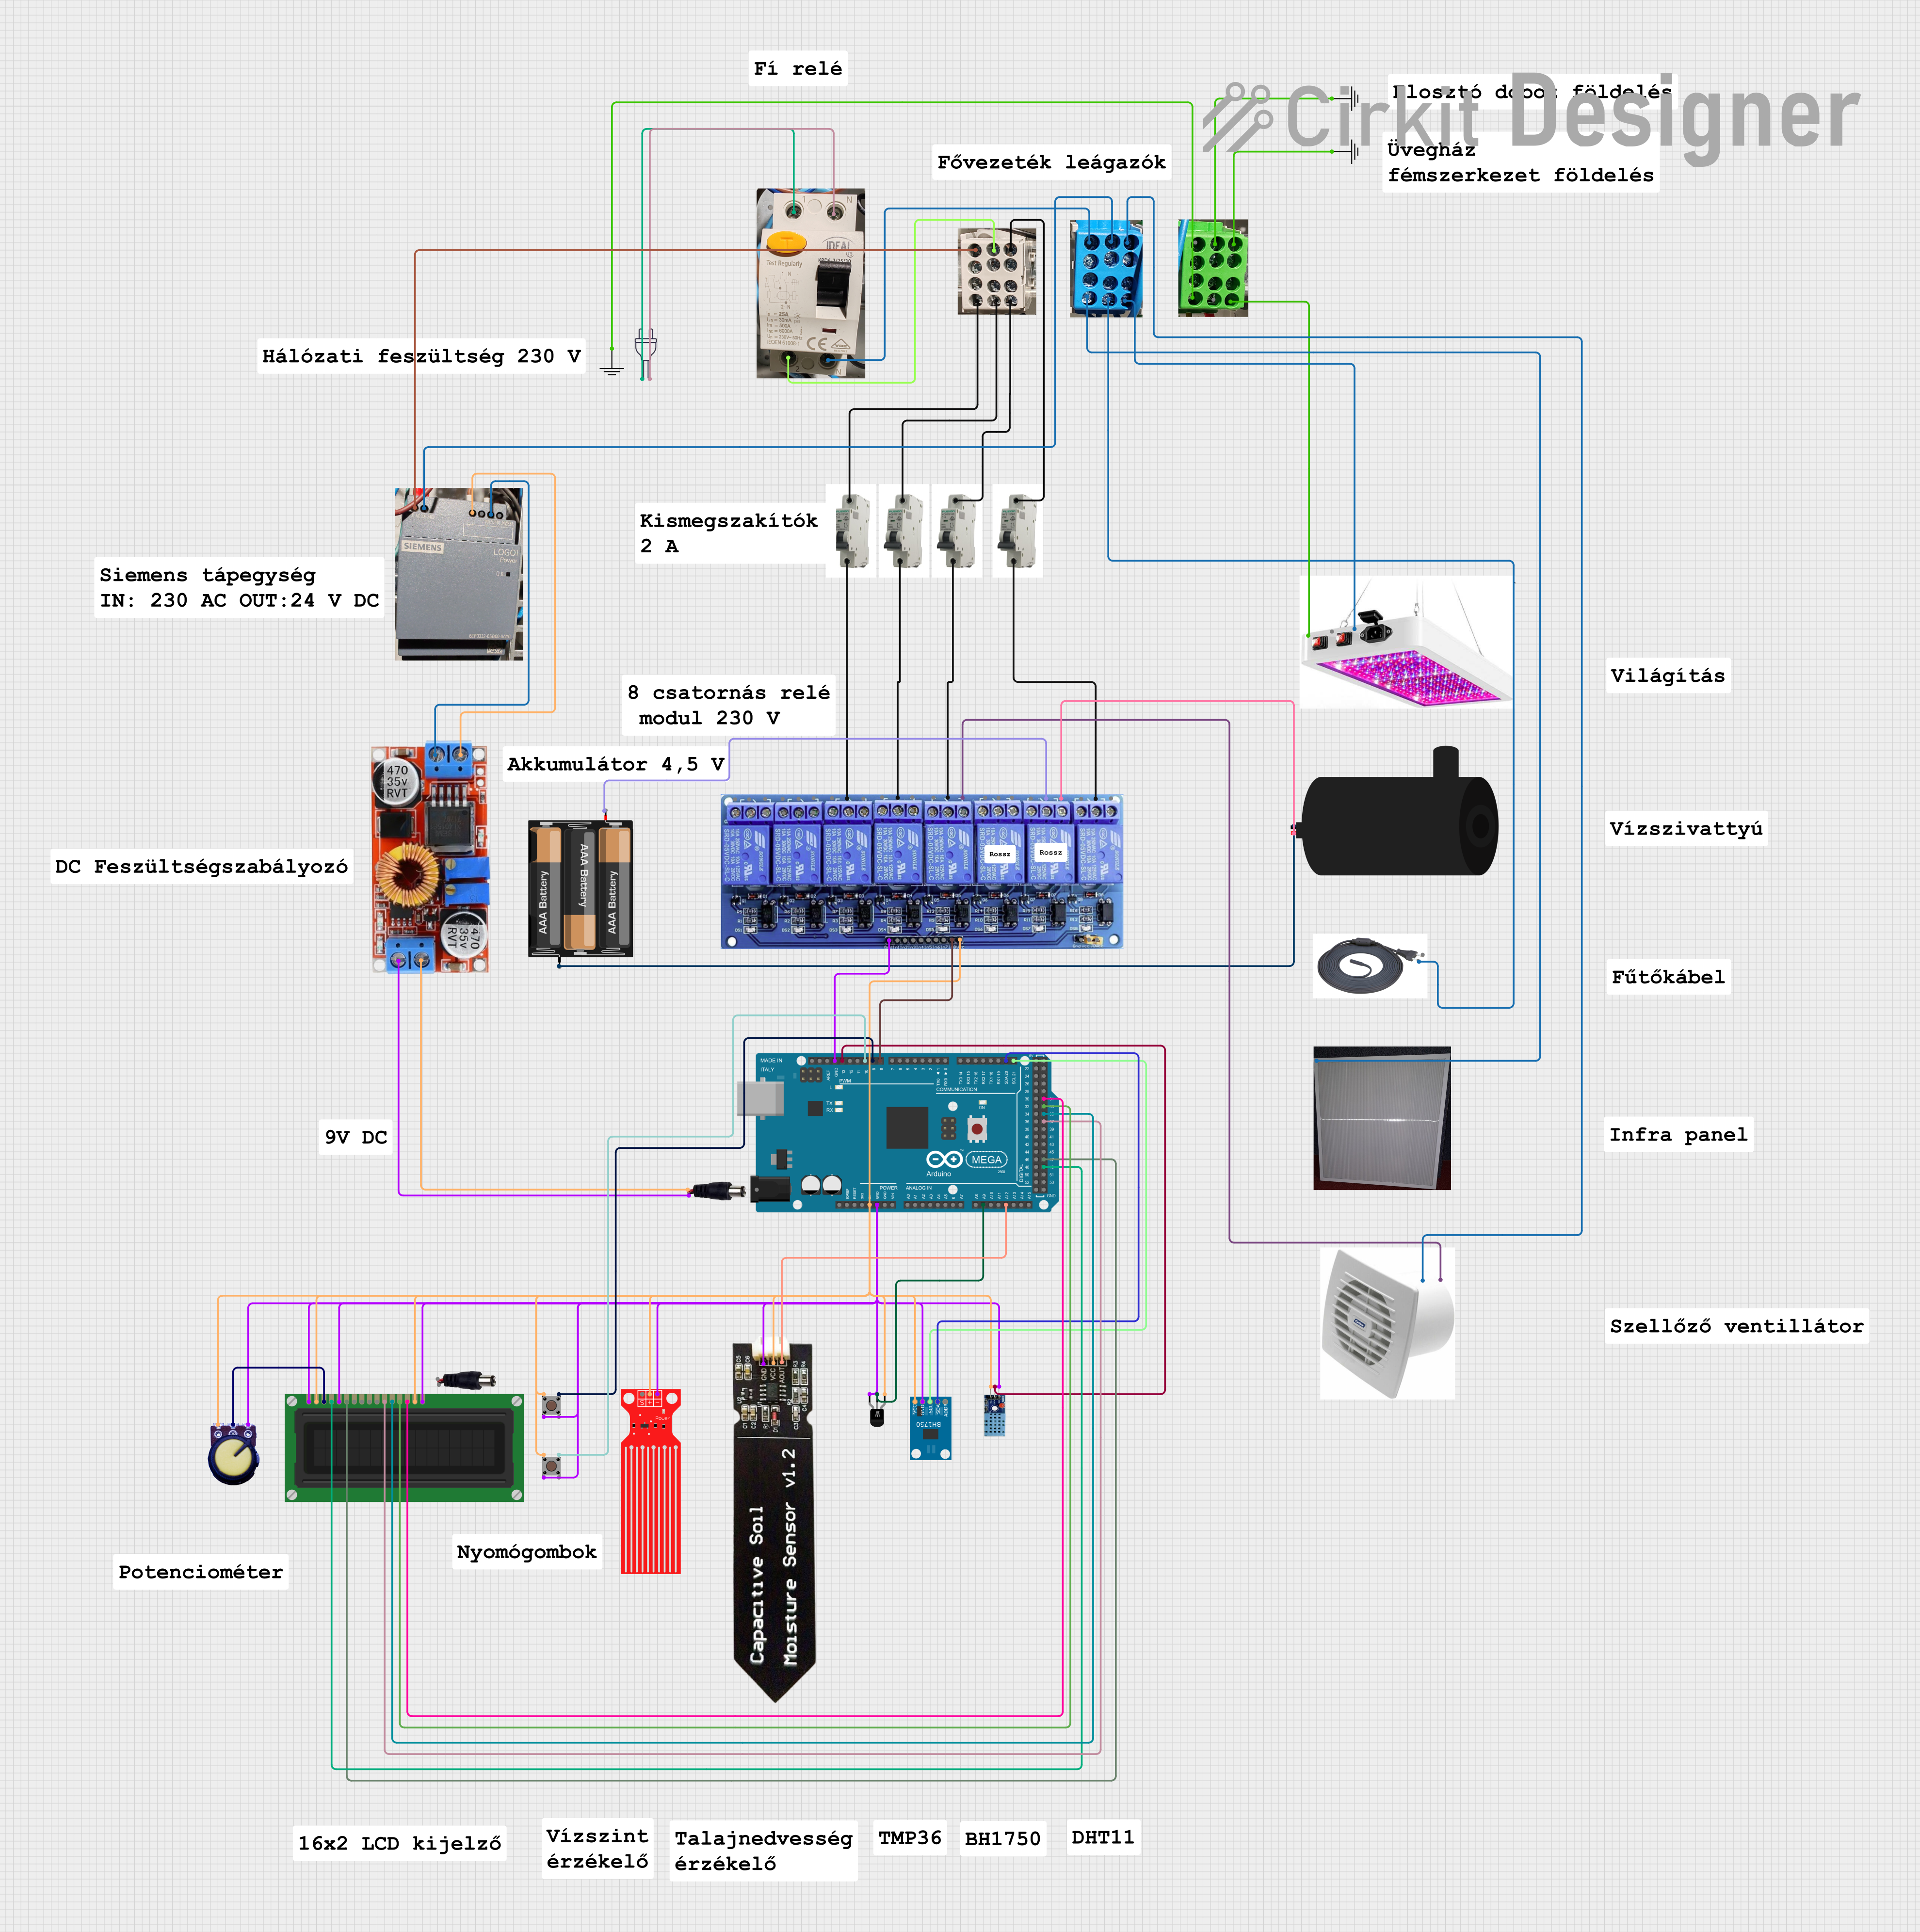
This circuit is a smart environmental monitoring and control system using an Arduino Mega 2560. It integrates various sensors (temperature, humidity, light, soil moisture, and water level) and controls actuators (relays, water pump, fan, and heating elements) to maintain optimal conditions, with data displayed on an LCD screen.
Beelink Mini S12 N95 and Arduino UNO Based Fingerprint Authentication System with ESP32 CAM

This circuit features a Beelink MINI S12 N95 computer connected to a 7-inch display via HDMI for video output and two USB connections for power and touch screen functionality. An Arduino UNO is interfaced with a fingerprint scanner for biometric input. The Beelink MINI S12 N95 is powered by a PC power supply, which in turn is connected to a 240V power source. Additionally, an ESP32 CAM module is powered and programmed via a USB plug and an FTDI programmer, respectively, for wireless camera capabilities.
Explore Projects Built with bela
Interactive Touch and Motion Sensor System with Bela Board and OLED Display
This circuit integrates a Bela Board with various sensors and actuators, including a TRILL CRAFT touch sensor, an ADXXL335 accelerometer, a vibration motor, and a loudspeaker. The Bela Board processes input from the touch sensor and accelerometer, and controls the vibration motor and loudspeaker, while an OLED display provides visual feedback.
BELA Board Controlled DC Motor System with Dual Motor Drivers
This circuit is designed to control four DC motors using two dual-channel TB6612FNG motor drivers, which are interfaced with a BELA board. The BELA board provides the control signals, while resistors are used for current limiting and signal conditioning.
Arduino Mega 2560 Smart Home Automation System with Sensor Integration
This circuit is a smart environmental monitoring and control system using an Arduino Mega 2560. It integrates various sensors (temperature, humidity, light, soil moisture, and water level) and controls actuators (relays, water pump, fan, and heating elements) to maintain optimal conditions, with data displayed on an LCD screen.
Beelink Mini S12 N95 and Arduino UNO Based Fingerprint Authentication System with ESP32 CAM
This circuit features a Beelink MINI S12 N95 computer connected to a 7-inch display via HDMI for video output and two USB connections for power and touch screen functionality. An Arduino UNO is interfaced with a fingerprint scanner for biometric input. The Beelink MINI S12 N95 is powered by a PC power supply, which in turn is connected to a 240V power source. Additionally, an ESP32 CAM module is powered and programmed via a USB plug and an FTDI programmer, respectively, for wireless camera capabilities.
Technical Specifications
- Processor: ARM Cortex-A8 (1GHz) on BeagleBone Black or BeagleBone Green
- Audio I/O:
- 2 channels of stereo audio input and output
- 24-bit resolution
- Sampling rate: 44.1 kHz or 48 kHz
- Analog I/O:
- 8 analog inputs (16-bit resolution, 0-4.096V range)
- 8 analog outputs (16-bit resolution, 0-5V range)
- Sampling rate: 22.05 kHz
- Digital I/O:
- 16 digital GPIO pins
- Configurable as input or output
- Latency: Sub-millisecond round-trip latency
- Power Supply: 5V DC via barrel jack or USB
- Connectivity: USB, Ethernet, and microSD card slot for storage
Pin Configuration and Descriptions
Audio I/O
| Pin Name | Description |
|---|---|
| Audio In L | Left channel audio input |
| Audio In R | Right channel audio input |
| Audio Out L | Left channel audio output |
| Audio Out R | Right channel audio output |
Analog I/O
| Pin Name | Description |
|---|---|
| AIN0 - AIN7 | Analog input channels 0 to 7 |
| AOUT0 - AOUT7 | Analog output channels 0 to 7 |
Digital I/O
| Pin Name | Description |
|---|---|
| GPIO0 - GPIO15 | General-purpose digital I/O pins |
Usage Instructions
How to Use Bela in a Circuit
- Powering the Board:
- Connect a 5V DC power supply to the barrel jack or power the board via USB.
- Connecting Audio Devices:
- Use 3.5mm stereo jacks to connect audio input and output devices.
- Using Analog and Digital I/O:
- Connect sensors or actuators to the analog and digital pins as needed.
- Ensure that input voltages do not exceed the specified ranges (4.096V for analog inputs, 3.3V for digital inputs).
- Programming Bela:
- Bela runs on a BeagleBone Black or Green. Use the Bela IDE (accessible via a web browser) to write and upload code.
- Bela supports C++, Pure Data, and SuperCollider for audio programming.
Important Considerations and Best Practices
- Low-Latency Performance:
- Bela is optimized for low-latency audio. Avoid adding unnecessary delays in your code to maintain real-time performance.
- Power Supply:
- Use a stable power source to avoid noise or interruptions in audio processing.
- Heat Management:
- Ensure proper ventilation for the BeagleBone board during extended use to prevent overheating.
- Grounding:
- Properly ground all connected devices to avoid noise or interference in audio signals.
Example Code for Arduino UNO Integration
Although Bela is a standalone platform, it can communicate with an Arduino UNO via serial communication. Below is an example of Arduino code to send sensor data to Bela:
// Arduino code to send analog sensor data to Bela via Serial
void setup() {
  Serial.begin(9600); // Initialize serial communication at 9600 baud
}

void loop() {
  int sensorValue = analogRead(A0); // Read sensor value from pin A0
  Serial.println(sensorValue);      // Send the value to Bela
  delay(10);                        // Small delay to avoid overwhelming the serial buffer
}
On the Bela side, you can use the following C++ snippet to read the data:
// Bela C++ code to read data from Arduino via Serial
#include <Bela.h>
#include <libraries/Serial/Serial.h>

Serial serial;

bool setup(BelaContext *context, void *userData) {
  serial.setup("/dev/ttyUSB0", 9600); // Initialize serial communication
  return true;
}

void render(BelaContext *context, void *userData) {
  while (serial.available() > 0) {
    int data = serial.read(); // Read data from Arduino
    rt_printf("Received: %d\n", data); // Print the received data
  }
}

void cleanup(BelaContext *context, void *userData) {
  // Cleanup code if needed
}
Troubleshooting and FAQs
Common Issues
- No Audio Output:
- Ensure that the audio output device is properly connected to the 3.5mm jack.
- Verify that the audio output is enabled in your code.
- High Latency:
- Check for unnecessary delays in your code.
- Ensure that the board is not overloaded with computationally intensive tasks.
- Analog Input Not Working:
- Verify that the input voltage is within the 0-4.096V range.
- Check the connections and ensure the sensor is functioning correctly.
- Serial Communication Issues:
- Ensure that the correct serial port is specified in the code.
- Check the baud rate settings on both Bela and the Arduino.
Solutions and Tips for Troubleshooting
- Debugging Code:
- Use
rt_printfin Bela to print debug messages to the console.
- Use
- Power Supply Issues:
- Use a high-quality power supply to avoid noise or instability.
- Firmware Updates:
- Ensure that your Bela system is running the latest firmware for optimal performance.
- Community Support:
- Visit the Bela forums or GitHub repository for additional help and resources.